
We noticed you are blocking ads. DO THE TON only works with community supporters. Most are active members of the site with small businesses. Please consider disabling your ad blocking tool and checking out the businesses that help keep our site up and free.
You are using an out of date browser. It may not display this or other websites correctly.
You should upgrade or use an alternative browser.
You should upgrade or use an alternative browser.
1974 CB360 - first bike/build
- Thread starter huck_finn
- Start date
huck_finn said:I grabbed the float height tool specs from Trek and printed out a few - they came out perfectly. I printed 19.5, 20.5, and a 21.5 heights.
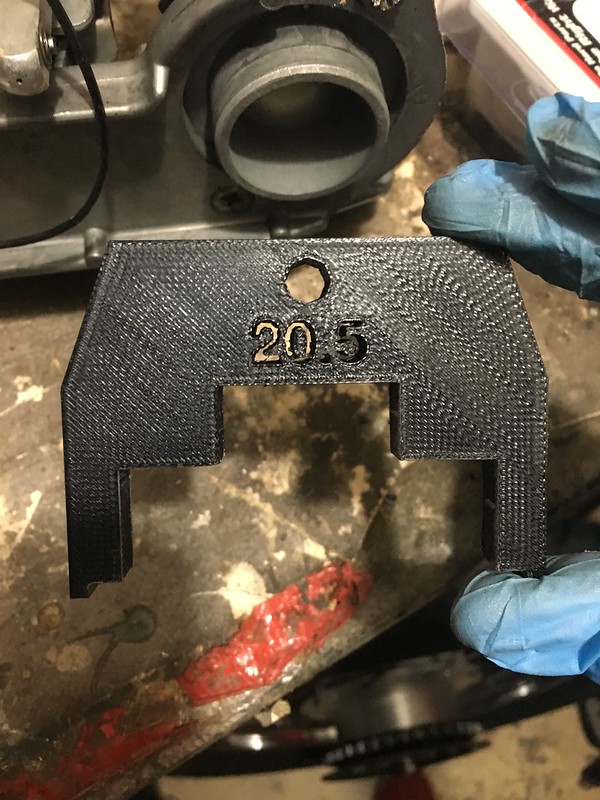
Those look familiar!
")
huck_finn
Been Around the Block
advCo said:Those look familiar!
Can't thank you enough for working these out - the dimensions are dead on.
huck_finn
Been Around the Block
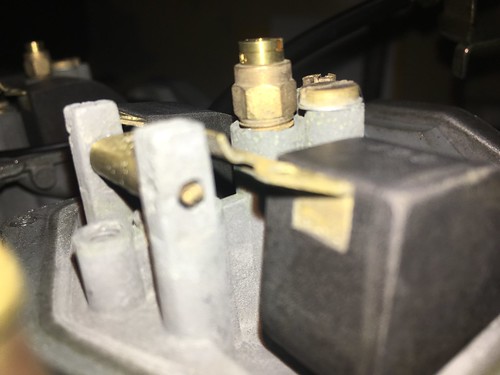
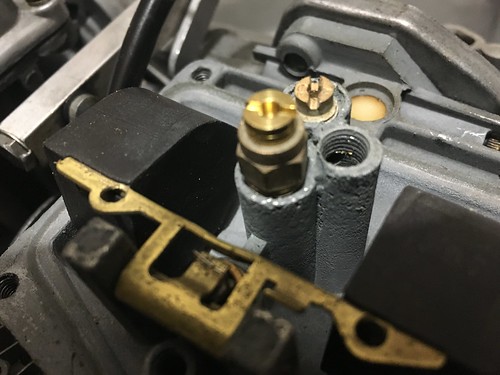
That is good news for sure.crazypj said:No need to worry about the corrosion as long as nothing is 'pin-holed' I've worked on much worse that worked fine
If nothing else, just Be careful tightening the jets into those corroded castings. A Yamaha I recently sold had similar corrosion and the main jet had been over tightened and cracked the casting.
Sent from my iPhone using DO THE TON
Sent from my iPhone using DO THE TON
crazypj
Split personality, I fake being smart
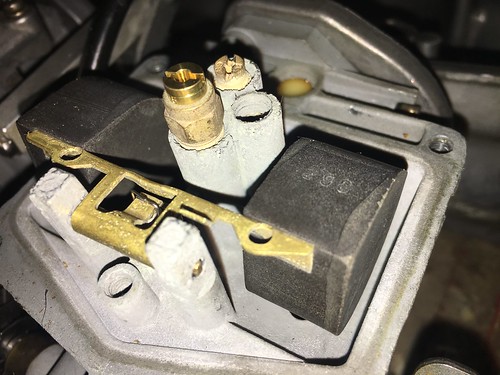
Pretty sure Mikuni use a 'stock' zinc based alloy which does seem to be more brittle than the Kei-Hin stuff.?
I've done XS400's with less corrosion but more damage plus a few XS650's and Kawasaki's have needed at least 1 'new ' carb.
Maybe Kei-Hin use a different 'proprietary' zinc alloy? It does seem more 'malleable' when I've been doing carb mods compared to the Mikuni's I've done (only GS and GSX-F air / oil cooled range, everything else is 'too new' ;D )
huck_finn
Been Around the Block
I put the new friction plates & springs on last night (after soaking the plates in oil for 24hr). I also bolted on the new stator. There isn't a whole lot more to do with the engine right now since I am not going to bore it out. Anything that needed replacing/fixing was done while still on the frame.
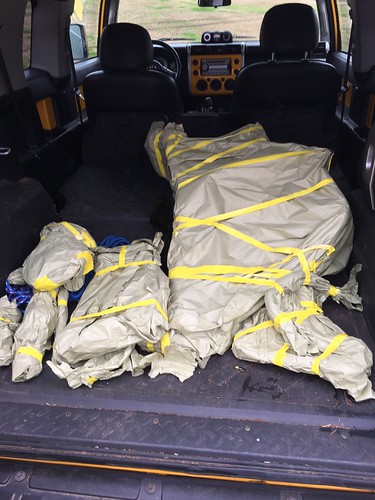
My frame and a few other pieces are in the shop for paint - having the paint/bodywork program at the community college where I work do it for me. All I needed to do was pay for the paint. They do a good job, but you just can't be in a hurry to get things back.
I think I remember seeing some pictures (can't find via search) on how to dremel out the metal oil guide (right crankcase) to help with oil flow. Do I need to watch out for anything if I give it a go?
huck_finn
Been Around the Block
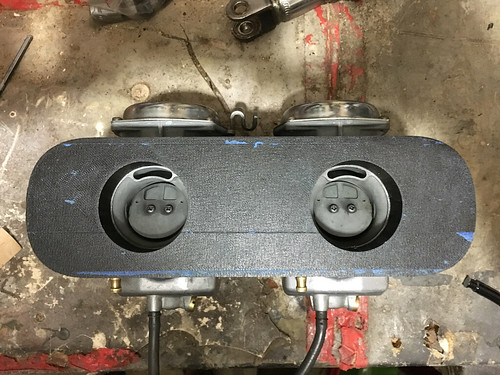
Printed out a test plate to make sure my measurements were good for my air box/filter. I was thinking of creating a design that is similar exactly like <a href="https://cognitomoto.com/products/cb750-air-intake-box-sohc-and-dohc?variant=11585137601">ones I have seen for 750's</a>.
Where the plate mates up with the intake is a really snug fit, but I have no idea if it will leak any air. I will have to wait until I get everything back together. Frame will be back from paint next week.
If anyone has done something similar for their 360, I would love to hear how it turned out.

Where the plate mates up with the intake is a really snug fit, but I have no idea if it will leak any air. I will have to wait until I get everything back together. Frame will be back from paint next week.
If anyone has done something similar for their 360, I would love to hear how it turned out.
huck_finn
Been Around the Block
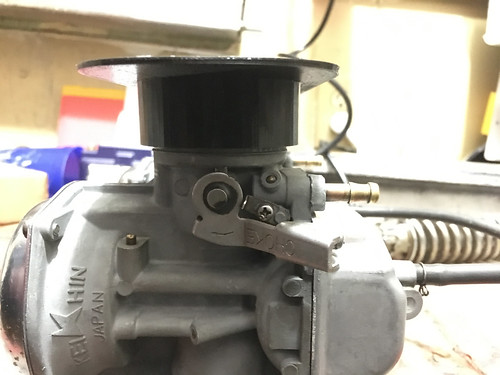
crazypj said:That's kinda cute.
You really want a radius on edge though, 3/8" seems to be about minimum for good flow. ( there are other radii and angles for max flow rate)
Sharp edge acts as a restrictor at high airflow
When you are referring to the edge, which edge do you mean? My thought behind going this route is to reduce the amount of space the air box takes up, while maintaining the same amount of filter surface area.
Sent from my iPhone using DO THE TON
huck_finn
Been Around the Block
I am not sure what the standard filament is, but I do know they have ABS plastic, carbon fiber, kevlar, and onyx. The onyx produces the most finished look out of them all. The carbon fiber and kevlar filaments use nylon as a binder.
I haven't had a chance to work on the design in a while - work has gotten busy and I haven't been taking lunch to head down to the lab.
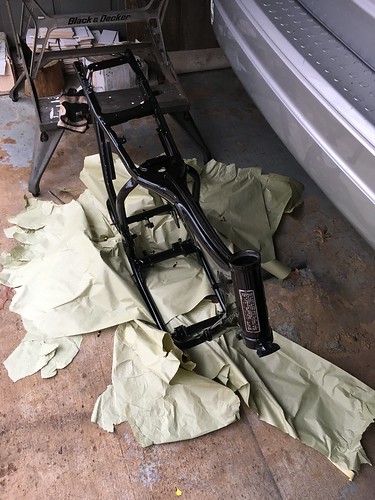
I did get my frame back from paint. Everything I got back looks good, with the exception of the rear brake cover, which came out with a run on it. The kid working on everything repainted it three times, but just couldn't get it to come out. I suppose I got what I paid for. More than anything I am glad rust won't be a concern for the foreseeable future.
When I get back from visiting in-laws I will need to put on the new steering bearings before reassembling, and taking final measurements for the air filter and seat pan.
I haven't had a chance to work on the design in a while - work has gotten busy and I haven't been taking lunch to head down to the lab.
I did get my frame back from paint. Everything I got back looks good, with the exception of the rear brake cover, which came out with a run on it. The kid working on everything repainted it three times, but just couldn't get it to come out. I suppose I got what I paid for. More than anything I am glad rust won't be a concern for the foreseeable future.
When I get back from visiting in-laws I will need to put on the new steering bearings before reassembling, and taking final measurements for the air filter and seat pan.


