FRANKENHONDA II the 1982 DOHC CB 750F2 Build

These first ones give an additional 20 mm at $199 and the others come in a 50 and 75 mm option at $395 they look a little more involved.


Sent from my iPhone using DO THE TON
 

Attachments

  • IMG_5993.jpg
    IMG_5993.jpg
    161.7 KB · Views: 219
  • IMG_5994.jpg
    IMG_5994.jpg
    138 KB · Views: 220
The first type is designed to keep all the fork internals, including the top adjuster in the same place, so the top "nut" goes around them and the adjuster is deep inside.

At 50mm, the adjusters would be too deep to get to or to see how they were set, so they basically lift the whole cartridge and the adjusters appear out of the top the same as stock to nuts.

Different ways to get to the same answer. Irk's are the same design as the top ones, but are very deep.

That's why a common solution is a gull type top triple clamp, but that's a lot of work and they tend to be very chunky.

To work out what you need, drop the forks through the to triple by 20mm and measure rake and trail or just compare to stock fork length to see how much you need to lengthen the forks.
 
Teaser I reckon you’re right I’ll have to drop the forks through and check. When I did the conversion Devin from cognito moto gave me this.

Original was 3.70 now with a 17” it’s 3.73 so it’s fairly close to original although I have a 17” on the back I’ll have to email him again to see if those measurements are done with an 18” back 17 “ front or all round 17”.


Sent from my iPhone using DO THE TON
 

Attachments

  • IMG_5995.JPG
    IMG_5995.JPG
    68.8 KB · Views: 218
Devin got back to me and said it’s matching front and back 17” which is what I am currently running


Sent from my iPhone using DO THE TON
 
So while doing some R&D I stumbled across an article on Gixxer.com in the stick notes titled suspension 101 by
Max McAllister from Traxxion Dynamics... an all encompassing article, well worth a read


Sent from my iPhone using DO THE TON
 
So I’ve been looking at how to mount the steering damper.

I was thinking of mounting it to the gsxr lower triple and then tapping a thread into the steering bump stop on the frame.

Only thing is the OEM gsxr damper has a 68 mm stroke and I think the damper I have had a 63 mm stroke.

I’m not sure if the 5 mm is doing to be a deal breaker or not. I can only speculate for the next 3 weeks while I’m at work.

The other thing I just did was order an M lock RFID ignition, mostly because I forgot to make a place to mount an ignition before powder coating the frame.

The ignition should be the final piece of the electrical puzzle, all the rest of the electrics should be sorted

I’m wondering if I should take the carbs apart and put a new seal kit in or if I can just hit it with carb cleaner.

Then I think I will need to custom make the throttle cables and brake lines.

Lol baby steps, I’ll be happy with a first start this break, but I’d be pretty dam happy if it was a first ride too


Sent from my iPhone using DO THE TON
 
Well the M Lock arrived a whole lot quicker than I thought it would


Sent from my iPhone using DO THE TON
 

Attachments

  • 6d50eb3b-6b3e-4b85-a95f-c31e88e55c4f.jpg
    6d50eb3b-6b3e-4b85-a95f-c31e88e55c4f.jpg
    105 KB · Views: 784
So I've bought an accelerator cable kit which I hope is the right length its 100cm with one end left adjustable so hopefully i can make that work.

Now thinking about the carb rebuild, I've been talking to a few people who have said running the carb components through an ultra sonic cleaner is the way to go. So I'm just trying to work out which one will be the best one for the job, and where to get it. If its from fleabay I'll have to order it soon as ill be back home in a week and I'm pretty keen to hear this motor roar and not having the carbs rebuilt is going to hold this up.

just counting down the days till shed time now
 
With the M-lock unit get yourself a long lanyard for the fob, loop it through your pants belt loop and stick it your pocket.. makes it easier to get out and use when wearing gloves ;)
https://www.ebay.com.au/itm/Security-Cell-Phone-Camera-Long-Lanyard-Cords-Strap-Mobile-Carabiner-PU-New/401566056195?hash=item5d7f33bf03:g:uW0AAOSwI5VbT-9c
 
wozza said:
With the M-lock unit get yourself a long lanyard for the fob, loop it through your pants belt loop and stick it your pocket.. makes it easier to get out and use when wearing gloves ;)
https://www.ebay.com.au/itm/Security-Cell-Phone-Camera-Long-Lanyard-Cords-Strap-Mobile-Carabiner-PU-New/401566056195?hash=item5d7f33bf03:g:uW0AAOSwI5VbT-9c
I’m picking up what you’re putting down here. Apparently there is also an option for a small pill sized RFID chip that you can sew into your jacket.

One of the guys I know from Melbourne Cafe Racers actually had it injected into his wrist under a tattoo or a key. Probably a little bit more dedicated than I am to the cause.


Sent from my iPhone using DO THE TON
 
Yeah I have one of the glass pea ones, anything thicker than a a piece of paper and its hit or miss...tried in the finger of my glove only worked now and again ...so now I just keep it hidden as a backup in my jacket and use the fob.....works ever time ;)
 
wozza said:
Yeah I have one of the glass pea ones, anything thicker than a a piece of paper and its hit or miss...tried in the finger of my glove only worked now and again ...so now I just keep it hidden as a backup in my jacket and use the fob.....works ever time ;)
Copy that, I won’t waste my money then


Sent from my iPhone using DO THE TON
 
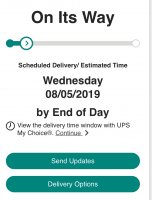
Well I'm in deep now, https://www.dimecitycycles.com/14-33-inch-ohlins-s36p-eye-to-clevis-gas-charged-rear-motorcycle-shock-absorbers.html .I just committed not quiet sure when they will land in country but the final part to the suspension puzzle is soon do be in place.

While I wait it will be steering stops and damper mounting points then she should handle better than new.

I'm 3 days from being home already getting pretty excited, new motor just needs the cams in and hopefully history will be made with the first firing of the engine since the build began here 16 April 2017. Over this time there has been an organic evolution through a hell of a lot of trial an error (perhaps more of the latter). Gallons of fiberglass resin, weeks of sanding, painting, repainting and sanding again. Plenty of hours Old Man Murphy fabrication and shed time, with more to come.

I don't see the bike being finished this break but I am hoping for a rolling starter. See how my brother goes with the reworked decals who knows may even get the tank sorted out.

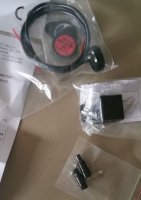
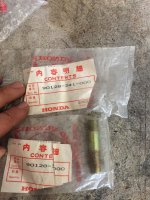
I'm not sure if the seal kit contains the seals for the petcock, its been sitting in my tool box for a few months now and I'm unsure if the rubbers would have perished by now (I'll add these to the list of parts to source if they're not in my kit.

I'm hoping the ultra sonic clear brings the carbs up to their original luster before putting them on. what does everyone here put in as a solution for cleaning the carbs in the ultrasonic cleaners. From what I read it cant be flammable. This kind of rules out traditional carb cleaner.

here's to the countdown to shed time hopefully in a few days I can start updating you all with some real time photos and videos
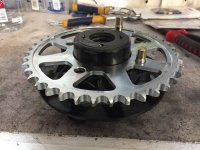
 :D
 
I use a lab cleaning product called Micro 90, but many just use a drop or two of Dawn (in water) to break the surface tension. If you start with HOT water, it cuts better.
 
copy that I believe there is a heater in the cleaner so I'll be cranking that to whatever the max temperature is. Just read up on the Micro 90 sounds like good stuff. although truth be told first run will probably be with the Dawn liquid just to see how she comes up.
 
cb250nproject said:
Whoop whoop we have a delivery date for the suspension super excited now.


Sent from my iPhone using DO THE TON


You may want to explain to the Muricans in the room that Aussies use Day:month:year before someone freaks out about August delivery... :)
 
Just picked up some OEM sprocket studs. I’ve gotten one in nearly as far as I can but there is still a section of non threaded stud above the sprocket it this correct ?


Sent from my iPhone using DO THE TON
 

Attachments

  • IMG_6454.JPG
    IMG_6454.JPG
    1.9 MB · Views: 184
  • IMG_6452.JPG
    IMG_6452.JPG
    1.6 MB · Views: 176
Back
Top Bottom