
We noticed you are blocking ads. DO THE TON only works with community supporters. Most are active members of the site with small businesses. Please consider disabling your ad blocking tool and checking out the businesses that help keep our site up and free.
You are using an out of date browser. It may not display this or other websites correctly.
You should upgrade or use an alternative browser.
You should upgrade or use an alternative browser.
The CB 350 Project.........with video.
- Thread starter New2meCB
- Start date
New2meCB
Been Around the Block
juan@crqcycles said:Just the way I like it: SIMPLE.
What are your future plans with her?
Thanks! Glad you dig it 8)
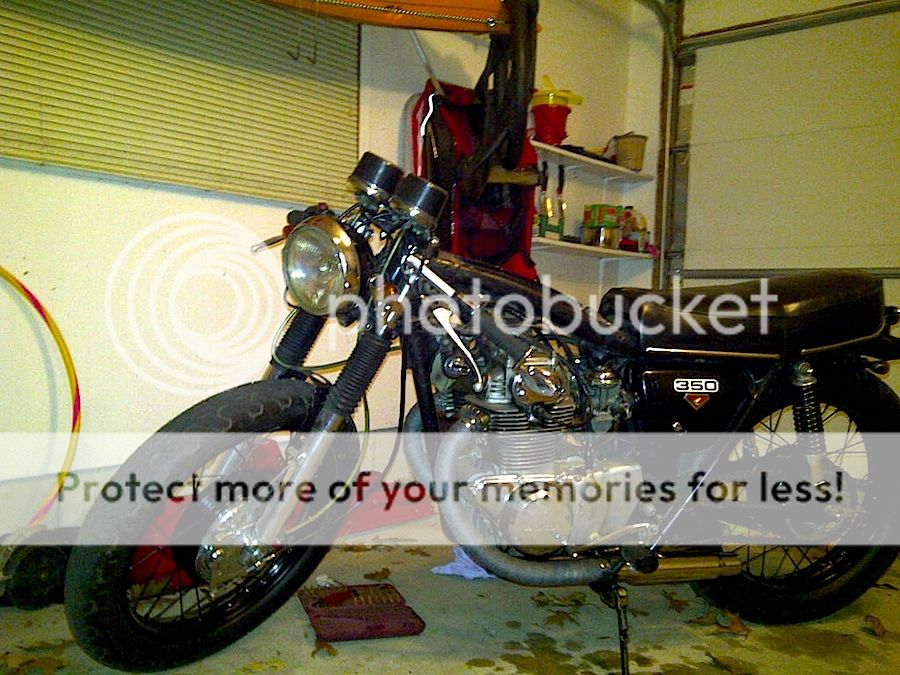
Really, I wish I didn't "have" to get into it at all. I'd like to just keep running it as is for a while but, the one thing the bike did have since the day I purchased it was an oil leak (cylinder/case gasket).
It wasn't really bad at first........bad, but not "really" bad so I just lived with it. After running it like I have it has now approached the REALLY bad point so I knew a while back that I'd have to rip into the bike again. I didn't have a choice. Delayed it until now though. I'm worried I'll get into it and discover or cause all kinds of issues. That's why I'm knda bummed about getting into the engine. It's running perfectly. Not smoking or burning oil, fires right up on the second kick from cold every time etc. It's a real shame I have to open it up.......

So, when it some to the engine, I'll be redoing top end only. New gaskets, while I'm in there I'll replace rings, cam chain pulleys and chain, that sort of thing. I'll clean up the engine while it's out of the bike and paint it up as well. I'll be adding some black to it and darken it up a bit.
Other stuff I have planned (on top of the engine stuff) since I won't be riding is:
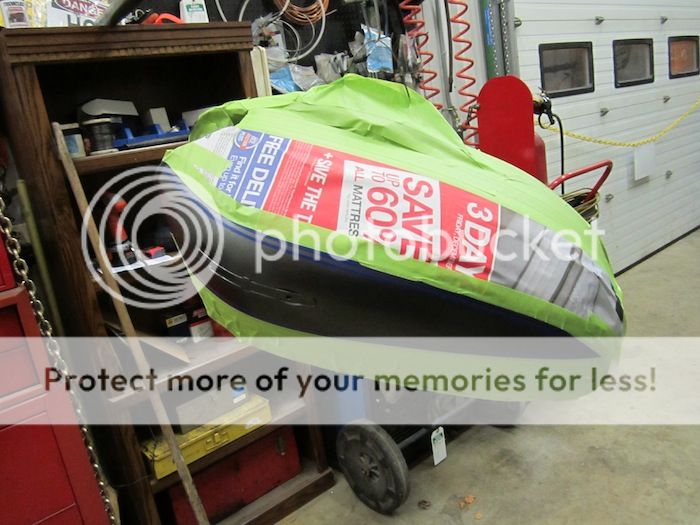
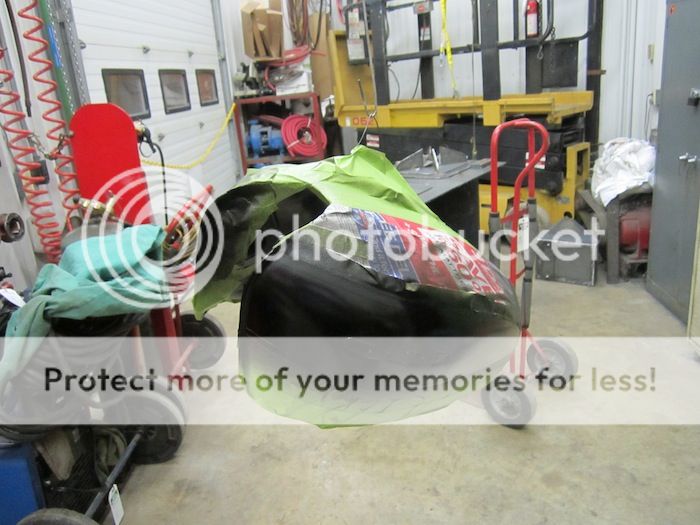
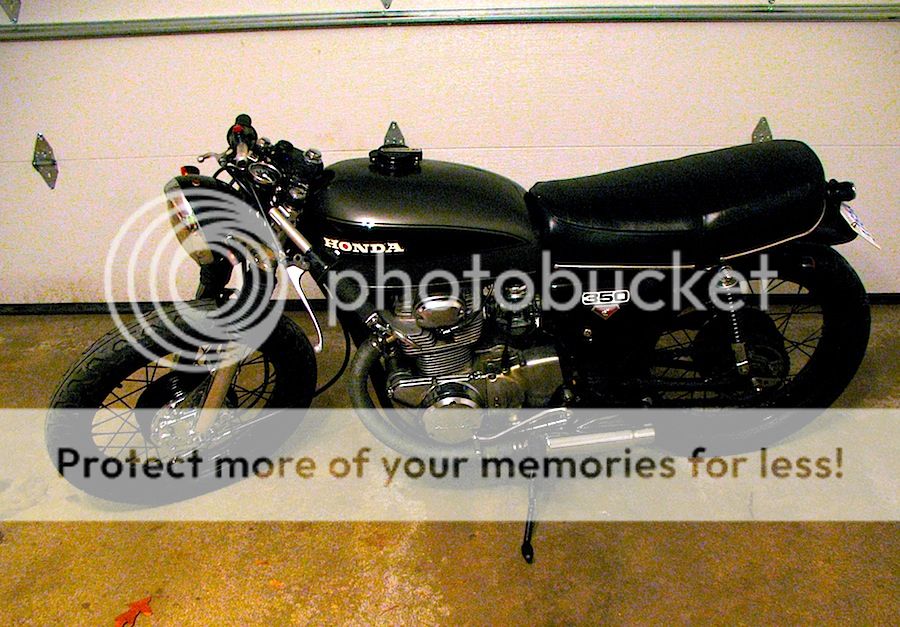
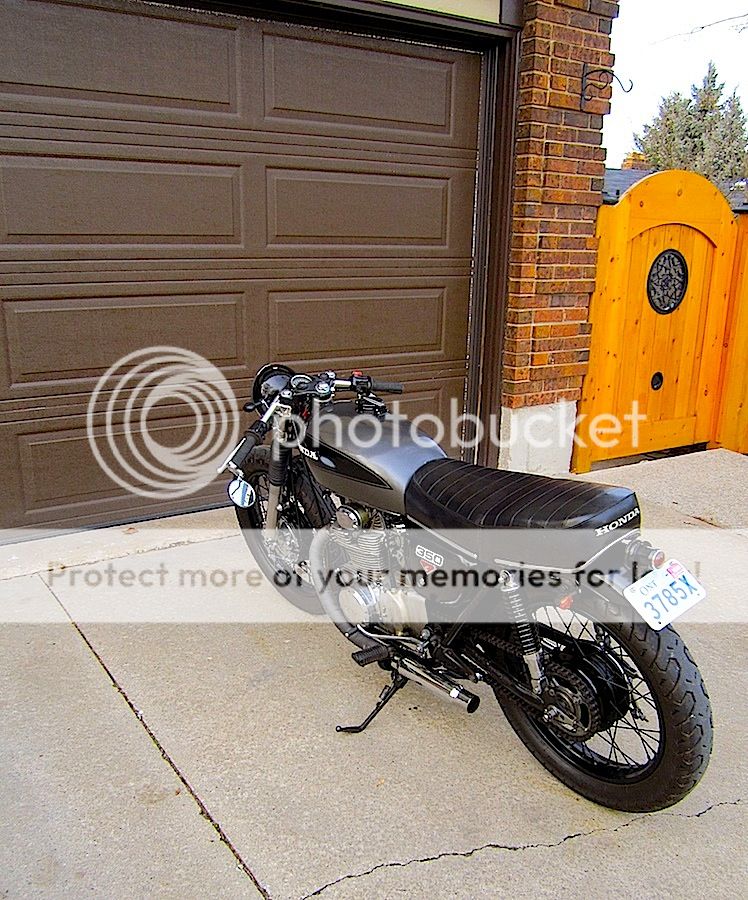
-Tank will be painted a different colour (starting on that today actually - as mentioned, last tank of the season was burned the other day) after paint I'll be installing s new CNC machined cap and latch.
-install new EBC brakes
-new sprokets and chain
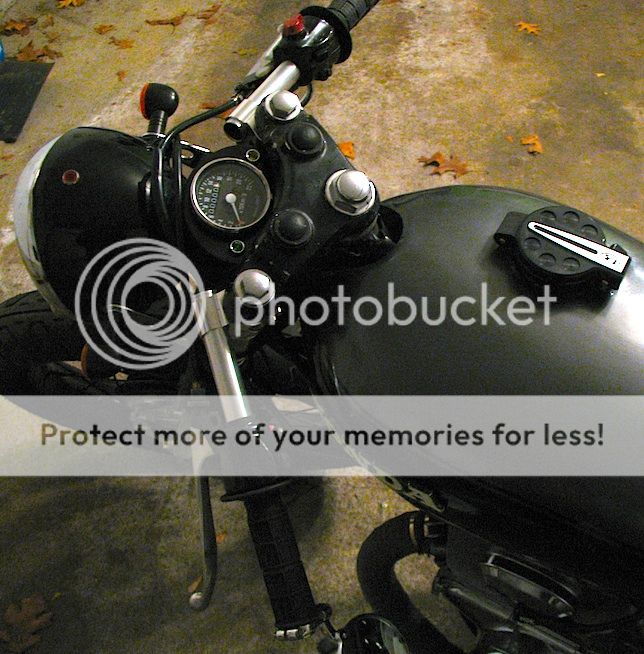
-Mini speedometer installed (will not be running tachometer) and dash with small indicator lights to be run (will fab up new dash)
-A buddy of mine machined some spacers for me for the rear shocks, I still need to get those on (5 minute job)
-New throttle cable, shorter speedo cable, new front brake cable install
-Have to get some new NGK plug cap on that I've been thinking about. The ones of the bike are the originals and don't "snap" on very well. If you sneeze around them they pop off the plugs so.....
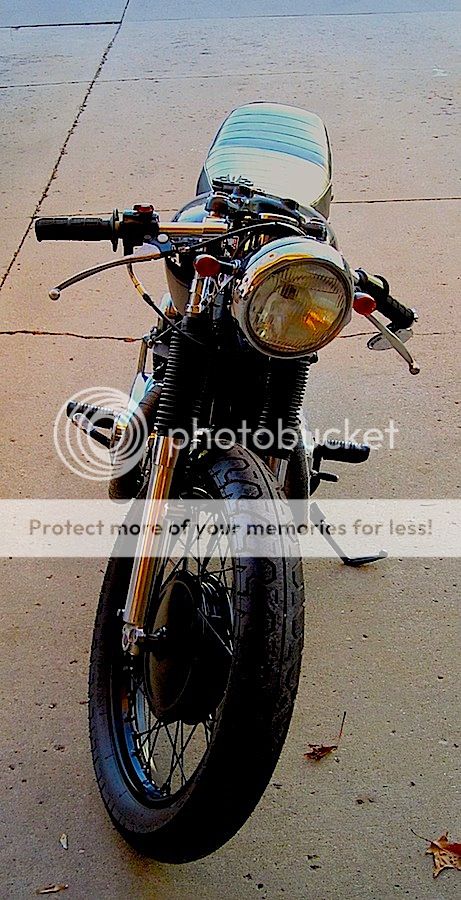
-New ring for headlight bucket.
-May mock up a seat as well........we'll see on that one. It's the last thing on the list.
There will be other small random things like grips, touch up paint, cleaning air filters and all that but I most concerned about the engine. I SO wish I didn't have to do that. Trouble is, I need to get this all done between kids, work, holidays etc as there is a HUGE project coming at work that will literally tie me up until JUNE!
If I don't get this done and the bike running before the end of January, I won't be riding until summer!!!! That is faulked up.
I'm stressed. I need to get started on the tank today!
Waiting for a couple of engine parts.
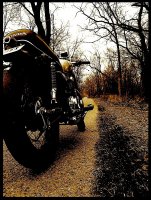
Last ride pic of this season. I hope to take more before summer!!!
Attachments
New2meCB
Been Around the Block
f22hb said:Maybe I missed it, but did you ever find replacements for the inner part of the swingarm bushings?
Tried several sources and couldn't come up with the good. Cleaned mine as best I could and reinstalled. They've been fine. I've had no issues. Unlike previous owners over the 41 years, I DO keep them greased
New2meCB
Been Around the Block
Here we go again........
Gotta update this thread a bit..........here's some catch-up
:this all takes places over the past few weeks so.....cut and paste from another site/forum.
Dec 22
------------------------------------------------------------------------------------------------
Tearing into it again. Bunch more small jobs. I was supposed to pull the motor and replace all the gaskets (oil leak) but when I pulled the tank off I tried the top nuts out of curiosity and NONE were torqued to spec...........Here's hopin'!!!! I'd be stoked if that cured that problem
Anyway........
-New throttle cable (now complete)
-New front brake cable/shoes (now complete)
-New rear brake shoes
-New headlight ring
-New chain and sprockets.
-New mini speedo (won't be using tach anymore)
-Building new dash with mini LED indicators (for neutral and turn signal markers).
-Shortened speedo cable due to lower controls
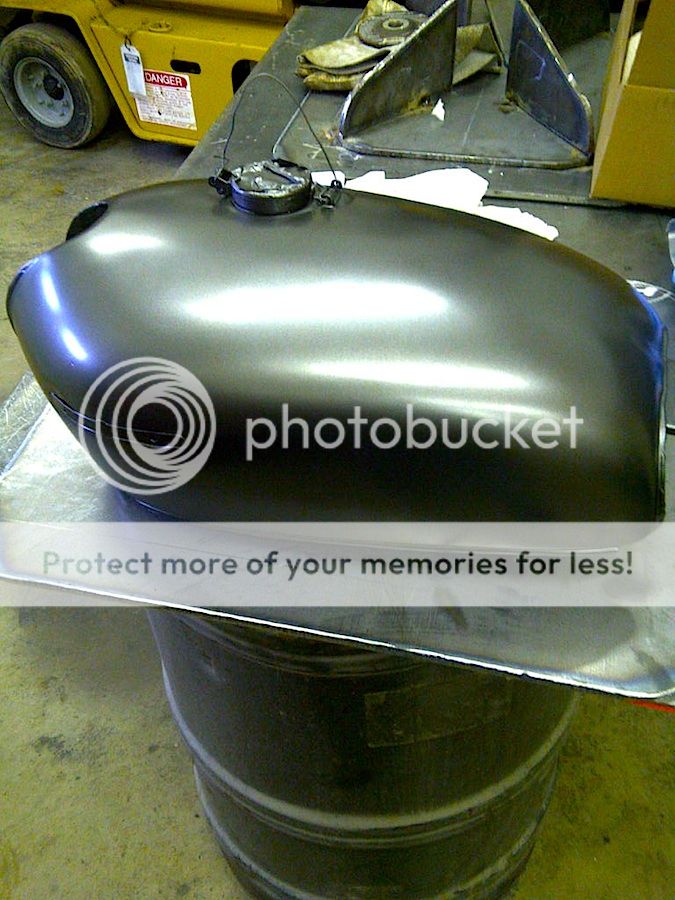
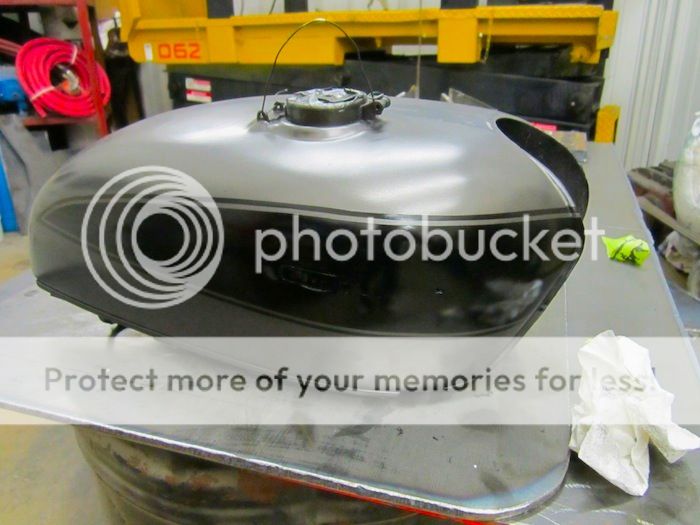
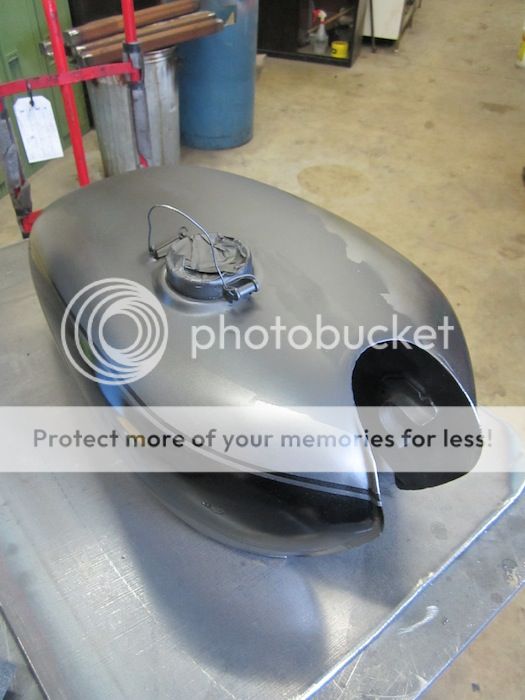
-Gas tank painted in Dark Graphite Silver (will be adding striping as well but not sure on design yet)
-New CNC machined gas cap and latch from Joker Machine
-Clean up some more wiring
-New front brake switch
-New NGK resistor caps to install
-Overhaul and clean air boxes
There's more, but, I forget
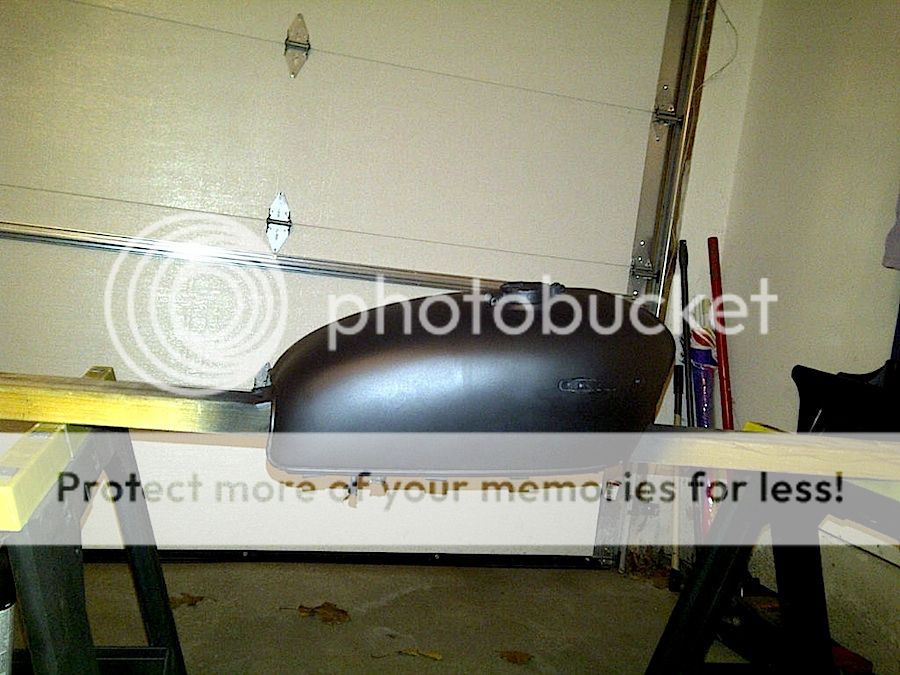
Tank's now primed and ready for sanding...........start painting on Monday I think.
Dec 28
------------------------------------------------------------------------------------------------
Slow going due to Holidays but I'm hoping to get this done over the weekend.
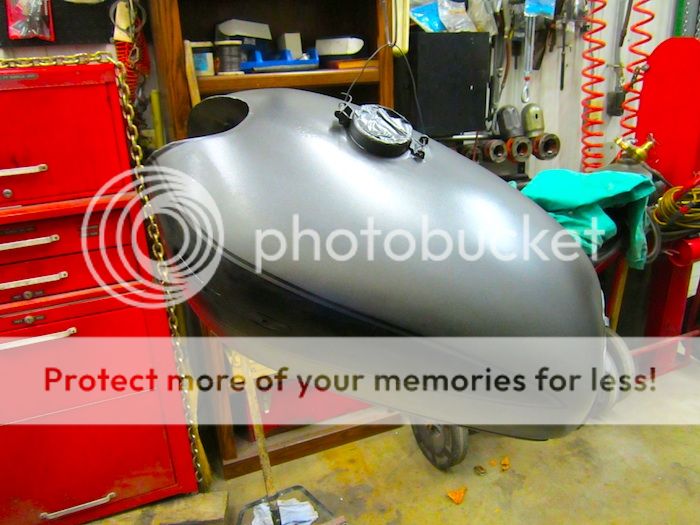
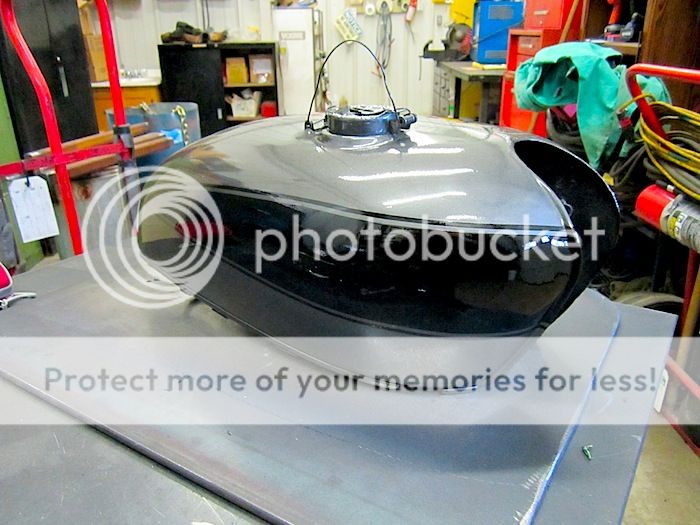
Base coat has been shot (Graphite Silver) and is now ready for a wet sand. I wish I didn't have to wet sand but it's been several days so the paint has hardened. I need to get something there for the next coat to hold onto.
Will wet sand and then mask the design. Shoot the black design, wet sand again where the two colours meet to knock down the ridge and then clear coat it. I hope I can get this done over the weekend as I'm tired of working the tank now. I really want to move on.
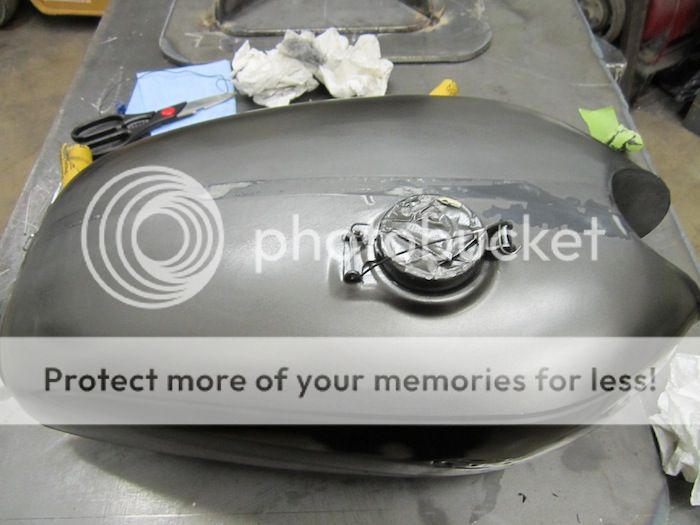
Finally got my new CNC machined cap and latch in the mail from Joker.

Should tie in nicely I think. I hope it looks good and goes together without issues..................I hope
It'll dress up the bike a bit I think
Dec 30
------------------------------------------------------------------------------------------------
One step forward 2 steps back....
Spent a TON of time masking the sides and getting them even. Done, looks good.
Shoot color...
Great! Goes well.......right?
WRONG!!!!!!!
The tape I had used as my centre line DESTROYED the paint. My stupid fault though I figure. It had been there for a few days.
Now I hoping to save this and not have to start over.
Rough mask, re-prime, sand, blend............we'll see when I'm done.
It may be ruined.
Dec 30
------------------------------------------------------------------------------------------------
Possible save!!!
We'll see. I sanded, re-primed, sanded, painted (blend), sanded, blended, sanded the entire thing, gave it one final quick coat on top and it is now drying. If it looks good in the morning (or afternoon) I'll wet sand the entire thing (1500) and then spray the clear.
It's not show-bike good, but, it's good.
Jan 1
------------------------------------------------------------------------------------------------
Took the kids tobogganing until they were worn out.
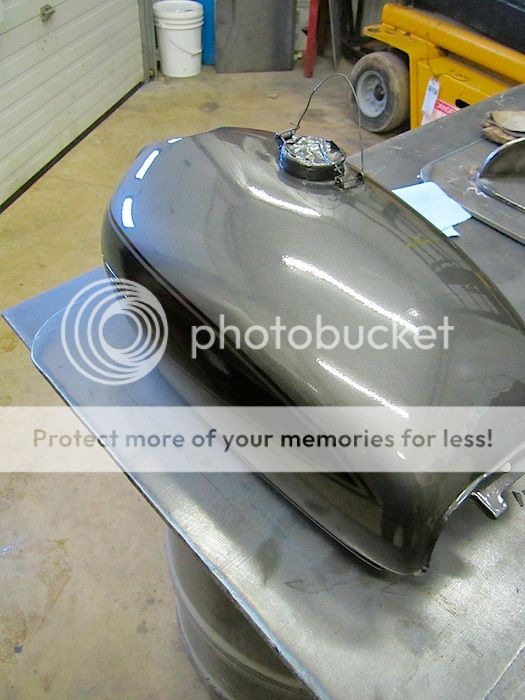
After that, I swung by the shop to see how the tank was making out. Well..........aside from the orange peel, I'd say it's doing AWESOME!
I'm leaving it at the shop where it's quite warm. I'll pick it up after dinner tomorrow and leave it a while longer before wet sanding the orange peel out (800, 1000, 1500, 2000, polish, wax)
Right now, you can't even see where I blended.
Faulking STOKED! Glad I persevered and kept at it.
Happy camper!
P.S. Used Spraymax 2K clear for the first time and, well, all other clears should be removed from the shelf. Holy CRAP is that stuff ever nice to use. Incredible.
Worth ever penny.
If you're doing any painting and need to clear - go find that Spraymax. WOW......
Jan 5
------------------------------------------------------------------------------------------------
So I get a laugh yesterday................for a second................until I remembered I PAID for that.
I have parts coming still so when I spotted this big box on the front step I was expecting some of the more substantial parts I've been waiting for
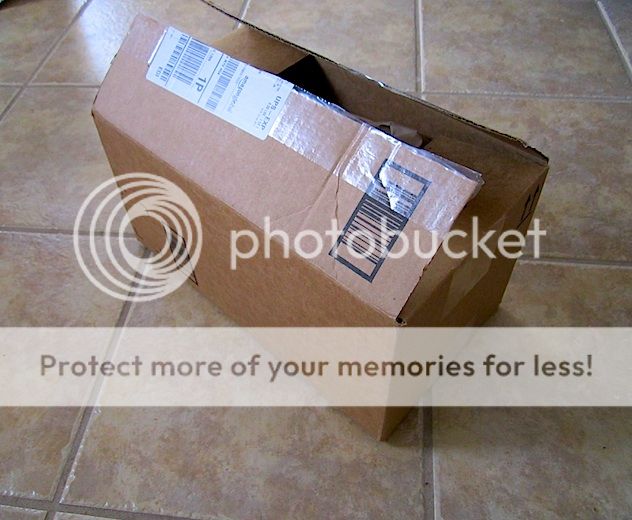
My daughter (6) went over to get it for me and she lifted hard thinking it might be a bit heavy. She almost fell over when she went to lift it alright. She almost threw it up over her head! She laughed and said, "I think it's empty daddy!"
So I grab it and she's not kidding. WTF?
Open it up and, sure, it was something I was waiting for but, SERIOUSLY??????
You needed to pack my two little LED's in this GIANT box?
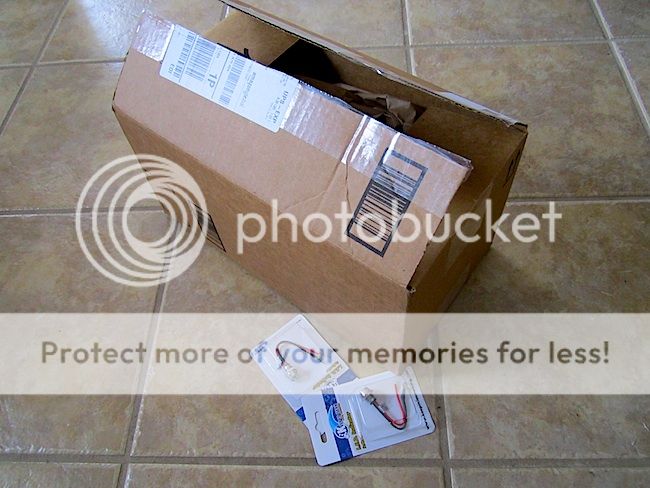
Good God..... :
Tonight
------------------------------------------------------------------------------------------------
Finally got some time tonight to get at it again!
Wet sanded a few days ago and dulled it up real good. Buffed the snot out of it (by hand) tonight. 8)
Smooth as silk!!

I'm happy...............after that bit of chaos that went down. As you can see, you can see nothing but reflection in the paint
Slapped the new cap and latch on tonight as well. Great stuff!

------------------------------------------------------
There we go. Updated. ;D
Gotta update this thread a bit..........here's some catch-up
:this all takes places over the past few weeks so.....cut and paste from another site/forum.
Dec 22
------------------------------------------------------------------------------------------------
Tearing into it again. Bunch more small jobs. I was supposed to pull the motor and replace all the gaskets (oil leak) but when I pulled the tank off I tried the top nuts out of curiosity and NONE were torqued to spec...........Here's hopin'!!!! I'd be stoked if that cured that problem
Anyway........
-New throttle cable (now complete)
-New front brake cable/shoes (now complete)
-New rear brake shoes
-New headlight ring
-New chain and sprockets.
-New mini speedo (won't be using tach anymore)
-Building new dash with mini LED indicators (for neutral and turn signal markers).
-Shortened speedo cable due to lower controls
-Gas tank painted in Dark Graphite Silver (will be adding striping as well but not sure on design yet)
-New CNC machined gas cap and latch from Joker Machine
-Clean up some more wiring
-New front brake switch
-New NGK resistor caps to install
-Overhaul and clean air boxes
There's more, but, I forget
Tank's now primed and ready for sanding...........start painting on Monday I think.
Dec 28
------------------------------------------------------------------------------------------------
Slow going due to Holidays but I'm hoping to get this done over the weekend.
Base coat has been shot (Graphite Silver) and is now ready for a wet sand. I wish I didn't have to wet sand but it's been several days so the paint has hardened. I need to get something there for the next coat to hold onto.
Will wet sand and then mask the design. Shoot the black design, wet sand again where the two colours meet to knock down the ridge and then clear coat it. I hope I can get this done over the weekend as I'm tired of working the tank now. I really want to move on.
Finally got my new CNC machined cap and latch in the mail from Joker.
Should tie in nicely I think. I hope it looks good and goes together without issues..................I hope
It'll dress up the bike a bit I think
Dec 30
------------------------------------------------------------------------------------------------
One step forward 2 steps back....
Spent a TON of time masking the sides and getting them even. Done, looks good.
Shoot color...
Great! Goes well.......right?
WRONG!!!!!!!
The tape I had used as my centre line DESTROYED the paint. My stupid fault though I figure. It had been there for a few days.
Now I hoping to save this and not have to start over.
Rough mask, re-prime, sand, blend............we'll see when I'm done.
It may be ruined.
Dec 30
------------------------------------------------------------------------------------------------
Possible save!!!
We'll see. I sanded, re-primed, sanded, painted (blend), sanded, blended, sanded the entire thing, gave it one final quick coat on top and it is now drying. If it looks good in the morning (or afternoon) I'll wet sand the entire thing (1500) and then spray the clear.
It's not show-bike good, but, it's good.
Jan 1
------------------------------------------------------------------------------------------------
Took the kids tobogganing until they were worn out.
After that, I swung by the shop to see how the tank was making out. Well..........aside from the orange peel, I'd say it's doing AWESOME!
I'm leaving it at the shop where it's quite warm. I'll pick it up after dinner tomorrow and leave it a while longer before wet sanding the orange peel out (800, 1000, 1500, 2000, polish, wax)
Right now, you can't even see where I blended.
Faulking STOKED! Glad I persevered and kept at it.
Happy camper!
P.S. Used Spraymax 2K clear for the first time and, well, all other clears should be removed from the shelf. Holy CRAP is that stuff ever nice to use. Incredible.
Worth ever penny.
If you're doing any painting and need to clear - go find that Spraymax. WOW......
Jan 5
------------------------------------------------------------------------------------------------
So I get a laugh yesterday................for a second................until I remembered I PAID for that.
I have parts coming still so when I spotted this big box on the front step I was expecting some of the more substantial parts I've been waiting for
My daughter (6) went over to get it for me and she lifted hard thinking it might be a bit heavy. She almost fell over when she went to lift it alright. She almost threw it up over her head! She laughed and said, "I think it's empty daddy!"
So I grab it and she's not kidding. WTF?
Open it up and, sure, it was something I was waiting for but, SERIOUSLY??????
You needed to pack my two little LED's in this GIANT box?
Good God..... :
Tonight
------------------------------------------------------------------------------------------------
Finally got some time tonight to get at it again!
Wet sanded a few days ago and dulled it up real good. Buffed the snot out of it (by hand) tonight. 8)
Smooth as silk!!
I'm happy...............after that bit of chaos that went down. As you can see, you can see nothing but reflection in the paint
Slapped the new cap and latch on tonight as well. Great stuff!
------------------------------------------------------
There we go. Updated. ;D
New2meCB
Been Around the Block
Couldn't resist Just "had" to set the tank on the bike to get an idea of what it will look like when I'm done. I'm really glad I took my time selecting colour and design. I'm quite happy.
Just dark enough.
The beauty of having a dad who restores vintage cars, gas pumps, juke boxes etc is that one phone call for those hard-to-find clips that hold original tank badges on is answered with a "Yep, I have those kicking around somewhere. I'm in the garage if you're coming over." 8) The badges in the pics from last night were just "set in": clipped in today.
10 minutes drive - 2 minutes search - 20seconds work and they're installed
Now for the dash. 8)
Just "had" to set the tank on the bike to get an idea of what it will look like when I'm done. I'm really glad I took my time selecting colour and design. I'm quite happy.
Just dark enough.
The beauty of having a dad who restores vintage cars, gas pumps, juke boxes etc is that one phone call for those hard-to-find clips that hold original tank badges on is answered with a "Yep, I have those kicking around somewhere. I'm in the garage if you're coming over." 8) The badges in the pics from last night were just "set in": clipped in today.
10 minutes drive - 2 minutes search - 20seconds work and they're installed
Now for the dash. 8)
New2meCB
Been Around the Block
Started working the dash.........
Rough sketch.
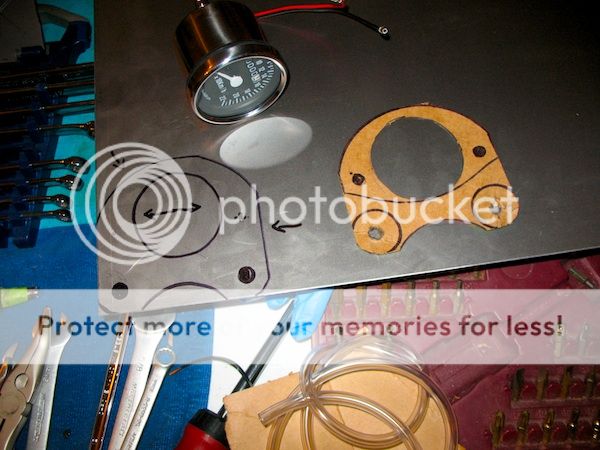
After tweaking cutting and cleaning I got the full mock up done tonight.
Looks kinda crooked in the pic but it's just the angle. It's bang on the money 8) I'm pretty stoked on it. Nicely tucked away!
Will disassemble again and start painting I hope tomorrow night. Black......
Rough sketch.
After tweaking cutting and cleaning I got the full mock up done tonight.
Looks kinda crooked in the pic but it's just the angle. It's bang on the money 8) I'm pretty stoked on it. Nicely tucked away!
Will disassemble again and start painting I hope tomorrow night. Black......
New2meCB
Been Around the Block
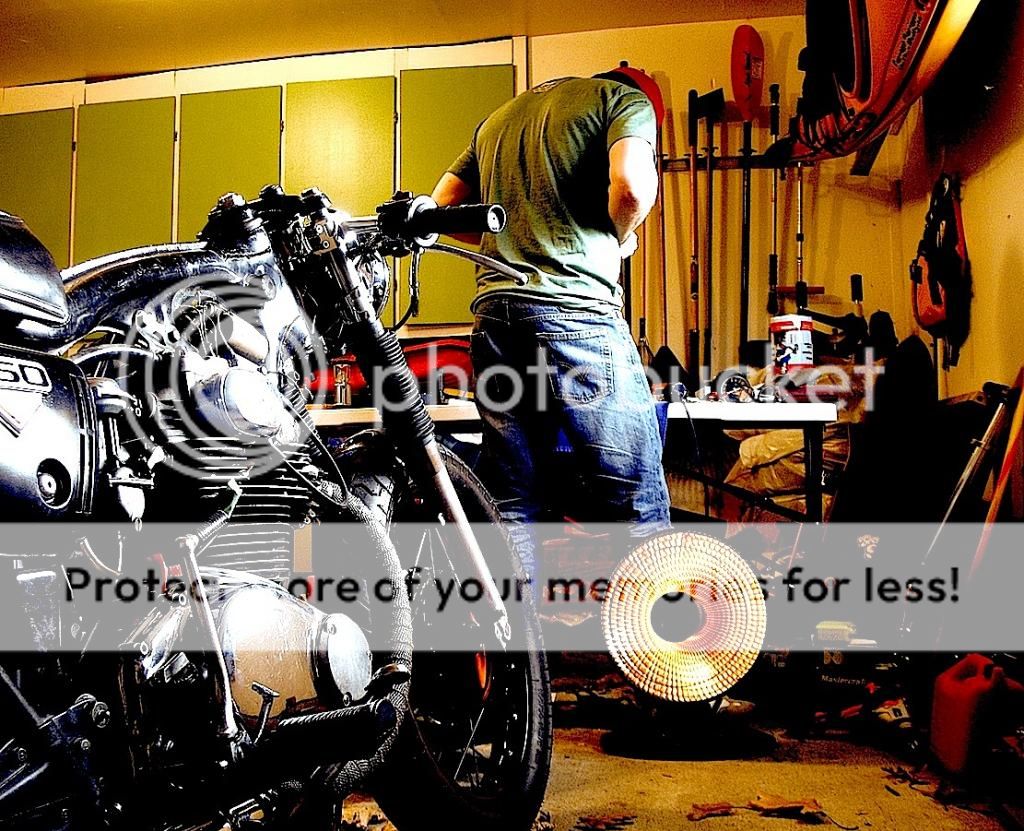
A couple of "artsy shots" snapped while I was working some minor details in the dash.....
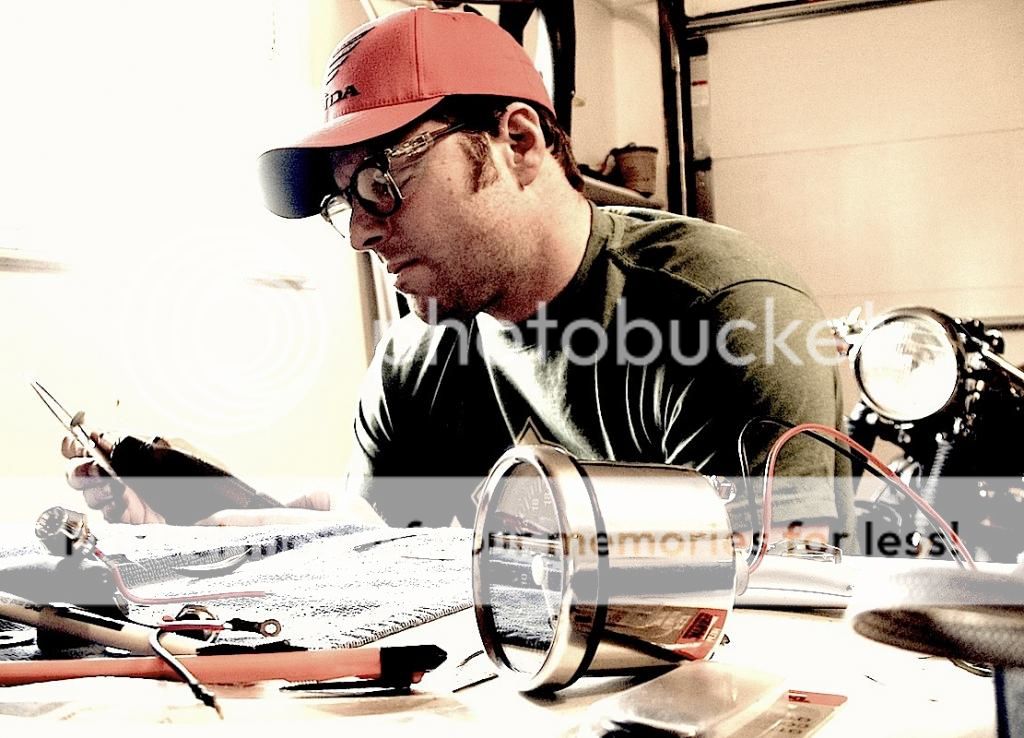
It's typically cold in the garage but that heater I bought works faulkin' GREAT 8)
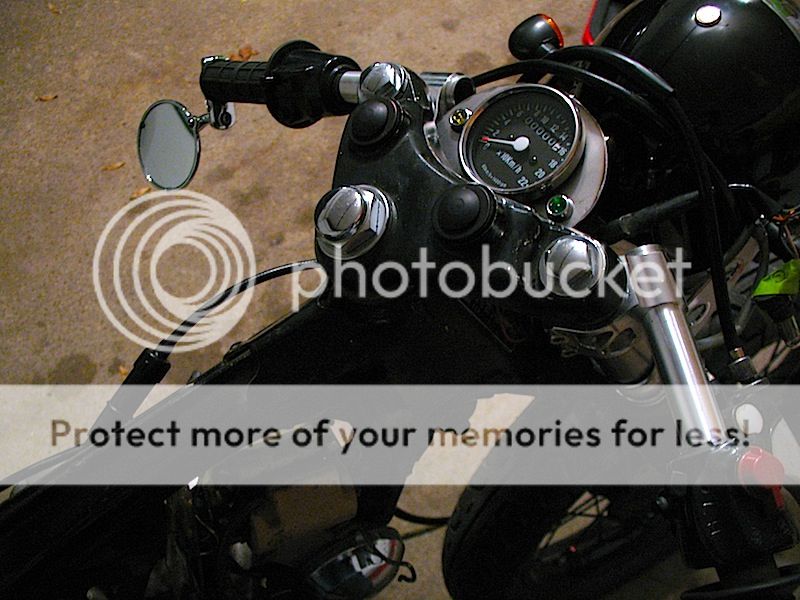
Dash now complete and tank back on.....
Very few things left to do. Hoping to kick it over tomorrow!!! Fingers crossed.
Here's a little preview. I'll try to get some better pics soon.
It's typically cold in the garage but that heater I bought works faulkin' GREAT 8)
Dash now complete and tank back on.....
Very few things left to do. Hoping to kick it over tomorrow!!! Fingers crossed.
Here's a little preview. I'll try to get some better pics soon.
New2meCB
Been Around the Block
mikewerx said:what did you use to cut the dash metal out?
Grinder to cut out the dash initially: basically to a manageable square at that point. After redrawing nicer lines, I just walked over to the bench grinder and shaped it old-school style. Dremel and hand-filing after that to clean and straiten it up.
I don't have a heap of machining type or precision type tools so I make due with what I've got. Took my time and got it looking good.
Hole for the speedo was bang on the same diameter as a standard 2 3/8 hole-saw. Nice tight fit once cut. Simple drill for the rest of the holes as well.
My bike isn't a show bike. I use it as much as possible.............even when it's freezing out. I take my time on my projects, try to get it looking as good as possible but again, it's not show quality.
If I were building something for sunny days only, I would probably not do it this way even though it turned out pretty good.
If you want precision (something really nice), I'd draw it up "perfectly" and take it to a machine shop to cut. They've got the tools.......
I enjoyed doing this little project immensely though. 8)
NOT the painting part though
New2meCB
Been Around the Block
Slightly better light this morning. Was taking the kids to school and just took a couple of quick shots.
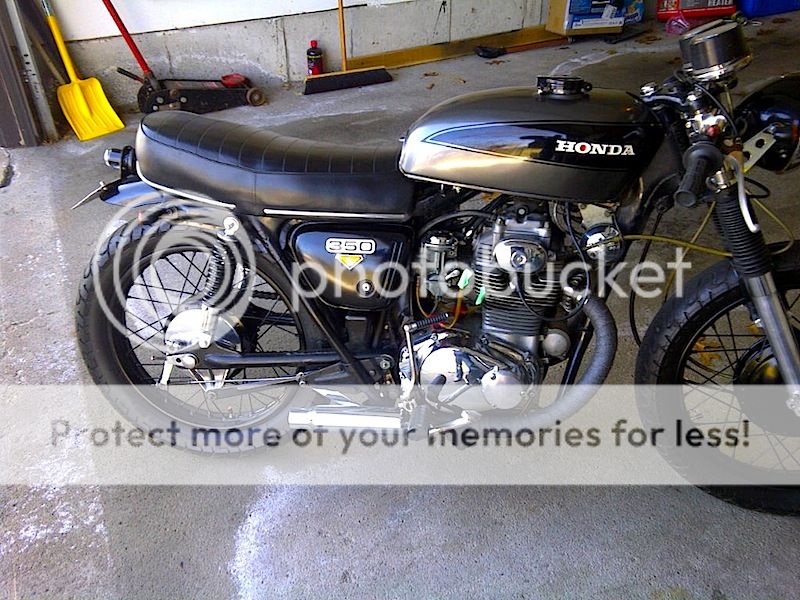
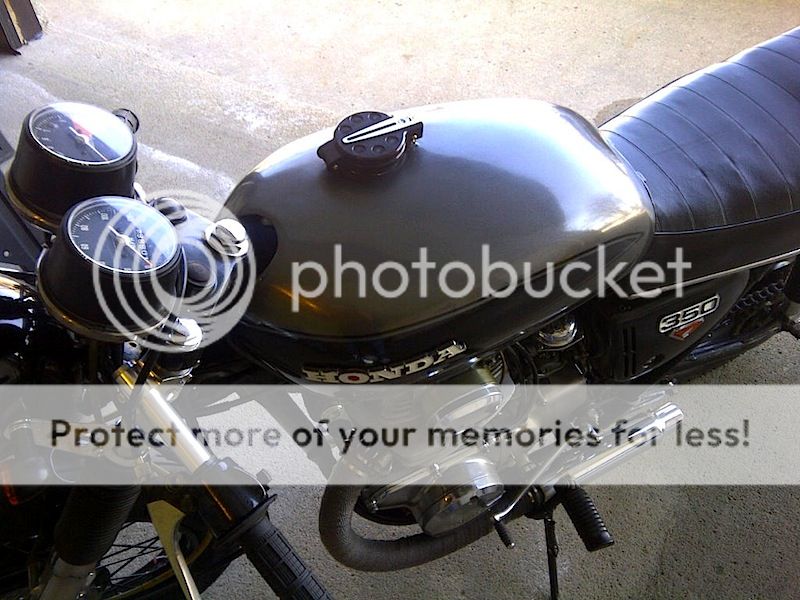
Tank turned out nice enough (not perfect but........). I'm VERY happy with how the darker colours tie in nicely though.

Now that the gauges aren't sticking way up in the air, the bike looks nicely balanced in the front end IMO. I know this bike isn't for everyone but I'm digging it.
Once I get ALL the jobs done that I had set out to do, I'll take some nicer pics.
Tank turned out nice enough (not perfect but........). I'm VERY happy with how the darker colours tie in nicely though.
Now that the gauges aren't sticking way up in the air, the bike looks nicely balanced in the front end IMO. I know this bike isn't for everyone but I'm digging it.
Once I get ALL the jobs done that I had set out to do, I'll take some nicer pics.
paddlesat16
New Member
Nice one, i'm digging the bike.
Regards
Regards
RustyOlive
Been Around the Block
I bet, You are itching for this stupid winter to take a hike as much as I am Steve?
Hahahaha
Hahahaha
New2meCB
Been Around the Block
You got that right brother! I froze my nuggets off the day before yesterday when I forced myself to go for a ride Crazy cold!
Juan, I'll pm you when I get a chance. I'm at work keying this in via Blackberry and I forget the name of the lights. I bought them locally but I know the manufacturer has a website as I've visited looking for other stuff. They're not real high-end but they work well, look pretty good and are cheap so..... Great for a daily runner like mine in the warmer months at least hahahaha
Thanks for the kind words!
Crazy cold!Juan, I'll pm you when I get a chance. I'm at work keying this in via Blackberry and I forget the name of the lights. I bought them locally but I know the manufacturer has a website as I've visited looking for other stuff. They're not real high-end but they work well, look pretty good and are cheap so..... Great for a daily runner like mine
in the warmer months at least hahahahaThanks for the kind words!
crqcycles
Not a lot of cafe's down here in Mexico...
New2meCB said:You got that right brother! I froze my nuggets off the day before yesterday when I forced myself to go for a ride
Juan, I'll pm you when I get a chance. I'm at work keying this in via Blackberry and I forget the name of the lights. I bought them locally but I know the manufacturer has a website as I've visited looking for other stuff. They're not real high-end but they work well, look pretty good and are cheap so..... Great for a daily runner like mine
Thanks for the kind words!
Thanks man. I really like your bike! No show queen but simple and effective for a daily bike!


