Follow along with the video below to see how to install our site as a web app on your home screen.
Note: This feature currently requires accessing the site using the built-in Safari browser.
We noticed you are blocking ads. DO THE TON only works with community supporters. Most are active members of the site with small businesses. Please consider disabling your ad blocking tool and checking out the businesses that help keep our site up and free.
OK... I've decided to put an end to my old thread and start a new one as I consider the first part of the project done and the bike is riding and running well.
If you haven't read the thread for stage one, you can find it here: http://www.dotheton.com/forum/index.php?topic=19672
Stage Two™ is going to mainly consist of fixing anything that didn't quite work out from stage one as well as some general improvements. I'm approaching this stage with two extra years of experience I didn't have at the beginning of my first stage and I've spent some time thinking and planning.
I kinda wanted to keep you all in suspense as to what I had planned, but I decided against it. Hopefully it will be just as interesting to know up front and then see it come to realization. I know it will for me, anyway...
Stage Two™ Improvements (in rough order)
General fixes I deem necessary after running the bike for a while after the completion of stage one.
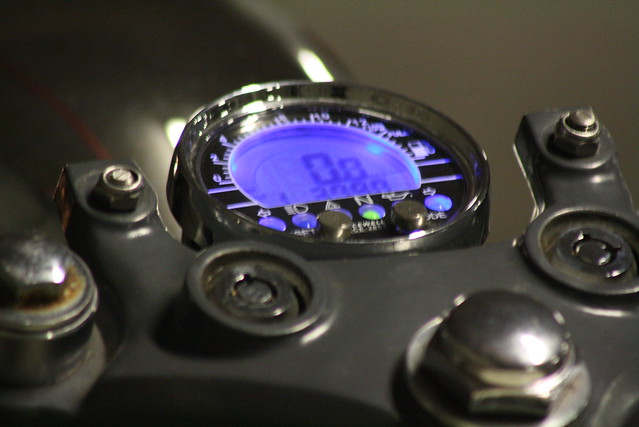
Replacement of the analog speedometer with a digital computer with all-in-one speedo/tach/temps sensors, etc
Racing style vent for the gas tank Done
Removal of stock foot controls and replacement with rearsets - '88 FZR rearsets ordered from eBay for $40
Upgrade to the charging system in order to allow use of more electrical gadgetry
External oiling system (including cooler) for the cam journals
Upgraded suspension both front and rear
Venting for the front and rear drum brakes
Replacement of stock steel wheels with shouldered aluminum rims
OK... first problem to deal with... Remove those zip ties holding my battery in place and get something better and more permanent.
Enter $2 leather belt from Goodwill.
First up, cut said belt into pieces and rivet to my electronics tray:
Next, strap the battery into place using the plastic clasp that came with the belt:
Finally, use a brass clasp (riveted to the belt) to finish things up. A spare bit of metal left from one of the rivets serves as a pin to keep the clasp from opening:
Though not shown in this pic, I went back and put the wires under the first belt section to help keep some tension off of the terminals.
A humble suggestion I simply bought industrial velcro straps from lowes. and put a couple thick cuts into the pan and laced it through them and around the battery.. You couldn't rip that battery off the pan.
Interested in your speed/tach choice if you've already done your research. I'm heading in that direction also, the digital gauge is One of those things I keep coming back to.
I'm currently working on getting onto the supplier's list for a company called TrailTech. They make a lot of gear (mostly for offroad use) and they have a couple of computers that act as speedos and tachometers as well as other functions.
I have one of these on the way to me:
http://trailtech.net/vapor.html
Hoping to resell some at around $110 (includes shipping) once I get the details worked out.
The vapor looks pretty cool, i might be down for one of those. I like that it doesn't have a bunch of indicators that we don't need (fuel level, coolant temp, oil pressure, oil temp) but you can add the indicator dashboard to get them.
Unfortunately there are a ton of super cool digital speed/tach combos for V-twins that only go to 8k on the tach...
I probably will at some point, just not for this stage. The front drum is adquate for now, especially after losing 70 pounds from the bike during the first part of the build. The venting should help keep fade at bay.
New gas tank venting system to help with fuel flow. I tapped the fuel cap and screwed in the one brass barb and the other (on the triple tree acorn nut) is silver soldered.
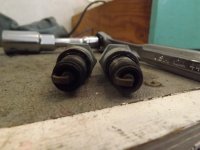
I got out for a 15 mile ride this afternoon. Bike felt great but I'm still getting used to this cam and gearing combo. The engine feels like it's loafing in 5th at 50mph. You crack the throttle and nothing. I had to downshift into 3rd to get any acceleration but it had that in spades once I raised the RPMs. I brought it up to 70 in 3rd and the bike just felt so eager.
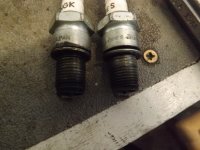
Attached are pics of the plugs after my jaunt. Not really a chop as I wasn't holding the RPMs at any given point, but you guys are free to weigh in with opinions. They look a little dark to me. I'm under the impression that unleaded fuel burns cleaner than the old leaded stuff so I should be looking for a very, very light tan.
On the downside, I'm leaking oil (yes, again, dammit) from the head gasket on the right side and so I'll need to take it apart (yes, again, dammit). I think the culprit is the uneven milling I got the from the machinist so it'll probably go back to him so he has an opportunity to correct his mistake.
Get him to use a mill in place of the table grinder/surfacer, Im a fitter and we use the table surfacer on hydraulic valve banks from time to time and they are very hard to get right! an overhead mill is the only way to be sure you get a good surface, the only reason we get away with the table surfacer is that the two blocks are oringed and so are a bit forgiving but a copper gasket has to have a good clean surface.
Oh and if you are having issue with power consumption I am just about to trial a HID headlight bulb (35w) as opposed to my current (60w/55w). Should give me a couple of spare amps...
I just scored some 1988 FZR 400 rearsets from eBay for $40. They're gonna take a couple of weeks to get here from Greece, but you can't beat that price, I figure.
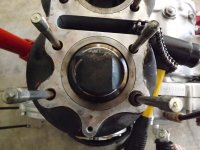
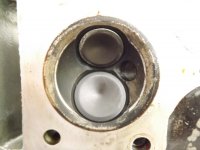
OK... I took an hour out of my day to pull the head and get it ready to go back to the machinist...
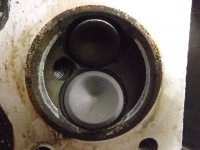
... and it looks like clearances were a bit tigher than I first thought. I seem to have lucked out this time, though. There was contact between the exhaust valves and the pistons but it must have been very light. The valves are not bent and it passed an acetone test right after I pulled it.
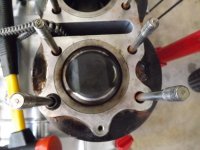
When the head gets back to the machininst we're going to have him take a bit of metal from the edges of the combustion chamber and I'm going to break out the Dremel again so the exhaust valves play nicely with the pistons.
Also, I believe my hunch about the core being out of square is correct. The contact patches on the right side seem "thicker" than those on the left. We'll make sure that's dealt with as well.
This site uses cookies to help personalise content, tailor your experience and to keep you logged in if you register.
By continuing to use this site, you are consenting to our use of cookies.


")