Follow along with the video below to see how to install our site as a web app on your home screen.
Note: This feature currently requires accessing the site using the built-in Safari browser.
We noticed you are blocking ads. DO THE TON only works with community supporters. Most are active members of the site with small businesses. Please consider disabling your ad blocking tool and checking out the businesses that help keep our site up and free.
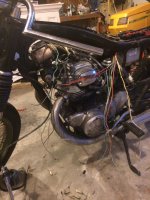
As for wiring goes, if you want just the basics it will be really easy to do. I used sparckmoto in the end because I was looking for a clean finish and having to buy all the plugs and doing it myself would have taken more time than I thought I had. You really only need like 10 wires if you go kick only. I would still recommend a battery, just go with lithiron. Below you can see I used a shorai battery that had 14a/hr and 220cca. This sucker is tiny! I fit all my wiring, starter solenoid, blinker relay and battery in that little tray under the flat seat. While mine is a cb500 it functions, it can't vary much for the basic setup.
So a quick update here, my buddy and I are making a completely new wiring harness for the bike. We are going to make a stock one with all the normal electronics and run the same wires, we are just going to change a couple things. The switches on the bars we are going to put pin connectors on, as well as the headlight and tail light plug ins so that they can be replaced easily if the need arises.
I have also started work on my seat(s). I think that I'm going to make one seat with a one person cowl and a two person seat without a cowl. This way I can have regular cafe racer styling and still be able to take a passenger if I know I'm going to need to carry one. I'll attach the seats with a couple wing nuts in order to make them easily remove able.
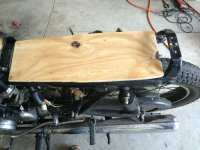
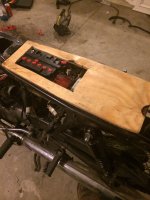
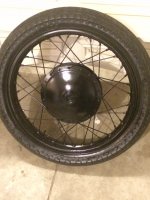
Unless anyone has any two seater ideas for the cafe racer i think I'm going to make two seats. It will be worth the extra work. Below is just a picture of the "pan" because that's as far as I have gotten without putting any foam on it yet.
pan needs to be higher the tire will hit it :'(
you really should check full travel clearance with your new rear shocks, leave an inch clearance to the seat fully bottomed out
I already checked, the picture must just look like it 0.0. The pan shouldn't hit the seat I have bottomed it out and left an inch on it. The shocks in the rear are pretty stiff surprisingly. However, the pan is going to be about 1/4 in higher because I need to give it clearance over the battery. So I'm going to fab up some mounts for it that will let it sit comfortable above the battery without me having to cut sections out of the he seat. Plus I may be able to store some things on the inside. I think I'll put some kind of hinge on it so I can swing the whole seat area to the side and have a small storage compartment. Think that's Dumb idea?
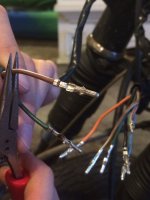
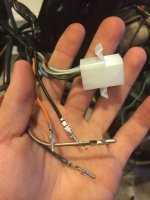
Spent about 6 hours on the wiring harness tonight, I would say that it's really coming together! Got some pin connectors to make attaching and detaching a breeze and have been clearing out the crappy wires and putting new wires in. Here is some progress.
Started on the seat as while working on the harness, measuring out the passenger and operator seat is a pain. But I'll get the measurements right soon. Here is a couple pictures.
lookin good! love the wood pan.
this probably wont be an issue since you are using new pin connectors, but i don't use them anymore since the wire could be broken in the white plastic connector housing, yet still appear connected to the naked eye...cost me a lot of taillights and troubleshooting before i found out i was getting AC voltage spikes due to an intermittent shorted wire. insulated bullet connectors like these
http://www.ebay.com/itm/251123943940
have never let me down. since you are taking the time to solder, this electrical system should be SOLID.
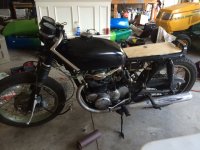
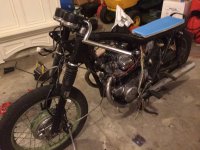
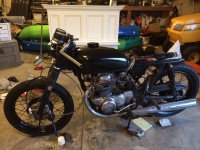
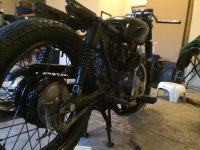
A quick update. Did some painting, and just in general clean up. Cleaned up the spots there was surface rust and painted over them, and started the work of cleaning the motor. Wiring harness will be done this weekend, then the seat, fender, and wiring on the lights. Last will be cleaning up the tank, the bars, gauges and such. Here is a couple pictures.
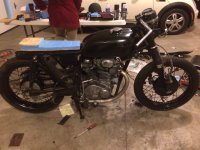
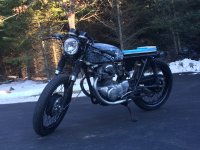
Ok so here's where I am so far, it's been slow, but I'll be cooking on it in the next month again. We just moved shops and now I'm going to get some welding done when I get the bike moved. The seat I'm going to angle the back end up, kind of like a sportbike. This will give the passenger a little more room and change my foot position aittle bit. I'll probably only lift the rear most seat part of the seat up 1.5-2in. And build a larger electronics area onto the bottom of it. Thoughts?
This site uses cookies to help personalise content, tailor your experience and to keep you logged in if you register.
By continuing to use this site, you are consenting to our use of cookies.