
We noticed you are blocking ads. DO THE TON only works with community supporters. Most are active members of the site with small businesses. Please consider disabling your ad blocking tool and checking out the businesses that help keep our site up and free.
You are using an out of date browser. It may not display this or other websites correctly.
You should upgrade or use an alternative browser.
You should upgrade or use an alternative browser.
72 CB350 For the Daughter
- Thread starter Harsh
- Start date


Kunphushun
Big Dreams. Small Funds!
Read start to finish. This is gonna be great! I can't wait to see the tank logo, the suspense is Killin me.
Harsh
Been Around the Block
Thanks.
Today proved to be a how bad can I mess things up kind of day. I started out with going to install the steering bearings. I measure the stack height of the old next to the new and decide that the stock very thin washer/spacer is the one to use. Get everything installed and slide the lower triple through the neck. When I just hand tighten the nut I can barely move the triple. It is hitting against the neck. Damn it, I will have to remove the lower bearing which will 99.9% surely destroy it. Well it aint budging one bit. I end up having to cut two slots in it and then use a cold chisel to gently caress it out. Fine, I will just have to order a new one.
Onto some wiring I guess. I get the electronic ignition installed on the engine and proceed to start wiring it up. Crimp on the pins and give them a little tug to make sure they are tight. Good to go. I go to slide them into their connectors. Once they pop through I pull them back a bit to lock to lock them in place and a wire pops out. Finagle the pin out of the connector and crimp on a new pin. This time I cinch down the crimp tool a bit. Go to install the other side of the connector and the same shit happens...a wire pops out.
I threw in the towel. The electronics store is closed today so I will have to wait until tomorrow until I can get a new connector and pins. Add to that number of screws, bolts, and a new carb clamp that have come up missing over the past two days I am getting very frustrated. Now would be the perfect time for a beer, but I am abstaining for a month.
That happens. I often solder the wire into a bullet after it's crimped just to be sure.
And I buy connectors and bullets by the bag because that stuff just happens. I don't have production grade torque calibrated crimping tools, so there will always be inconsistencies. And you know that any connector you have lots of will not fail and any that you don't always fail. It's that bugger Murphy again....")
And I buy connectors and bullets by the bag because that stuff just happens. I don't have production grade torque calibrated crimping tools, so there will always be inconsistencies. And you know that any connector you have lots of will not fail and any that you don't always fail. It's that bugger Murphy again....
Great project and thread ,guess we all have days like that one step forward two back , fudge everything we touch that's the time to sit back and look how far you've come ( I speak from experience ) haha :-[ , i'me loving the frame colour too keep up the top job look forward to your next update .
jag767
Over 1,000 Posts
Harsh said:Thanks.
Today proved to be a how bad can I mess things up kind of day. I started out with going to install the steering bearings. I measure the stack height of the old next to the new and decide that the stock very thin washer/spacer is the one to use. Get everything installed and slide the lower triple through the neck. When I just hand tighten the nut I can barely move the triple. It is hitting against the neck. Damn it, I will have to remove the lower bearing which will 99.9% surely destroy it. Well it aint budging one bit. I end up having to cut two slots in it and then use a cold chisel to gently caress it out. Fine, I will just have to order a new one.
Onto some wiring I guess. I get the electronic ignition installed on the engine and proceed to start wiring it up. Crimp on the pins and give them a little tug to make sure they are tight. Good to go. I go to slide them into their connectors. Once they pop through I pull them back a bit to lock to lock them in place and a wire pops out. Finagle the pin out of the connector and crimp on a new pin. This time I cinch down the crimp tool a bit. Go to install the other side of the connector and the same shit happens...a wire pops out.
I threw in the towel. The electronics store is closed today so I will have to wait until tomorrow until I can get a new connector and pins. Add to that number of screws, bolts, and a new carb clamp that have come up missing over the past two days I am getting very frustrated. Now would be the perfect time for a beer, but I am abstaining for a month.
My saying for days like that is if it were raining pussies, I'd get hit with a dick. Been there. One time I had to put in races and the handy dandy tool I made for it was mia, so it took me close to an hour just to get the bottom race in because I manage to rack it in the neck. As for connections, I got tired of issues, bought a good crimper other gadgets, plus a serious soldering setup. Everything I do gets solder and a little heat sleeve, no more problem.
Harsh
Been Around the Block
jag767 said:My saying for days like that is if it were raining pussies, I'd get hit with a dick. Been there. One time I had to put in races and the handy dandy tool I made for it was mia, so it took me close to an hour just to get the bottom race in because I manage to rack it in the neck. As for connections, I got tired of issues, bought a good crimper other gadgets, plus a serious soldering setup. Everything I do gets solder and a little heat sleeve, no more problem.
I might just steal your saying. That shit is funny.
That is what annoys me about the connections. I have a good ratcheting crimper that I can adjust the level of how tight it crimps. The wires I am crimping are 22 awg, so pretty thin. The more I think about it, I think the last time I used it on these pins I doubled the wire over so there was more purchase area in the pin crimp area. Which is what I will be doing today when I get a new connector and pins.
Shit happens. Sometimes you just get days like that.
Just found this thread. Great work, and attention to detail. Looking forward to seeing this one in the end.
Just found this thread. Great work, and attention to detail. Looking forward to seeing this one in the end.
Harsh
Been Around the Block
Thanks ncologerojr.
Stopped by the electronics store on the way home and picked up some new connectors and pins. Got the wiring for the electronic ignition finished. Doubling over the bare wire definitely helped. The connections are now strong. The new steering bearings will be here tomorrow so I should be able to get the front end together then. I started doing some measuring for the cables. Unfortunately I found two throttle cables in my stash of parts that are of vastly different lengths. The shorter of the two fits the best. Now I just need to see if I can find a cable in that length online. I will more than likely have the same issue with the clutch cable.
I also received my LED headlight yesterday. Unfortunately there was supposed to be two in the package, but they only shipped one. I am going to put one in the 750. Attached it to the headlight and there is plenty of room in the bucket. And damn is that thing bright.
I also managed to track down the tripe pinch bolts. For some reason when I was doing some mock ups of the front end a long time ago I attached them to the piece that my buddy made for me vice putting them back in their labeled baggie.
Harsh
Been Around the Block
Picked up my wheels this morning. Then I had to attach the kickstand and figure out how to get the bike off of the work bench. Lifting it off was out of the question, at least with the wife helping. So I engineered a solution. Hooked my chain fall to the rafters and hoisted it up, swung it out, and set it on my chair. From there I put the wheels on.
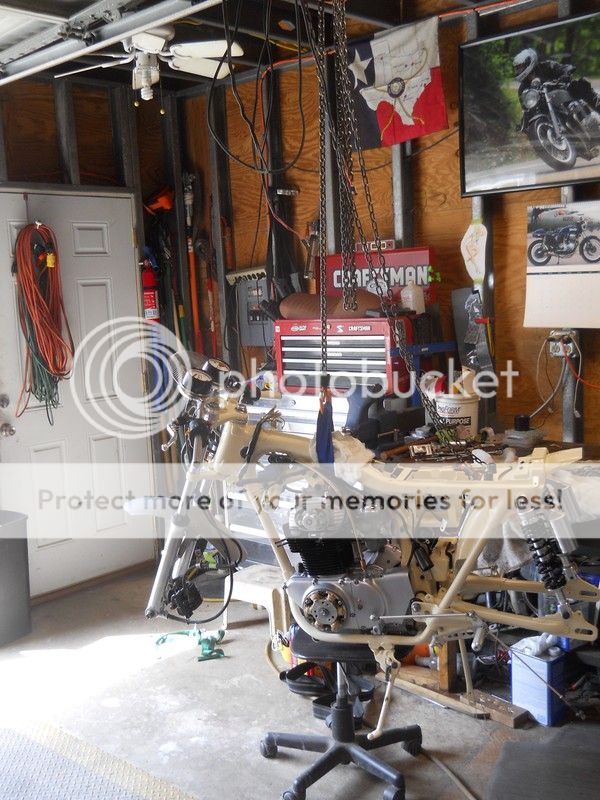
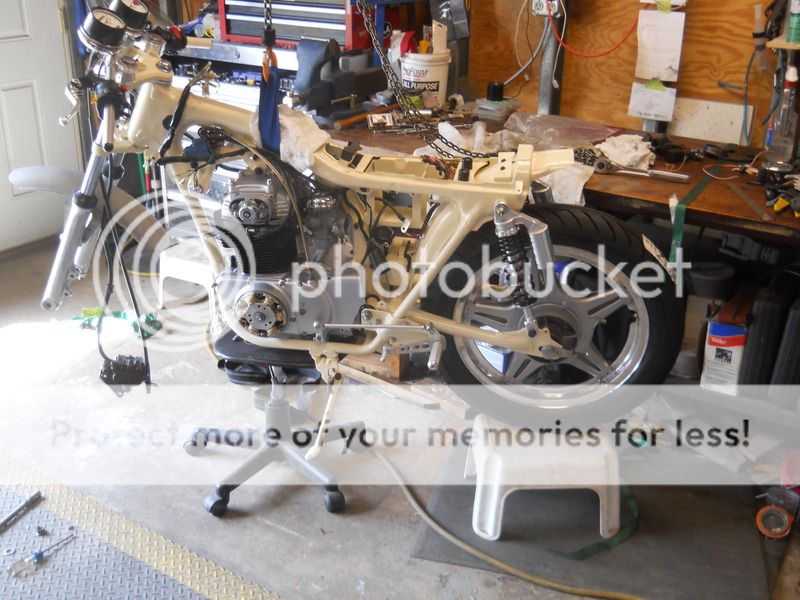
They see me rollin, they see me hatin...


They see me rollin, they see me hatin...

thrillseeker
Been Around the Block
Looking good!!
Sent from my iPhone using Tapatalk
Sent from my iPhone using Tapatalk
ChroniclyQuickly
The itch
A family after my own heart... my wife has a 74 CB750 and I have a 79. My son goes to school in motorcycle boots and makes us take him on 10mph rides, he's 6. That's a really cool venture, what a daughter. I cannot wait until my son is old enough to help me build his first 360 or 250. If I have a girl who likes bikes, my family will be complete. Can't wait to see the finished product.
Sent from my iPhone using DO THE TON
Sent from my iPhone using DO THE TON
Harsh
Been Around the Block
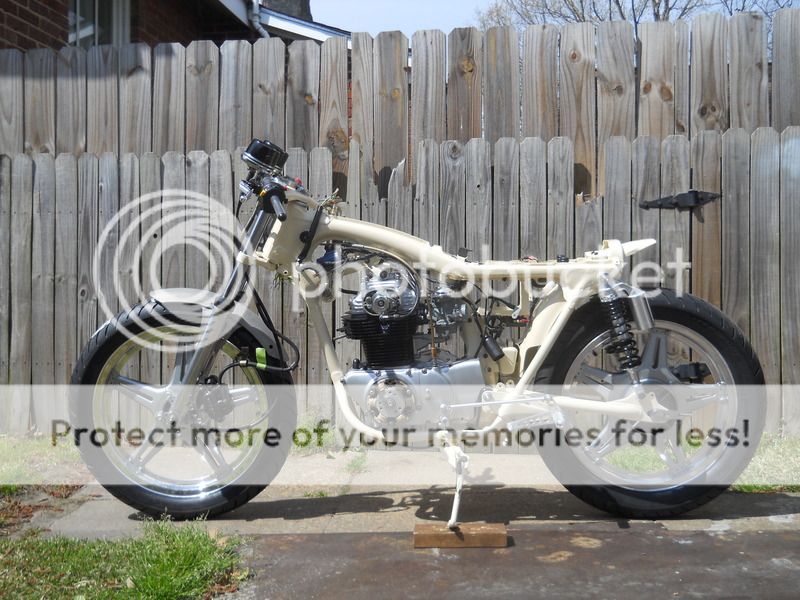
This is without a doubt the smoothest rolling bike I have. When pushing it around it feels like it just floats.
However, I ran into a huge issue yesterday. I started hooking up all of the wiring yesterday and adapting the controls I am going to use to attach to the stock wiring. I was mostly done when I came to a show stopper. When I dropped in the battery I noticed the problem. I can't get the seat on with the battery in. The bracket I welded in to anchor the front of the seat sits just in front of the battery. With the battery installed I need about an inch of clearance for the seat to be able to slide in. After a lot of thought I think I can get a smaller than stock size battery. I currently have a Scorpion YT12C (180cca, 12a/h). I looked at the lithium batteries, but great googly moogly are they expensive. So I started looking for a smaller dimensioned AGM battery. I found a Scorpion YT9C (130cca, 9 a/h) that should give me 1/16" of clearance at the top. I will have to cut off the upper front piece of the battery box so that I can attach the ground wire to the battery, but I can live with that. I will be running an LED headlight that uses 19 amps less than the stocker, no turn signals, and all other lighting is LED so I think I should be good with the a/h rating.
The icing on the cake yesterday was that none of the wiring works. I have power at the connector in the headlight bucket, but nothing turns on. Not a light, horn...nothing. So I think I have a ground issue somewhere.
thrillseeker
Been Around the Block
is it just me or is your front tire mounted backwards?
thrillseeker
Been Around the Block
okay cool. it looked like a directional tire so thats why I mentioned it. certainly don't want anybody having hydroplaning issues!
Harsh
Been Around the Block
One step closer. Found a ground that wasn't connected. Only one tiny light came on though so it looks like I still have some work ahead of me. I think I am going to disconnect everything and hook them up one at a time to see what is going on. I have a feeling something in the right control pod isn't correct.
Harsh
Been Around the Block
Decided to disconnect everything and go through the complete hook up again vice one part at a time. Finding the missing ground had a lot to do with the decision. This time the headlight came on and so did the speedo gauge light, but that was it. Noticed a couple of wires (brown and brown with a white tracer) that weren't hooked up. The brown needs a jumper to power to turn on the tail light. The brown with white tracer needs a jumper to power to turn on the tach gauge light.
A quick thumb of the starter button only caused the headlight to dim.
A quick thumb of the starter button only caused the headlight to dim.
Maritime
Over 10,000 Posts
Some Honda controls ground at the bar and the little pins that make contact can wear down, not sure on the 350F but check them there is a green ground that ends at a pin that contacts the bars when control is tightened, if that is the issue to fix it I just run a proper ground wire out of the control and to the frame somewhere. That problem also happens when folks paint the bars, but in your case the bars are bare.


