Follow along with the video below to see how to install our site as a web app on your home screen.
Note: This feature currently requires accessing the site using the built-in Safari browser.
We noticed you are blocking ads. DO THE TON only works with community supporters. Most are active members of the site with small businesses. Please consider disabling your ad blocking tool and checking out the businesses that help keep our site up and free.
I've been working on this little cb200t for a few months and thought it was time to finally get around to posting some pics. I have been getting a bunch of tips from here and Stik70 has given me some help on a few things. Hopefully there will be a few things new on my ride but I'll skip the boring stuff.
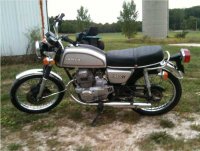
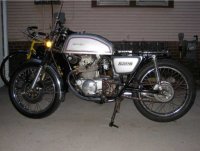
Like most she started as a CL find and I have to say I almost left her the way she was. A bit of cleaning and some new parts and I could have had her looking like she did the day she left the factory. Tool bag was never opened and the manual was still under the seat.
But I just had to cut her up and try to make her go a bit faster.
First I was just going to do a basic cafe with a new seat from the magic web and some new bars, remove the lights, clean it up and have some fun. But as I started to work on it I realized I wanted to make it my own and started to really get into it.
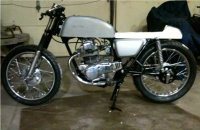
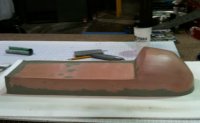
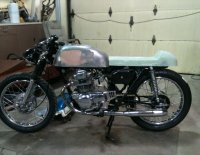
Here are a couple shots of the first days I had it. Things started to go really fast after that.
So like anyone out there I hate paying for parts. So when it came time to put the cables on and I needed custom sizes I just had to make them myself.
There are a few "How to's" on the web so I gathered as much info as I could and had a go at it. The first few turned out horrible but I got it down to a pretty good system and thought I would share it.
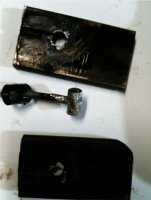
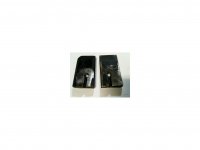
I machined two small pieces of metal 3/16" with holes for the ends and a channel for the cable. I figure this would make the end a bit long but I could just file it to size after. In the picture there is only on hole but I also made the brake cable so I used the same piece for the clutch with two holes in each half.
I cut the cable to length and then frayed the ends out to help grab the metal that I used for the ends.
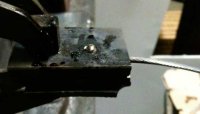
Then clamped it all together with a healthy dose of flux for good measure. I filed in some solder shavings to help start the melt process and hopefully fill in the gaps. There was a bit of trial and error but I found that with some shavings and flux there was enough heat to melt it all and pull in the solder so I wouldn't have any air pockets.
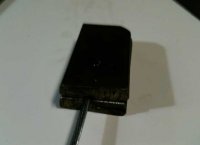
Then heated the bottom until it was good and hot and melted the old end and some extra solder into the hole. It turned out pretty good once I had the system figured out. Just be careful to not torch the cable or that will bend and ruin your whole day. :'(
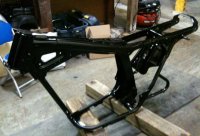
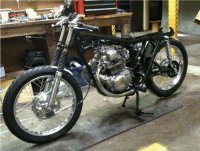
So I put in the engine too. It was a bit of a wrestle and I will have to do some frame touch up but after it went in everything else went on super fast.
I'm still not sure about running rear sets and pods on it. I like the look of the old style cafes with side covers and stock pegs. It looks a bit more authentic to me. I guess I shouldn't be using Clubmans either but what's a guy gonna do...
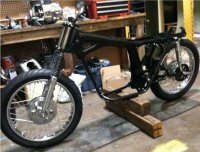
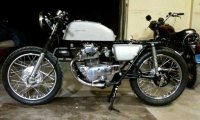
So after a bunch of days with a ton of time in the shop this is where she sits.
I have a piece of foamcore where the seat is to go. I'm still trying to figure out what the seat will look like. But this is pretty close, I should be starting on that this week. And the headlight brackets are just temps too. I'm going to make some nice minimal ones to cut down on the clutter up front.
Figured out a wiring issue with a friend of mine and then hooked up a plastic bottle to the fuel lines to test the thing. Fired up and ran like a Banshee!!! I still can't believe that sound came out of a 200!
Seat is being shaped and molded soon. Hope to get some pics of that up soon. Stay tuned.
Well, after a bit of a break I was able to get back into the shop and work on the seat and tank.
I decided to cover up the emblem mounts on the tank and make it smooth for some graphics I'm working on. I was a bit sad to see them go but I'll get over it i think.
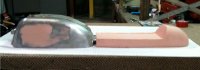
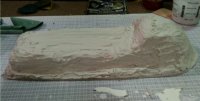
I then sealed the foam model and covered it in plaster and burlap. Now I just have to wait for the mold to dry and I will lay up the fiberglass and hopefully have a new seat by weeks end! I can't wait to get this all to the paint shop and put all the finishing touches on it.
It's actually not that hard. it just takes some time and searching the internets for tips. The seat will be done in white and black leather hand stitched by a friend of mine. It will be pretty kick ass I think. He is actually finishing up his own CB750. Check out his build here:
I will take some good pictures of the process, hopefully it will encourage others to try their own stuff! The problem with the CB200 is it's so small and every other pre-made seat is way too big! Someone has to look out for the little guy!
Hey Rockland, good looking ride! The cb200 tanks are some of the nicest honda tanks around. A lot of guys run the look of the vinyl pad through the seat somehow. That would be a good look with all the yellow you got goin on up top and blend nice with the black wheels. Maybe add a black section to the tail hump too? Just a thought.
I'm curious about the seat though. Why the extra fins down the side? It makes it look a bit heavy. Just my opinion of course. Did you make your own velocity stacks?
I hope to get my seat finished up this week and painted sometime in the next two. Can't wait to get it running again!
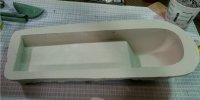
I was able to lay up my seat and popped it out of the mold yesterday. I still have some trimming to do on it and mount it at the right height so it's level with the tank but it's almost finished.
I'll give it a coat of bondo and sand it out so it's all even but it's not too bad really. Then off to get paint! I was thinking of spraying it myself so I can say I did all the work on it but I really want it to turn out right and the amount of time it would take to re-do my inevitable goof up I figure it will be money well spent. ;D
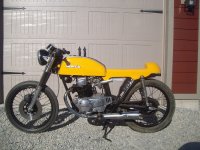
Here is a pic of it on the bike after a bit of trimming.
I'm curious about the seat though. Why the extra fins down the side? It makes it look a bit heavy. Just my opinion of course. Did you make your own velocity stacks?)
The sides of the seat were to cover frame rails. I dont know if i like them eather but you dont see to many like it.
I would like to make a cover to match the tank strip But am still looking for a way
I did make the velocity stacks . They are just 1.5 tube
This site uses cookies to help personalise content, tailor your experience and to keep you logged in if you register.
By continuing to use this site, you are consenting to our use of cookies.

")