
You could get an inch up front if you used regular bars because you would not need the top of the fork to clamp the clip-on to and you could slide it down in the triple clamp. If you wanted to keep a clip-on bar find one that clips below the top clamp like a Honda one and has a little bit of a rise to be more comfortable. This will also allow you to slide the forks down some.MORK said:Current thoughts are a set of CM drop triples, and a matching rear hagon shock for about a 1" ride height raise.
Now... do I want to drill it for some bars, or keep clipons...
We noticed you are blocking ads. DO THE TON only works with community supporters. Most are active members of the site with small businesses. Please consider disabling your ad blocking tool and checking out the businesses that help keep our site up and free.
You are using an out of date browser. It may not display this or other websites correctly.
You should upgrade or use an alternative browser.
You should upgrade or use an alternative browser.
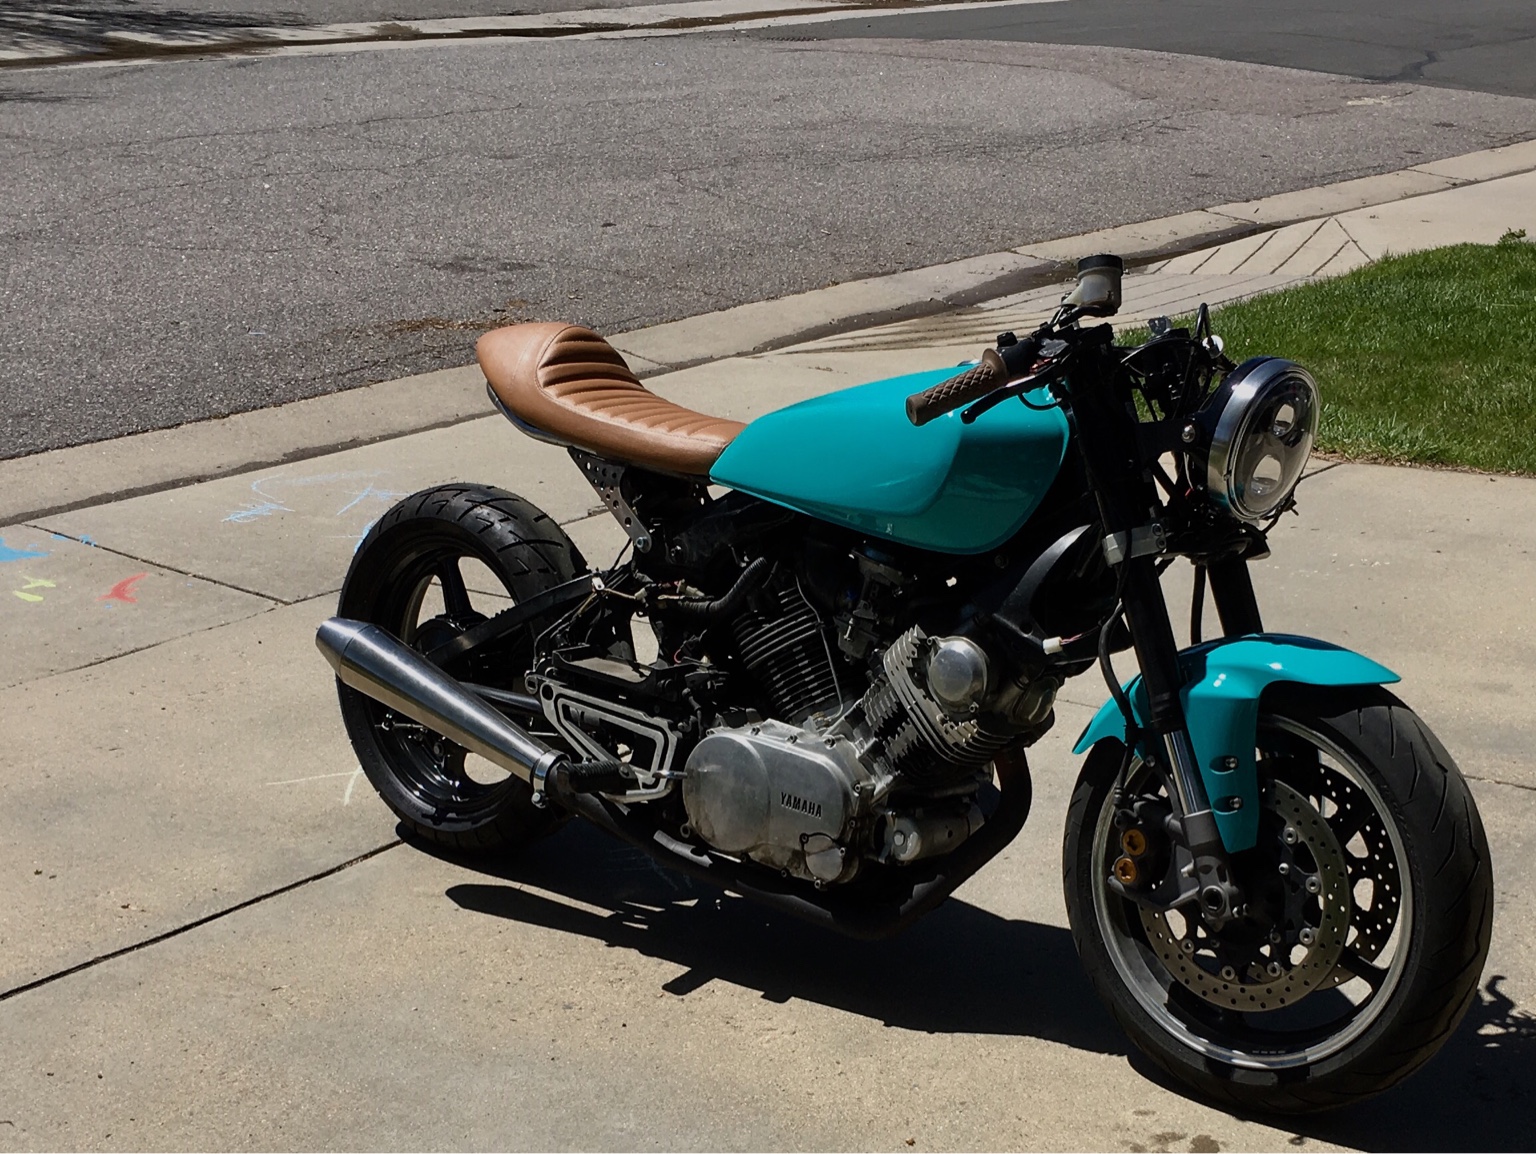
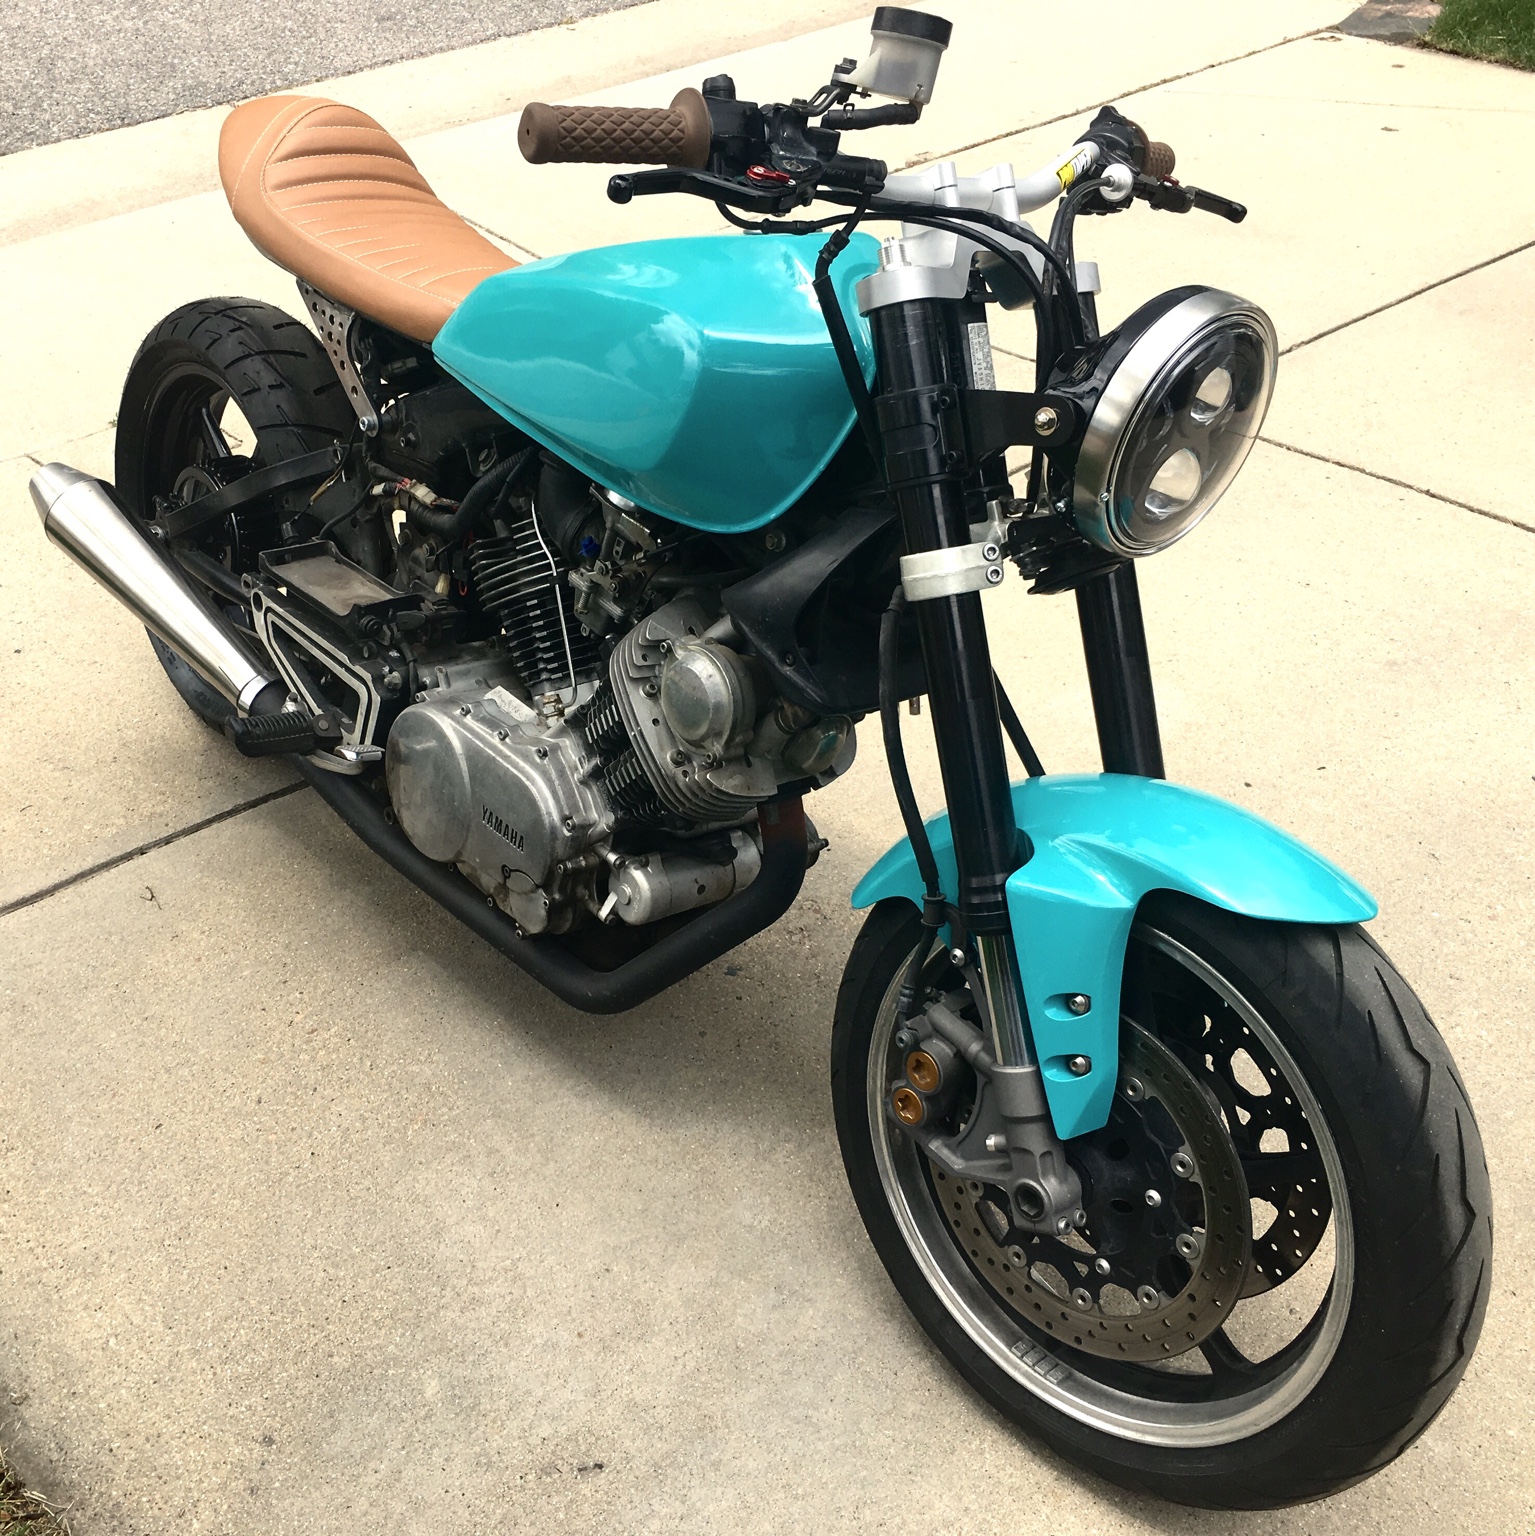
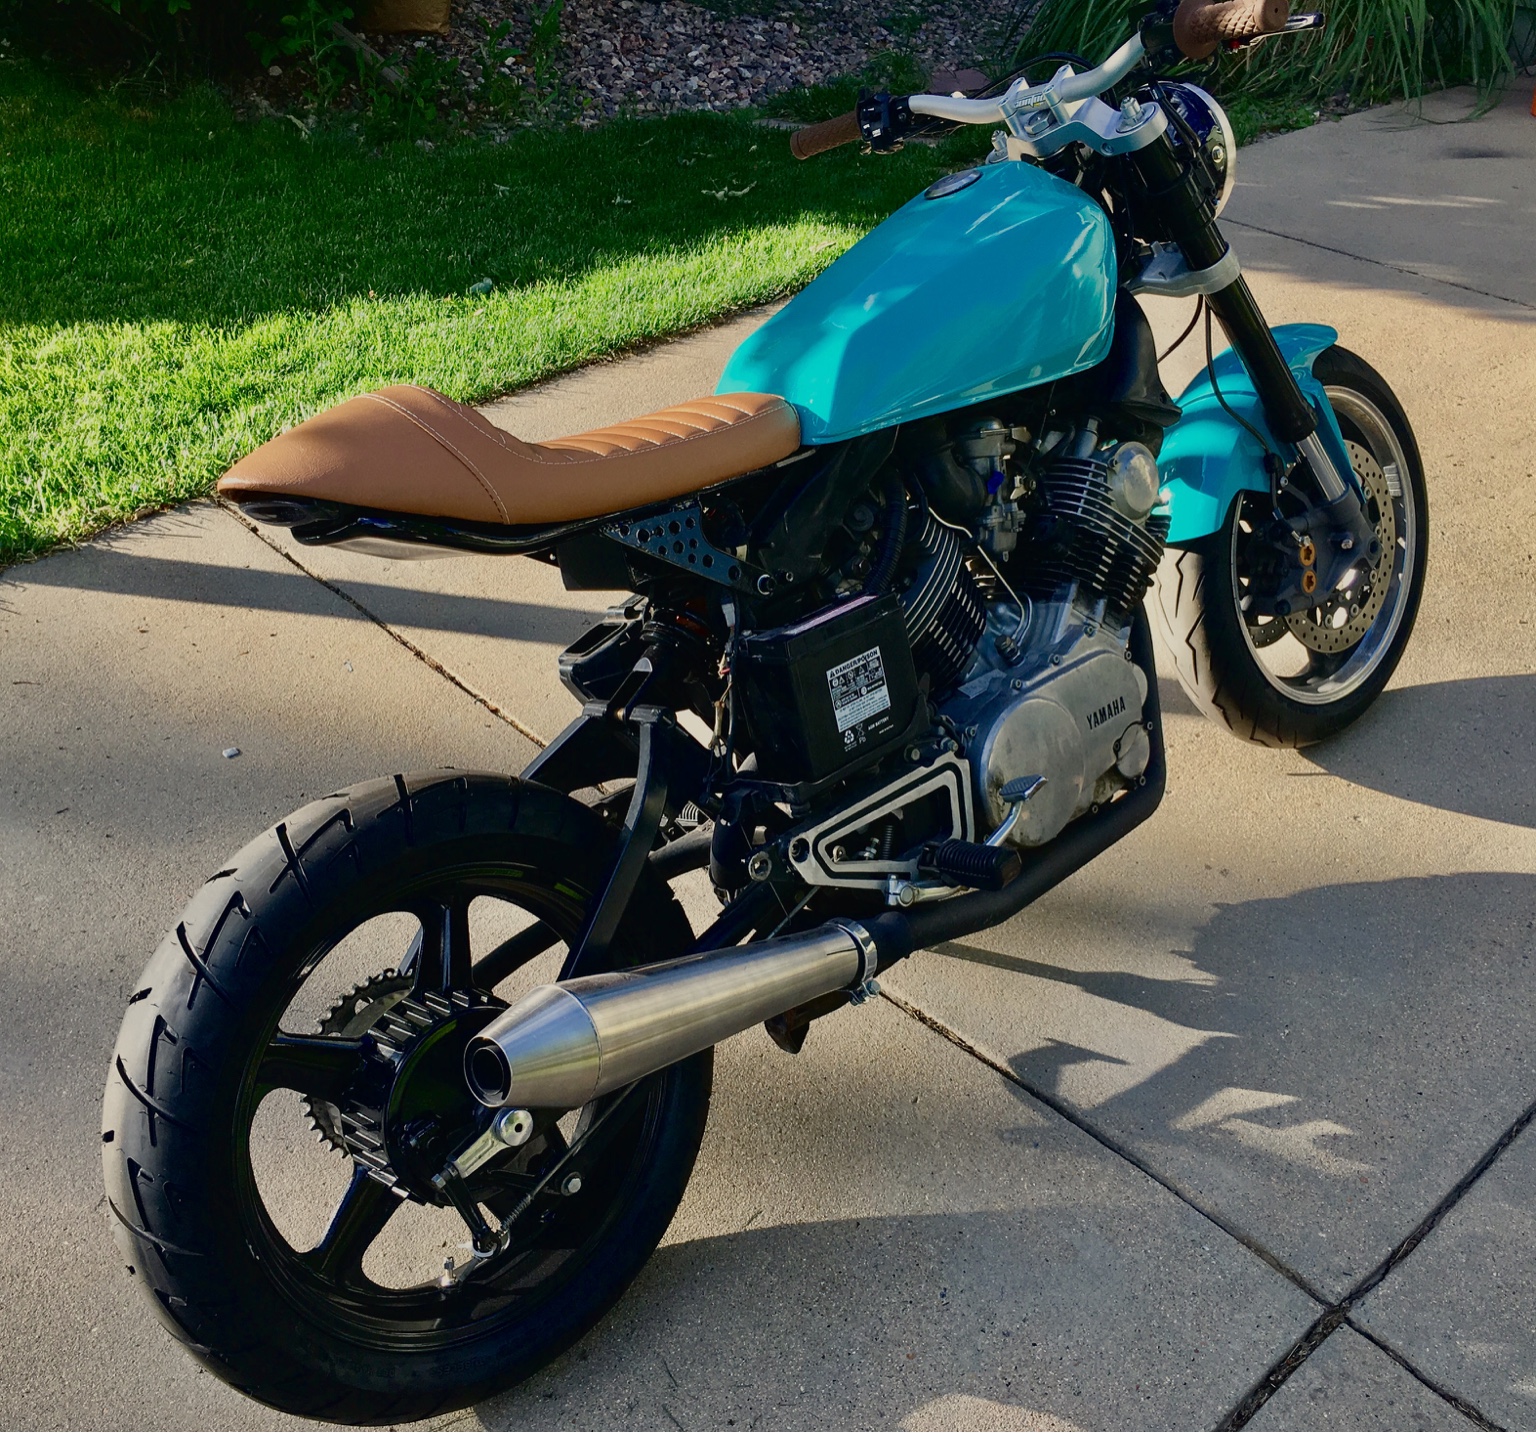
XV920R - Fat and Low
- Thread starter MORK
- Start date
MORK
Back at er
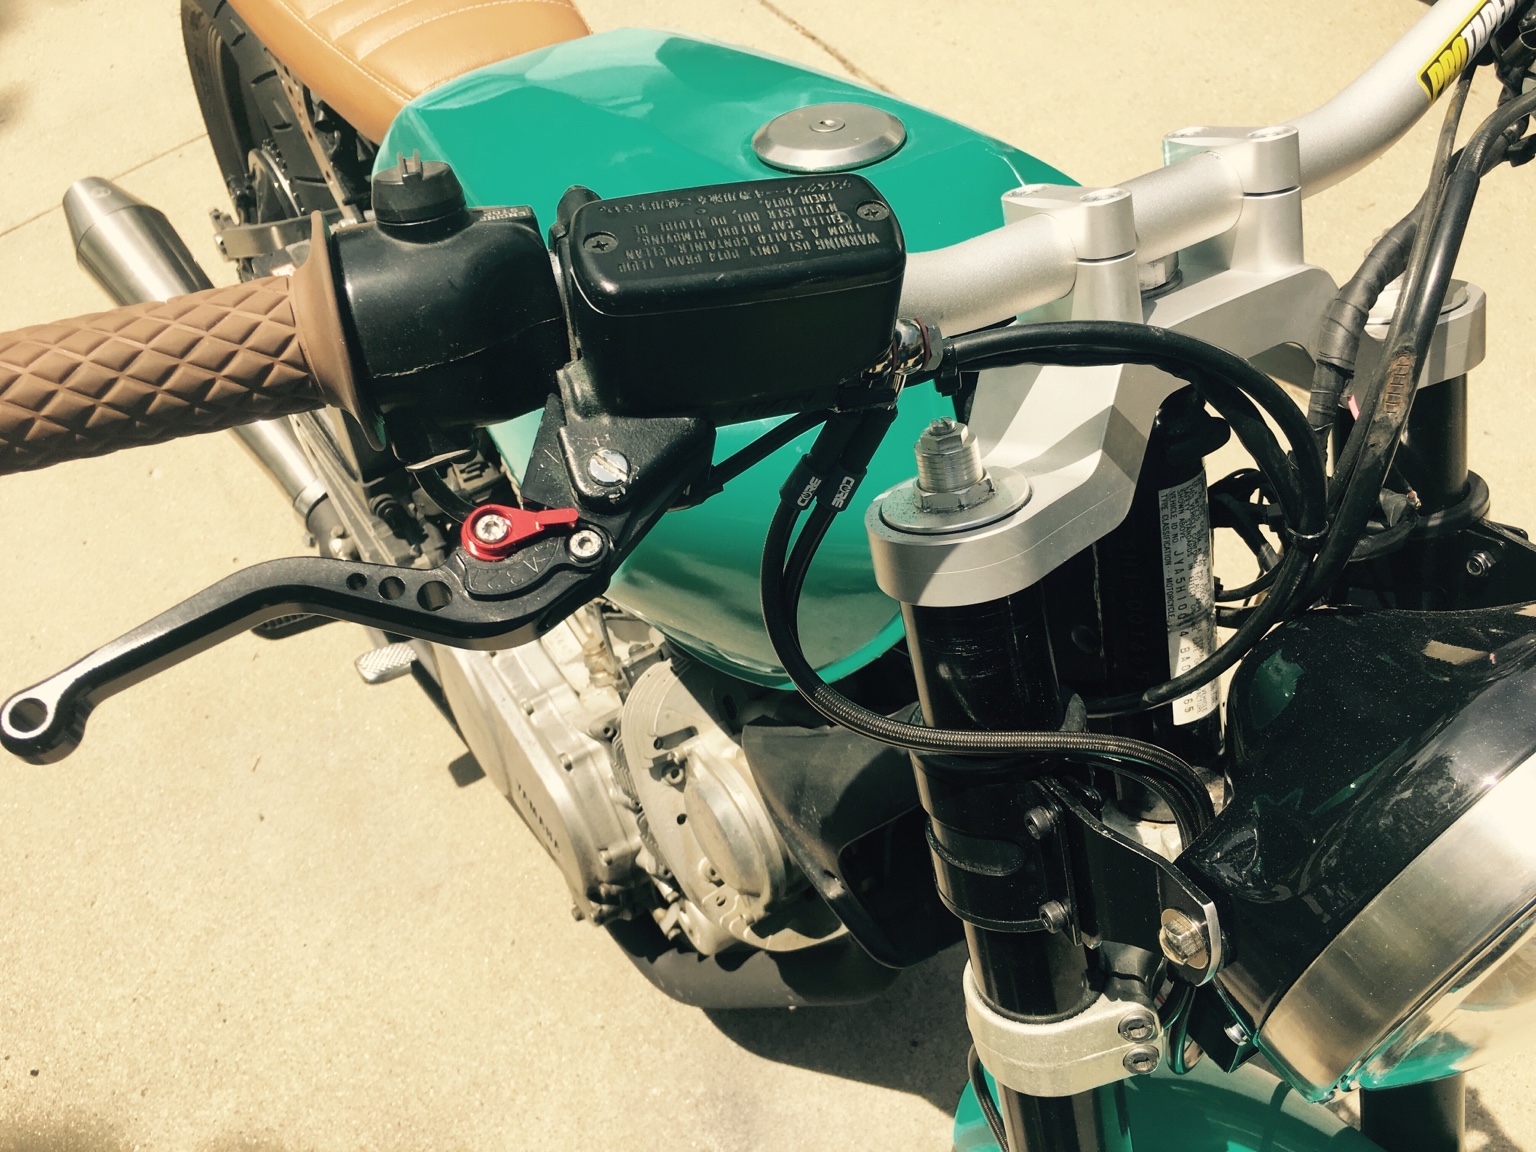
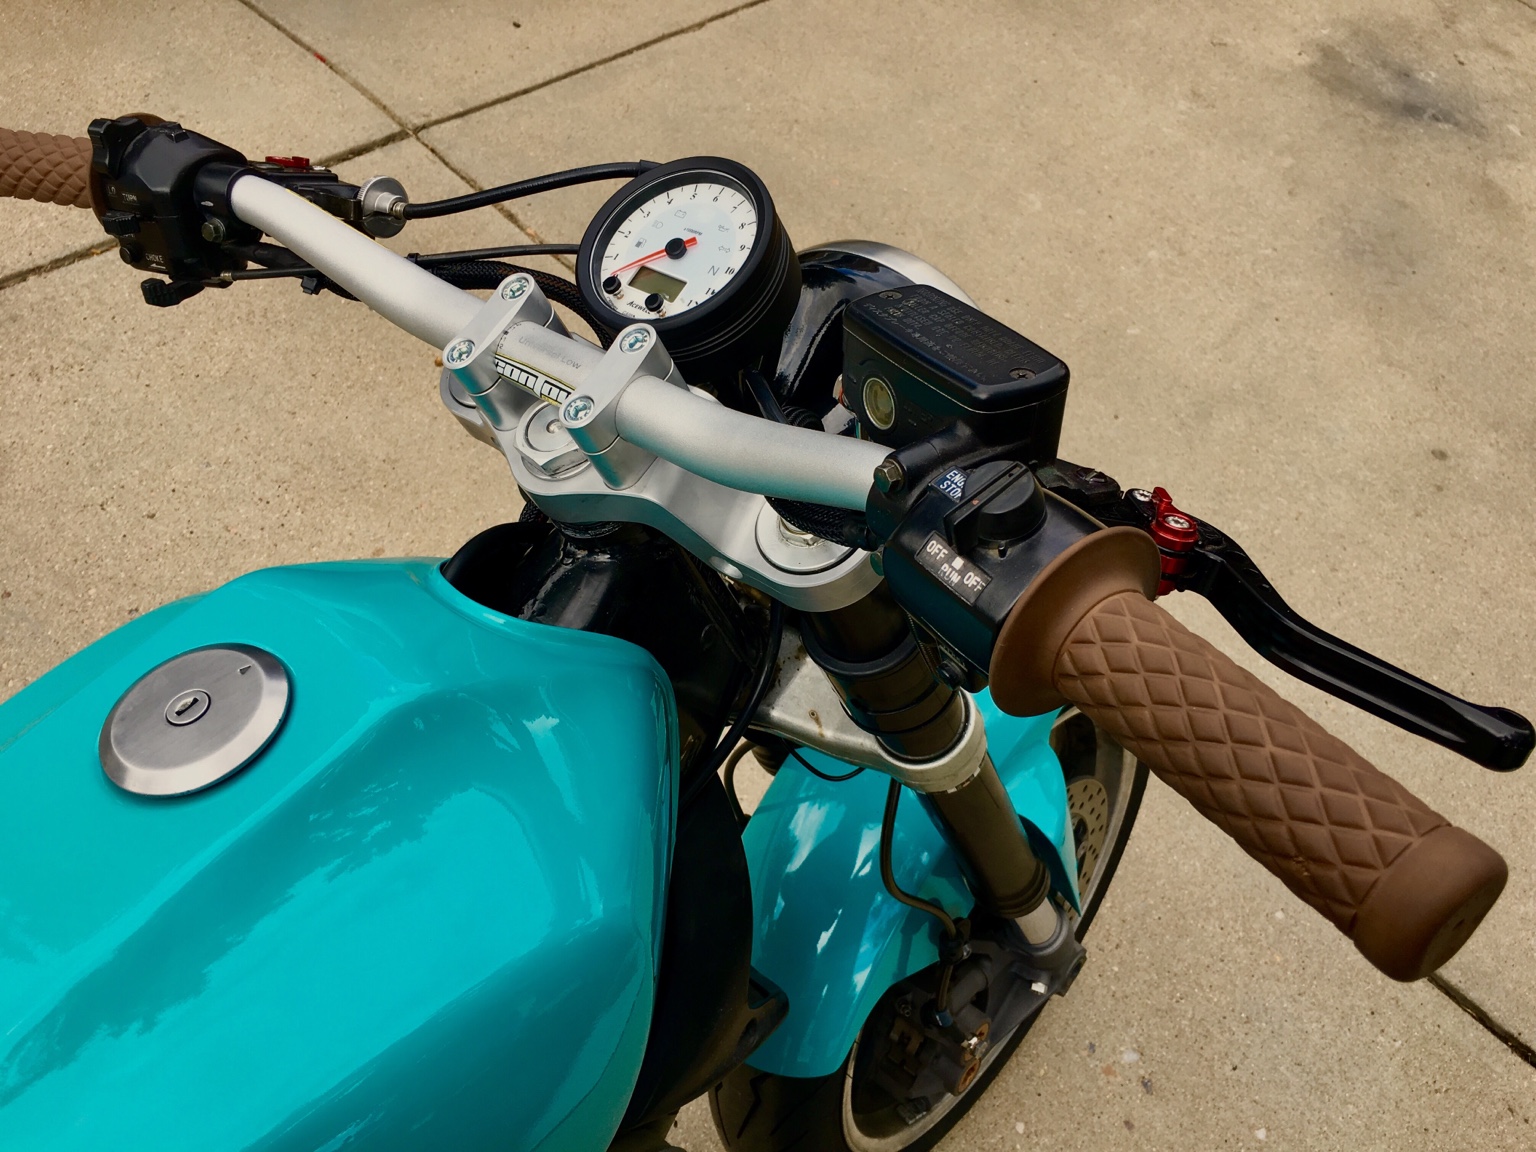
Currently cleaning up wiring and waiting on rear shock. Front brake lines came in and still have to order the battery. The bars at 29.25" feel perfect.
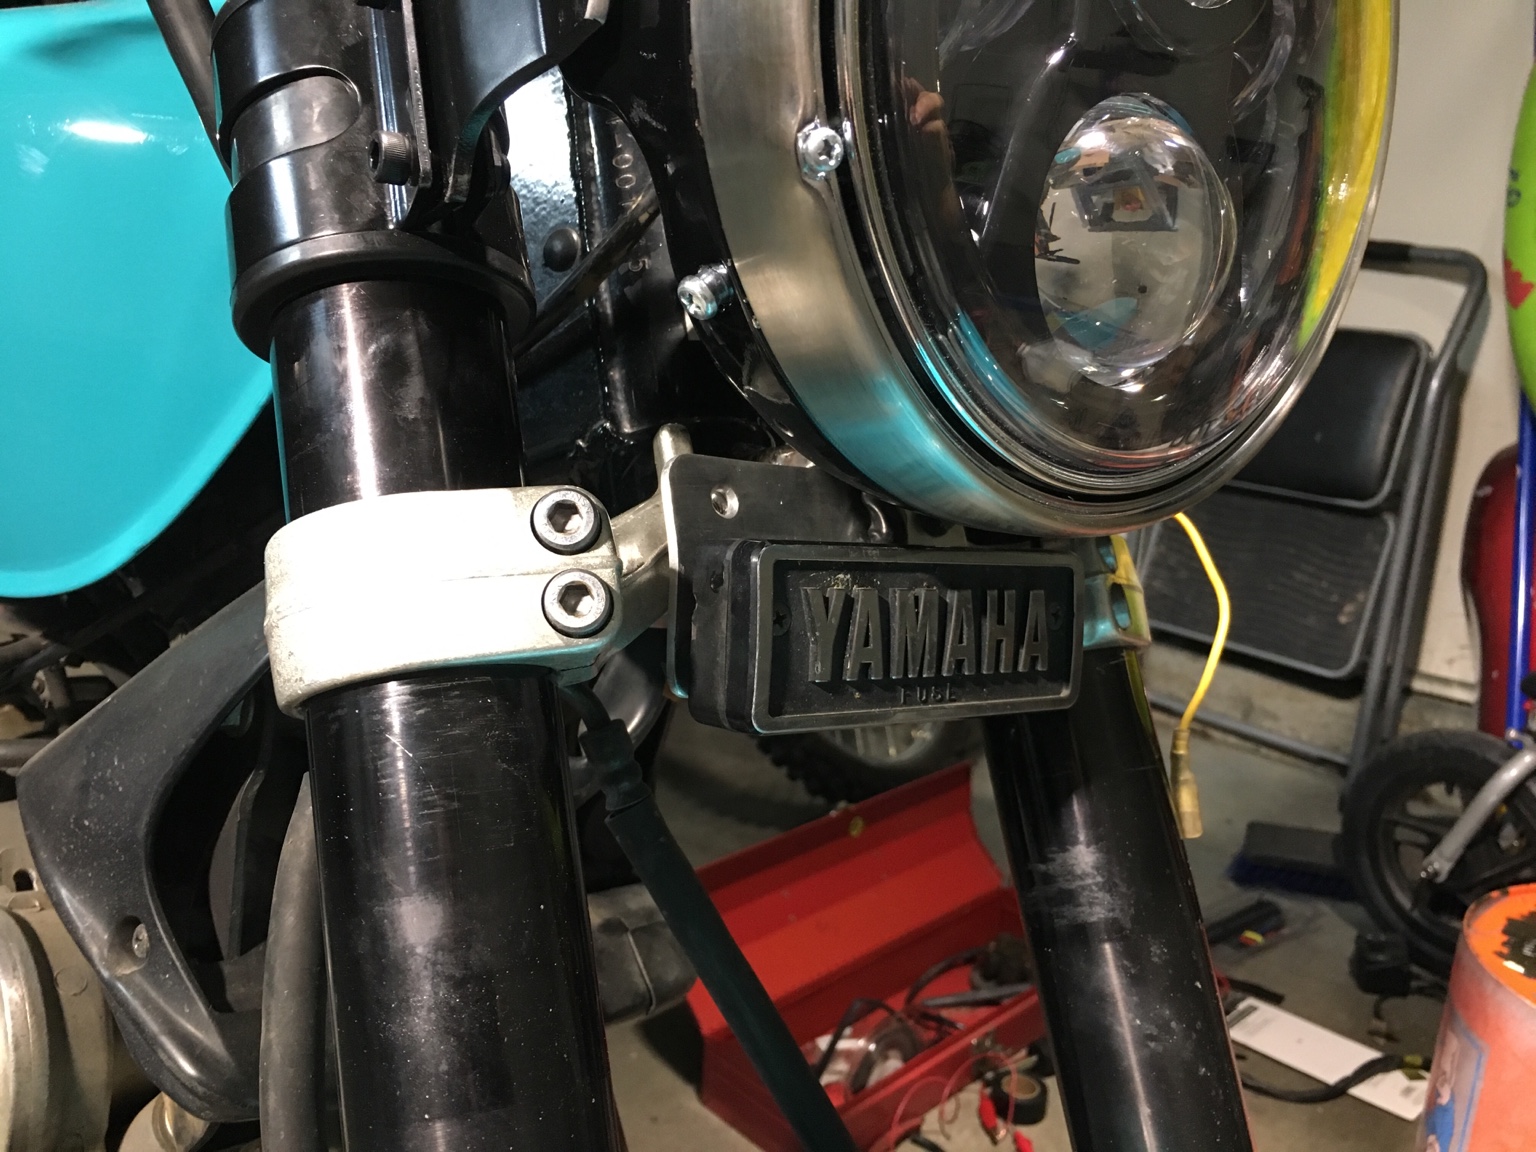
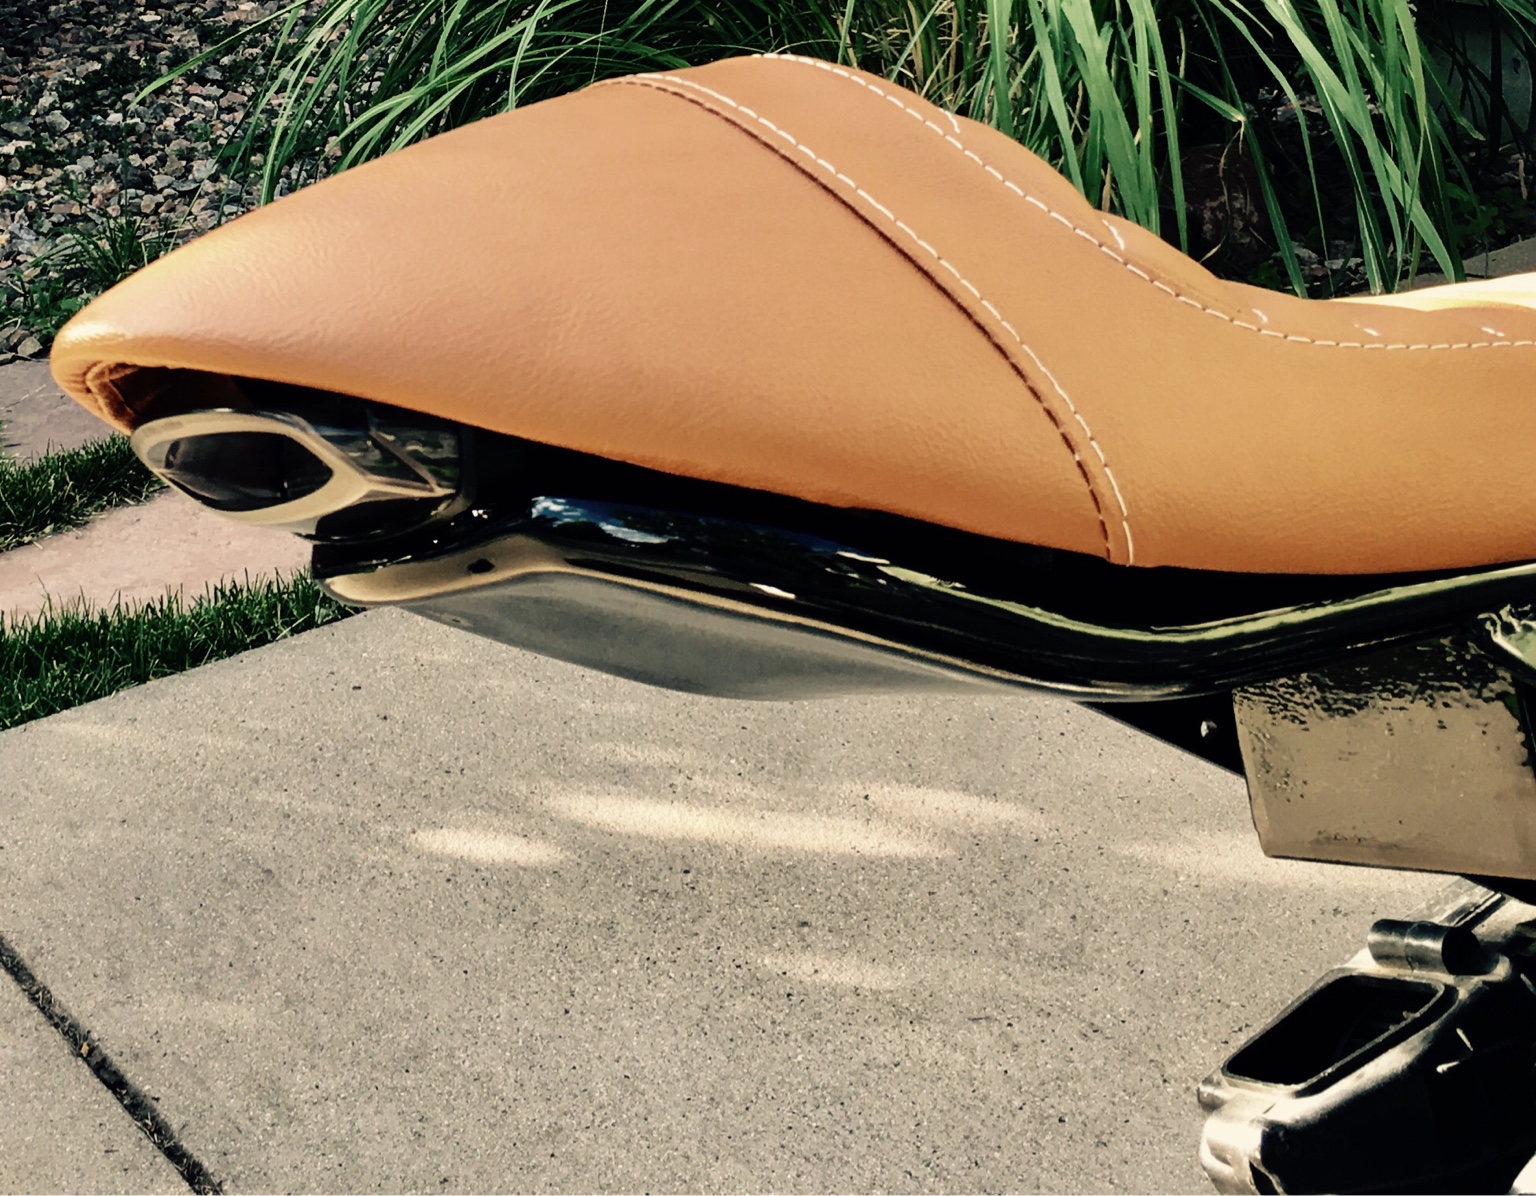
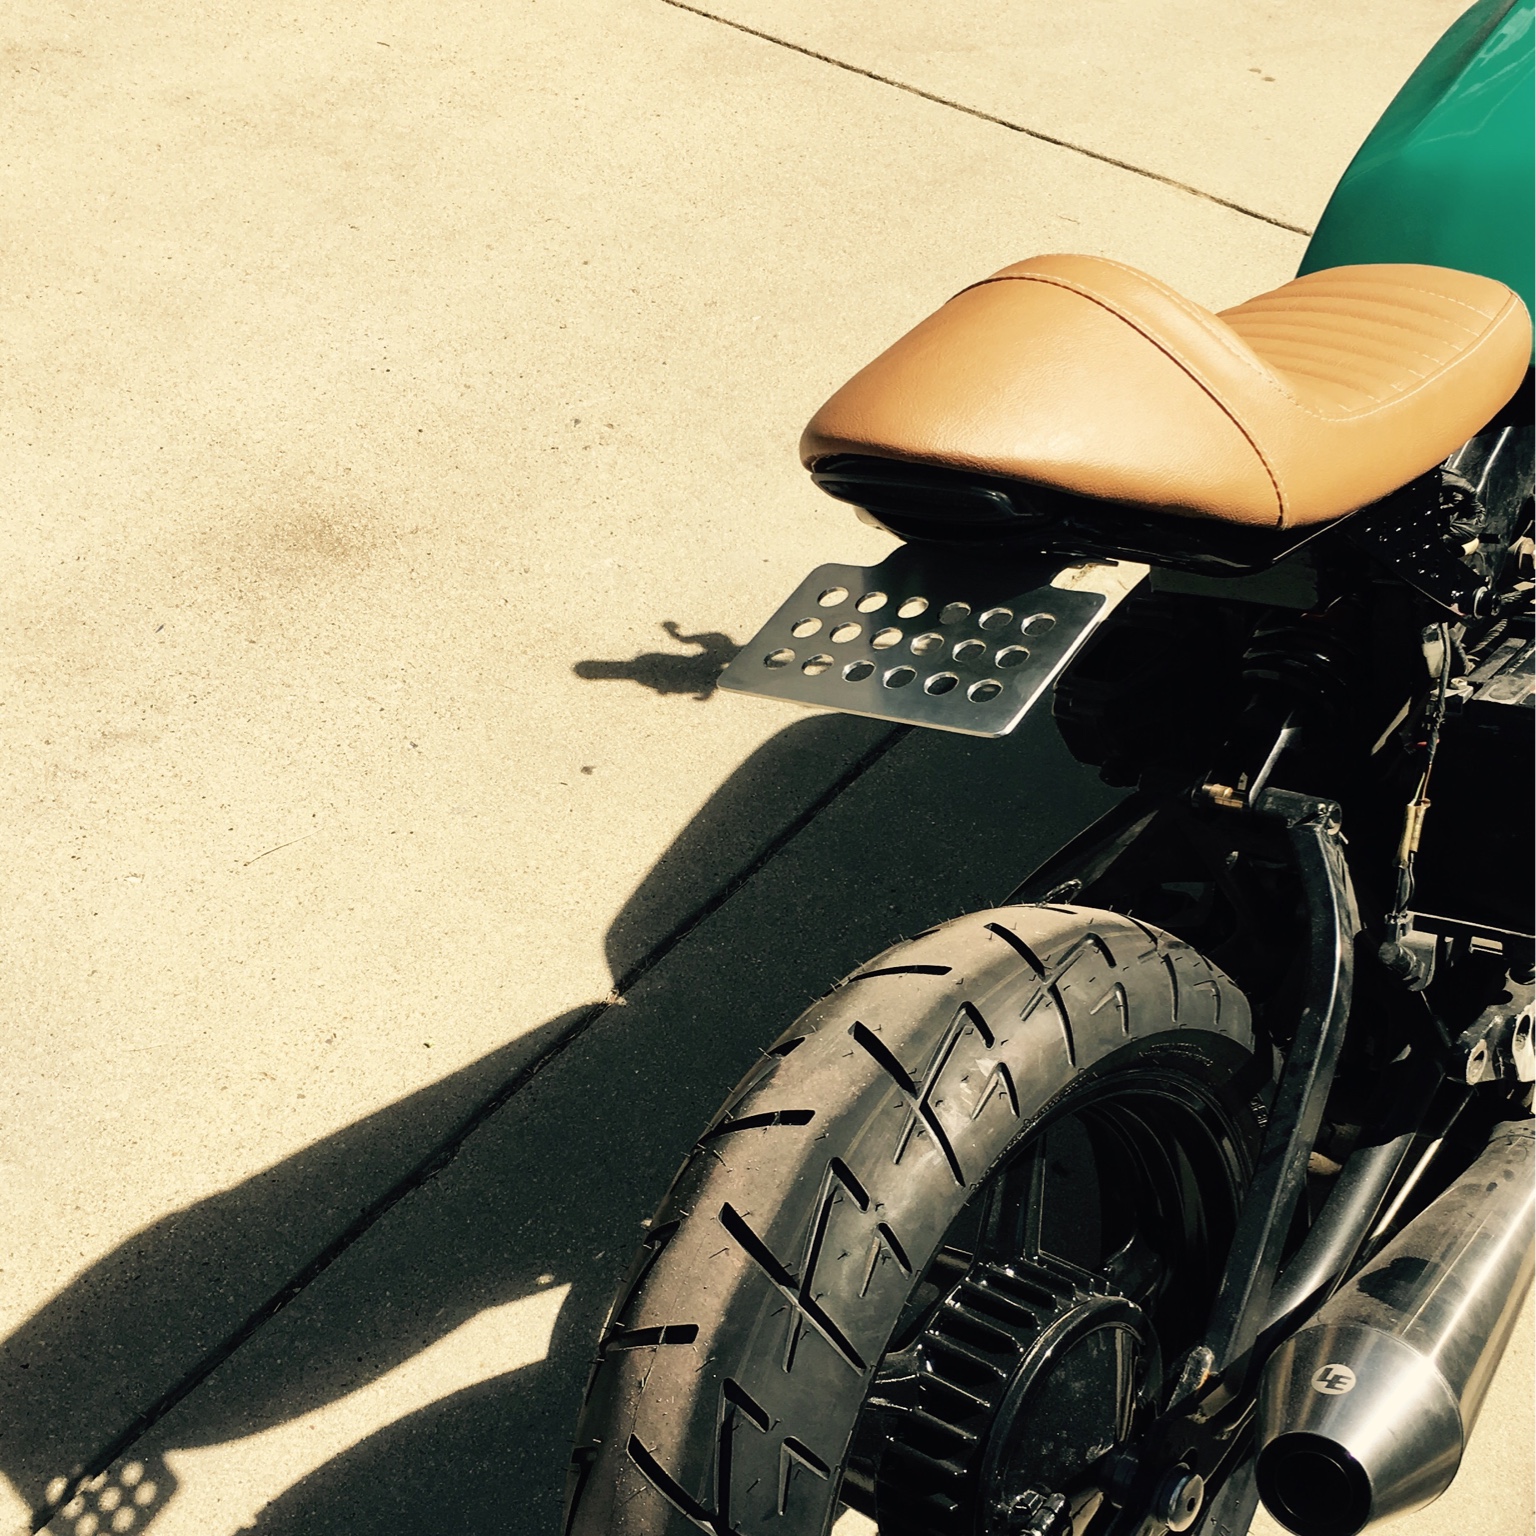
Decided to keep the fuse block and make a bracket for it. Also took almost 2" out of the headlight ears - was out way too far as you can see above.
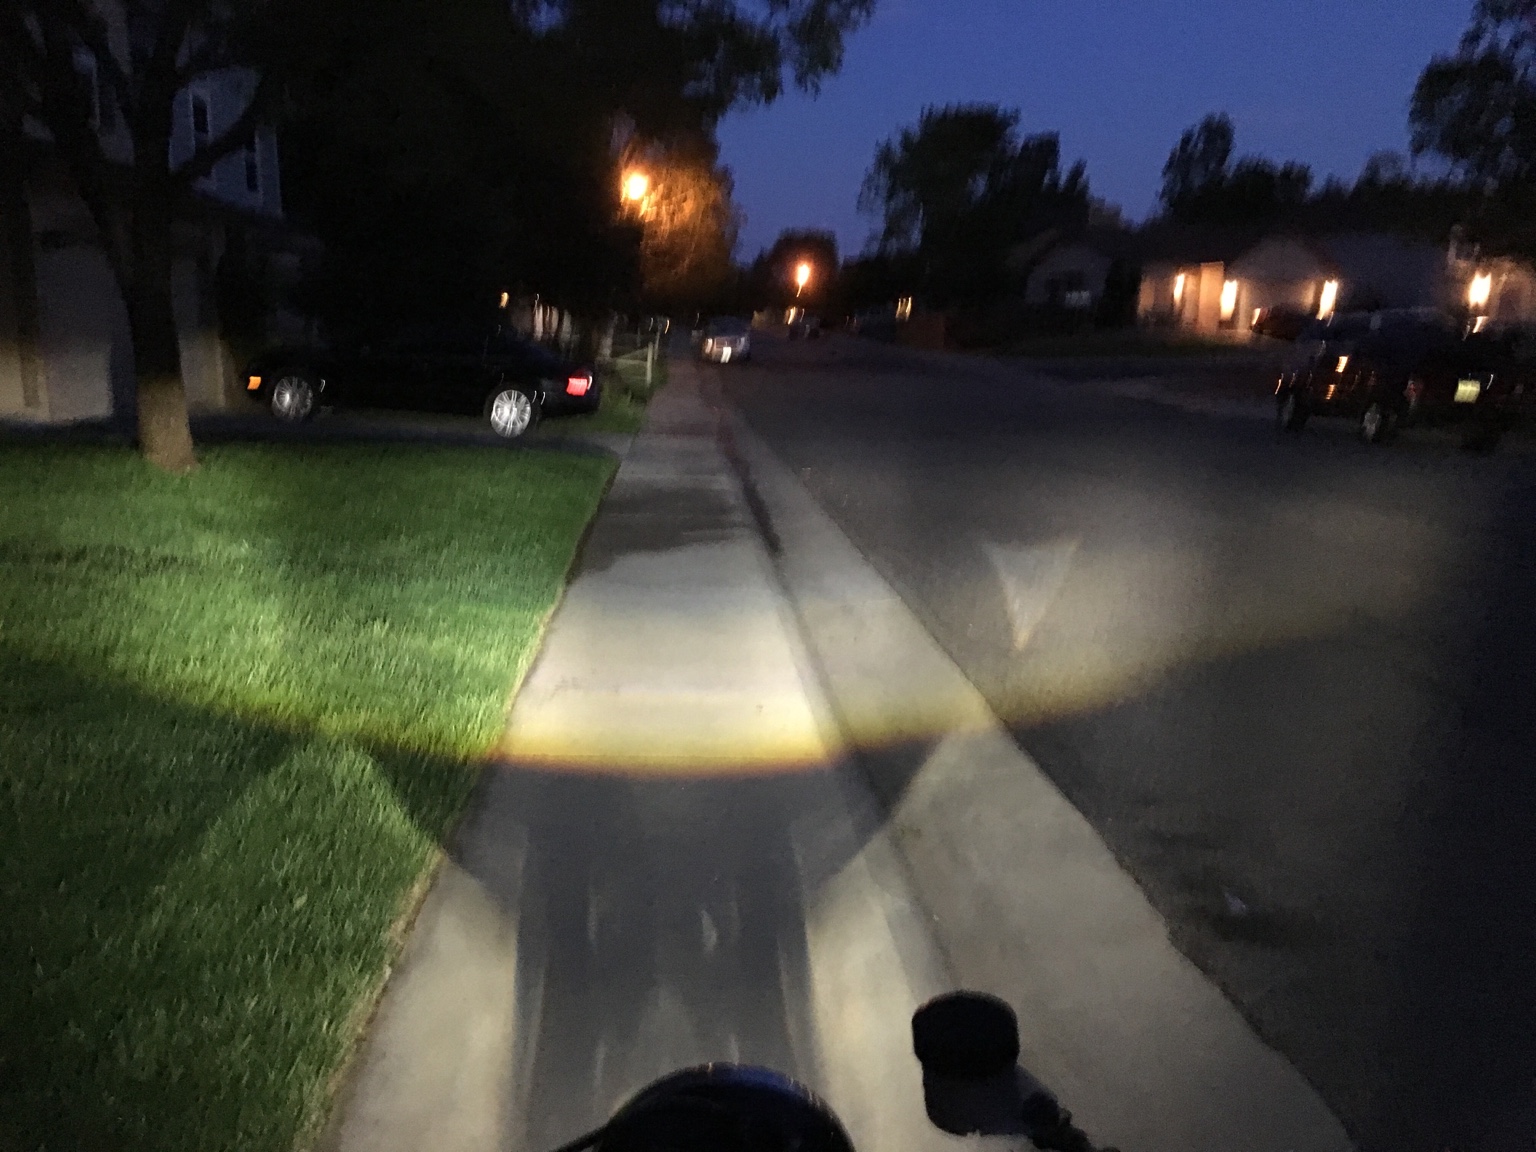
The headlight is bright as well!
Decided to keep the fuse block and make a bracket for it. Also took almost 2" out of the headlight ears - was out way too far as you can see above.
The headlight is bright as well!
MORK
Back at er
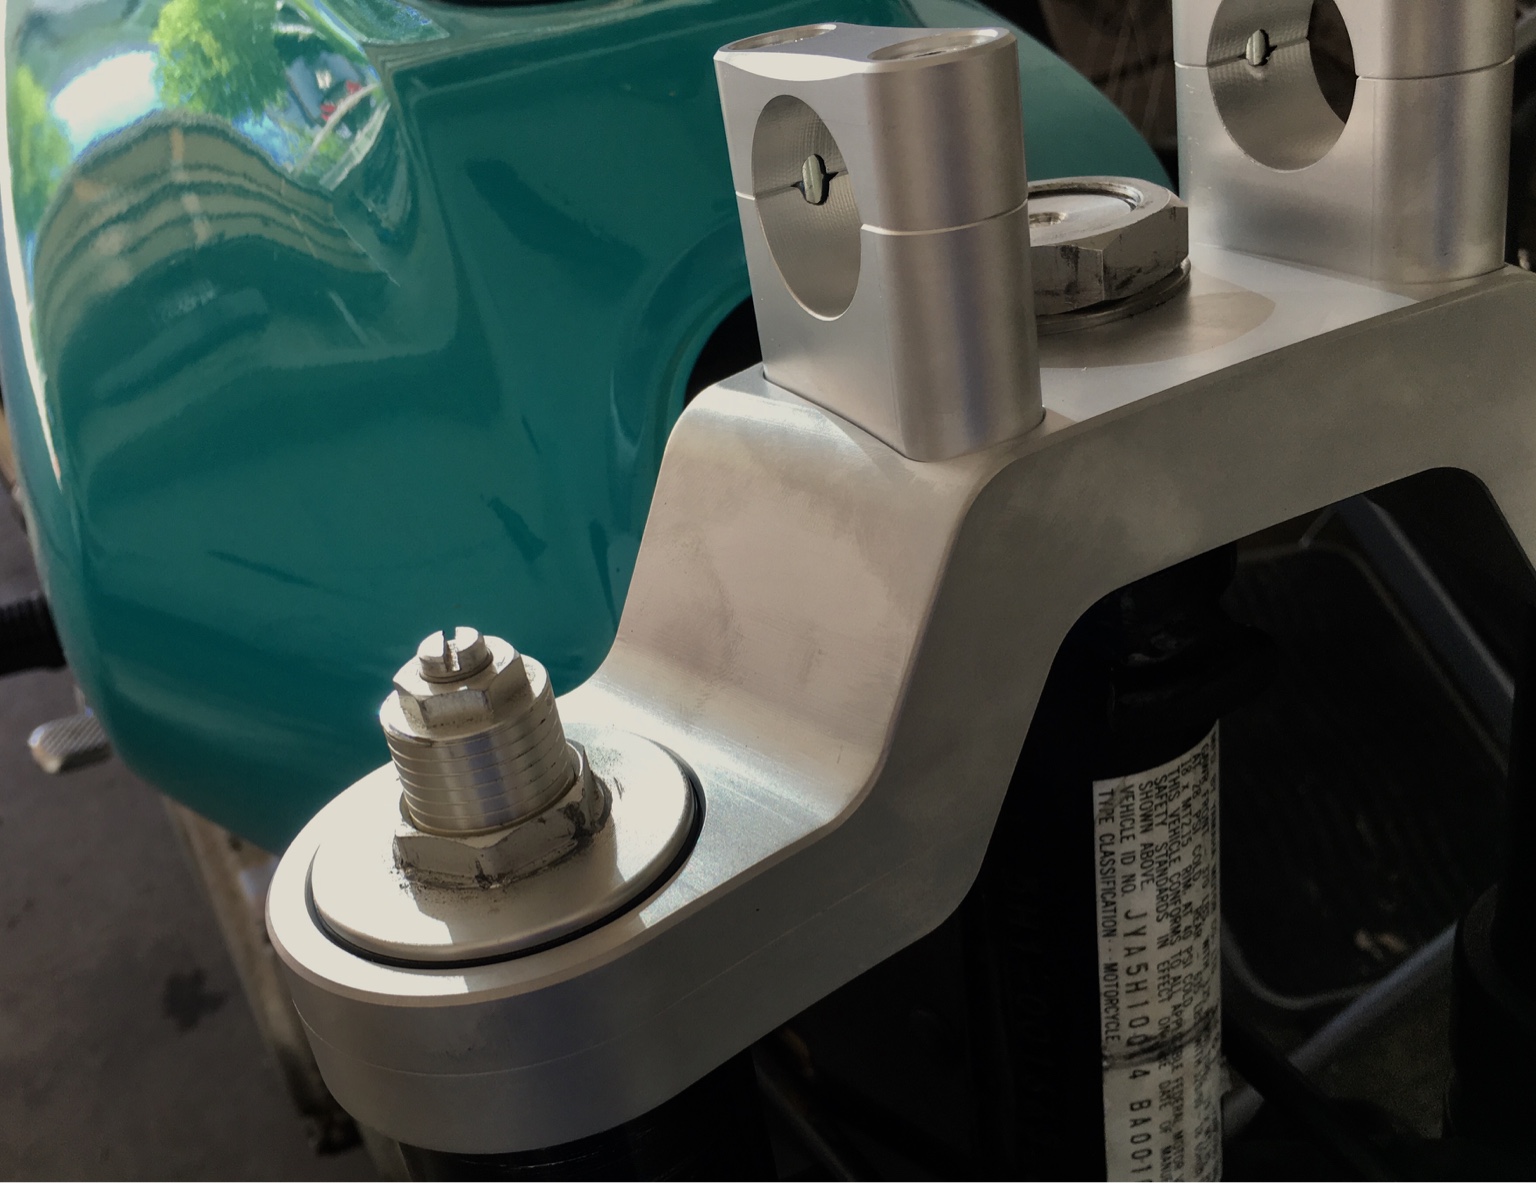
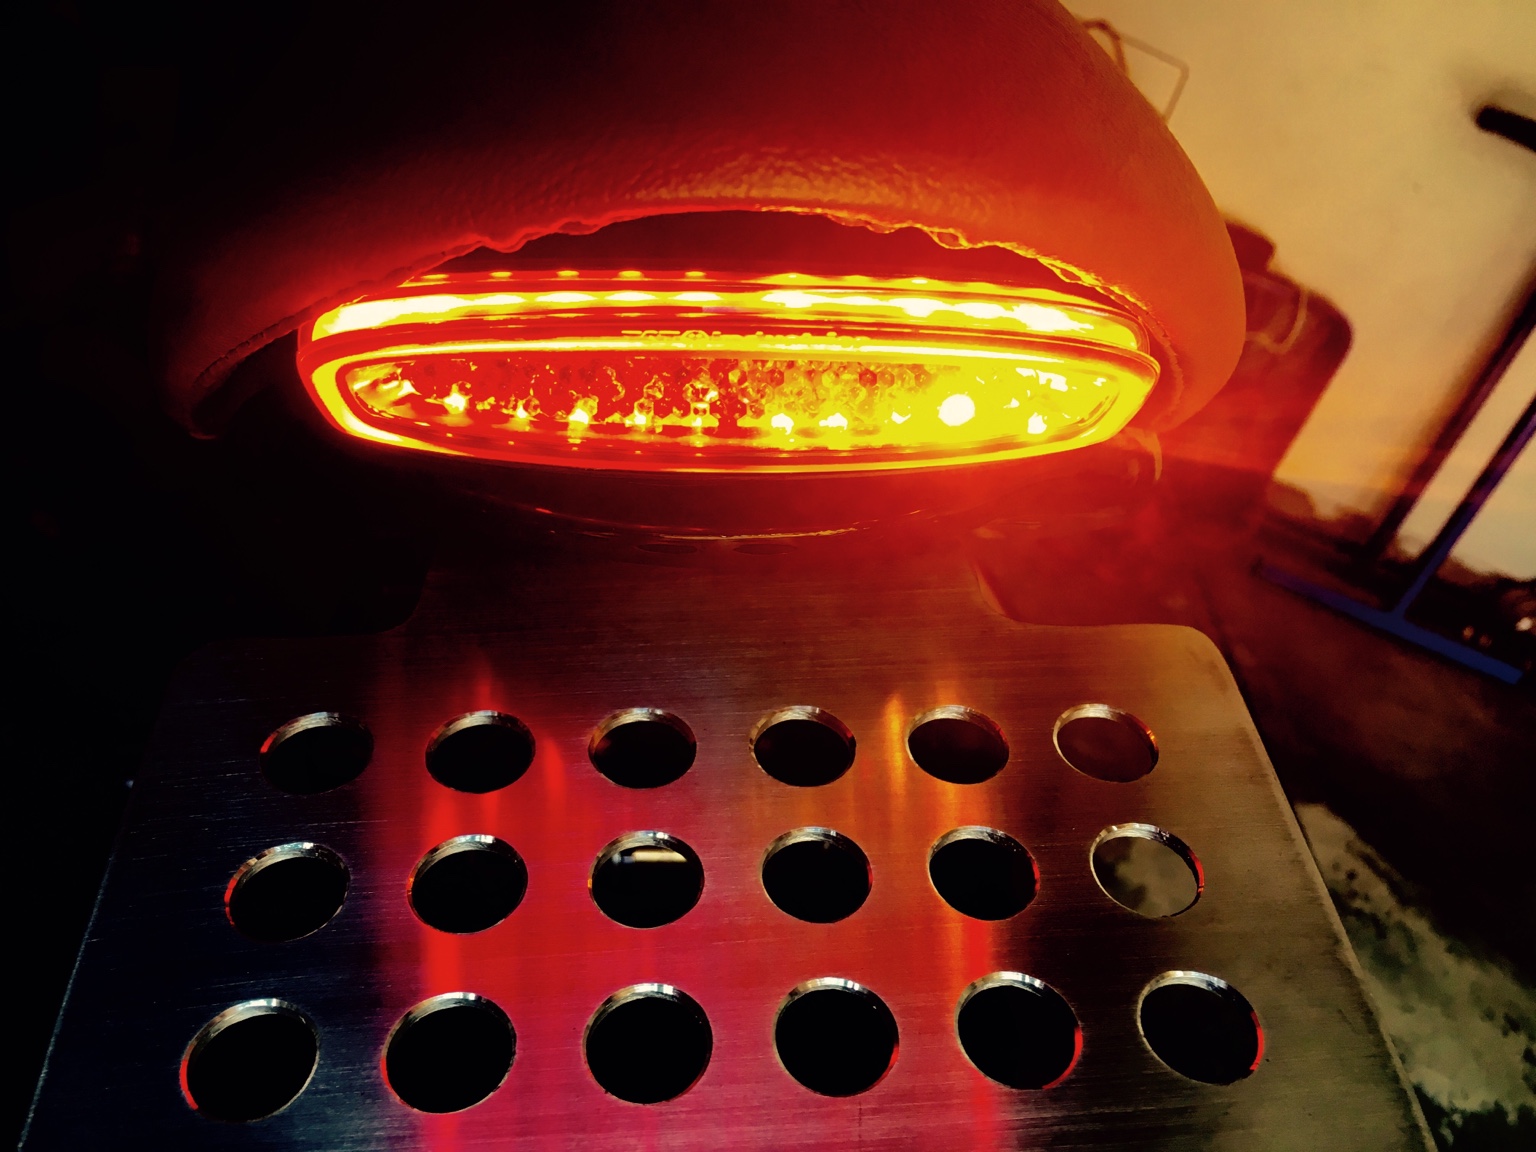
JAGspeed said:WOW! this bike has turned out really great. Good job on the top clamp, super clean look and totally helped the clearance issue. Cool little tail light.. What is it off of ?
Thanks, I'm getting really anxious to get riding it. The rear shock helped just as much and should match up really nicely with the R6 spring rate etc.
The light is from TST Industries originally meant for an FZ-09 with super bright integrated signals etc. it's tough to get a picture as it's brightness overwhelms my camera. I guess almost 90 led's will do that.
")
MORK
Back at er
I tried to get a picture of the light on, but it's just too intense for the camera to discern clearly what it looks like in person.
It also took forever to figure out a signal problem with the wiring that turned out to be all three wires pulled out from the switch. It's now cleaned up, re-soldered and epoxied. Should be good for years.

It also took forever to figure out a signal problem with the wiring that turned out to be all three wires pulled out from the switch. It's now cleaned up, re-soldered and epoxied. Should be good for years.
MORK
Back at er
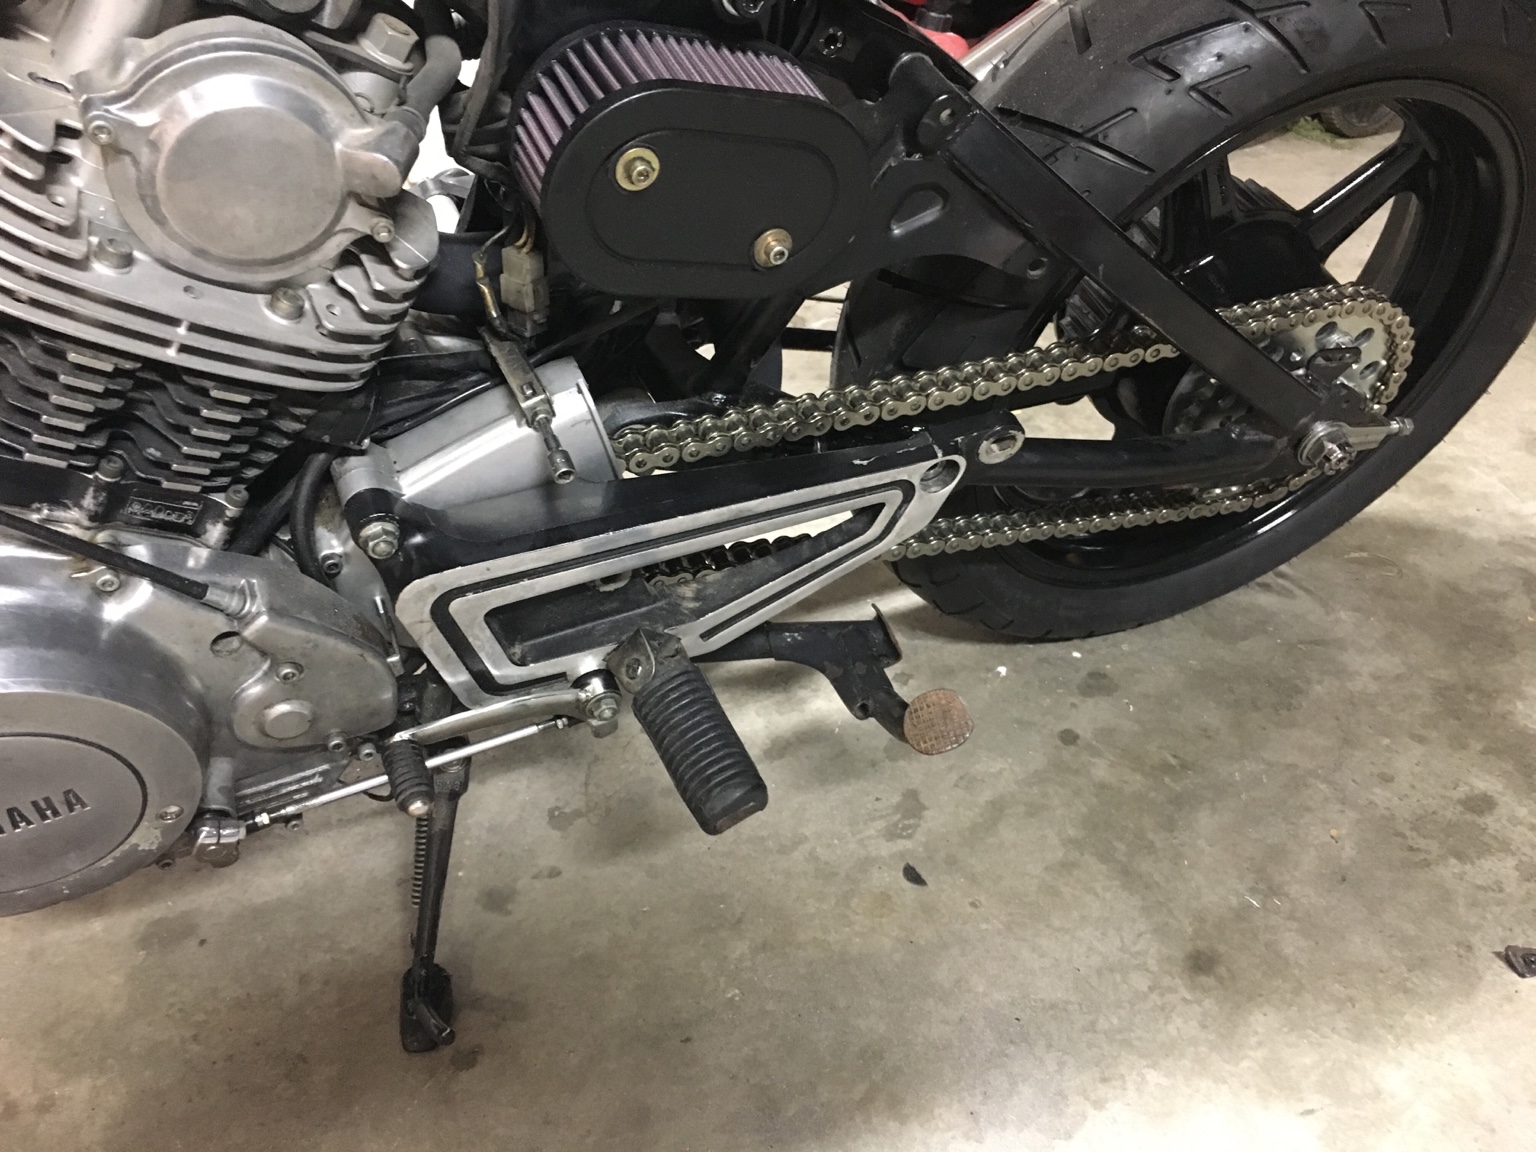
Alright - any gearing experts out there? Im having a 17t front sprocket currently drilled and tapped to match the original sprocket and I'm debating what final ratio I want.
Because of the new rear wheel, I can go as low as a 34 in the rear and running everything through a great gearing calculator (gearingcommander.com) with a 36t rear, I am almost spot on the the factory ratios even working in the difference in wheels and chain pitch.
However one thing I dislike about many Japanese bikes is just how high they always seem to spin, so I'm thinking of going 17/34.
Any downsides with the additional chain and sprocket wear?
Can anyone think of a reason not to drop to a 34 rear with this relatively torquey low revving twin?
Here is where I'm at with the 17/34:
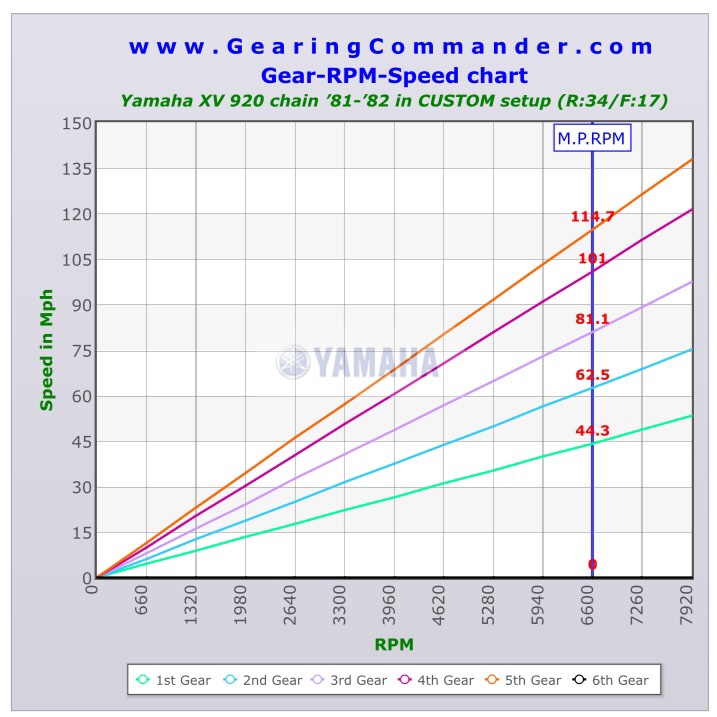
MORK
Back at er
Sigh. Machinist broke a couple bits and wants to give up drilling the sprocket. It's ok though, in going to try out MikesXS 18 tooth and see if I can make the pre drilled speed holes work.
Also, it's getting close... Antigravity 12 cell, new mosfet R/R and motogadget mlock keyless ignition. This ain't no trailer queen fenderless hard parkin sunny day show Nancy. No sir.
I might have to think of a new name beside fat and low seeing as the effort done to mitigate exactly that...
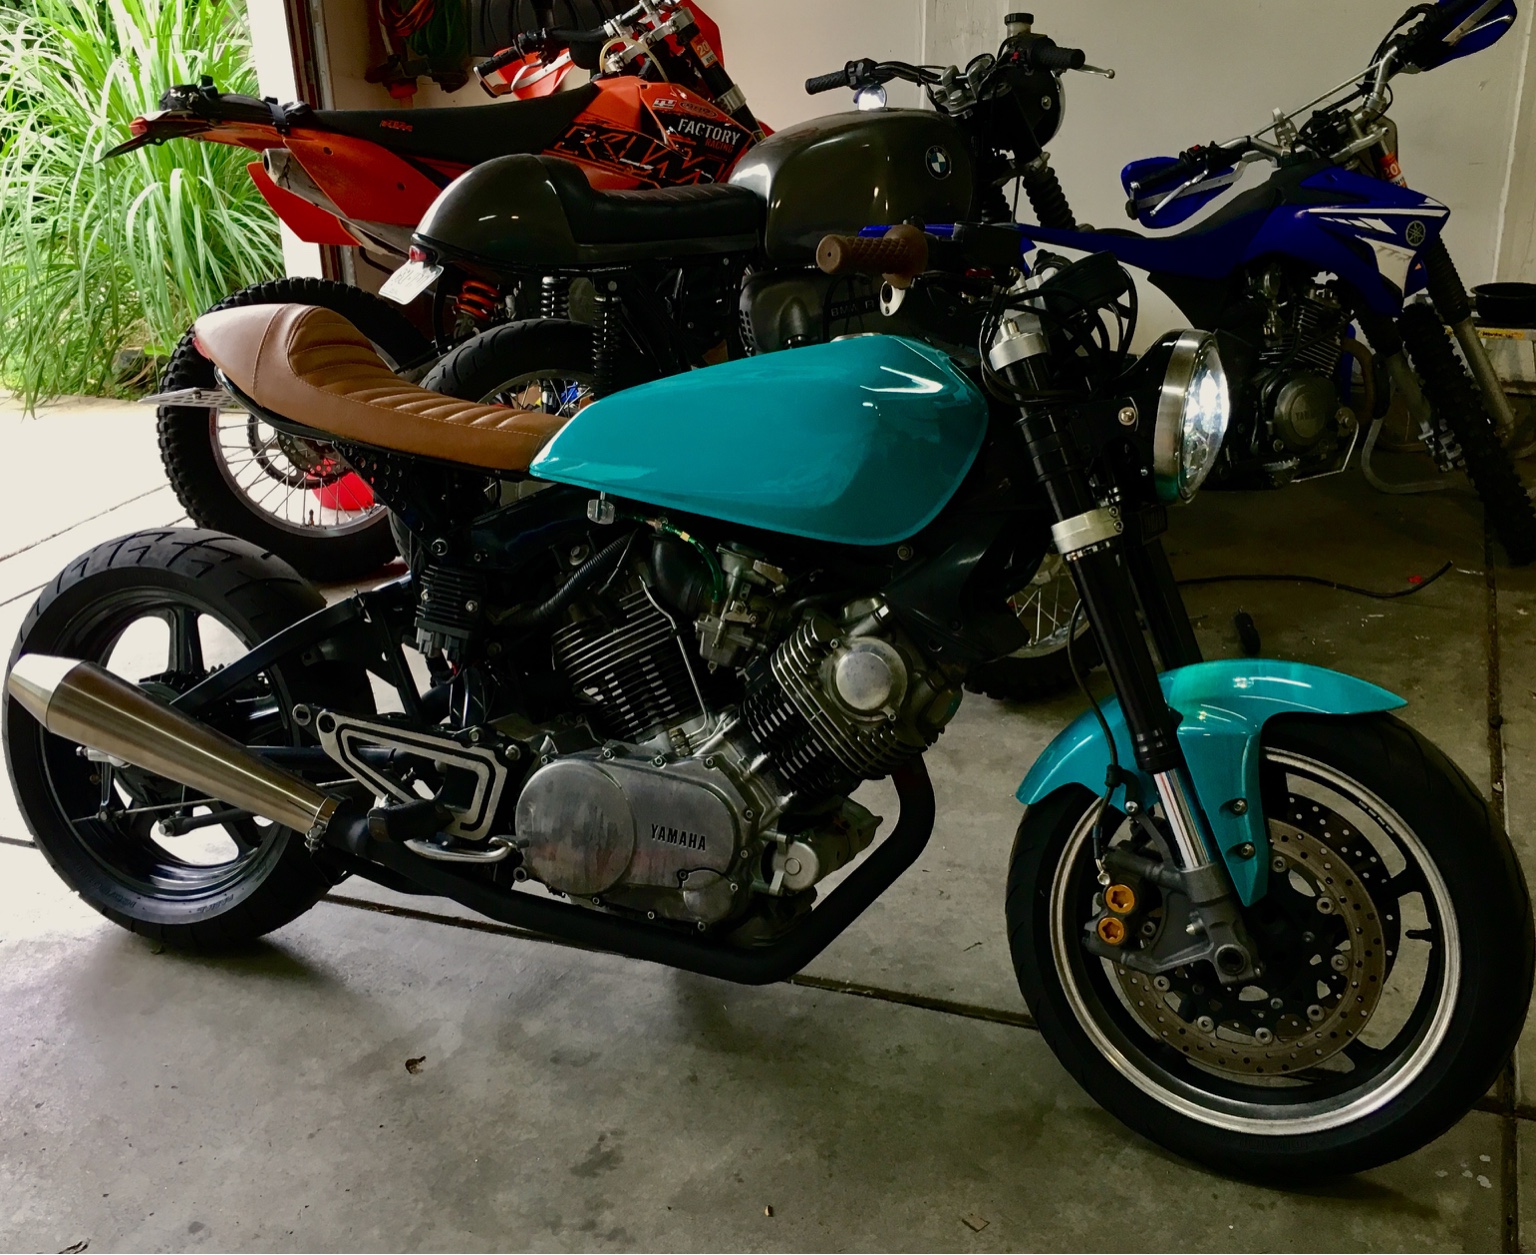
Also, it's getting close... Antigravity 12 cell, new mosfet R/R and motogadget mlock keyless ignition. This ain't no trailer queen fenderless hard parkin sunny day show Nancy. No sir.
I might have to think of a new name beside fat and low seeing as the effort done to mitigate exactly that...
MORK
Back at er
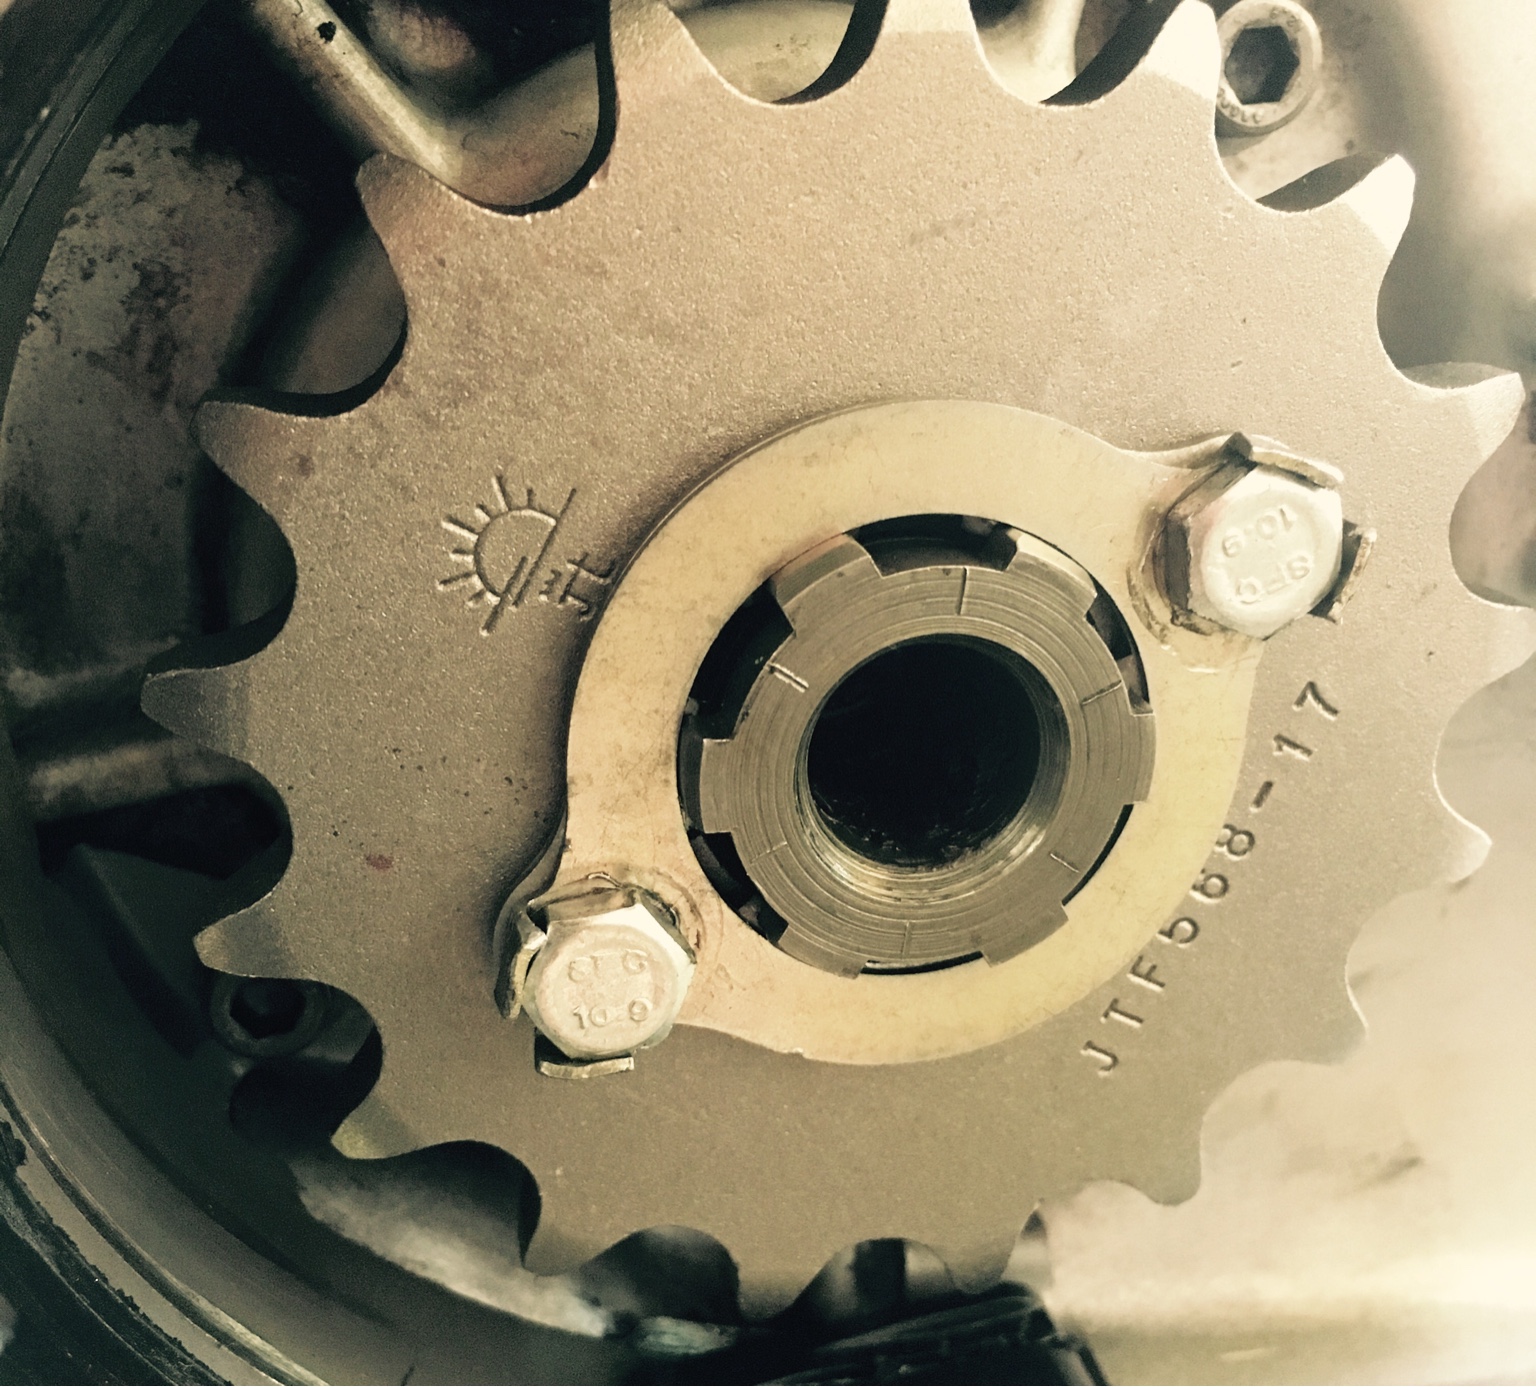
I'll just put this here for anyone's reference on future builds...
My final spacer measurement to use a CB750 nighthawk rear wheel on a virago XV920R is 22mm drive side and 24mm brake side.
You also need to either drill out the sprocket bearing spacer or machine a new one to fit the 20mm axle.
Other than drilling the center spacer and fitting the appropriate bearings, that's about it. My spacer dimensions are for a 530 chain with the XS650 sprocket up against the retaining washer without an additional spacer.
Pictures later as I'm putting the finishing touches for the chain tonight.
danielnordin
New Member
How did you manage to drill not one, but TWO holes in that sprocket? I'm going for the exact same setup with the nighthawk wheel as you but the front sprocket gives me headaches. Any advice?


