Follow along with the video below to see how to install our site as a web app on your home screen.
Note: This feature currently requires accessing the site using the built-in Safari browser.
We noticed you are blocking ads. DO THE TON only works with community supporters. Most are active members of the site with small businesses. Please consider disabling your ad blocking tool and checking out the businesses that help keep our site up and free.
I'm doing a similar build. As far as R6 spoked wheels go I don't think there are any direct swaps. What I went with (I have a inverted fork R6 front end) with some XS650/TX500 36 spoke hubs, custom wheel spacer(s) I made and ducati rotors. I found some bearings from allballs that were the correct od for the hubs and correct (I think 22mm) id for the r6 axles. For now I'm just doing a single disk since I figured that's probably going to be more powerful than the stock dual disks. The Ducati disk is a direct bolt on to the hub, I just made a spacer to get the disk lined up with the caliper and some spacers to get the wheel centered.
I looked for a while for XS650 hubs and they were running kind of expensive on ebay, then I realized the TX500 is as far as I can tell the same. They're much cheaper on ebay because it's less desirable than the xs650 stuff
Oh, forgot to mention supermoto wheels. It'd probably be a lot more affordable to get a 3.5x17" hoop already laced up to a SM wheel than to an older hub (if I end up going that way I'll have to get some $300+ Excel rims with custom spokes... not cheap). Keep in mind tire height though if you go the 17" route. You'll be better off with the non inverted forks since they're longer in the first place.
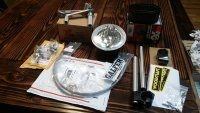
Finally was able to come up for air from work and have some fun time with the project and a parts that have been trickling in.
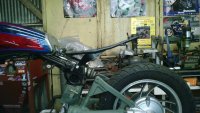
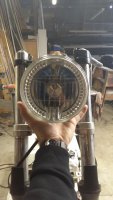
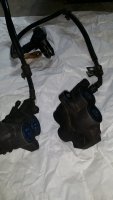
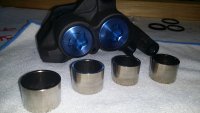
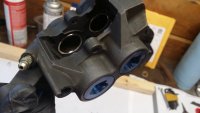
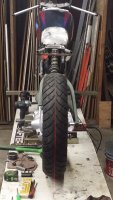
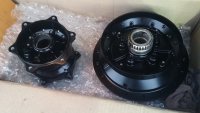
Shifted gears to focus on this new front end set up, fitting the new light with integrated signals is going to be the ticket. Still waiting for the new bucket from DCC so I started in on the R6 brakes. They needed a full tear down and cleaning so I have confidence when the time comes to steer-wit-da-rear and back it in. ;D New seal kits all around, polished pistons and some sintered pads should bring back the butter.
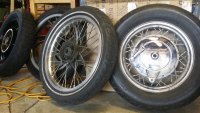
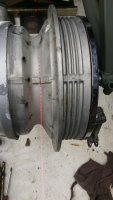
I've got wheels coming out of my ears and need to get on the stick. Next up I had to start breaking down the wheels I got from other various viragos so I can convert to spokes.
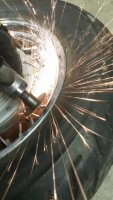
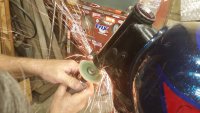
Not sure if the hoops have any value but the stock spokes are toast so time to crank up the AC/DC and make some sparks.
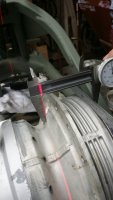
After freeing the 30+ year enslaved hubs I had to take some measurements to get the offset I'll need for the new wheels. Since I don't have a stock offset to go by I decided I'll just use the frame centerline and measure from there to the brake hub side. Time to bust out the trusty laser. Yep I know what y'er thinkin'.... lasers, sparks n' Angus on the axe.....that's how we roll in this garage.
Took a few minutes to get a line from the stem center back down the middle of the stock tire (which was actually left of the frame center by quite a bit) then swapped out to the spoked hub to get a final value. All good!
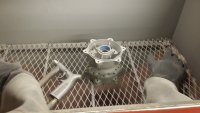
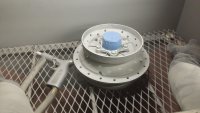
Had just enough time before the end of the day to get the hubs into the blast cabinet so a quick tape up for extra insurance and off to the races to finish before the wife calls in the dinner bell. Hopefully will have a chance to drop these off at the powdercoater tomorrow. More to come...
Do you have a part # and spec?
I looked that their charts and the closest I found was a 42/20/12. The R6 axle is a 22mm so what I need is a 42/22 and can go with either a 12 or 13 mm wide.
As far as the sumo wheels, the only dual rotor hub I know of being offered is for the KTM 950 which is crazy expensive. My original plan was to have Buchanans lace up some Sun rim blanks (to maximize the offset) but I can get RAD to lace up some Excels for A LOT cheaper. Guess it would help if I had a dealer account but I'm a lowly grease monkey. Let me know what you got on that bearing info, would be a big help if I didn't have to turn down the R6 axle.
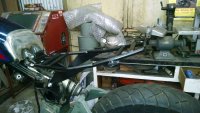
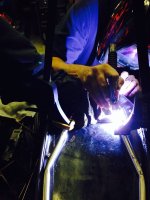
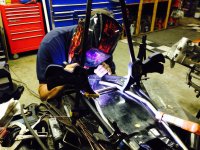
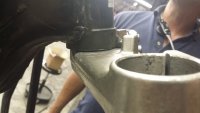
Ever since the decision to go with the R6 front yard we had to make adjustments to the subframe, plus the tank mount just wasn't sitting right with the gut. So!....
Here's a sneak peak at the start of subframe V2.0. Gotta have a beta version to launch off the alpha right? Can you hear the OCD kickin in?!!
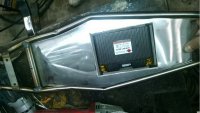
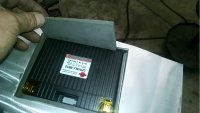
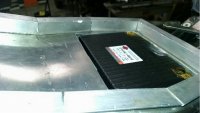
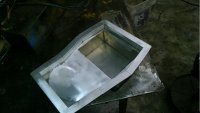
Made some more progress on both the subframe and pan. Tried something a little different and trimmed down the r/r to fit within the sub rails but right out in the wind flow to get max heat dissipation. Aluminum pan with built in LiPo battery box which is lined with high density foam for insulation and shock protection. Here's a few progress pics.
Well it's been a while since I gave an update on the build but we've been chipping away on various components and it's coming along nicely. The main focus for me the last couple weeks has been finalizing the details on how and where I was going to put together the custom spoke wheels, after all this was going to be the one component that will bring the target look of this bike together. Need to get this one right!
There's really only one option here in the states when it comes to building a custom spoke wheel. Everyone I talked to (i.e. RAD, Chris @ Wheelworks, etc.) all pretty much pointed me back to Buchanan's in SoCal. Yeah, these guys can all build wheels (reluctant as they were with my request) but none of them can fabricate custom spokes and/or drill rim blanks to fit. So, it was time to pay the piper and get them on board with the project. Honestly though I'm pretty excited to have the experienced shop doing the work.
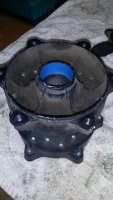
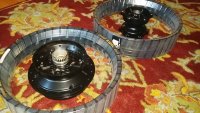
While working out the details on wheel specs I got the hubs sent over to a local shop for some 50% gloss black powder coat. These turned out nicely!
Part of the struggle with spec'ing the wheel build was whether or not to go with Buchanan's Sun rim blanks (which were 2x the cost of Excels) or use 36 hole Excels. After talking with Matt at Buchanan's I learned that they can modify the Excel spoke holes enough to accommodate a steeper spoke angle so the Excels were a no brainer. A couple days later they were shipped in and the black matched up great with the hubs. Time to pack'em up and get them out to Buchanan's.
With the wheels out of the way I can now focus on wrapping up that R6 front end that has until now only been mocked up. So after carefully measuring the triples, stem, and headstock I ordered up some bearings from All Balls. The beauty of transplanting modern Yamaha parts on to old Yamaha platforms is that certain aspects of Yamaha engineering has really remained a constant over all these years. For example, it was a pleasant surprise to see that the new R6 brake rotors matched the old '84 hub bolt hole circle or that the steering stem design was almost identical dimensionally....sure made the job that much easier. Of course I don't have to preach to you guys.
The only mod required for the transplant was shaving off 5mm from the underside of the headstock (though we could have gotten away w/o doing this) so that I could fully utilize the threads on the stem. After mounting the upper triple and hardware it looked like a stock set up. And of course a little breathing room between the lower triple and headstock is required. Now just need to modify the steering stop so the new triples can kiss.
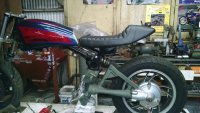
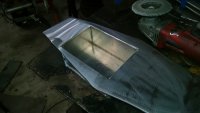
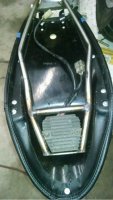
After having spent quite a bit of time building the updated subframe and seat tray for electronics we ran into an unforeseen problem with the battery box orientation within the tray. There wasn't enough clearance between the battery box and the rear shock (and it was pushing the proximity limits of the rear tire as well). Robert took this one in stride and quickly fab'd up a shiny new seat tray that address the problems and fit perfectly into the build subframe v2.0
Seems like a theme is forming with this build, doing everything twice is just plain fun!!
Now that the subframe/tray design was complete we needed to move on to addressing an oversight (on my part) on the original tank mount. Gas tanks always need rubber mounts otherwise they will quickly begin to grow microfissures which eventually grow into cracks....BOOM!! Came up with an improved design for the rear mount that will isolate the tank from vibrations and tuck under the seat nicely.
Now that the front end and suspension was modernized and only some minor maintenance to freshen it up remain, it's time to take a look at that dumpy backyard.
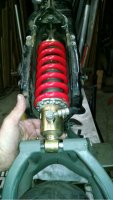
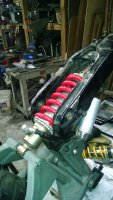
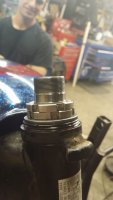
There weren't (and still isn't) too many companies that gave the ugly first gen Viragos much love in the suspension department. Let's face it....They're Fugly!! The few outfits that did offer upgraded springs stopped long ago leaving a void in the market of Virago owners with 'My baby's mama' tattoos on their arms. So I had to think outside the box to get something that was adjustable. A little bit of research revealed a few promising options from late 90's YZF600s to Speed Triples. I ended up finding a rear shock off a '99 Triumph 955i that was almost a direct fit. Only ~1/8" shorter than the stocker but with much higher spring rate (even higher when I upgrade the spring), I'll be able to maintain the rear geometry but have adjustability...WOOHOO!!
Basically the only things needed to fit the new shock is to change out the bushing, make up some new spacers, and find a home for the remote reservoir.
This site uses cookies to help personalise content, tailor your experience and to keep you logged in if you register.
By continuing to use this site, you are consenting to our use of cookies.

 Came up with an improved design for the rear mount that will isolate the tank from vibrations and tuck under the seat nicely.