First Project - 1980 Suzuki GN400

MattL9

New Member
What's up everybody. I'm attempting to rebuild my 1980 Suzuki GN400 that I bought back in the beginning of June. My dad and I have been tinkering around with it for a while now but we are finally starting to get to the good stuff. I bought it for $750, which I thought was a fantastic deal at the time. I still think it was a pretty good deal, but if I had known some of the problems at the time, I probably would've gone with something a little nice. On to the good stuff. When I bought it, the guy said it had electrical issues, but it ran like a champ. Got it home and started riding it around the neighborhood. I live in the middle of nowhere so there were no cops to pull me over (I didn't have my license at the time and the flashers didn't work.. whoops). Eventually, we took the seat off and found that none of the wires were connected. We eventually got it all hooked up. The flashers would light up but not flash, the head light was dead, and one of the front flashers wouldn't even light up. Now you're caught up to where I am now.

Schools out for the winter which means I have five weeks to work on the bike before I go back. However, that doesn't mean it will all get done in this time. I am a college kid building this on a college kid budget so not all of it will get done in five weeks. For all I know, none of it could!

So here's what I want to do with my bike.
I'm 6'2 and if you don't know anything about a GN400, they're kind of small (I think anyways). I sit on the back seat so my knees don't cramp up. Sitting on the front seat makes me look funny. I want to make a flat seat (probably out of some sheet metal and workout mats). That way I can sit lower and farther back without looking as ridiculous.
I would love to repaint or have someone repaint the gas tank. The previous owner decided it would be a good idea to spray paint it... My dad works at a truck shop and has guys in the shop that will repaint the tank and shine it for me. We're just waiting for some warmer weather and for the shop not to be busy. Soon.
I want to get a flatter handlebar or even some clip ons. I like the buckhorn style handles and all, but I grew up riding dirt bikes so I want something more standard.
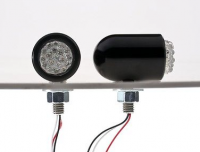
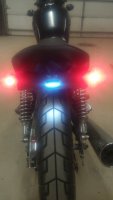
With the new seat, we're planning on taking off the fender and wiring two LED lights to the brake switch. That way the seat can sit lower on the frame. We'll also have to take a metal bracket/something-or-other off. I'll probably do away with the turn signals and just use my hands unless we can get them working and somehow attached. I've also seen lights at AutoZone that I could probably rig up, but that's not really first priority. I bought a 6 to 12v converter off eBay that might fix the light problem. The headlight and brake light work fine so the flashers will run off 12v and head and brake off 6v.

That's all I think needs to be done as of now.

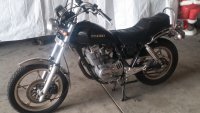
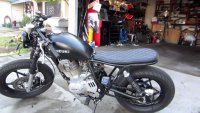
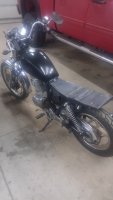
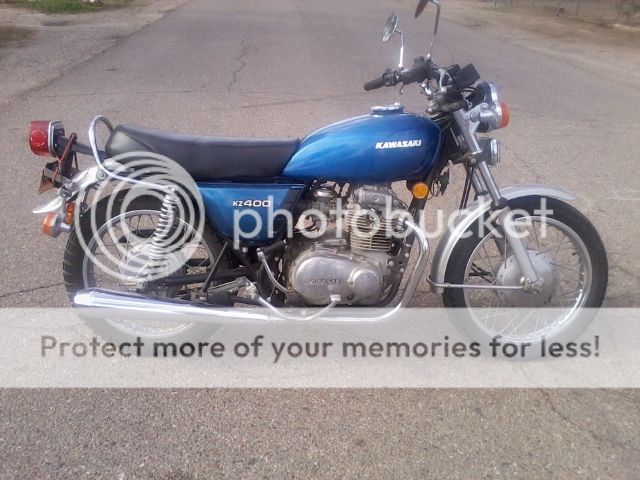
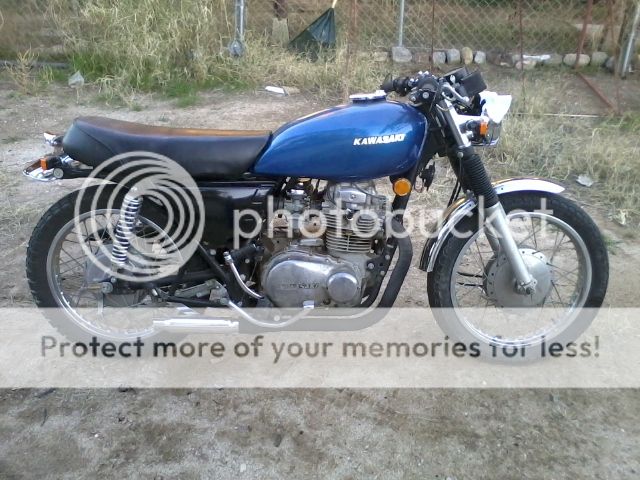
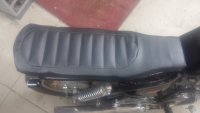
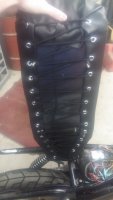
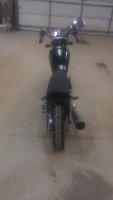
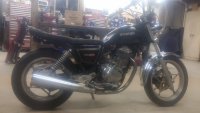
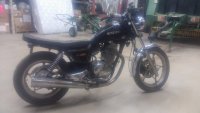
The below pictures are my bike now and an idea I found on here for how I want my bike to look. Shout out to the guy that built the bike in the second picture. I'd give your name but I forgot who's it was. So props to you!
 

Attachments

  • 20140705_184402.jpg
    20140705_184402.jpg
    2.7 MB · Views: 506
  • maxresdefault.jpg
    maxresdefault.jpg
    104.4 KB · Views: 1,268
1

Started taking the back end apart. Before I can put the seat on or anything, I have to get rid of the raised part in the back. I still haven't started building the seat yet, but I called a friend who works at a metal shop and he's getting me a quote on a piece of steel that I can cut up to the size I need it to be. Should know that by tomorrow.

I also found a piece of metal that will attach to where the seat attached to on the frame that could hold the license plate and maybe the brake light.

Can anybody tell me, in simple English, what everything in the back triangle does? I know the battery is back there obviously, but I'm not sure what everything else does. I've seen a lot of custom bikes with the back empty. I've thought about doing that but I don't know what I'm doing and what I'll have to change.

A couple pictures:
Seat Mock up
Bike minus seat
Potential License Plate Mount
 

Attachments

  • 20141217_174601.jpg
    20141217_174601.jpg
    2.8 MB · Views: 395
  • 20141217_172814.jpg
    20141217_172814.jpg
    2.4 MB · Views: 329
  • 20141217_174516.jpg
    20141217_174516.jpg
    2.5 MB · Views: 402
Been a while. Haven't had a ton of time to work, but I was able to make a seat pan and cut up a workout mat for some cushion. I'm having a friend upholster it, not sure how he's going to do it, but I trust his judgement so let's hope it turns out well!
I bought a new chain off D2moto. It was needed sooner or later so I decided to make it sooner.
She's currently in the shop getting some work done. 6v-12v conversion, put on said new chain, and, as they said I apparently need, a new sprocket. As much as I would love to do this myself, I don't have time, I don't really know what I'm doing, and I want to get this done ASAP. Hopefully after this bike is done, I will be able to buy a new project for cheap and do it all myself. I just want to have this done so I'm able to ride come riding season. Michigan's still cold so I have a week or 2...or 5. Who knows.
We decided to put on some LED lights off the back. One for the brake light, one for markers, and one for license plate light. The license plate won't be going on the side anymore either. It's just going to come off the back on a slant.
 

Attachments

  • 20150131_194531.jpg
    20150131_194531.jpg
    2.1 MB · Views: 354
  • 20150131_213700.jpg
    20150131_213700.jpg
    2.3 MB · Views: 390
Also looking to find some clip-on handlebars. Not sure if they will look good, but it should! If anybody knows where I can get some cheap, good quality (potential oxymoron), clip-ons, let me know!
 
A while ago I bought a 6-12V step-up converter to change the electrical system. Shop called today saying that I bought a 6-12V DC-DC converter when I need a 6-12V AC-DC converter. Just my luck. I bought it for four bucks so I'm not really to upset about it. Unfortunately, I haven't been able to find the AC-DC converter, so I'm really hoping the shop has some connections.
 
Re: 1

MattL9 said:
Can anybody tell me, in simple English, what everything in the back triangle does?

Typically, the back triangle houses the airbox, regulator, rectifier (regulator rectifier sometimes all in one piece), starter solenoid.

sometimes you can find the spark generators (like the CXs and GLs), fusebox, turnsignal relay, rear brake master cylinder, toolbox, or any other number of things.

Something i learned a while back. If you remove the badging from your side covers, and paint them GLOSS black (not flat) you dont even notice them. AND you dont have to relocate anything.
 
MattL9 said:
Also looking to find some clip-on handlebars. Not sure if they will look good, but it should! If anybody knows where I can get some cheap, good quality (potential oxymoron), clip-ons, let me know!

Check out eBay. There are all kinds of them on there in just about any fork tube size you need. They are mostly made in Asia but the ones I've seen haven't been half-bad quality. They seem to range in price from surprisingly cheap to "second mortgage."
 
Thanks guys!

Akastus, I like that idea for the gloss. I might have to try that once I buy another side cover.

Ridesolo, is it a difficult job to raise or lower the forks? Do you know?
 
Heres a good shot of what im talking about on a friends KZ400:

1209115910_zpse99703c2.jpg

Before

0103171248_zps879218b7.jpg

After

Your eyes just gloss right over it, like its not there
 
MattL9 said:
Ridesolo, is it a difficult job to raise or lower the forks? Do you know?

Yeah, I know how to do it. I'll give you a recommendation, though. Ride it as-is for a while and get to know it, make sure you can trust it; just live w/ it for a while, maybe even this whole summer coming up. In the mean time spend lots of time reading on here. There is Tons (pun intended) of really good info on here that'll teach you lots. Then after you have decided on something and then changed your mind a few times you'll eventually come to a final decision and be more likely to end up w/ your dream. AND be more likely to actually finish it and not quit because of some kind of unrecoverable error. Most of the guys on here will be more than happy to answer your questions. Try using the search function, too, I'll bet just about anything you come up against or have questions about has been covered. Guys are always happy to answer questions, but some of them have been asked and answered over and over.
 
Akastus said:
Heres a good shot of what im talking about on a friends KZ400:

1209115910_zpse99703c2.jpg

Before

0103171248_zps879218b7.jpg

After

Your eyes just gloss right over it, like its not there

I never would've thought of that. Thanks for sharing man, I'll definitely need to consider this once I get to the paint job
 
ridesolo said:
Yeah, I know how to do it. I'll give you a recommendation, though. Ride it as-is for a while and get to know it, make sure you can trust it; just live w/ it for a while, maybe even this whole summer coming up. In the mean time spend lots of time reading on here. There is Tons (pun intended) of really good info on here that'll teach you lots. Then after you have decided on something and then changed your mind a few times you'll eventually come to a final decision and be more likely to end up w/ your dream. AND be more likely to actually finish it and not quit because of some kind of unrecoverable error. Most of the guys on here will be more than happy to answer your questions. Try using the search function, too, I'll bet just about anything you come up against or have questions about has been covered. Guys are always happy to answer questions, but some of them have been asked and answered over and over.

Thanks for the advice. I appreciate all the advice I can get from the more experienced riders.
 
I've been looking around a bit to find information on the best way to convert from a 6v to a 12v, but the only forum that I've seen has been deleted or something. None of the pictures are up and the guy who made the forum has none of his comments up. Looks like he left... Anybody know anything?
 
A couple weeks ago I picked up a 3-in-1 lighting fixture set from Harrison Specialties. Turn signal, running lights, brake lights. I was going to stay away from turn signals and use my hands, but I guess this works.

Also bought a license plate light from the local fox dealership for $15. The guy said it would work at 6v, but when I picked it up, the package said right on it that it was 12 volt. Fortunately for me, the guy doing all the electrical work on my bike said he could wire the light to the converter I bought way back when. There is good news after all!

Seat was finished up yesterday. Will have pics up soon.

Once the wiring is done, license plate mount is welded together and mounted, and the seat is on, phase one will be complete. Should be done by next weekend. Then on to phase 2
 

Attachments

  • Screen Shot 2015-04-09 at 6.35.06 PM.png
    Screen Shot 2015-04-09 at 6.35.06 PM.png
    74.3 KB · Views: 1,296
MattL9 said:
A couple weeks ago I picked up a 3-in-1 lighting fixture set from Harrison Specialties. Turn signal, running lights, brake lights. I was going to stay away from turn signals and use my hands, but I guess this works

I've had the same Harrison LEDs installed around 4 years now. I think you will be pleasantly surprised with brightness and quality.
 
trek97 said:
I've had the same Harrison LEDs installed around 4 years now. I think you will be pleasantly surprised with brightness and quality.

The only thing is that they won't blink because there isn't enough power being put through. I think they I still be happy with them though
 
Got a couple more pictures. UPDATE: Phase one is done. I got the seat and the bike back on this past Saturday, welded the license plate mount on Sunday, and rode it to school for the week, but I'll get to that later.

So the everything turned out pretty great, I think. The seat idea is pretty genius and the lights are all bright, so that's a plus. Unfortunately, the my turn signals don't work, so I'm stuck with the lights I got from HS being just running and brake lights. The little license plate light I got is really good too. Mounted the license plate on an angle off the license plate light bracket.
Now for some pictures

Seat
Genius seat idea
Back view
Side view (seat looks pretty thin, but's it still pretty comfortable)
Lights

So tonight (4-28-15), I rode the bike to my cousins baseball game back in my hometown. Long story short, after hitting a few bumps and the bumps causing the wheel to hit the license plate, the license plate mount fell off. I ended up carrying the mount in my jacket (because it was too big for my pockets) for about 10 miles. Never got pulled over, winning. So now I have to decide if I want to just invest in a side mount, add to the wires, and move the light over to the side mount, or keep it how it is and just weld it better. The weld job wash't very good last time so that might be why it eventually fell over, but if I keep hitting it, it will start to take a toll on the tire. Any suggestions?
 

Attachments

  • 20150425_204644.jpg
    20150425_204644.jpg
    2.1 MB · Views: 251
  • 20150425_204657.jpg
    20150425_204657.jpg
    717.7 KB · Views: 273
  • 20150425_210841.jpg
    20150425_210841.jpg
    794.2 KB · Views: 285
  • 20150425_210859.jpg
    20150425_210859.jpg
    2.4 MB · Views: 267
  • 20150425_211804.jpg
    20150425_211804.jpg
    823 KB · Views: 253
Forgot to put on here the other day that my seat caught on fire as I welded the license plate back on.. It's all right though, just some burnt rope. Nothing I can't replace. Oh, and it burnt the wires to my left side marker/brake light. So now I need to invest in a new light, but as long as I have the right one still working as a brake light, I should be good for the time being.

I also have a question for the readers out there. Would I be better off going with some clip on handlebars or clubman handlebars? I've read a lot about how you get lucky if you find clubmans that have the right angle that you want, but they would also be a lot easier to install. Any advice would be appreciated.
 
MattL9 said:
I also have a question for the readers out there. Would I be better off going with some clip on handlebars or clubman handlebars? I've read a lot about how you get lucky if you find clubmans that have the right angle that you want, but they would also be a lot easier to install. Any advice would be appreciated.

That's certainly one of the most asked questions areound here... usually it depends on personal preference, but most seem to like the adjustability of clipons better that clubman bars. One thing to consider though is that if you go w/ either and use your stock foot pegs you will most likely find yourself very uncomfortable, sort of folded up. You may want to consider using some flat drag bars or the slightly higher and wider ones that are usually referred to as super bike bars until you get your foot position and controls worked out. I used drag bars on my bike for a long time and was very happy w/ them.
 
A couple weeks ago, I caved in and bought a "racing" handlebars for 25 bucks at the local motorcycle/atv/dirtbike/snowmobile shop. They look pretty sweet, I think. As I was putting the throttle, brake, clutch, etc. on, I tightened one of the bolts that attaches the clutch to the handlebars a little too tight. And by a little too tight, I mean I broke it... Bought a new one off Partzilla for maybe 2 bucks, came out to around 7 with shipping and handling. So now that's done.

I also made a mount for the license plate to go on the side. It's two pieces that will be welded together. I wanted desperately to ride so I put some JB Weld to keep it together. I tried maxing out the speed a couple days later(got it 80 before the lights started flickering). I guess JB Weld can't withstand 80 mph of force. Mount broke apart and fell off, but I got it back and it's good now.

I have bad luck with bolts... I was changing the oil today and had it almost finished. As I was putting the oil cap back on, one of the bolts broke off. Again, inside the hole. Spent about 20 minutes trying to get that sucker out, but I did it and got another piece off Partzilla again for dang cheap. Maybe next time I'll learn...

Anyways, here's a pic of the bike with new handlebars
 

Attachments

  • 10407481_10205926514995713_1431861258367347332_n.jpg
    10407481_10205926514995713_1431861258367347332_n.jpg
    50.1 KB · Views: 310
Back
Top Bottom