JustinLonghorn
No Purple Hearts, No Blue Ribbons
Re: Moto Guzzi V50 II Cafe
Purrdy.
Purrdy.
")
I used some synthetic...Castrol, I think of the weight called for...I consulted Dave Richardson's Guzziology, also added a bit of Moly additive...same went for the trany. I can look it up. If you don't have that book, it's priceless. Available on fleabay pretty resonableDale said:Thanks gentlemen. I think the color will contrast nicely with some polished aluminum and black leather components. Next step is getting some aluminum parts CNC cut. Should have done this before painting.
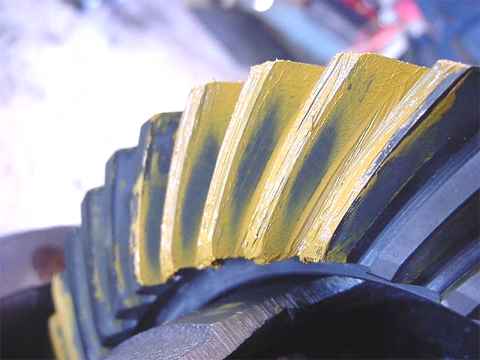
I've disassembled the rear drive hub again, and asked my dad to check the backlash, before I go into final assembly. He's a retired Mech Engineer, and I told him about my project and asked if he could have a look. Gave it to him on Saturday. I just wanted to make sure, as the drive had been "fixed" by somebody in the past, but there were no shims in there. When I tested it, I had to put in some shims (from a spare unit I had). I'm no expert on this, if anyone knows anything about this component, please share!
v-pilot, motobox, quantity/grade etc oil do you put in the rear-drive hub?
Also, I'm considering upgrading the steering head bearings to roller bearings. Current system is top and bottom cups with bearings packed into them. Not great. Found some resources, but seems overly complicated. Any knowledge will be appreciated.
Dale said:I've disassembled the rear drive hub again, and asked my dad to check the backlash, before I go into final assembly. He's a retired Mech Engineer, and I told him about my project and asked if he could have a look. Gave it to him on Saturday. I just wanted to make sure, as the drive had been "fixed" by somebody in the past, but there were no shims in there. When I tested it, I had to put in some shims (from a spare unit I had). I'm no expert on this, if anyone knows anything about this component, please share!