
We noticed you are blocking ads. DO THE TON only works with community supporters. Most are active members of the site with small businesses. Please consider disabling your ad blocking tool and checking out the businesses that help keep our site up and free.
You are using an out of date browser. It may not display this or other websites correctly.
You should upgrade or use an alternative browser.
You should upgrade or use an alternative browser.
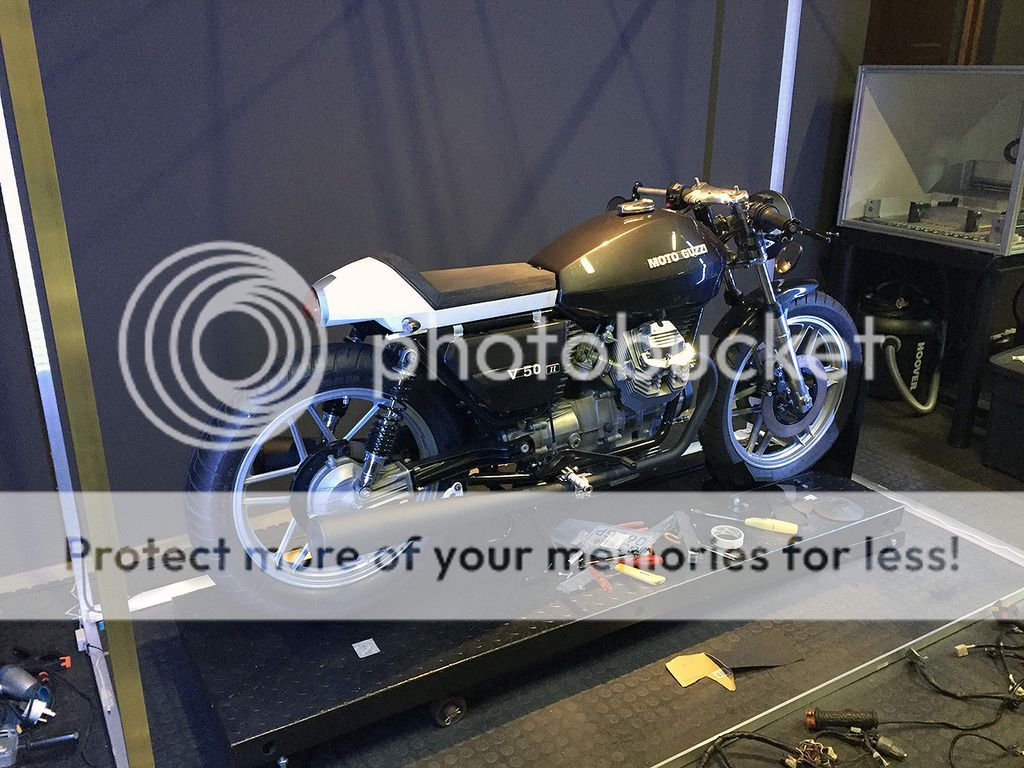
1979 Moto Guzzi V50 II Cafe
- Thread starter Dale
- Start date
Dale
Coast to Coast
Thanks guys.
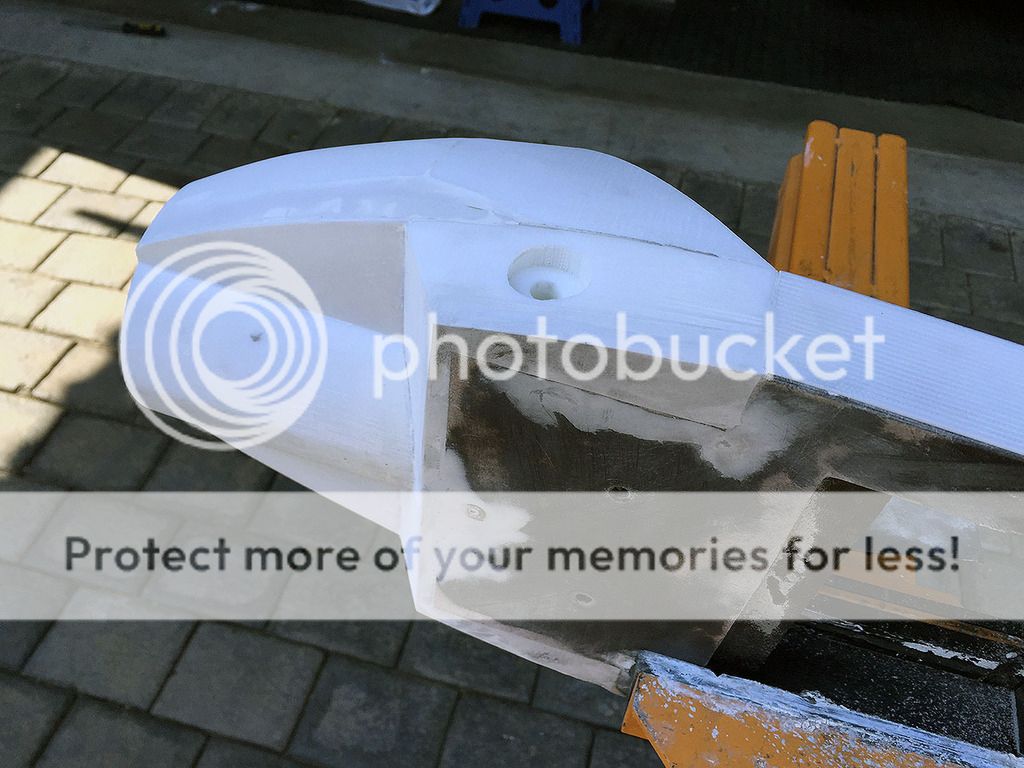
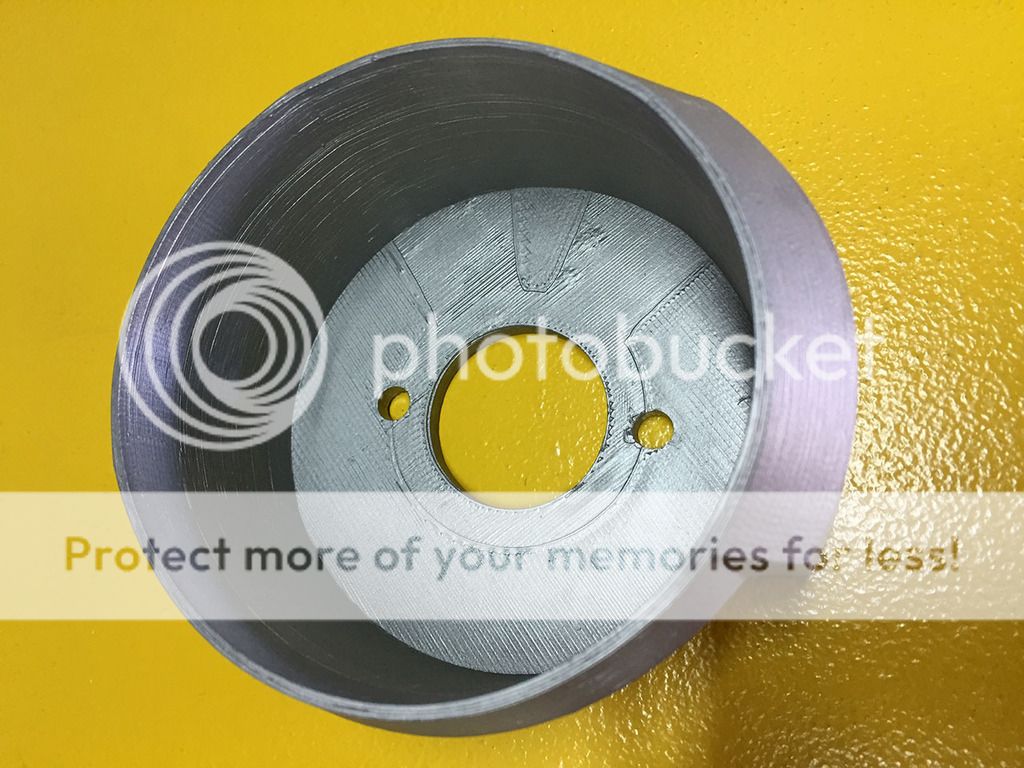
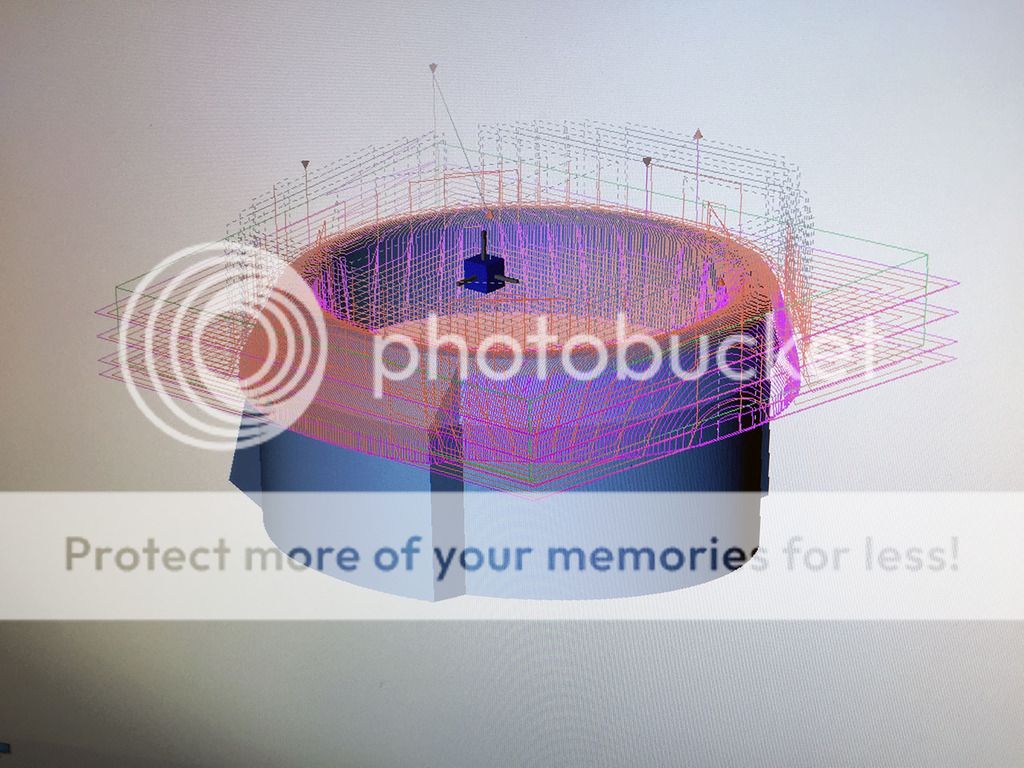
Goosifer, I think its just another weapon you can put into your tool set. It definitely requires another skill set wrt to CAD and 3D modelling, and the technology is still in the development stage. So early adoption means putting up with a fair amount of imperfection if you're using hobbyist / semi pro tech (like I am).
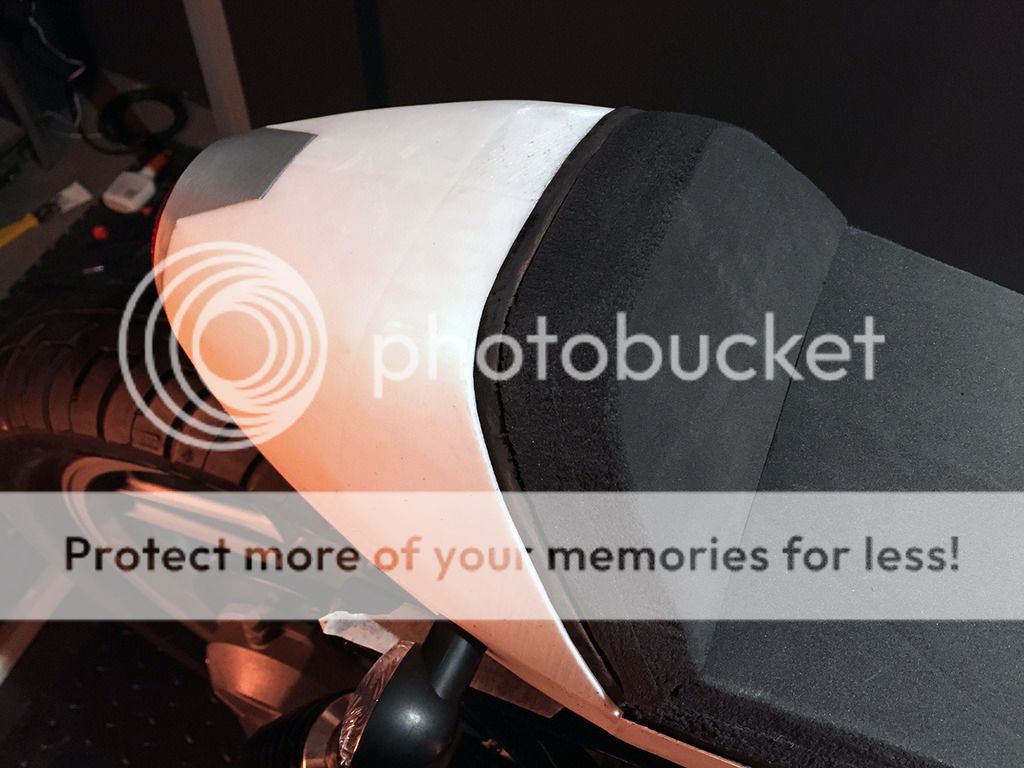
As you can see I've had to do a some finishing due to warping:
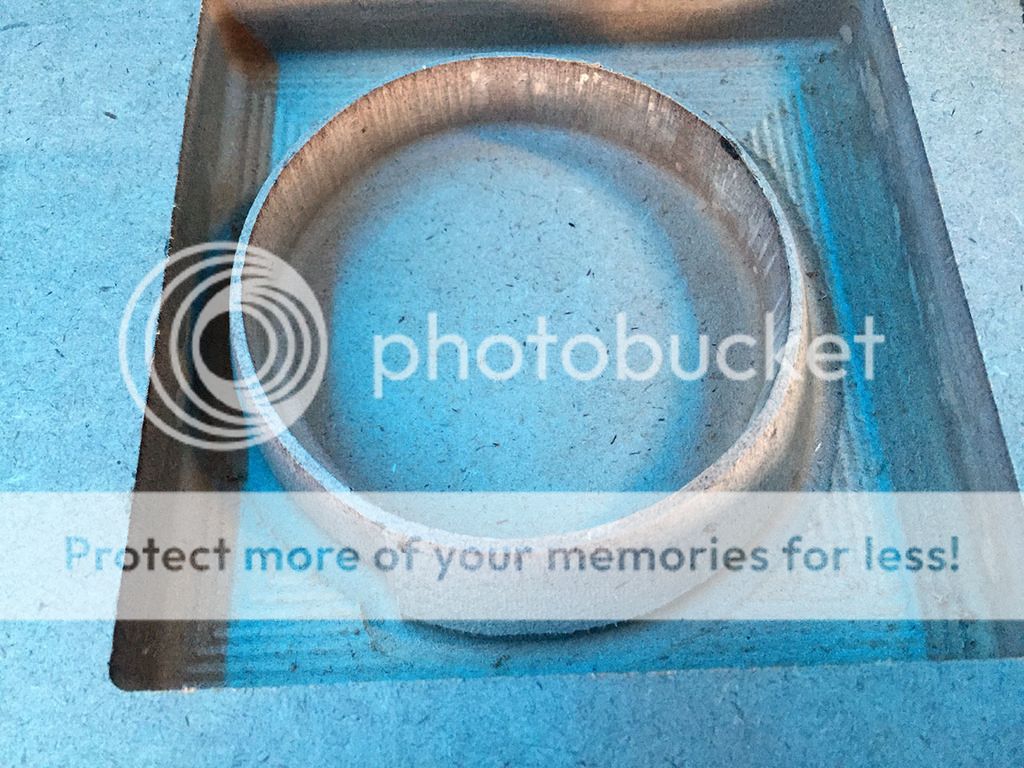
Here's some low tech for ya:")
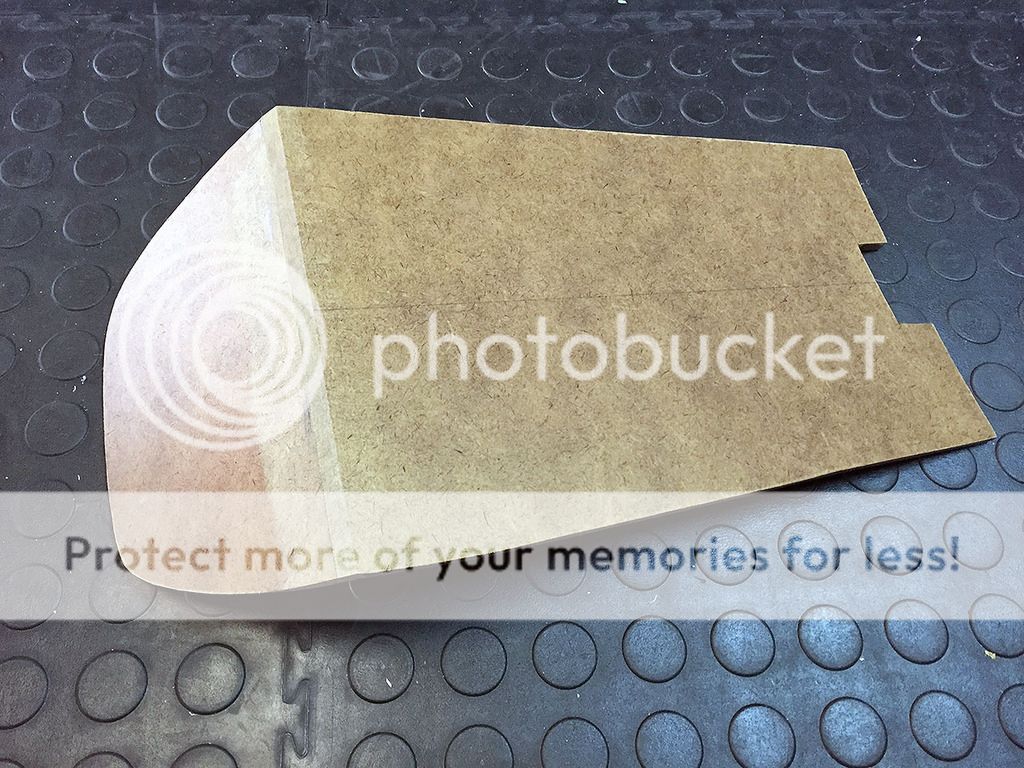
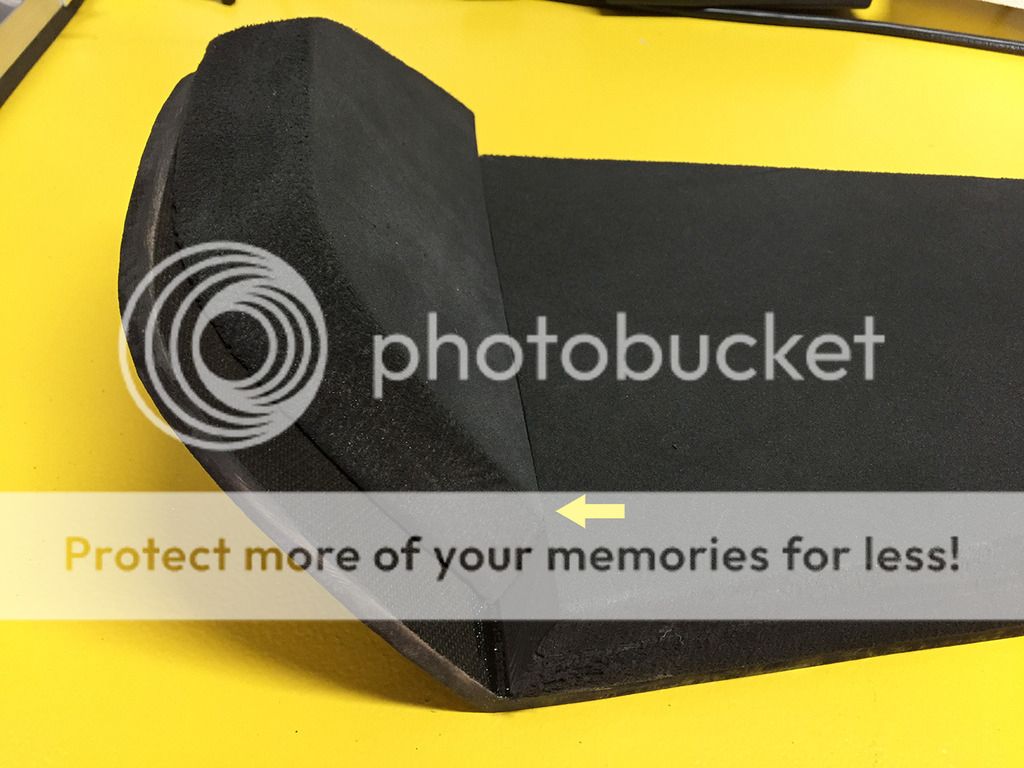
SEAT PAD
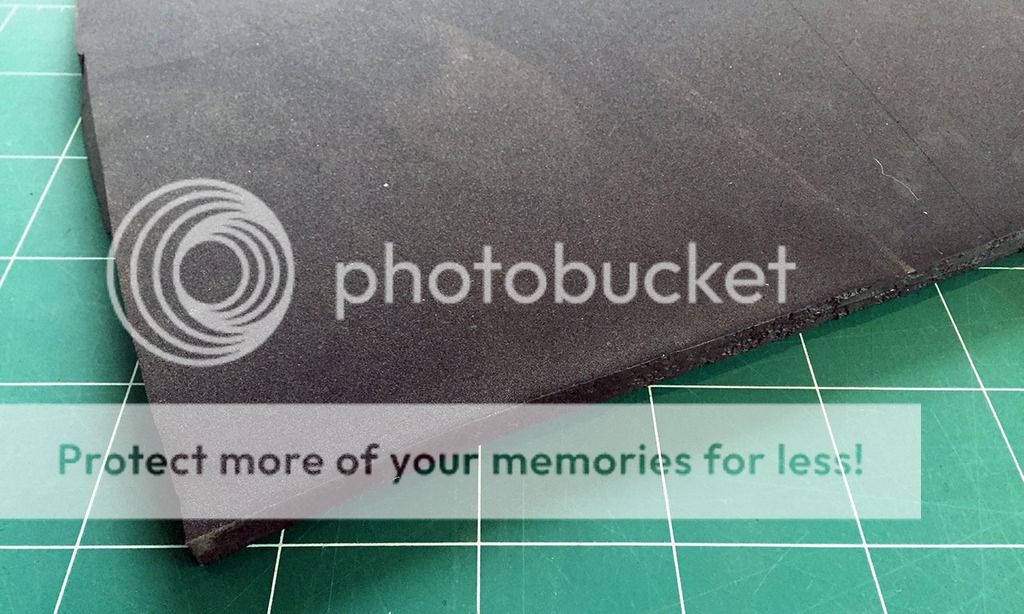
Had some race seat hi density foam lying around. Doubled it up for the desired thickness.
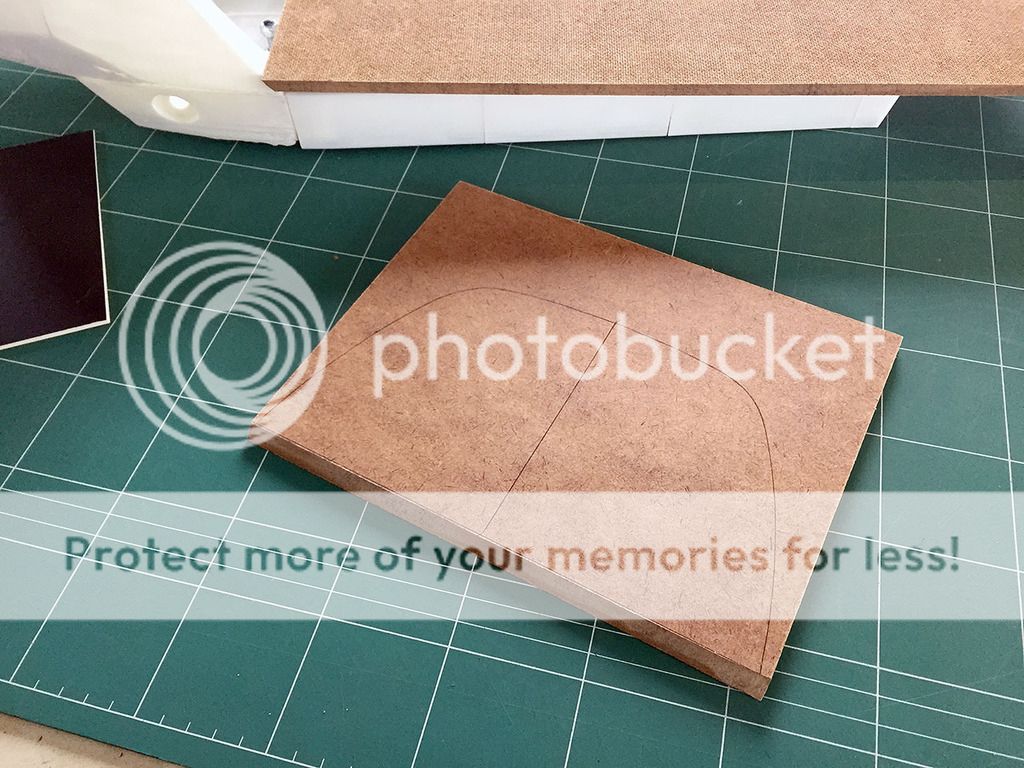
Was originally going to make the seat pan out of aluminium plate, but I was thinking that a wooden base for the pan might be more comfortable? Could be way off here, but that was my gut feel.
Im not too concerned about weight. This is going to be a commuter.
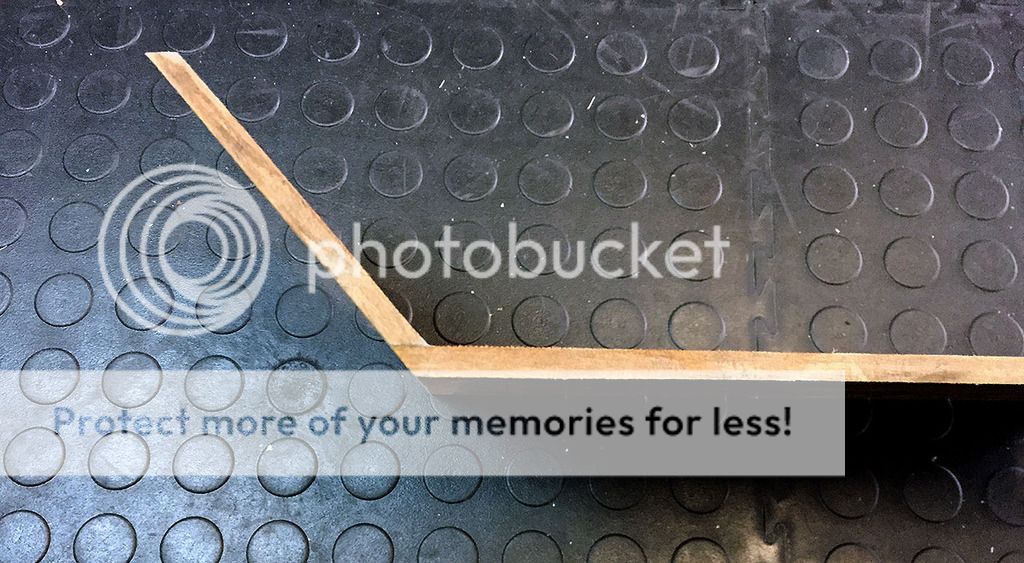
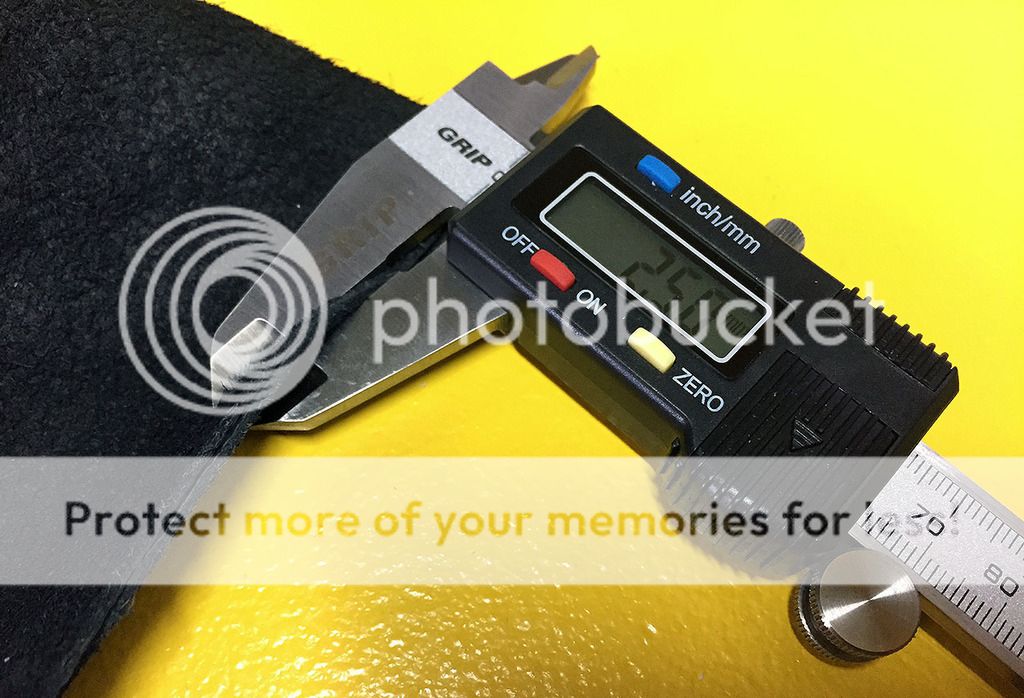
Need to compensate for the thickness of the leather between the seat base and the padded section. There will be a fair amount of compression, and 2.5mm will not be the final gap distance, so will be working to roughly half that. This will affect things as there are two axis to take into account here with multiple angles, and I want everything to to flush once its all covered.
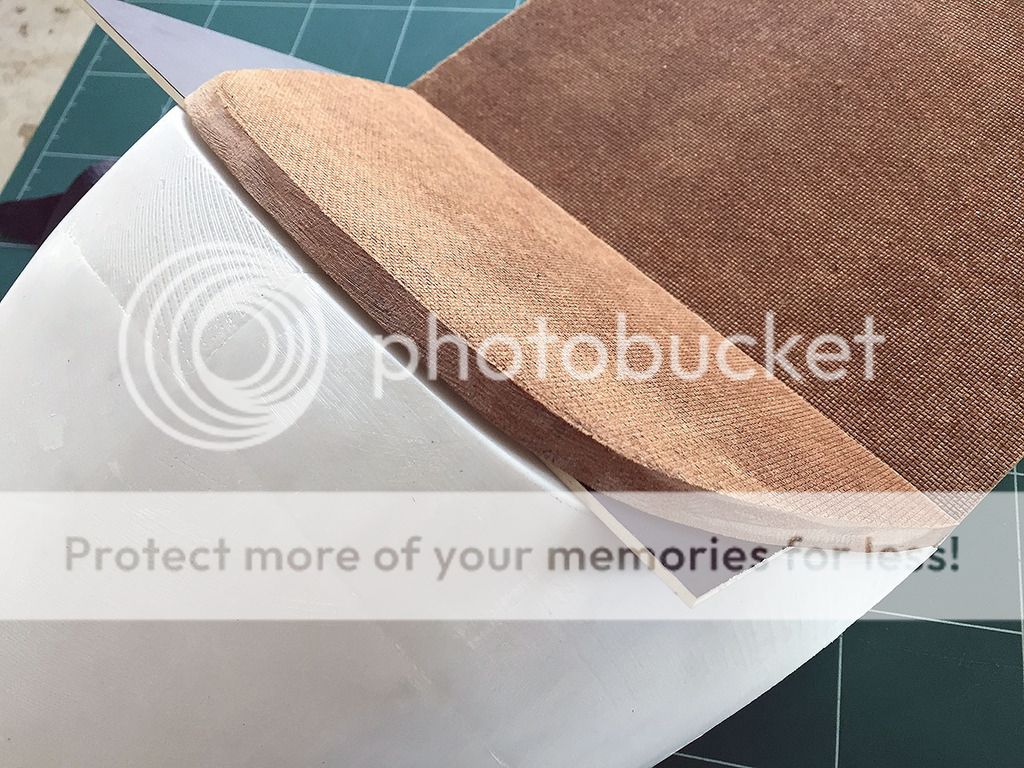
Matching up lines.
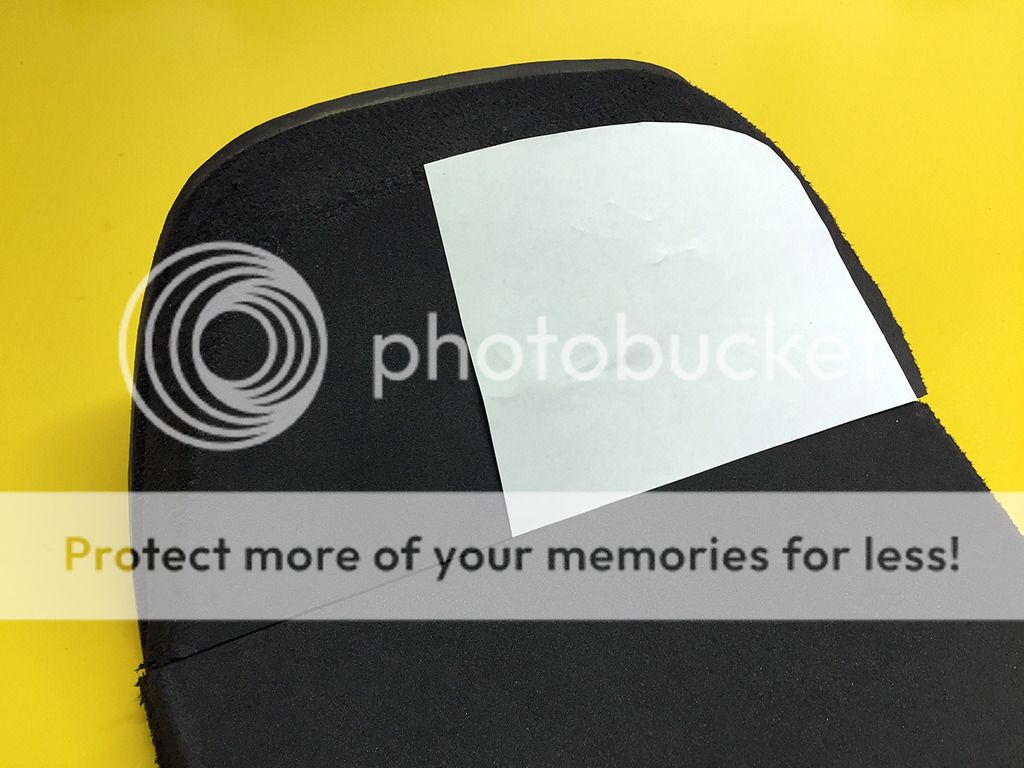
Worked the right side, then made quick template to work from making sure everything is symmetrical.
Goosifer said:Great stuff, looking awesome!
I'm really interested to see what impact 3D printing has on the bike modding community.
Goosifer, I think its just another weapon you can put into your tool set. It definitely requires another skill set wrt to CAD and 3D modelling, and the technology is still in the development stage. So early adoption means putting up with a fair amount of imperfection if you're using hobbyist / semi pro tech (like I am).
As you can see I've had to do a some finishing due to warping:
dewjantim said:Damn Dale..... this sure has turned into a high tech job. Looking great too........
Here's some low tech for ya:
SEAT PAD
Had some race seat hi density foam lying around. Doubled it up for the desired thickness.
Was originally going to make the seat pan out of aluminium plate, but I was thinking that a wooden base for the pan might be more comfortable? Could be way off here, but that was my gut feel.
Im not too concerned about weight. This is going to be a commuter.
Need to compensate for the thickness of the leather between the seat base and the padded section. There will be a fair amount of compression, and 2.5mm will not be the final gap distance, so will be working to roughly half that. This will affect things as there are two axis to take into account here with multiple angles, and I want everything to to flush once its all covered.
Matching up lines.
Worked the right side, then made quick template to work from making sure everything is symmetrical.
Man, that is some spectacular work! Your bike has to be one of the truly most difficult (awkward?) body styles to sync up with, and that tail section looks fantastic. I have a lot of respect for a craftsman that is willing to be dissatisfied with something he has put a great deal of time into and start fresh to get it right. Absolutely love the attention to the functional and mechanical aspects as a starting point and taking that into the aesthetic you want. That aluminum section is going to look gorgeous. I have to say I really hated the round tail light at first but it has really grown on me. Nice blend keeping the angular nature of the tank and merging to the perfectly round light. I did notice that the seat looks too narrow right where it meets the tank - seems like it would be pretty easy to match the hard and soft parts of the assembly with the shape of the tank at the front and blend straight back to what you have into the back. Could just be the pics though - I know things often look a bit different walking around them and often you take pictures from angles that you never experience in life. (EDIT) Scratch that- backed up and took another look at the previous pics - looks great. Hope you will arc the front of the padding to match the tank though!
The seat itself looks great too, but consider the edges where the foam becomes the Masonite if you haven't already. Sometimes when you stretch the covering over the softer foam it will compress and reveal the edge of the hard base under it. Makes a dreadful wear point too. Maybe taper that edge down a bit and round it off where it matches up to the foam as a precaution. Makes it look bad without the cover, but should be invisible when covered. I also cover seats first with car headliner to help with this sort of thing. It is thick enough to "inflate" little imperfections but super soft and will compress super thin, so it does a lot of smoothing without adding any puffiness. I wrap it around all the edges and corners just like the cover will be. Over time anything wrapped against a hard surface tends to wear, and even the tiniest bit of padding under it helps immensely. It does add a little thickness you have to compensate for if you want the end result perfectly flush with the bodywork, but you have to do that anyway with just the cover as you know.
Also hoping you will paint your new bodywork rather than cover it - I think the bodywork should not be diminished by a cover but amplified with new paint! My $.02 - I am sure it will be great either way!
Really great work!
Dale
Coast to Coast
Well that is high praise coming from you! Thank you!
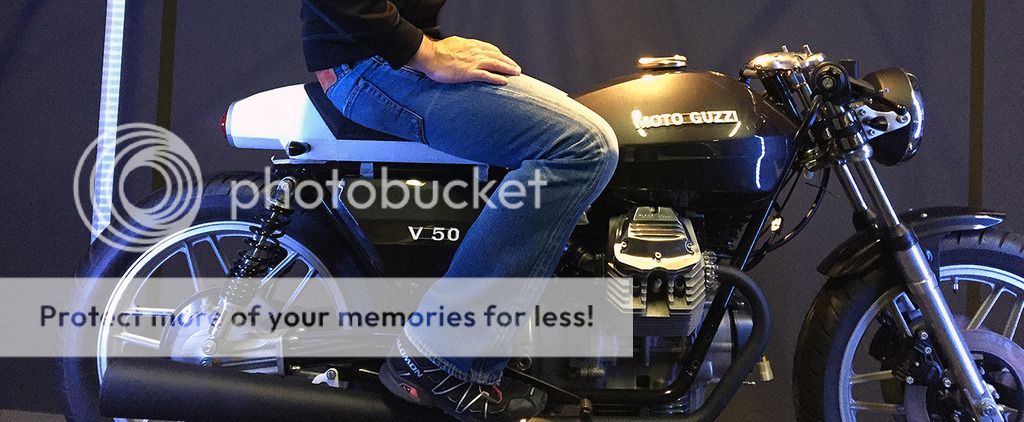
As for width, its at 220 mm at the rear of the seat, and it feels pretty comfortable for me.
Yeah, I'm pretty excited about cutting it. Wanting to hold off until I have all the parts designed I want to CNC cut, but might just do it soon anyway.
I guess the round light was just something I always thought I would use. If I had to be totally objective, a rectangular light would probably have been a more synchronous choice.
Not quite following you? You mean give the top part of the padding, as it moves toward the tank, a subtle convex curve?
Yeah, (if that's what you're saying) that kind of detail would certainly change things from good to great.
Great advice! Thank you! I totally get what you're saying. DONE!
Right! Yeah I remember my dad doing stuff like that. I had forgotten about this. Again - Awesome! Great advice! On my shopping list.
Oh I hate you for that!
Man had a look at it, and having paint on that shape will make it pop so nicely.
Having to buy more paint, and twist my buddy Mario's arm to paint it for me (he painted the tank, fender and side covers for me - about 3 year ago I think) would take a lot of time and effort.
It *would* look better. You're totally right. But I just don't think I'm gonna go down that route for the above reasons.
I'm also always going to think about that every time I look at it! Ha Ha.
Thanks for taking the time to give me some great feedback. Its hugely appreciated.
As for width, its at 220 mm at the rear of the seat, and it feels pretty comfortable for me.
jpmobius said:That aluminum section is going to look gorgeous. I have to say I really hated the round tail light at first but it has really grown on me. Nice blend keeping the angular nature of the tank and merging to the perfectly round light.
Yeah, I'm pretty excited about cutting it. Wanting to hold off until I have all the parts designed I want to CNC cut, but might just do it soon anyway.
I guess the round light was just something I always thought I would use. If I had to be totally objective, a rectangular light would probably have been a more synchronous choice.
jpmobius said:Hope you will arc the front of the padding to match the tank though!
Not quite following you? You mean give the top part of the padding, as it moves toward the tank, a subtle convex curve?
Yeah, (if that's what you're saying) that kind of detail would certainly change things from good to great.
jpmobius said:Sometimes when you stretch the covering over the softer foam it will compress and reveal the edge of the hard base under it. Makes a dreadful wear point too.
Great advice! Thank you! I totally get what you're saying. DONE!
jpmobius said:I also cover seats first with car headliner to help with this sort of thing.
Right! Yeah I remember my dad doing stuff like that. I had forgotten about this. Again - Awesome! Great advice! On my shopping list.
jpmobius said:Also hoping you will paint your new bodywork rather than cover it - I think the bodywork should not be diminished by a cover but amplified with new paint! My $.02 - I am sure it will be great either way!
Oh I hate you for that!
Man had a look at it, and having paint on that shape will make it pop so nicely.
Having to buy more paint, and twist my buddy Mario's arm to paint it for me (he painted the tank, fender and side covers for me - about 3 year ago I think) would take a lot of time and effort.
It *would* look better. You're totally right. But I just don't think I'm gonna go down that route for the above reasons.
I'm also always going to think about that every time I look at it! Ha Ha.
Thanks for taking the time to give me some great feedback. Its hugely appreciated.
Right, in the one shot it looks like the tank has a body line across the back that the seat looks like it should match up to.Dale said:Not quite following you? You mean give the top part of the padding, as it moves toward the tank, a subtle convex curve?
Yeah, (if that's what you're saying) that kind of detail would certainly change things from good to great.
Dale
Coast to Coast
jpmobius said:Right, in the one shot it looks like the tank has a body line across the back that the seat looks like it should match up to.
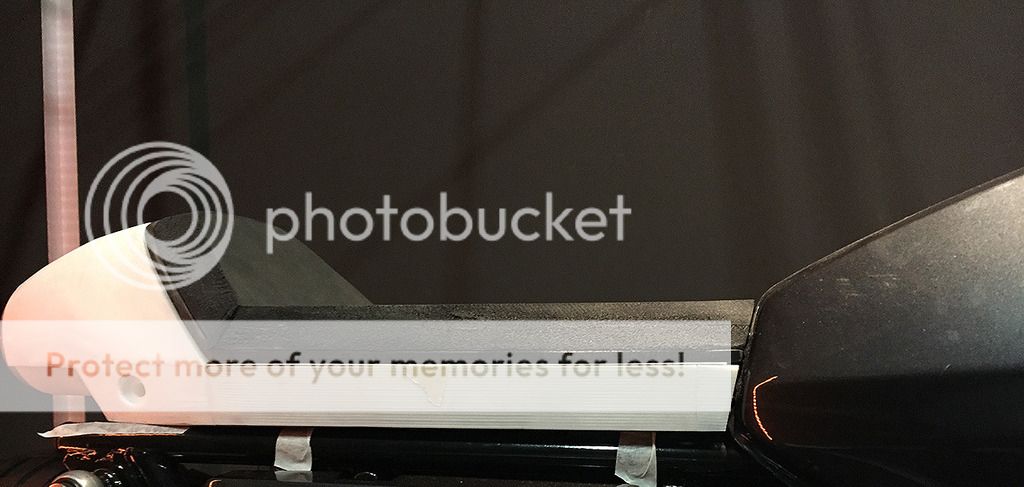
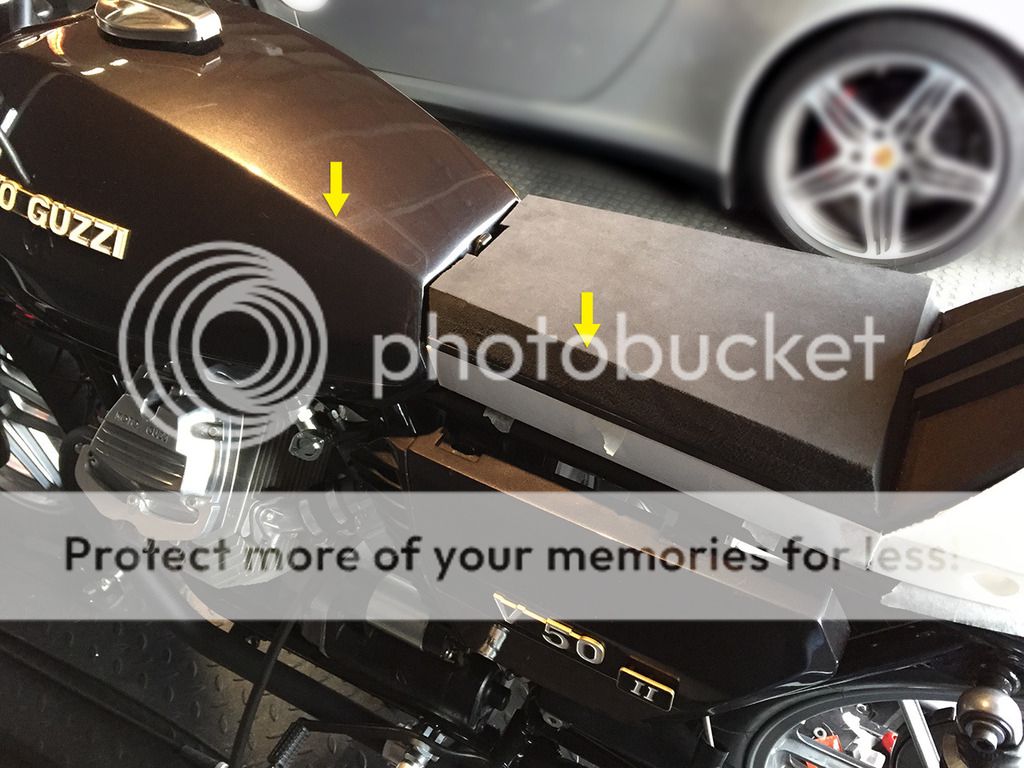
You talking about this section? Tried to shoot it as accurately as possible.
Actually no. See pic. I realize this is the older version, but the new one looks flat here too, though the foam is a lot higher. I would however, want that horizontal bodyline on the side of the tank (your last pic) to align very accurately with those on your seat, otherwise it will look like your seat in not bolted on right. Something else occurred to me too which is the very straight body lines of the seat between the tank and cowl. The body lines on the tank and your cowl would seem perfectly straight when viewed from the correct vantage point, but they are actually the intersection of very gently arced panels which are themselves not flat but just barely compound curves. If you make the straight sides of your seat "bow" very slightly I think you will get a much more matching look to the factory Guzzi tank. Harder to do than it might seem at first. Lots of very subtle things to match. For example, the tank has some pretty hard creased edges making its shape, but actually those edges have a small but distinct radius. Matching that with your new bodywork will go a long way toward making your parts look like they were OEM. I know this may be splitting hairs, but you are putting so much into it I though I would mention it.
Again, I realize that things very often look different in real life, all I have is a static picture. I know from my own work that when you are working on and looking at something every day, you get used to how it looks and sometimes fail to notice something. Just trying to offer a "less contaminated" set of eyeballs!
Again, I realize that things very often look different in real life, all I have is a static picture. I know from my own work that when you are working on and looking at something every day, you get used to how it looks and sometimes fail to notice something. Just trying to offer a "less contaminated" set of eyeballs!
Attachments
Dale
Coast to Coast
Right, yeah the new seat certainly matches up WAY better than the old mock-up.
Gotcha on the top padding piece being convex to match the tank. That's what I thought you meant earlier - yeah Man you're keeping me on my toes! I appreciate it! :-D "Fresh eyes" as they call it.
With the new seat, the curvature (convex shape) is only about 4-5 mm in the center, so its pretty subtle, and I'm thinking soft sponge will do it? With the leather covering compressing towards the outer edges (left and right) forming a convex curve? What do you suggest?
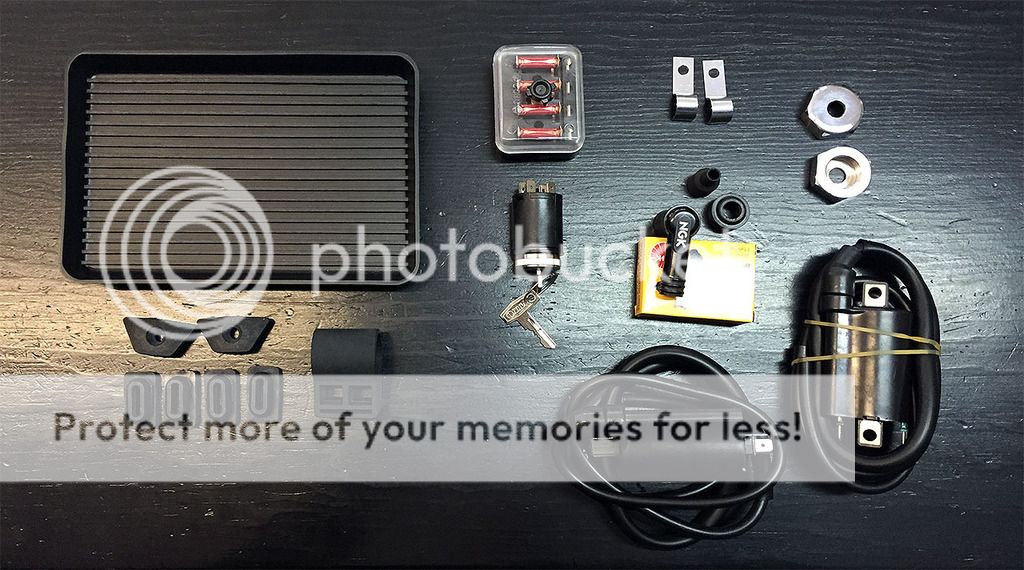
In other news: Got what is probably one of my final component purchases on this project: Some fresh rubber, fresh coils, correct ignition switch etc. Glad that at my age I still can get excited at opening a box. Ha ha.
Gotcha on the top padding piece being convex to match the tank. That's what I thought you meant earlier - yeah
Man you're keeping me on my toes! I appreciate it! :-D "Fresh eyes" as they call it.With the new seat, the curvature (convex shape) is only about 4-5 mm in the center, so its pretty subtle, and I'm thinking soft sponge will do it? With the leather covering compressing towards the outer edges (left and right) forming a convex curve? What do you suggest?
In other news: Got what is probably one of my final component purchases on this project: Some fresh rubber, fresh coils, correct ignition switch etc. Glad that at my age I still can get excited at opening a box. Ha ha.
- Moto Guzzi Rubber Battery Tray
- New Coils
- Flasher holder
- Ignition Switch
- Correct Fuse box with clear cover (I had a black cover version)
- Swingarm piviot nuts (lost part while in storage)
- Spark Plug Cap
- Body rubbers (lost)
You may be right on the cover. My preference is generally to make the foam padding the exact shape I want in the end, but usually my cover is really stretchy vinyl so it only minimally changes the foam shape. Plus, my seats also usually have a more amorphous shape that yours does so the cover tend to not distort the foam's shape very much. You can always just test stretch some cover material over it as a simulation which might help steer you in the right direction. Hey, when all your parts are prototypes, you are doomed to having to guess a lot about the results of the manufacture and assembly. Factories just do another iteration to work out the unforeseeable bugs, but working independently, there is a limit to how many iterations you can do if you ever want to ride the thing!
When I was a kid, ordering anything was the worst torture possible - having to wait who knows how long for it to arrive. Now it is the opposite. I often forget or at least get sidetracked and when a box is delivered, it's like Christmas!
When I was a kid, ordering anything was the worst torture possible - having to wait who knows how long for it to arrive. Now it is the opposite. I often forget or at least get sidetracked and when a box is delivered, it's like Christmas!
Dale
Coast to Coast
@jpmobius: Congrats on the BOTM! Joey and yourself put out two amazing machines!
K, not a big update, I've been really busy at work the last couple of weeks, but I'm trying not to loose too much momentum. If that happens, it will be another two years before I work on this thing again
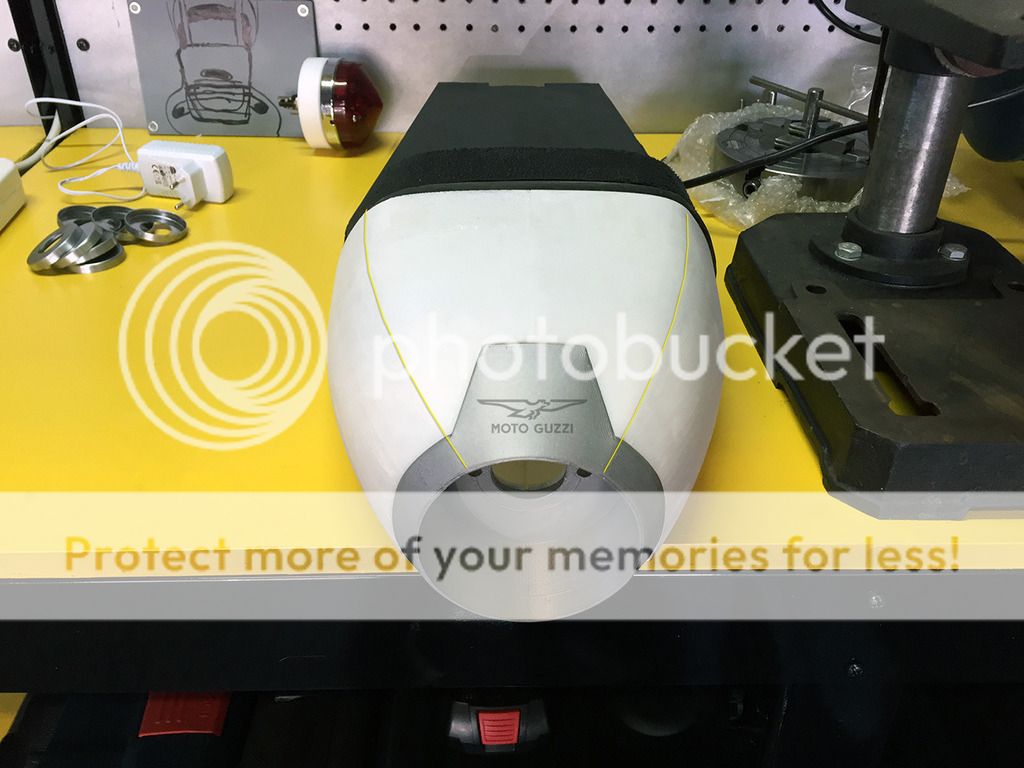
I pinched the profile of the taillight rim to echo the lines of the tank more, and did a 12 mm segment - roughing, finishing and contour pass - of the piece in some MDF board. Hoping to get some alu next week. Also considered etching a MG logo into it.

Cleaned up the coil hangers and mounted it to the frame:
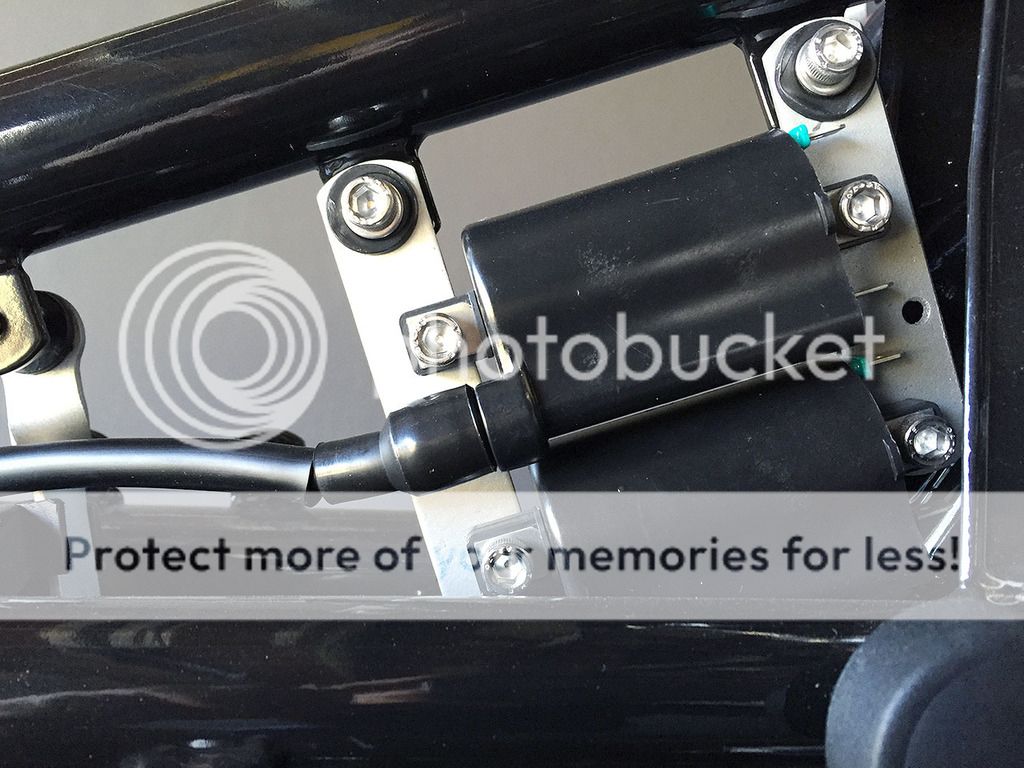
Now I need to motivate myself to start the wiring!
K, not a big update, I've been really busy at work the last couple of weeks, but I'm trying not to loose too much momentum. If that happens, it will be another two years before I work on this thing again
I pinched the profile of the taillight rim to echo the lines of the tank more, and did a 12 mm segment - roughing, finishing and contour pass - of the piece in some MDF board. Hoping to get some alu next week. Also considered etching a MG logo into it.
Cleaned up the coil hangers and mounted it to the frame:
Now I need to motivate myself to start the wiring!
Dale
Coast to Coast
Thanks everyone for the input.
I've been at it for over a year now with this machine, and I'm still learning every day. Its been a steep (and expensive - read "breaking" stuff) learning curve. Its really exciting and challenging though, and I'm loving what I'm starting to be able to do with it!
Yeah, definitely!
Yeah, long time! Thanks for the nudge. Havent been on the forum for a long time, and truthfully, haven't worked on the Moto Guzzi for some time either.
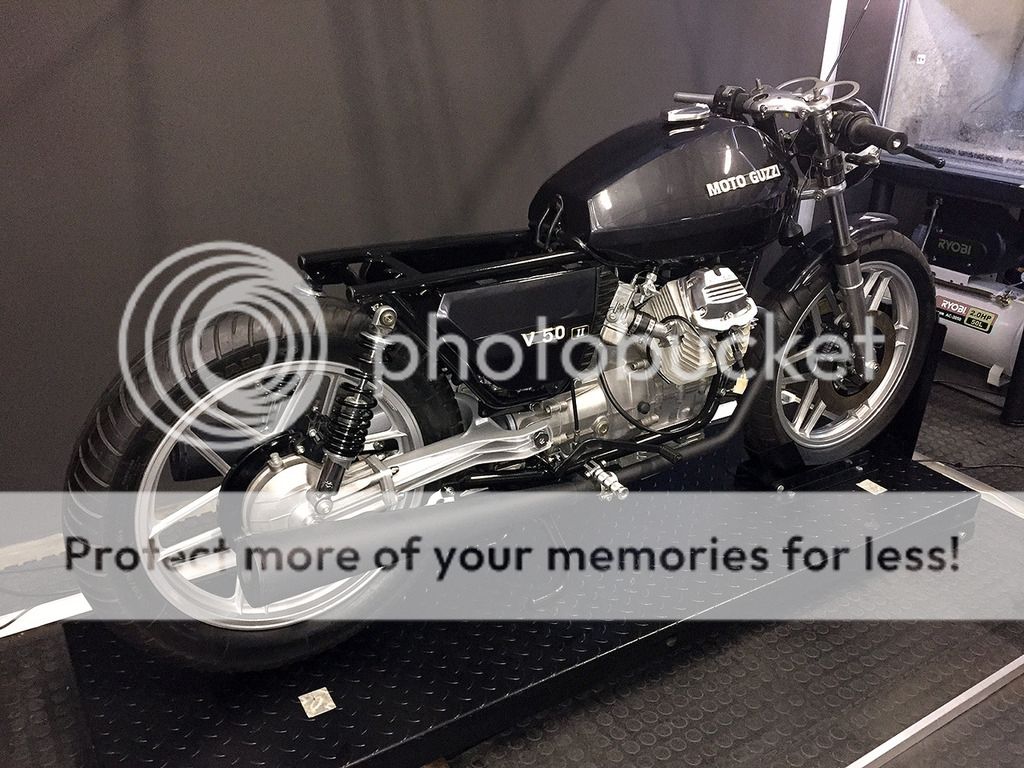
I did have a light bulb moment recently though, and that was returning the swing-arm to a natural aluminum color as opposed to the black.
I'm really nor sure why I chose to make it black when I started out with with project. The black breaks the visual continuity from the motor through to the wheel hub.
Look at the difference:
.... and then ... looking at it with fresh eyes, decided I didn't like the seat I made a couple of months back anymore...!!
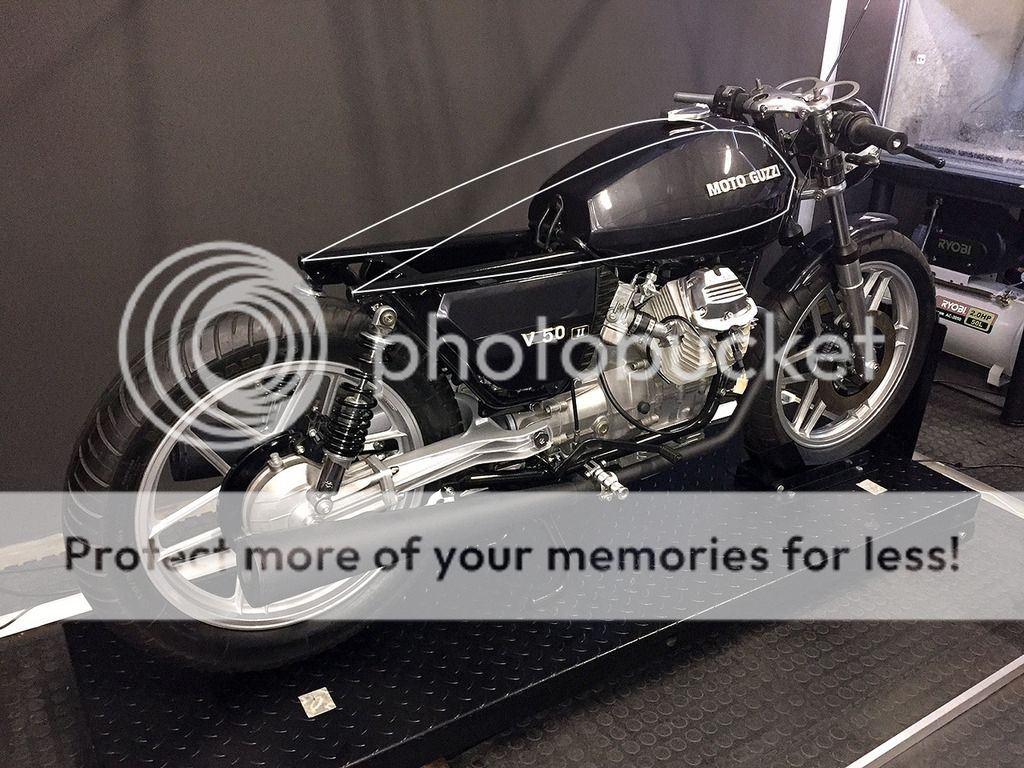
This teardrop shape has a real deco feel to me. I think I'm going to redesign the seat to fit into this kind of silhouette instead.
crazypj said:OMG
I'm really envious of someone with that equipment plus the skills to use it 8)
That seat/ tail light is fantastic, particularly when you get the M-G etched in
I've been at it for over a year now with this machine, and I'm still learning every day. Its been a steep (and expensive - read "breaking" stuff) learning curve. Its really exciting and challenging though, and I'm loving what I'm starting to be able to do with it!
J-Man said:+1
Etched will be a nice little detail.
I'm looking forward to the finished bike.... As are I'm sure.
Yeah, definitely!
v-pilot said:Hi Dale, glad to see you picked it up again. I haven't been here in a while as my favorite builds all seem to have stalled. The new tail section looks great BTW. Don't lose the momentum!
Yeah, long time! Thanks for the nudge. Havent been on the forum for a long time, and truthfully, haven't worked on the Moto Guzzi for some time either.
I did have a light bulb moment recently though, and that was returning the swing-arm to a natural aluminum color as opposed to the black.
I'm really nor sure why I chose to make it black when I started out with with project. The black breaks the visual continuity from the motor through to the wheel hub.
Look at the difference:
.... and then ... looking at it with fresh eyes, decided I didn't like the seat I made a couple of months back anymore...!!
This teardrop shape has a real deco feel to me. I think I'm going to redesign the seat to fit into this kind of silhouette instead.
Wow, that teardrop shape would be pretty cool! But I'm thinking that would propagate yet another seat/tail section redesign. Lots of work, but I can get behind it - some of the most excellent projects I've ever seen are a consequence of the builders refusal to say "I'm not changing it, I've got too much time in it already". Better to change it until you are happy with it.
Dale
Coast to Coast
Thanks jpmobius - so many builds have come in and gone out of my little workshop since starting this project in late 2010. I guess the main reason is that it's "my" motorcycle. And I've not compromised on it as I've gone along. When I don't feel like working on it I dont. There's no rush.
And to everyone who's emailed me over the years, commented and watched this thread:
Happy New Year!
Here's to 2016 - the year it all happened!
And to everyone who's emailed me over the years, commented and watched this thread:
Happy New Year!
Here's to 2016 - the year it all happened!
fingerprince
New Member
Hi Dale,
I'm a big fan of your work. Just a thought. Wired wheels would look amazing on your project. Maybe the Guzzi Nevada wheels will match, if you put the rear brake disc on the left side.If you fancy the thought, maybe I can be of any help. I'm building a cafe racer from a '95 V75 PA TN.
Keep up the good work,
cheers
papercutout
New Member
I've only just stumbled across this and joined the forum to say you've done a fantastic job! I can't wait to see what you do with the rear seat... Although it's bloody well taking you forever! I found your thread because I'm looking at a V50 II atm, and am searching for problems with them, mods, and what to do. I sincerely hope it's in better condition than yours was!
Fingerprince is right. Wire wheels in straight matt black look amazing, but they're probably a pain to change on something with shaft drive - still, you have lots of new toys!
Fingerprince is right. Wire wheels in straight matt black look amazing, but they're probably a pain to change on something with shaft drive - still, you have lots of new toys!
Dale
Coast to Coast
fingerprince said:Hi Dale,
I'm a big fan of your work. Just a thought. Wired wheels would look amazing on your project. Maybe the Guzzi Nevada wheels will match, if you put the rear brake disc on the left side.If you fancy the thought, maybe I can be of any help. I'm building a cafe racer from a '95 V75 PA TN.
Keep up the good work,
cheers
Hi there, welcome to the forums. Thanks for the interest and the ideas. Yes I agree, wired wheels would look great. They always do.
I have to say though, I really love these high profile skinny cast wheels. They certainly give the motorcycle a definitive late 70's look. Going wire would give the machine an earlier look IMO. I love the 70's era of design, and the wheels are one of the features of this motorcycle that I really love
papercutout said:I've only just stumbled across this and joined the forum to say you've done a fantastic job! I can't wait to see what you do with the rear seat... Although it's bloody well taking you forever! I found your thread because I'm looking at a V50 II atm, and am searching for problems with them, mods, and what to do. I sincerely hope it's in better condition than yours was!
Fingerprince is right. Wire wheels in straight matt black look amazing, but they're probably a pain to change on something with shaft drive - still, you have lots of new toys!
Yup, this project has really been dragging. Im cool with it though. Its my "inbetween building other bikes project" :-D Every now and again I get all inspired to work on it. And then it gets packed away again. Ive gone slowly with this little bike, as Ive really tried to not compromise on it along the way. Its one of my projects that I intent to never sell. So its kinda special to me. The result has been, well, yes 6 or so years :-/. Ok, wait, you're right. This has taken way too long ! Ha ha.


