Follow along with the video below to see how to install our site as a web app on your home screen.
Note: This feature currently requires accessing the site using the built-in Safari browser.
We noticed you are blocking ads. DO THE TON only works with community supporters. Most are active members of the site with small businesses. Please consider disabling your ad blocking tool and checking out the businesses that help keep our site up and free.
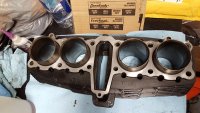
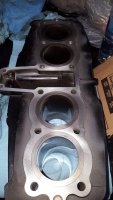
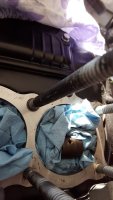
So, if you've been following along, you know I've been chasing down the cause of an oil leak. Ultimately discovered the suspect head stud was pulling the threads from the engine case, hence why it wouldn't torque properly. See attached pic of the threads still attached to the stud when I pulled it out.
No way to fix that except for tearing down the motor, so out it came again from the frame. And she is now all in pieces again. Will repair the threads with a Time-Sert.
Plan is to do a few things while it is apart:
-- new piston rings, and hone the cylinders
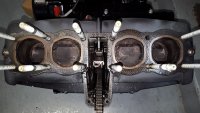
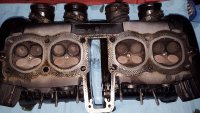
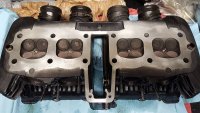
-- mill the head to make sure it is level and bump compression a tad
-- new valve guide seals
-- full gasket set
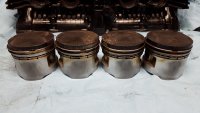
-- clean pistons and combustion chambers of carbon build up
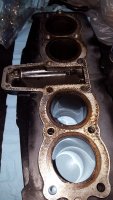
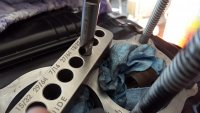
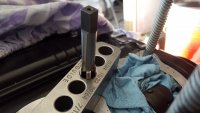
Successfully installed the Time-Sert today with the help of my wife as an extra set of hands.
I was pretty concerned about getting the hole drilled nice and square/true. Because of this, I searched around for different types of drill guides and ended up getting one of the Gator units off Amazon. It is a quality piece and I believe it really aided me in getting this install done right the first time.
https://www.biggatortools.com/products.html
My wife held the guide straight and in place for me while I carefully drilled the hole. After that, I used the guide to also start the tap to make sure it went in straight as well.
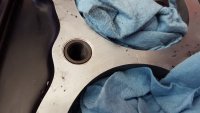
I installed a 20mm insert as advised by Genesound I believe it was. Everything ended up looking real good in the end. The stud installed is as true as any of the other existing ones.
Important Queston: When installing the stud into the case, should I use any kind of thread lock and what should it be torqued to?
you need a precision ground bar/straight edge to check a suface you cant do it with a ruler
feeler gauges are the only other tool needed for a quick initial assement
it almost looks like you used a scotchbrite grind/sand buffer on the head surface, please say it isn't so
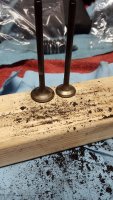
as far as slapping valves it really is a hugely abused/overused process you cannot "renew" or repair valves and seats with slapping
and really it should only be done very lightly an time it is done
the concern is getting the seats overly wide we get some idea by looking at those slapped valves of yours which look awfully wide but the actual contact width should be verified with prussion blue or some kind of color witness chalk, saharpie etc can do it
did you check the valve stem to guide clearance ? it is tedious and you need a dial indicator but it is impossible to verify these critical servive specs/limits with the engine back together
now is the time
You only really want to look at that stuff if you have the funds to fixit Otherwise, do what is nesessary to get it back on the frame and ride the pizz out of it... I will break again and you'll have another whopertunity.
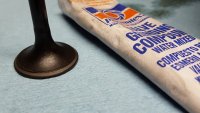
-- The lapping was done lightly, just to remove minor pitting. I researched this quite a bit before doing it. It is fine to do this on these valves.
-- I did use a straight edge and feeler gauges to check the head.
-- Yes, I used a scotchbrite pad to clean up the head. Nothing aggressive, just to get the remnants of the gasket off.
-- No, I didn't check the value guides. Don't have the equipment or experience with this.
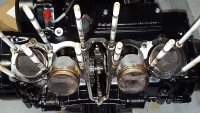
I'm not doing this to build up the motor. I'm just taking care of some things while it is apart. Not trying to go overboard. Biggest expense is going to be new, upgraded cam chain tensioner and guide. Another timely find the resulted from opening the motor was the discovery of the A chain tensioner beginning to fail.
I would have rather not opened the motor, but it was necessary. I'm confident it will go back together just fine.
What was you method for lapping the valves? How wide is the face of each? How wide is the margin? How about the seats? I'm just trying to learn. Maybe I don't know as much about this stuff as I thought.
Where'd you get your precision straightedge? I been looking for a New one thought maybe you could help me out.
This site uses cookies to help personalise content, tailor your experience and to keep you logged in if you register.
By continuing to use this site, you are consenting to our use of cookies.