
We noticed you are blocking ads. DO THE TON only works with community supporters. Most are active members of the site with small businesses. Please consider disabling your ad blocking tool and checking out the businesses that help keep our site up and free.
You are using an out of date browser. It may not display this or other websites correctly.
You should upgrade or use an alternative browser.
You should upgrade or use an alternative browser.
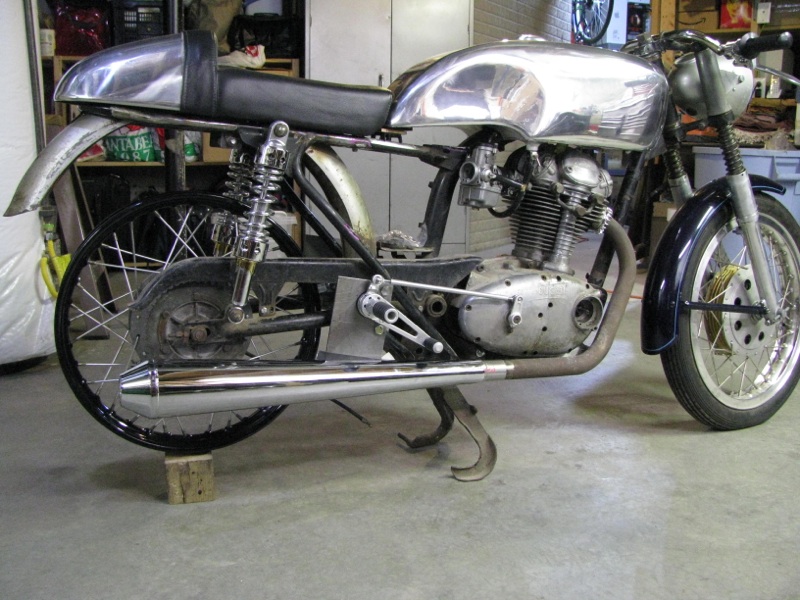
1966 Ducati 250 Monza
- Thread starter DesmoDog
- Start date
SeekingZero
Been Around the Block
Hey DD, I've got a question for you about the carb. Does yours have right-hand adjustments, or lefthand? Meaning, is the mixture screw on the right side or left? I would think right is more convenient since the carb is on the right side of the bike.
Just curious. I hope your build is coming along. I getting ready to start mine.
Just curious. I hope your build is coming along. I getting ready to start mine.
DesmoDog
Been Around the Block
SeekingZero said:Hey DD, I've got a question for you about the carb. Does yours have right-hand adjustments, or lefthand? Meaning, is the mixture screw on the right side or left? I would think right is more convenient since the carb is on the right side of the bike.
Just curious. I hope your build is coming along. I getting ready to start mine.
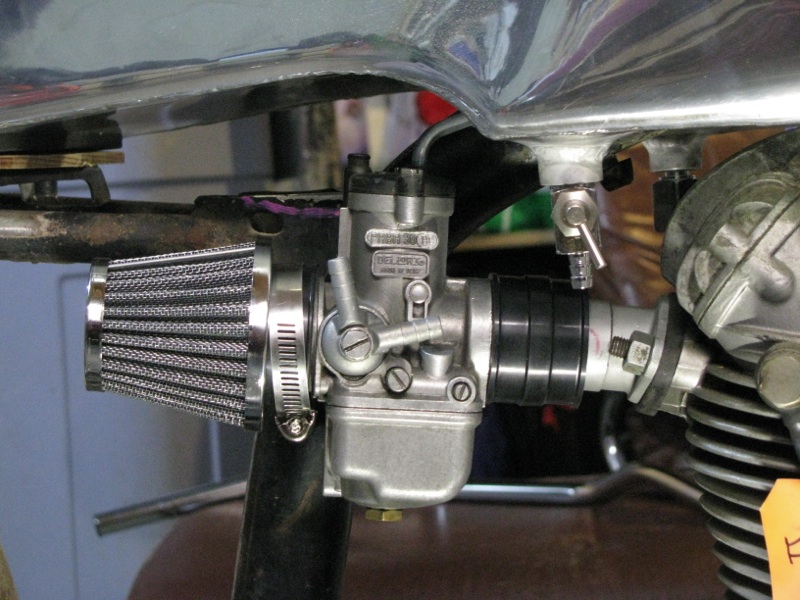
I don't remember off hand about the stock carb, but I'm guessing it's the same as on my 160 so it'd look a lot like this:
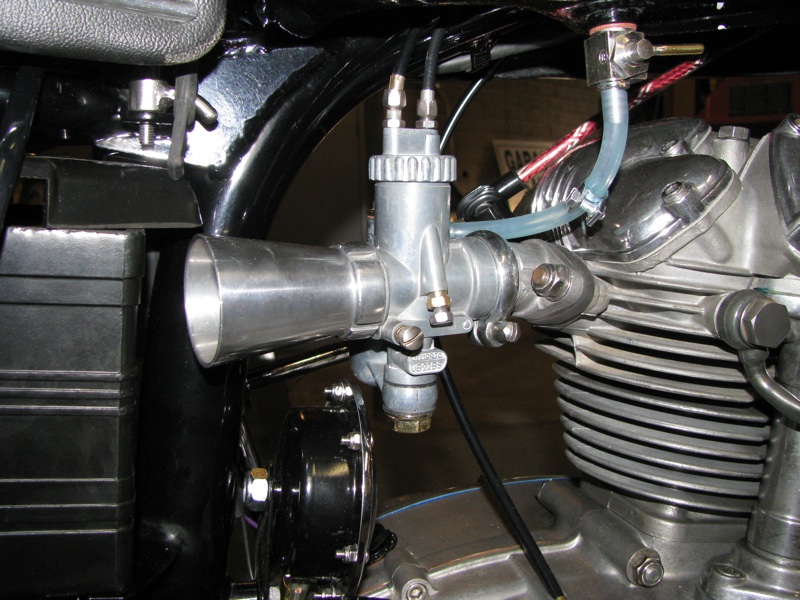
That is of course a smaller carb but the layout should be similar. As for the carb(s) I bought to put on this one, I have one of each so I can choose where I want the adjustment screws to go. IIRC they are off a 500cc Moto Guzzi? Or maybe that was the brake calipers (which obviously I decided not to use). I'm guessing you're asking because IIRC the carb Bevel Heaven sells is set up with the adjusters on the left side? I wondered about that too.
I mentioned the stock carb because I'm probably going to go with a stock engine for now. I may even use the 250cc it came with? I'm just trying to get this thing running at this point, it's been siting too long. Did I already mention this? Damn, I need to read my own thread once in a while.
As for progress, I did a repeat of the brake stay on the shift lever. I cut out the main shape, then went to add the bearing for it to pivot on. Drilled out the rough size hole with a hole saw, and used a reamer to bring it up to size to press fit the bearing. Eased my way up to the right size.. had it SO close but still needed to come up a little. I was running out of time, decided to take a little bigger bite than I had been, and... the bearing slipped in with finger pressure. D'oh! I can use it for mock up but will remake it for the final part. I could probably rebuild it just as quickly as repairing what I have so why bother. And I think I'm going to use bushings instead of bearings so I can use drills instead of reamers...
SeekingZero
Been Around the Block
The stock carb on the 250's was a Dellorto square slide VHB. They make the mixture screws on the right and left. I was just curious if you had one and what side yours was on.

SeekingZero
Been Around the Block
DesmoDog said:That wasn't the stock carb for the narrowcase bikes. Later widecase bikes used VHBs but they weren't around in 1966. I know some guys are using VHBs on narrowcase engines now, but I have two 30mm PHBH carbs I was going to choose from.
You are correct. It was the widecases in the 70's that had them, my mistake.
It looks like the SS1 was the most popular for these bikes in the 60's. I just got a VHB26FD for mine. Going to see how I like it.
DesmoDog
Been Around the Block
It's been a couple years since I've posted about this... mainly because I haven't gotten jack done on it lately. however, I HAVE started making progress again so here's a bit of a catch up as it were. This is all copied from other forums I post on so some of it might not make sense and those of you who frequent other sites may have seen it before...
****************************
I started working on rearsets for it but got tangled up in constantly changing my plan on them. Every time I thought I had something, I'd come up with something "better" and start over. I finally put them on hold and started working on other things.
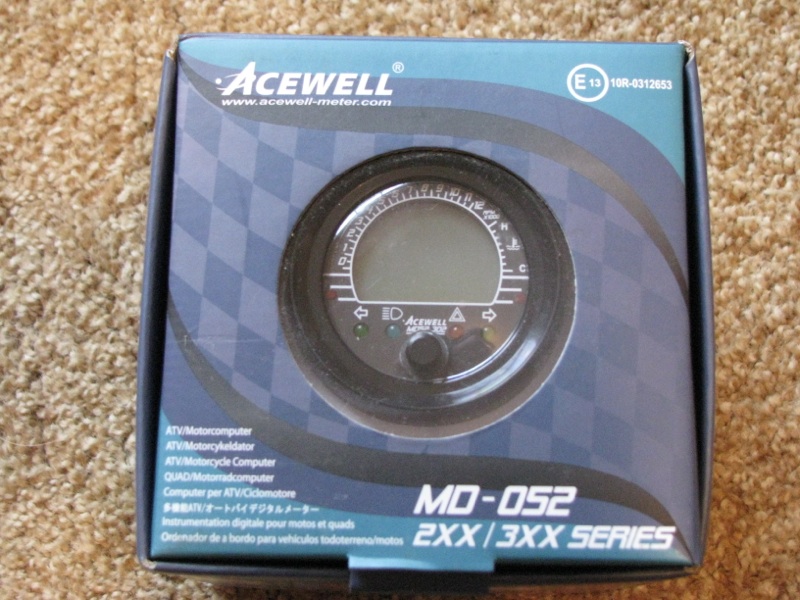
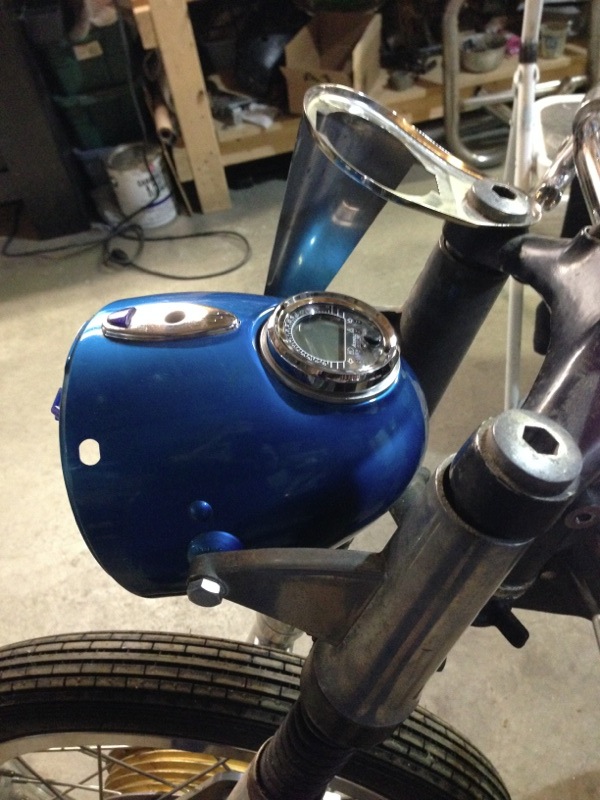
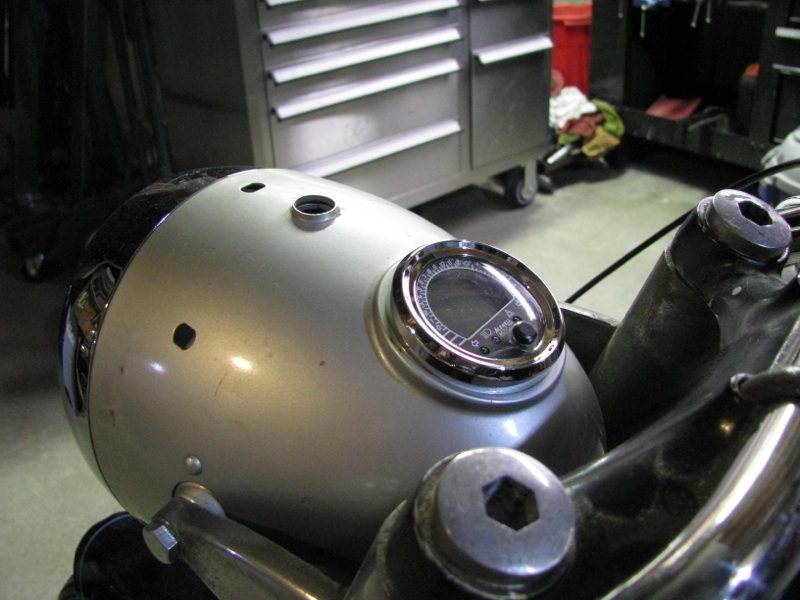
Since starting this I have dialed the plans back a few notches and instead of being an era-correct bike I'm now going to use modern parts in some places. For instance, Instead of buying the rest of the parts I needed to install the tach, I decided to find an electronic speedo/tach I could drop into the headlight shell. Enter Acewell. The only ones that seem to be sold in the USA right now don't lend themselves well to being stuffed into a Ducati headlight, but when I checked a British website for them I discovered two possible solutions. I couldn't find the dimensions to see if the larger choice would fit (and I'm not modding the headlight shell) so I decided to go with the smaller version. It's a little tidier anyway - they all offer a lot more features than I need/want, this one isn't so blatant about it though.
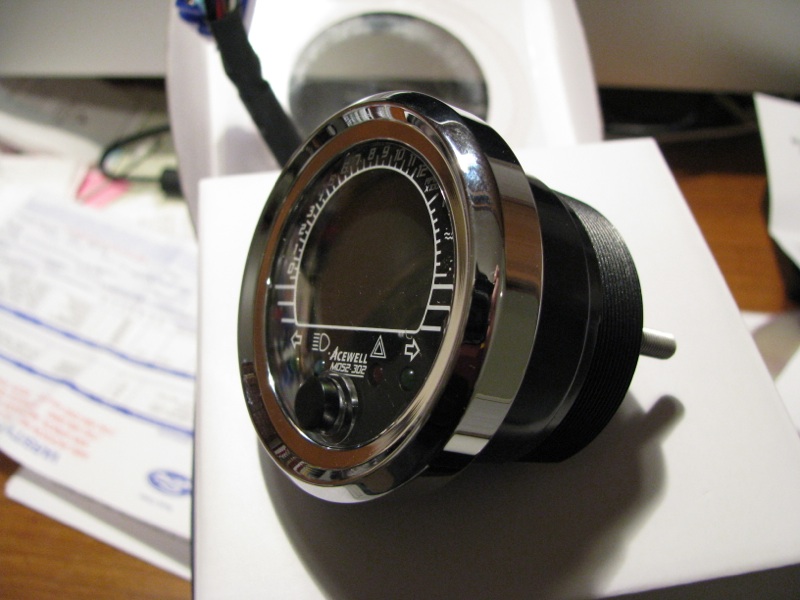
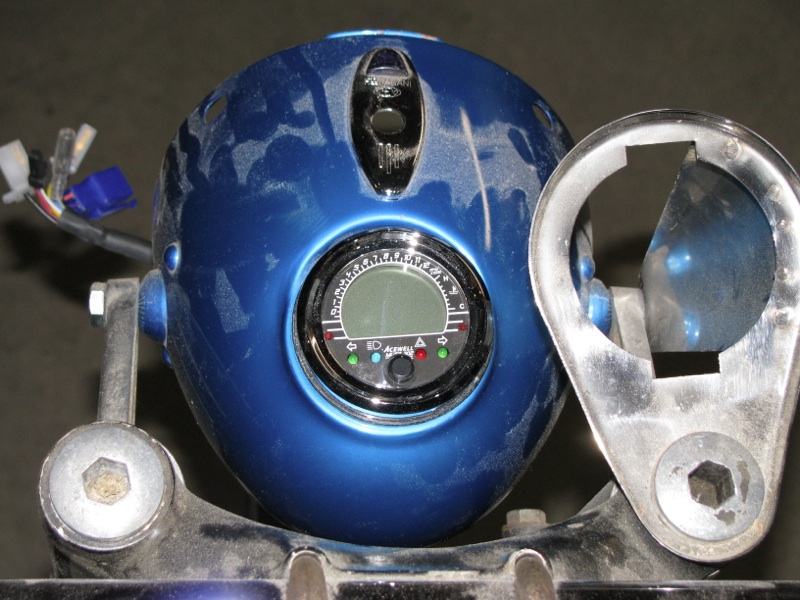
So here it is, an Acewell MD052-302. It's got a 52mm body so it will fit the 60mm hole in a Ducati headlight shell. I'll have to make a bushing to center everything up but it shouldn't be too big a deal. And now that I look at the catalog that was in the box, I see the larger version wouldn't have worked, so, nice guess on my part.
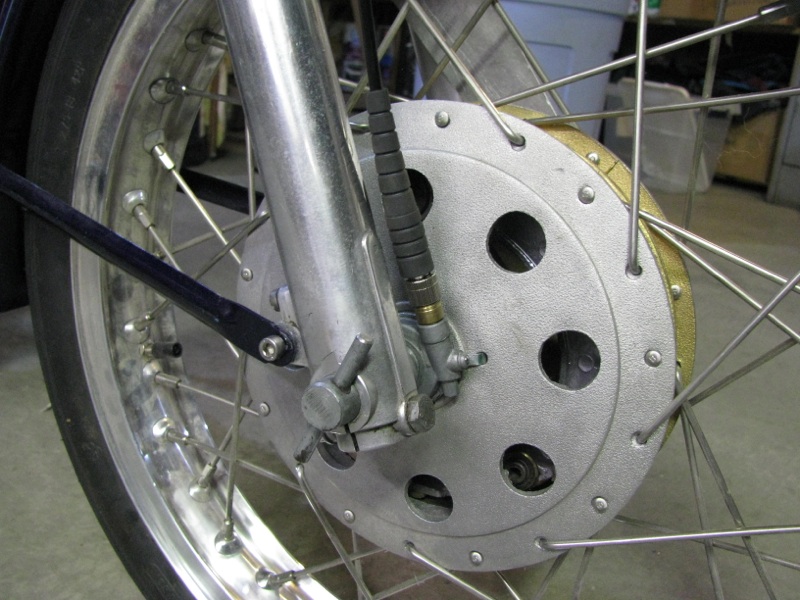
I got some goodies with it to help the fitment. First was the chromed bezel so it looks more like a stock part. I also got two different drives for it - the typical magnet sensor like on a bicycle speedometer, and one that screws onto a stock speedo drive. But as it turns out not a stock drive from the singles. I'll have to find a new drive or make the magnet set up work. EDIT - I've since learned this is incorrect. The sensor they list for a Ducati speddo WILL work on a singles front hub!
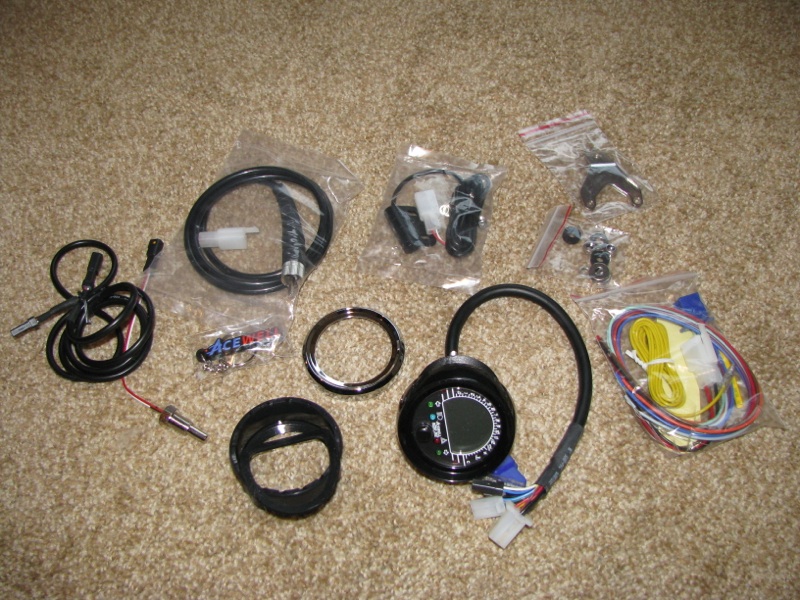
The stock plastic bezel was cracked. No worries, I wasn't going to use it anyway.
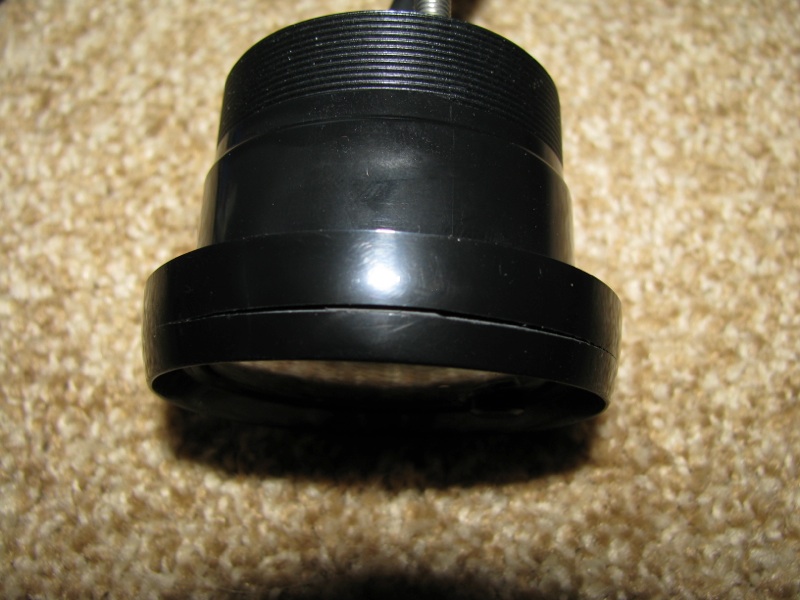
Just screw it off and replace it with this shiny one… um, er... Why won't if come off? It's cracked, it should be loose, not tight. Wait a minute.. is it glued on?
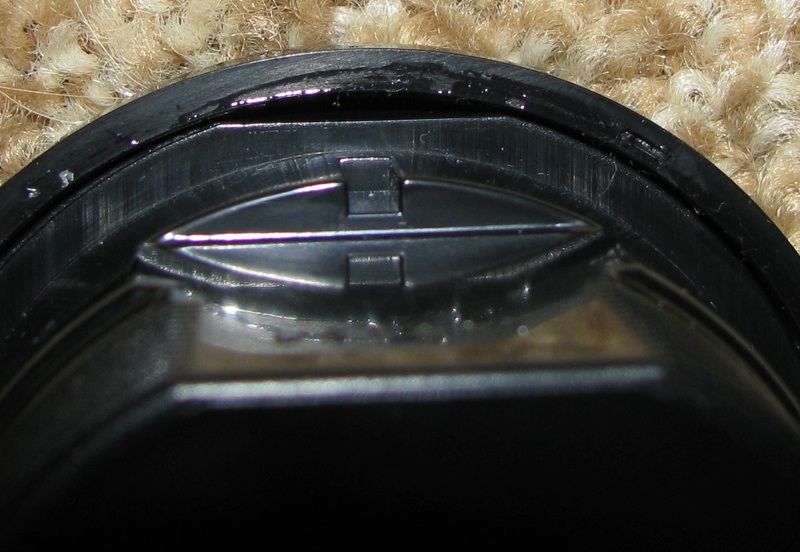
Not the best picture but I think the bezel got glued to the speedo body. I really don't want to send this back to England… I guess I'll send off an email to the seller but I'm pretty tempted to just cut the thing and try to peel it off the shell… it'd pretty much suck if that didn't work though. The bushing I'd need to make would become a lot more complicated anyway.
Looks like I own it now!
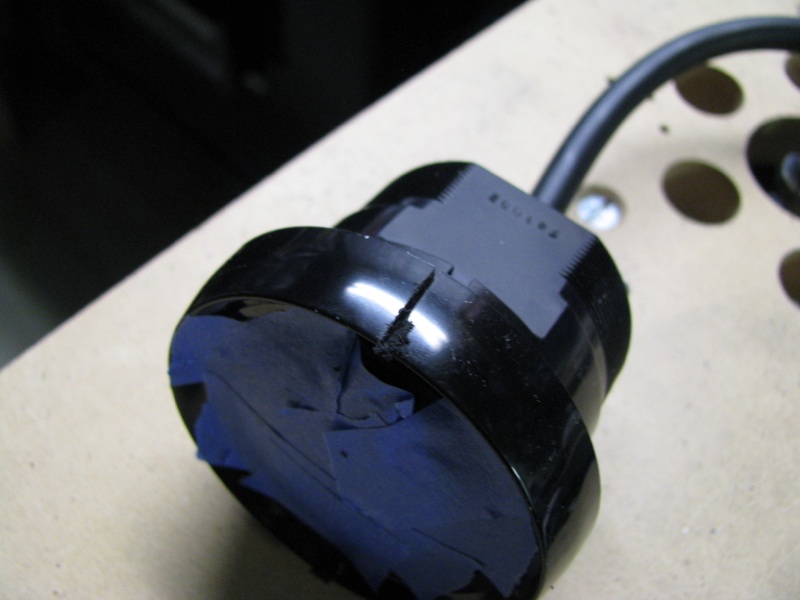
Success… though even with two cuts in the bezel it was still a pain to break loose. Before I tried this I was twisting so hard one of my arms is sore… which may say more about me getting older than anything else, but still. Anywhos, I think it was some sort of sealer that locked it all up, not glue. Which brings up the question of how the hell they expect people to separate these things without breaking something but that's moot now.

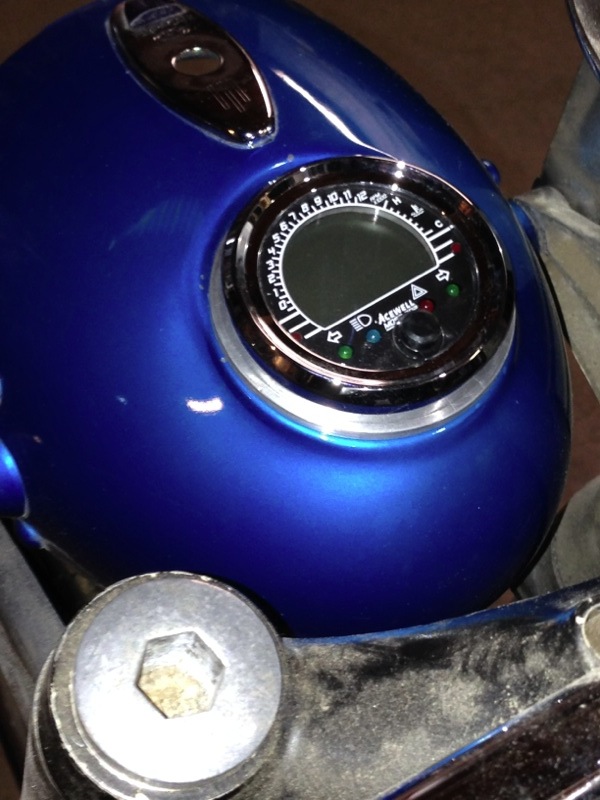
Ah yes, much more better.
I think if a guy put a little time into it he could come up with a vinyl face to make it look much more vintage, at least when there was no power going to it. Maybe a little Ducati logo on there? Hmm…
****************************
I started working on rearsets for it but got tangled up in constantly changing my plan on them. Every time I thought I had something, I'd come up with something "better" and start over. I finally put them on hold and started working on other things.
Since starting this I have dialed the plans back a few notches and instead of being an era-correct bike I'm now going to use modern parts in some places. For instance, Instead of buying the rest of the parts I needed to install the tach, I decided to find an electronic speedo/tach I could drop into the headlight shell. Enter Acewell. The only ones that seem to be sold in the USA right now don't lend themselves well to being stuffed into a Ducati headlight, but when I checked a British website for them I discovered two possible solutions. I couldn't find the dimensions to see if the larger choice would fit (and I'm not modding the headlight shell) so I decided to go with the smaller version. It's a little tidier anyway - they all offer a lot more features than I need/want, this one isn't so blatant about it though.
So here it is, an Acewell MD052-302. It's got a 52mm body so it will fit the 60mm hole in a Ducati headlight shell. I'll have to make a bushing to center everything up but it shouldn't be too big a deal. And now that I look at the catalog that was in the box, I see the larger version wouldn't have worked, so, nice guess on my part.
I got some goodies with it to help the fitment. First was the chromed bezel so it looks more like a stock part. I also got two different drives for it - the typical magnet sensor like on a bicycle speedometer, and one that screws onto a stock speedo drive. But as it turns out not a stock drive from the singles. I'll have to find a new drive or make the magnet set up work. EDIT - I've since learned this is incorrect. The sensor they list for a Ducati speddo WILL work on a singles front hub!
The stock plastic bezel was cracked. No worries, I wasn't going to use it anyway.
Just screw it off and replace it with this shiny one… um, er... Why won't if come off? It's cracked, it should be loose, not tight. Wait a minute.. is it glued on?
Not the best picture but I think the bezel got glued to the speedo body. I really don't want to send this back to England… I guess I'll send off an email to the seller but I'm pretty tempted to just cut the thing and try to peel it off the shell… it'd pretty much suck if that didn't work though. The bushing I'd need to make would become a lot more complicated anyway.
Looks like I own it now!
Success… though even with two cuts in the bezel it was still a pain to break loose. Before I tried this I was twisting so hard one of my arms is sore… which may say more about me getting older than anything else, but still. Anywhos, I think it was some sort of sealer that locked it all up, not glue. Which brings up the question of how the hell they expect people to separate these things without breaking something but that's moot now.
Ah yes, much more better.
I think if a guy put a little time into it he could come up with a vinyl face to make it look much more vintage, at least when there was no power going to it. Maybe a little Ducati logo on there? Hmm…
DesmoDog
Been Around the Block
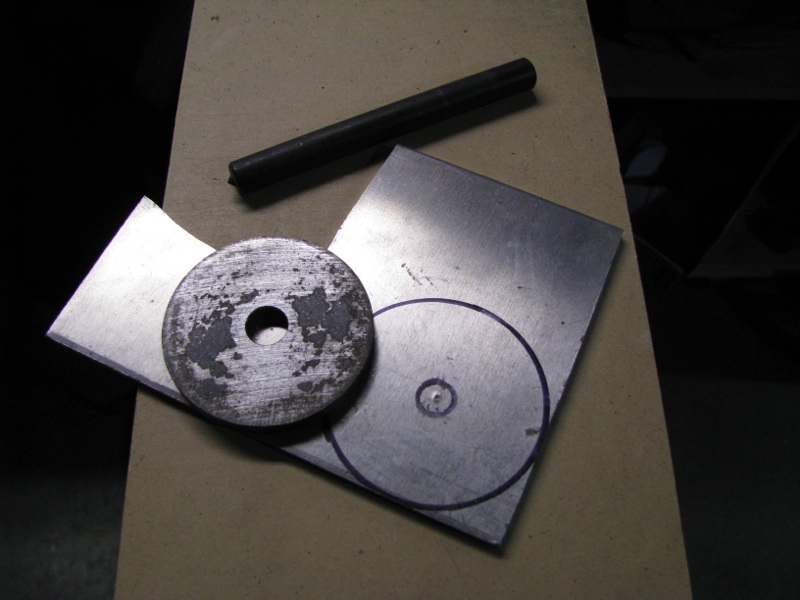
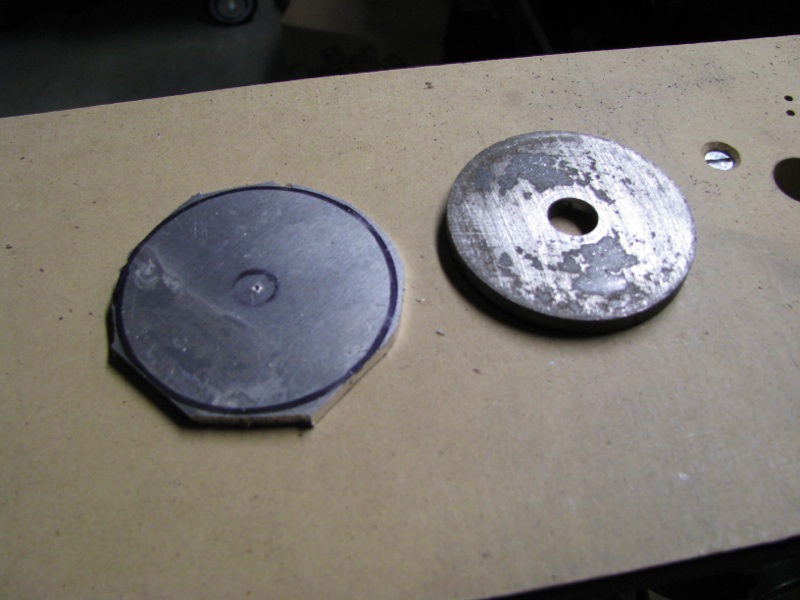
I started cutting a bushing out of aluminum to make the speedo fit the headlight shell, but before I finished it I gave some rough dimensions to a buddy who then printed one out on his 3D printer. The first one is out of cheap material just to see how it works, when I finalize the dimensions he'll make one out of some softer material for me so it has a little give to it.
A little tweak to the inner diameter and a test fit. Don't mind the tach mount on the right, it goes away now since the Acewell is a tach too.
Works like a champ. Except the headlight shell I used as a pattern doesn't match the one on the bike so the fit is a bit off… but that's nothing that can't be fixed in the final version. Good enough for mock up. Now on to working out a way to drive the speedo.
The next day I went downstairs to clean up the shop so it'd be easier to work on things. Got bored instantly. Instead I put a little more time into the aluminum insert.

This headlight shell will likely end up being painted silver. I'll probably just polish this up and use it as.
A little tweak to the inner diameter and a test fit. Don't mind the tach mount on the right, it goes away now since the Acewell is a tach too.
Works like a champ. Except the headlight shell I used as a pattern doesn't match the one on the bike so the fit is a bit off… but that's nothing that can't be fixed in the final version. Good enough for mock up. Now on to working out a way to drive the speedo.
The next day I went downstairs to clean up the shop so it'd be easier to work on things. Got bored instantly. Instead I put a little more time into the aluminum insert.
This headlight shell will likely end up being painted silver. I'll probably just polish this up and use it as.
DesmoDog
Been Around the Block
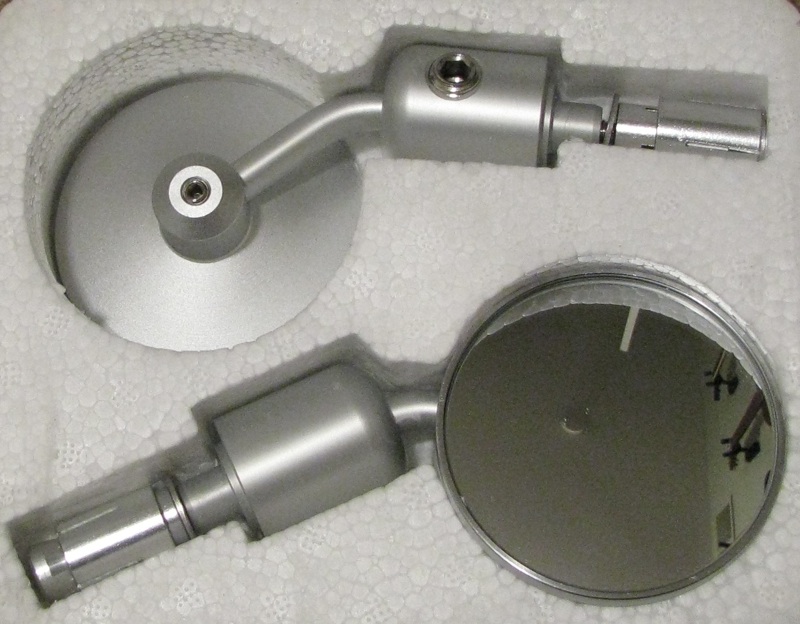
And more parts! I got these el cheapo mirrors off of eBay and I must say I'm pleasantly surprised by them.
And then another eBay find, I ran across a manifold I thought might work. I was dreading putting a manifold together for this thing, not technically difficult but one of those deals that would have delayed me for months. Ah, who am I kidding? Years even. It's the little things.
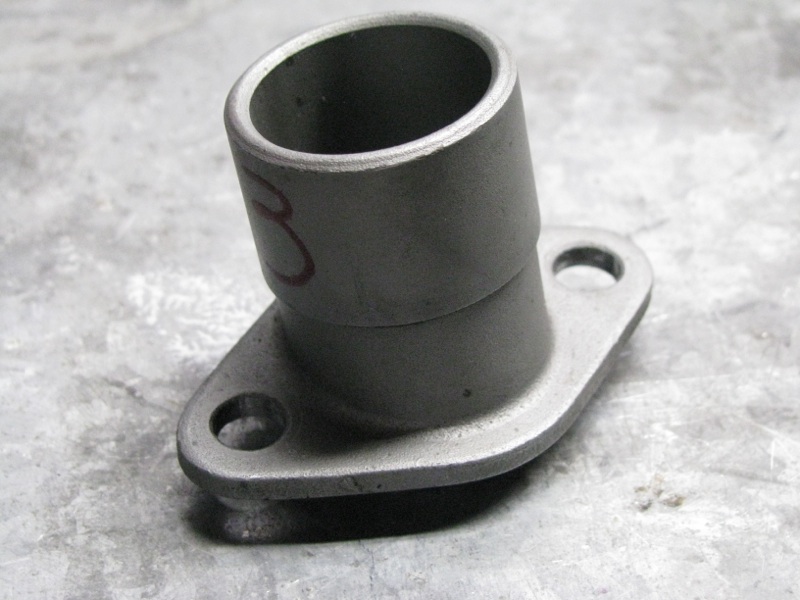
When that showed up it inspired me to buy the other stuff I'd need to mount it up. Clamps, hoses, choke lever, etc.
I know, nothing too exciting but at least I'm getting things checked off the list again. I'm really hoping there will be many progress updates to this thread in the coming months...
And then another eBay find, I ran across a manifold I thought might work. I was dreading putting a manifold together for this thing, not technically difficult but one of those deals that would have delayed me for months. Ah, who am I kidding? Years even. It's the little things.
When that showed up it inspired me to buy the other stuff I'd need to mount it up. Clamps, hoses, choke lever, etc.
I know, nothing too exciting but at least I'm getting things checked off the list again. I'm really hoping there will be many progress updates to this thread in the coming months...
DesmoDog
Been Around the Block
I mentioned the reasets earlier... I've been working on them literally for years and just going in circles spending time and money on ideas that didn't pan out. As it turns out, the answer to my multi-year gumption trap rear sets was to stop making things so f'ing complicated, get over having to use aluminum, and just bolt some steel plate on there. They aren't done yet but the basics are laid out and they will work just fine. I haven't cut the plate to shape yet since I was going to work the muffler mount into the shifter side (decided not to) and I still want to work a brake light switch into the brake side. I'm waiting for a few switches to show up for that.
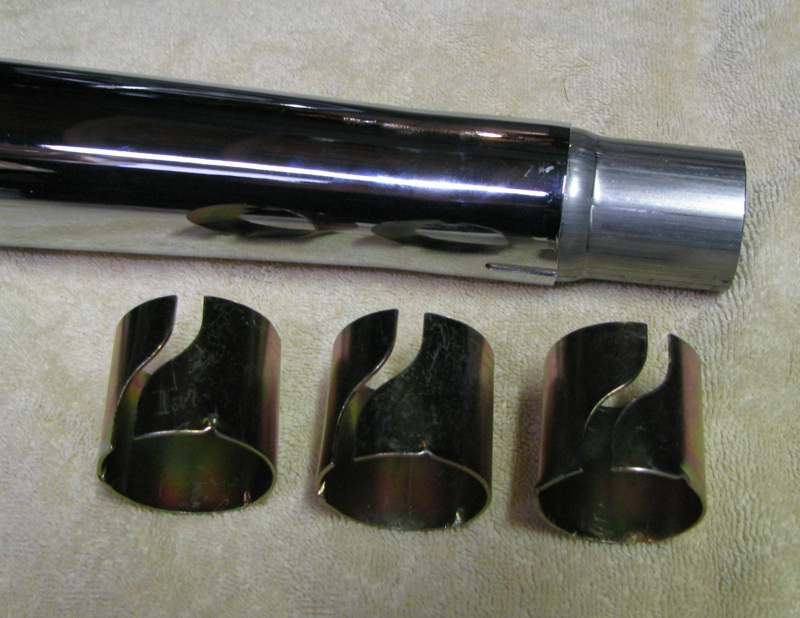
I also had some muffler adapters made up to go from a 45mm muffler to the 38mm pipe. The shims included with the muffler were trash, but then I expected that.
The pics:
POS adapters below. I'd need all three. No chance of an exhaust leak there! The new one is already slid into the muffler. Still needs to be slotted welded and polished.
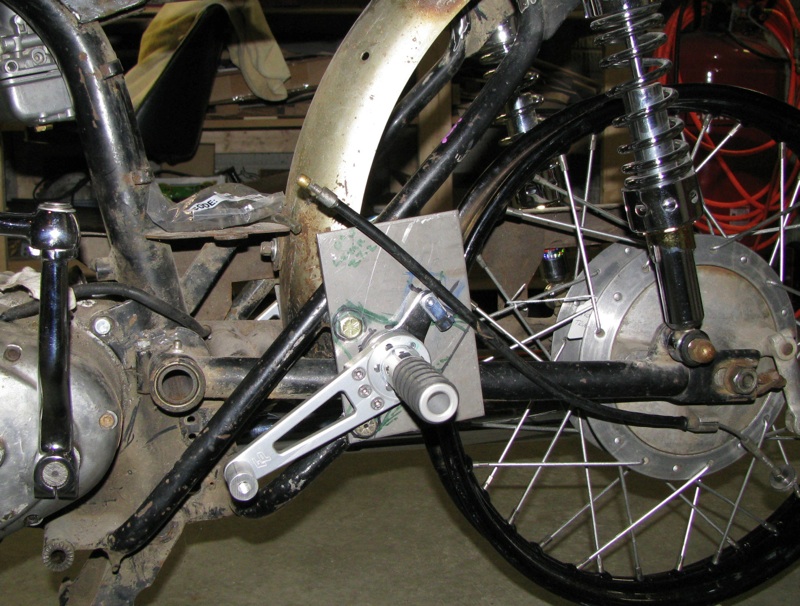
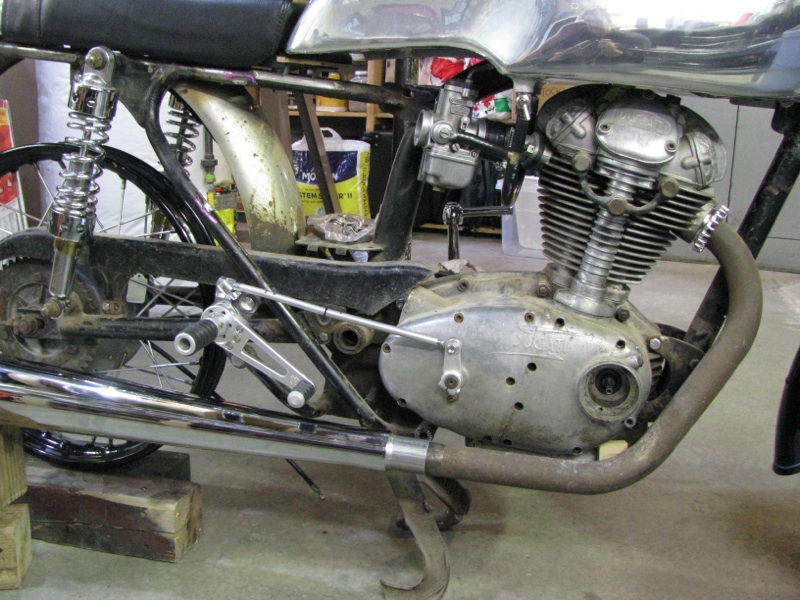
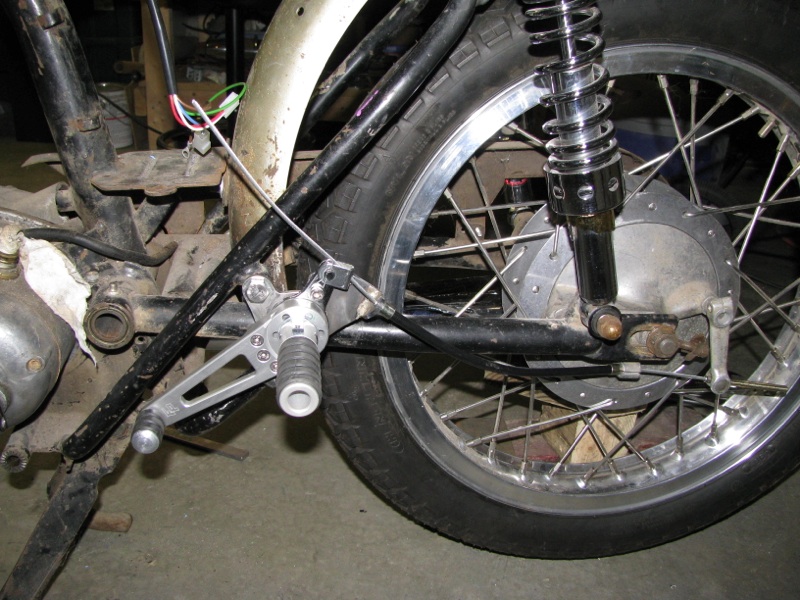
Kind of sort of in position. Shift linkage will be redone, but that's the gist of it. Obviously the mount for the rearset will be cut down quite a bit…
And the brake side. A touch simpler than the first five or ten iterations. Add a cable stop, work in a brake switch maybe, and done. That will be a very happy day for me.
I discovered I was over complicating the speedo drive too (do I sense a theme here?) so I ordered a drive I think I can make work. It was supposed to show up today but didn't show. More news later...
I also had some muffler adapters made up to go from a 45mm muffler to the 38mm pipe. The shims included with the muffler were trash, but then I expected that.
The pics:
POS adapters below. I'd need all three. No chance of an exhaust leak there! The new one is already slid into the muffler. Still needs to be slotted welded and polished.
Kind of sort of in position. Shift linkage will be redone, but that's the gist of it. Obviously the mount for the rearset will be cut down quite a bit…
And the brake side. A touch simpler than the first five or ten iterations. Add a cable stop, work in a brake switch maybe, and done. That will be a very happy day for me.
I discovered I was over complicating the speedo drive too (do I sense a theme here?) so I ordered a drive I think I can make work. It was supposed to show up today but didn't show. More news later...
DesmoDog
Been Around the Block
I traced around the footpeg and then pulled the plate off the bike. A little more scribbling and the basic shape was laid out.
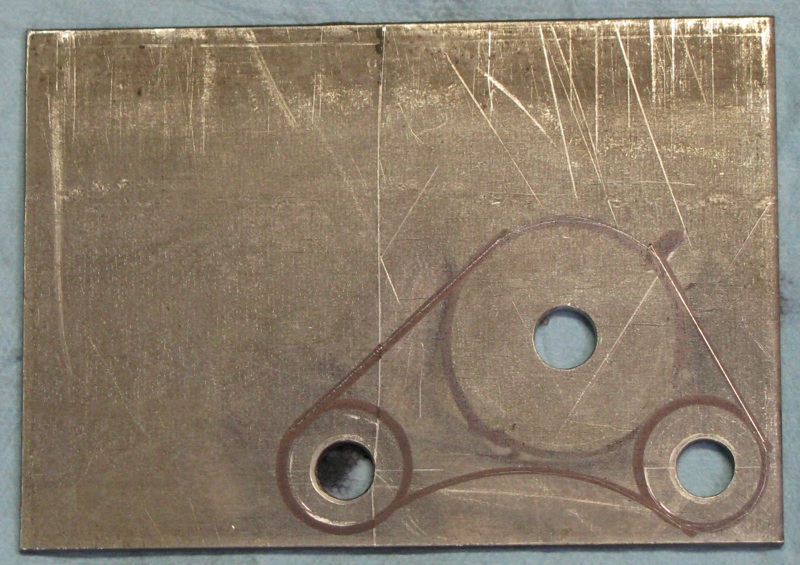
Cut and grind
Linkage is still just a mock up. I screwed up putting the bends in it, and may add spacers behind the plate anyway to get the lever moved outboard a little is the muffler ends up being in the way. This is the basic idea though.
I also made the speedo drive work. That will save me some messing around with brackets and wiring!
*************************
And that makes the thread current. It might not look like I got much done but figuring out the rearsets was HUGE and all the other little details help too.
")
SeekingZero
Been Around the Block
Waiting for more updates! 8)
Also, I am nearing the paint stage on mine and I was wondering, since you did such a marvelous job with you Junior, what paints you used. I need to paint the engine cases and I guess any grey-silver would work but I thought I'd see what your experience says. I'm going with the Mach 1 colors on my 250 so I am also looking for the red/silver color codes though I might give it the red from my 2006 999!
Looking forward to seeing how yours turns out!
papercutout
New Member
This has been a good read, some massive wait times (I'm lucky I'm reading it now!) between posts though. Where did you get the tach mount? I've searched the 'Road and Rally' links that come up from google, but no luck. Thanks
DesmoDog
Been Around the Block
Thanks for the comments everyone.
I actually have been working on this but haven't posted any updates becasue, well, how many in process shots of the damn rearsets does anyone need to see anyway? I did get the cable anchor for the rear brake in place tonight though so that side is THIS CLOSE to being done. All that's left is the final step in mounting the brake light switch. I know what I'm gogin to do but ran out of time today. I have to come up with a muffler bracket before I can figure out spacers for the shifter side, but that shouldn't be too big a deal so the end is FINALLY in sight for the foot controls.
On my 160 I used House of Kolor products, from the primer to the clear coat is was all HOK. On this bike I'll probbaly go wiht something else but I don't know what yet. I don't paint the cases with anything, they're bare aluminum.
I think I got the tach mount (and tach) from Classic Ducati in England. Road and Race has them too though: http://roadandrace.com.au/cat20.htm
SeekingZero said:Waiting for more updates! 8)
Also, I am nearing the paint stage on mine and I was wondering, since you did such a marvelous job with you Junior, what paints you used. I need to paint the engine cases and I guess any grey-silver would work but I thought I'd see what your experience says. I'm going with the Mach 1 colors on my 250 so I am also looking for the red/silver color codes though I might give it the red from my 2006 999!
Looking forward to seeing how yours turns out!
I actually have been working on this but haven't posted any updates becasue, well, how many in process shots of the damn rearsets does anyone need to see anyway? I did get the cable anchor for the rear brake in place tonight though so that side is THIS CLOSE to being done. All that's left is the final step in mounting the brake light switch. I know what I'm gogin to do but ran out of time today. I have to come up with a muffler bracket before I can figure out spacers for the shifter side, but that shouldn't be too big a deal so the end is FINALLY in sight for the foot controls.
On my 160 I used House of Kolor products, from the primer to the clear coat is was all HOK. On this bike I'll probbaly go wiht something else but I don't know what yet. I don't paint the cases with anything, they're bare aluminum.
papercutout said:This has been a good read, some massive wait times (I'm lucky I'm reading it now!) between posts though. Where did you get the tach mount? I've searched the 'Road and Rally' links that come up from google, but no luck. Thanks
I think I got the tach mount (and tach) from Classic Ducati in England. Road and Race has them too though: http://roadandrace.com.au/cat20.htm
DesmoDog
Been Around the Block
Here's a little more info of the stuff I've been doing.
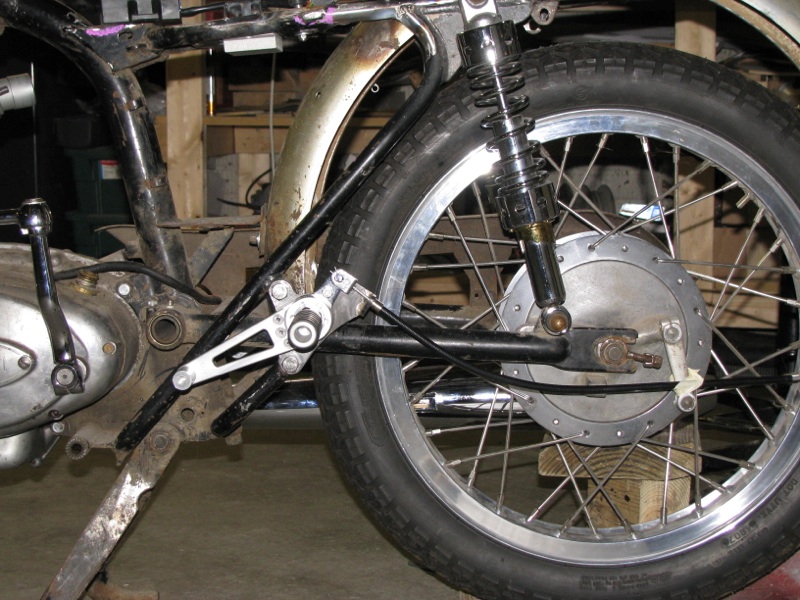
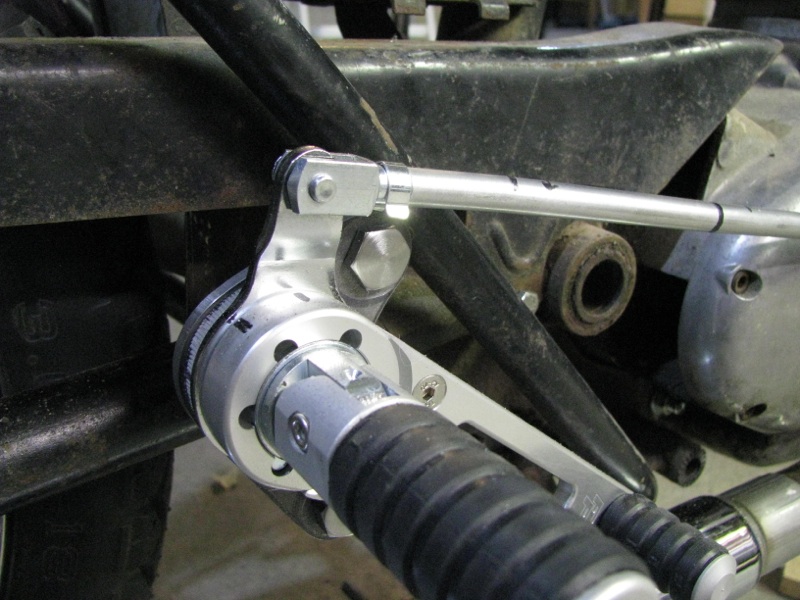
Rearsets post #4397. This is the basic set up for the rear brake, I made a cable end to fit the gizmo on the lever, but I haven't shortened the cable yet. All that's left on the bracket is to attach something to hold the brake light switch in position (it only has one mounting bolt and can pivot right now) and do the final clean up on the edges and the overall shape.
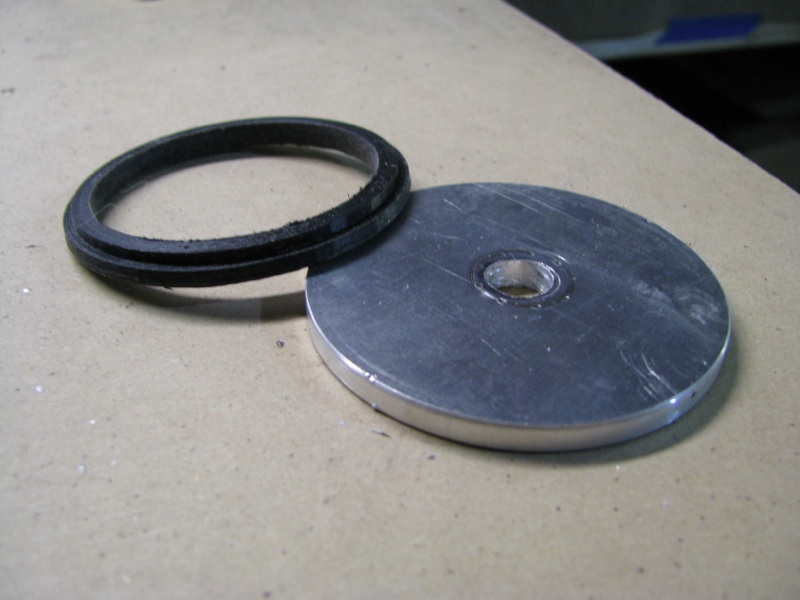
I tweaked the speedo adapter thingie so I can put it inside the headlight shell. Now all I need is an o-ring to put between the speedo and the shell.
After spending way too much time screwing with ways to mount the speedo sensor and magnet, I sprung for a speedometer drive off a moto guzzi (Guzzi parts are often cheaper than the identical Ducati parts...) and tah dah! I considered pulling the casing off the wires and running them up a real speedometer cable housing but decided against it.
I bought some stainless bolts to hold the rearsets on. On the shifter side I turned down the head a bit so the shifter can move past it. I'm also taking the markings off the other three of them.
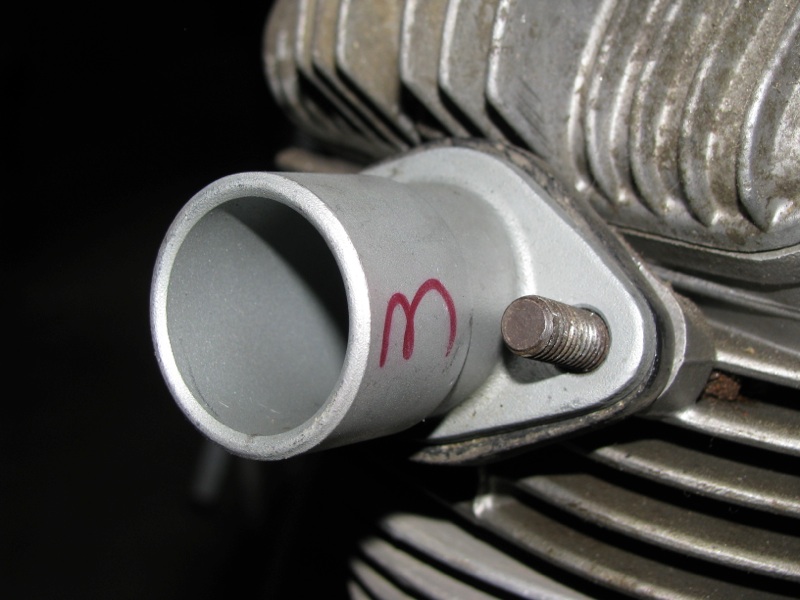
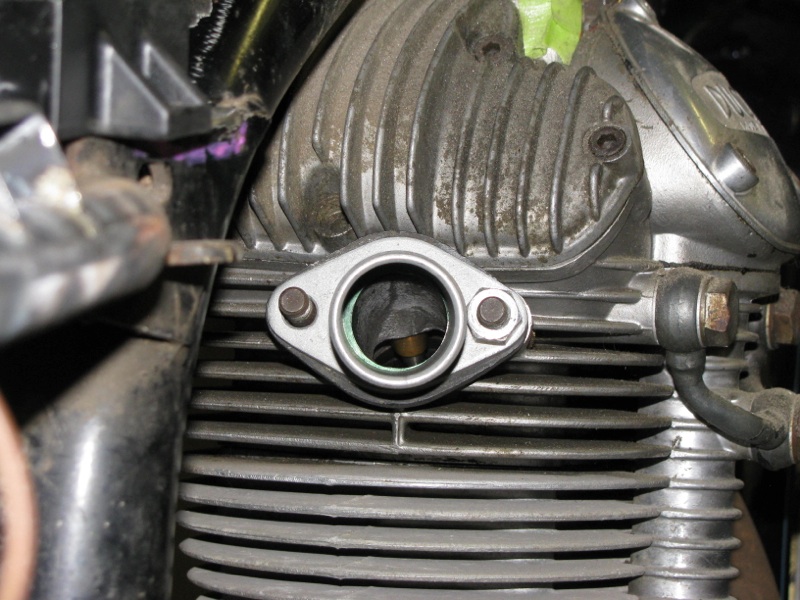
And this morning I figured out that the inlet manifold doesn't center on the port in the head. No biggie, except it complicates my cheat to putting a tapered insert into the oversize manifold if I don't spring for porting the head right away. Looks like I'll have to at least modify the head to blend the two.
Rearsets post #4397. This is the basic set up for the rear brake, I made a cable end to fit the gizmo on the lever, but I haven't shortened the cable yet. All that's left on the bracket is to attach something to hold the brake light switch in position (it only has one mounting bolt and can pivot right now) and do the final clean up on the edges and the overall shape.
I tweaked the speedo adapter thingie so I can put it inside the headlight shell. Now all I need is an o-ring to put between the speedo and the shell.
After spending way too much time screwing with ways to mount the speedo sensor and magnet, I sprung for a speedometer drive off a moto guzzi (Guzzi parts are often cheaper than the identical Ducati parts...) and tah dah! I considered pulling the casing off the wires and running them up a real speedometer cable housing but decided against it.
I bought some stainless bolts to hold the rearsets on. On the shifter side I turned down the head a bit so the shifter can move past it. I'm also taking the markings off the other three of them.
And this morning I figured out that the inlet manifold doesn't center on the port in the head. No biggie, except it complicates my cheat to putting a tapered insert into the oversize manifold if I don't spring for porting the head right away. Looks like I'll have to at least modify the head to blend the two.
DesmoDog
Been Around the Block
Ok, one more post covering the dreaded rearsets and that will be it, I promise. And why do I make that promise? Because, except for a couple details mostly involving cleaning up the cosmetics, they are f'ing done. Finally.
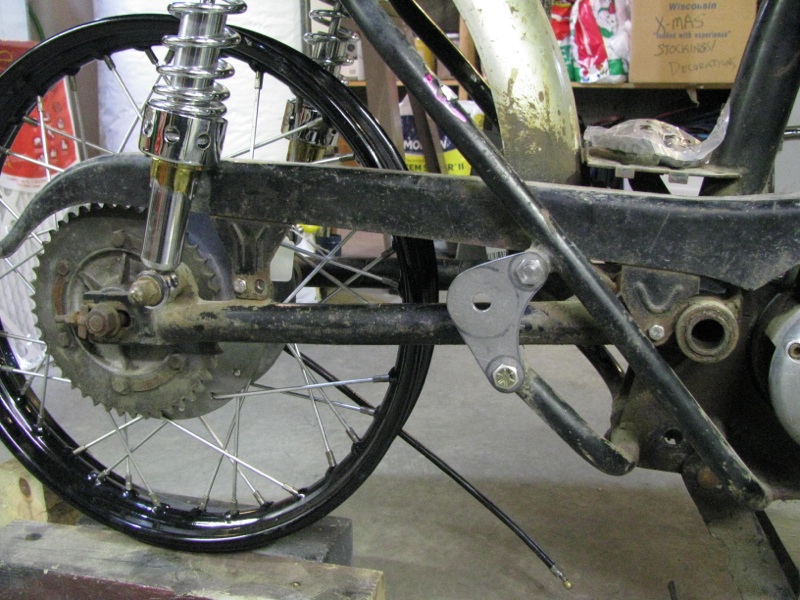
Here's the brake side with all it's functional bits in place. It looks much the same as the previous shot but now the cable housing has been shortened (but not the wire) and the brake light switch is mounted and functional (on the back side of the bracket). No funky linkages to activate the rear brake, no levers hacked out of aluminum plate and stuffed behind the bracket. No added brackets and springs for light switches. Done.
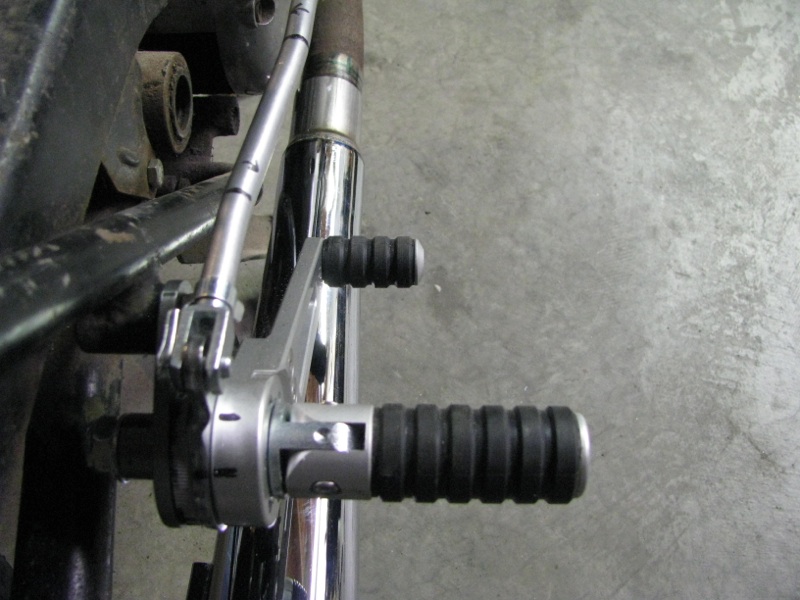
Also, the "stock" peg has been modified to work with the kickstart. The shadow might make it less obvious but TAH DAH! A functional brake lever that clears the kickstart. Color me happy to be done with this part of the rebuild.
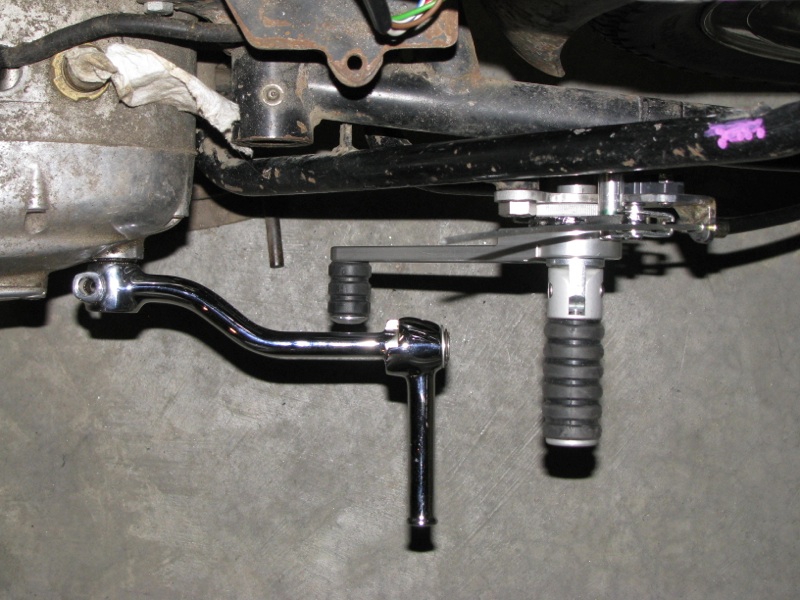
Shortened peg on brake
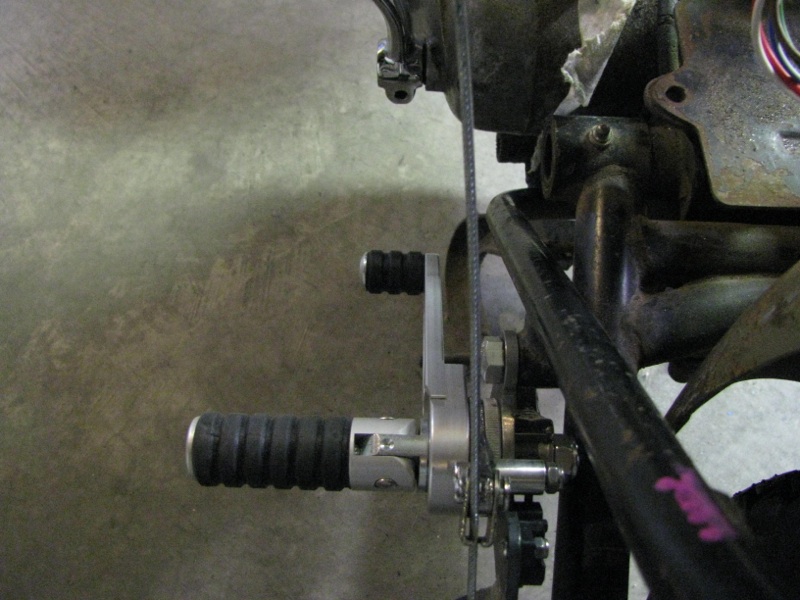
Original length peg on shifter
Why I was making this so complicated along the way I'll never know...
Here's the brake side with all it's functional bits in place. It looks much the same as the previous shot but now the cable housing has been shortened (but not the wire) and the brake light switch is mounted and functional (on the back side of the bracket). No funky linkages to activate the rear brake, no levers hacked out of aluminum plate and stuffed behind the bracket. No added brackets and springs for light switches. Done.
Also, the "stock" peg has been modified to work with the kickstart. The shadow might make it less obvious but TAH DAH! A functional brake lever that clears the kickstart. Color me happy to be done with this part of the rebuild.
Shortened peg on brake
Original length peg on shifter
Why I was making this so complicated along the way I'll never know...


