Yamaha RD Neutral Switch Not Working

2_DONE_THE_TON

Over 1,000 Posts
DTT BOTM WINNER
hey forum!


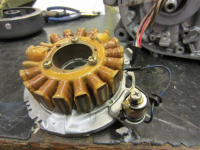
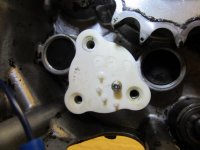
i ´ve pretty much broke down my RD 250 this winter to replace the crank seals gaskets et cetera.

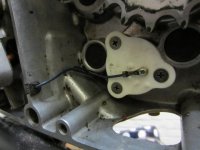
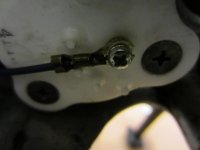
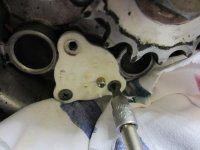
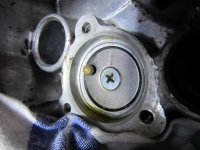
i´ve also replaced the old broken Neutral Switch.

Now i´m pretty much done and trying to get all the Electrics to work properly...figured blinkers,oil idiot light and now the neutral switch doesnt work....bike is in neutral....generator cable connected....no light in the idiot panel.

the bulb is working (hooked it up to the battery lit right up).

since i´m an idiot in the electrical area i´ll need an advice from you guys how to tackle this problem.

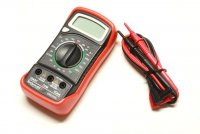
i got a multimeter (dunno how to useit yet ;-)) but i´m ready and down to get that light working...

is it possible that I done something wrong building back in the gears...?the bike shifts trough the gears....and i´ve done everything like in my manual....

i´ve done a little video too. :)


https://www.youtube.com/watch?v=Q8lQVnqP794&feature=youtu.be


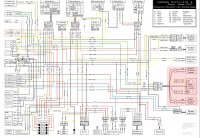
WIRING DIAGRAM below!!!!


help appreciated!!
 

Attachments

  • IMG_4281.JPG
    IMG_4281.JPG
    58.9 KB · Views: 432
  • IMG_4282.JPG
    IMG_4282.JPG
    38.6 KB · Views: 395
  • RD400_(US)_wiring_diagram.pdf
    45 KB · Views: 193
The neutral switch couldn't be any easier. Set your multimeter to voltage on the 20 scale (turn it on if you haven't yet). Take your bike out of neutral, turn the bikes power on, touch the red lead of the multimeter to the wire at the neutral switch plate, then touch the black lead to the chassis. If you don't read 12v then something isn't connected properly between the neutral lamp and the power. If this is the case then you need to start checking back through your harness, again, trying to find 12v from the neutral lamp wire to ground. If you do get 12v, then the neutral switch itself isn't working correctly.
 
Also, you say you have an RD250 but then show the diagram for a RD400. Which is it?
 
No, you are not looking for a 12V+ reading at the neutral switch plate. When in neutral, the switch grounds the blue wire.


The positive "+" side of the N indicator light comes from the brown wire at the bulb. The negative "-" or ground is provided by the neutral switch plate via the sky blue wire.

First, disconnect the blue wire from the neutral switch plate. ( to eliminate any change of a false reading if there is a short etc. elsewhere) Test continuity from the screw on the switch to the chassis with the gearbox in neutral. There should be continuity as the switch in neutral provides the ground. If it does, the switch is working fine. Now test continuity of the blue wire from the switch end to the N indicator bulb socket. If you have continuity all the way from the N switch to the bulb you are good on the ground. If not, check , narrow your fault in the ground side of the circuit by testing the blue wire from the switch to the connector in the headlight bucket. If you have continuity, the wire is good. Now check between the connector there and the N indicator lamp.

The positive side of the N indicator lamp circuit is from a brown wire ( general ignition on positive ) ensure you have 12v between the brown wire and a general chassis ground.

Of course the there is the socket and bulb to check too.
 
+1 DeanJ is is exactly correct.

I would add, though, the easiest thing to do first is to take that sky blue wire loose and touch it to ground with the trans in neutral and the key on. If the light comes on, there is a mechanical problem with the switch. If it does not, it is an electrical problem.

Though it is very unlikely the switch is mechanically malfunctioning, just FYI, there is nothing inside the cases to fool with; all the switch workings are under that white nylon piece held on with the three screws. Take the three screws out, the nylon piece comes out. It is sealed by an o-ring, so a little twisting should have it out pretty easy. Under that is a single center phillips (JIS more correctly) flat head screw and an offset spring loaded mushroom headed pin which is the contact that connects the sky blue wire to ground. These parts are on the end of the shift drum (cam), and when the cam rotates into the correct position, it lines up the switch contact to complete the ground connection to the neutral light. You can watch it turn if you shift gears. It can not somehow be not lining up correctly; everything assembles only one way. About the only thing that can be wrong is the spring that keeps the pin loaded against the contact in the nylon cover. You should be able to push the pin in and have the spring push it back out freely sort of like the button on a click type pen (without the click, stronger spring, and shorter travel!) You don't have to take it apart, if it works ok, check to see the nylon cover is not somehow damaged. If it does not move easily against the spring, take out the center screw. I only holds a sheet metal cover that retains the spring and pin, so don't worry about anything inside the trans going wrong. You should easily be able to figure out what the problem is. Either the spring is ruined somehow, or it is gummed up with corrosion or other goo.

And yea, the socket and bulb: The sockets very often grow a lot of white corrosion around the bulb. Moisture goes in, but does not come out!
 
jpmobius said:
+1 DeanJ is is exactly correct.

I would add, though, the easiest thing to do first is to take that sky blue wire loose and touch it to ground with the trans in neutral and the key on. If the light comes on, there is a mechanical problem with the switch. If it does not, it is an electrical problem.

And yea, the socket and bulb: The sockets very often grow a lot of white corrosion around the bulb. Moisture goes in, but does not come out!

hey guys thank you SOOOO much for your expertise!i can always rely on your help!this forum rocks!


sorry i took the english diagram....see the diagram (sorry german) below for my RD 250:

the skyblue and brown wire --> goes to idiot light panel.

a blue (not skyblue) goes from generator to my plastic switch.

so you mean to ground the blue wire (the one between generator and switch) to the frame dont you (in american RD version sky blue)?

the brake switch plastic plate got replaced by me...is it possible that i need to unscrew the JIS screw on behind before installing or that i built it in wrong way?

cheers
 

Attachments

  • dia.jpg
    dia.jpg
    268.5 KB · Views: 1,240
  • IMG_3503.JPG_thumb.png
    IMG_3503.JPG_thumb.png
    657.4 KB · Views: 969
I think you will find that blue wire just runs along with the generator wires. It does not interact with the generator. Yes, simply take the end of the blue wire and touch it to a bare metal spot on the engine. That is what happens when the switch contact aligns in neutral. On US rd's it is impossible to incorrectly assemble the switch. I am assuming the transmission is correctly assembled. It might be possible to have the shift cam in wrong, but then the transmission would certainly not work. If you can shift it through the gears, it is assembled correctly.
 
Sorry Ryan, work and life kinda got in the way ::)

Looks like you got your answer though ;)
 
Hey guys,

Yesterday i disconnected the blue wire from the white plastic plate,switched on the key and grounded it to the motor.

No light

So.i guess theres a problem in the circuit.
Bulb works.

Didnt check the socket yet.
 
Make sure you have power going to the bulb, with the key on. Could be a loose wire in the bucket.
 
Redbird said:
Make sure you have power going to the bulb, with the key on. Could be a loose wire in the bucket.

could be after messing soooo long with my bucket ;-)

so for the neutral switch

brown is plus
and
blue is ground (runs down to the white plastic piece)

isnt it?
whats the best way to use my mulitmeter on the bulb socket?

there are three "ports" in my multimeter (see pic) where do i put the + side in and where do i plug the - side in for measuring this?

thanks!
 

Attachments

  • DIGITAL-MULTIMETER-ROTHEWALD.jpg
    DIGITAL-MULTIMETER-ROTHEWALD.jpg
    36.3 KB · Views: 666
Wish I could help ya there, but I'm a multimeter moron :p
I'm a big fan of my testlight for these types of situations :)
 
Then i gonna borrow the t light of my father (harley guy :))

He told me that he has a kind of needle on the tips of the plus and minus terminals to see of theres power to a connection.

I.guess checking.the socket would be touching plus on the bottom and minus on the side 'wall' of the bulb socket that holds the bulb...am i right :)?
 
Ryan Stecken said:
I.guess checking.the socket would be touching plus on the bottom and minus on the side 'wall' of the bulb socket that holds the bulb...am i right :)?
Correct, but only if the bike is in neutral.
If the testlight lights up, you're good.
If not, try holding the + to the bottom terminal and the - to the chassis. If it lights up that way, you have a loose connection between the light and the switch on the motor.
 
ok guys i have news...

when i replaced the old broken neutral switch i forgot to order the mechanism on the inside of the switch (only the plastic piece no spring)....*idiot me*
i talked to my yamaha dealer and he confirmed that.

but i still wonder now: i took the blue wire from the white switch plate and grounded it to the motor and no light came on.

so for my unterstanding there is

A) the switch missing -->so no ground on the crank--> no light

B) no light even if grounded to the motor-->electrical connection problem

so i definitely need to take the plastic piece of the motor...do i need to get all the trans oil out?

the platic piece has an O-ring that holds the oil so i guess so...

thanks in advance!!
 
I don't use the neutral switch or indicator so I just have an aluminum cover over where the switch panel goes. That said, when i took the panel off the other day I just leaned the bike over to the right onto my hydraulic jack (as a temporary kickstand) and barely any gearbox fluid leaked out. So there's that.

Though, I still don't think you have power going where you need it, otherwise you could just jump the switch and make the bulb light.
 
yesterday i took the connector of the cable, touched the nude cable against the motor and the neutral light lit up...seemed to be a corroded connector...no wonder how much dirt and grime goes in that area near the sprocket.

i´ll wait till next week when i get the mechanism in the mail behind the white plastic piece.
i think i will drain all the oil then put the mechanism in and the put the oil back in...i cannot lean my bike on one side on my table...the bike is on the main stand.

i´ll keep you guys updated if this worked out.
 
Assuming your newer RD is the same as the US models, and at least as far as the switch is concerned I am quite sure it is, there is no need at at all to drain the trans fluid. It will definitely leak without the plastic switch cover, but only the tiniest bit. You will certainly lose 10 times more oil draining and replacing the oil than what you will lose replacing the switch - including the spring contact. Very curious yours is missing. If it is in fact there, don't assume it is bad, take it apart. There are 4 parts total. 1)The screw in the center of the shift cam. 2)The sheet metal plate which retains the contact plunger. 3) the contact plunger. 4) the spring behind the contact plunger. As noted in a previous post, about the only thing that can go wrong (assuming you in fact have all the parts) is the pin is jammed with sludge or the spring is no good - probably from corrosion.
 
jpmobius said:
Assuming your newer RD is the same as the US models, and at least as far as the switch is concerned I am quite sure it is, there is no need at at all to drain the trans fluid. It will definitely leak without the plastic switch cover, but only the tiniest bit. You will certainly lose 10 times more oil draining and replacing the oil than what you will lose replacing the switch - including the spring contact. Very curious yours is missing. If it is in fact there, don't assume it is bad, take it apart. There are 4 parts total. 1)The screw in the center of the shift cam. 2)The sheet metal plate which retains the contact plunger. 3) the contact plunger. 4) the spring behind the contact plunger. As noted in a previous post, about the only thing that can go wrong (assuming you in fact have all the parts) is the pin is jammed with sludge or the spring is no good - probably from corrosion.

hey moeb...i got news....today i removed the white plastic piece (NO oil drained out,maybe 2 drops)

behind the white plastic piece it came clear why theres no contact....the contact plunger is in place...the spring works just nicely...looks nearly new...

but the contact is "out of place".

the plunger is on the "left" of the circle and the contact to the neutral able is on the right...so NO contact here.
i thought about maybe that the plate is the wrong way around but theres only one way to place it...

the original piece that was broken (lost pic) had the contact in the same place....is it possible that the contact is rotated in the wrong direction (is it rotable with the philips screw loose?)...

thanks in advance!!!
 

Attachments

  • IMG_4412.JPG
    IMG_4412.JPG
    60.3 KB · Views: 337
  • IMG_4414.JPG
    IMG_4414.JPG
    76.1 KB · Views: 298
  • IMG_4419.JPG
    IMG_4419.JPG
    57 KB · Views: 266
  • IMG_3290.JPG
    IMG_3290.JPG
    53.9 KB · Views: 412
Back
Top Bottom