Follow along with the video below to see how to install our site as a web app on your home screen.
Note: This feature currently requires accessing the site using the built-in Safari browser.
We noticed you are blocking ads. DO THE TON only works with community supporters. Most are active members of the site with small businesses. Please consider disabling your ad blocking tool and checking out the businesses that help keep our site up and free.
Finally some good news. My fuel cell has been welded !! Haven't seen it yet, but my pal that got it done for me says it looks the biz.
Now if I can persuade the same guy to get my headers welded up .................
Tracking down a DARC-2 ignition unit is now giving me a headache. They were as low as $200 back end of last year - now up to $350 !
That's the last big ticket item - the rest is down to ass'y and minor expenses . Oh, then there's the engine ! One of my engines is in excellent shape and I already have new pistons, rings, gaskets, and bearings [ all standard ] - so providing no machining is necessary - we're good to go. An exhaust cam has been modified for the inlet [ rev.counter drive machined off ], but this #1 donkey will be fairly mild and rely on the NOS and blueprinting [ and 40 DCOE Weber ] to do the biz. I've now ditched the idea of supercharging - so the 2nd engine will be turbo'd. That's definitely next year !
I'm now back into the 101 little jobs that need doing - brackets, mounts, controls .............
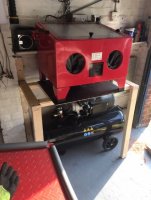
And finally today - we set up my new compressor and blast cabinet in my pal's garage. Makes sense as we will be building my engines there ..... oh and the GS500 Suzuki Boardtracker !!!
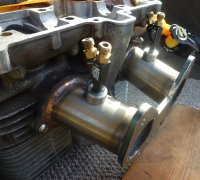
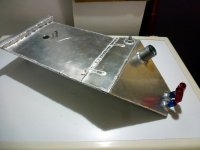
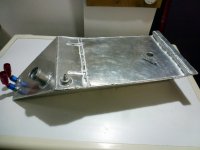
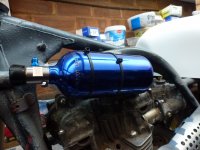
Thanx for your feedback - however - not even a simulation - simply showing where they will go. The foggers are simply placed in the holes to indicate where they will eventually be ! The weld bungs are being machined to provide a 25 degree angle towards the head - and the nozzles will be reversed 180 degrees. They wouldn't sit there on their own for the pix ! Additionally they will be indexed to provide a direct spray pattern into the inlet. Experience gained with 3 stage NOS on my 502 ci Ford Altered will give me a guide.
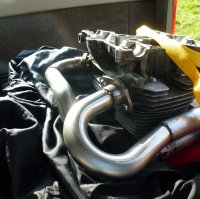
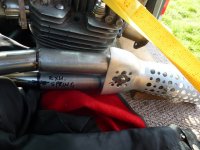
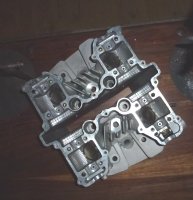
Thanx Luugo - it was hard work as I am NOT a welder ! I made the exhaust as a 3D jigsaw puzzle from random bends. Initially it was all held in place with gaffer tape until a pal was able to tack it ! When I get it back, work will start on blueprinting and mild headwork. I need a bit of work around where the 2nd plug enters the chamber. I have a theory regarding the flame path and the 2nd plug. twin plugging the head has lead me to come up with some improvements - Mk2 head underway !
If the central plugs are 3/4" reach, try using 10mm plugs next time to get a little more working space. And unless the motor is running huge compression as well as Nitrous, you shouldn't need the second plug. That said, unburned nitrous when it does finally burn makes for a nice bang, so maybe it's cheap insurance.
CXman - keep the feedback coming. And the critique - never know when I've overlooked something !!
Teazer - that's nail on the head time !!! I wasn't at all happy when the head came back VERY close to valve seat and I could just see hot spot / pre-ignition setting in !
I did ask the guy to machine for 10 mm plugs ...... hard to get good help................ It was a mates rates job tough - so what can you say !! :
Fortunately I have 2 more heads and the guy that will tackle the job this time knows EXACTLY what I want. And still mates rates !!! ;D
I have had quite a bit of experience in the past with my Triumph 500 and 650 motors with twin plugs. We learned quite a bit with them. 2 were blown / petrol - and 3 blown alky.
A trick you are probably familiar with is to machine the plug recess so that the electrodes are just outside the combustion chamber and they 'fire" through a slot to minimize weakening the head around the valve seats. A better idea is to allow the plug electrodes to intrude into the head - as long as you can clear the valves. Kawasaki did that on the Eddie Lawson S1 KZ1000 heads
A trick you are probably familiar with is to machine the plug recess so that the electrodes are just outside the combustion chamber and they 'fire" through a slot to minimize weakening the head around the valve seats. A better idea is to allow the plug electrodes to intrude into the head - as long as you can clear the valves. Kawasaki did that on the Eddie Lawson S1 KZ1000 heads
Yep - thanx for the headsup, when the plugs have been indexed to align the electrode "gap" they'll also get the treatment you suggest.
That's something I used to do with the Triumph head / plugs. No perceivable difference [ no dyno access in those days ! ] in performance - but NEVER had a failure due to pre-ignition or plug related - as in mechanical damage. Since I had a spate of issues with Champion plugs in the early sixties I switched to NGK when they became readily available in the UK - NEVER had mechanical issues with the plugs since and I found they are more tolerant of heat ranges.
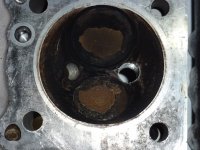
I'm going to alter the flame propagation flow - you might just be able to see a shoulder in the chamber that directs the fuel towards the OEM plug site. That needs to be re-worked to get the mixture to the 2nd plug asap.
I'll get the head beadblasted as soon as the compressor / cabinet is up and running and it will be a little clearer.
Once the ass'y comes back from the welder I'll start work on the head / engine.
My machinist guy is going to make another long Weber intake manifold for me as the one I currently have needs a lot of fettling.
A trick you are probably familiar with is to machine the plug recess so that the electrodes are just outside the combustion chamber and they 'fire" through a slot to minimize weakening the head around the valve seats. A better idea is to allow the plug electrodes to intrude into the head - as long as you can clear the valves. Kawasaki did that on the Eddie Lawson S1 KZ1000 heads
Mr. Rex, you may well be correct. I'm not sure who actually did the heads on Lawson's bikes. Kawasaki had all sorts of secret parts and Muzzy did a whole lot of secret work, but who actually did what is not something I know. Above my classification level. That's all "need to know", "compartmentalized" top secret race stuff. ;-)
Beach: On our high comp Honda race heads we invariably end up with fire notches in the piston crown and try to get an angled squish band like a 2 smoke to push gas into the fire pit and of course you want the lowest crown and combustion chamber possible.
Much as I like the look of Weber carbs, in this day and age, I'd probably go with flatside carbs or EFI if you can get some huge throttle bodies and use a Megasquirt or similar to drive it all. MoTeC would be nice but a touch spendy. I wonder if it's possible to get an off teh shelf EFI controller for say a modern 650 twin and completely re-program it with TuneBoy or something similar. That would make for a much more rideable bike and way easier to Dyno tune.
Teazer, regrettably I am not of the modern age and I am totally out of my comfort zone with EFI, computers etc !
Of course I am well aware of the advantages to be gained, but this is an old school do it yourself as cheap as possible [ of necessity ] build.
The Weber cost me £45 and it's been overhauled - OK, it's unlikely that the jets, tubes etc will be on the money out of the box - but I have large stockpile of Weber parts, jets, etc from my early racing days. I also got 2 good basic bodies and tubes for spares in with the £45 .... no brainer for me.
Then there's the "let's all be different together" school of thought. I always like to try something a bit off the wall. Not sure you'll ever see another KZ750 equipped with a Weber !! Maybe you wouldn't want to - but I guarantee it will get folk talking.
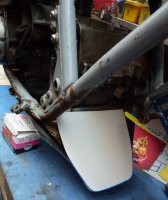
Finally .... through no fault of anyone - the fuel cell mods / welding have been completed.
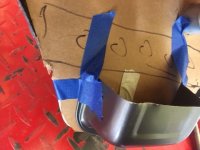
Note to others using the tried and tested CAD approach [ cardboard aided design ] - cardboard is easily deformed - not clever when you're trialing it under something heavy !!!
Perfect fit now. I'm trying to persuade the same guy to weld up my exhaust. His day job is making Brough Superior frames !!!! So he should be up to the task.
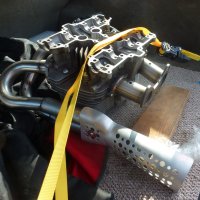
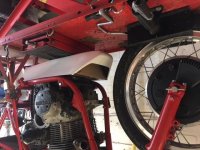
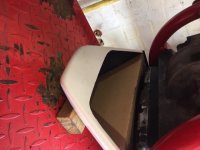
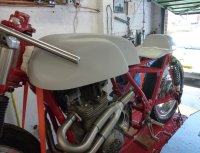
Just in case you're not aware - the tank is the work of Uncle Rob 8) [ UK / DTT ] who fitted me in with his hectic schedule of bike and tank building to produce that beauty. Also, for anyone coming late to the party - it will live under the frame in a belly pan fairing. The Manx dummy tank is where all the NOS and other squitter will live. I want to keep the NOS as stealthy as possible. Talking of the NOS - couldn't resist posting this again. And for the knowledgeable - yes the injectors are arse about face in the pic .... but they're there courtesy of gravity - and the correct way round they kept falling off. I'll do something more permanent eventually! In the first pic - the belly pan was roughly fitted as POC - now moved back to be more aesthetically pleasing ! :. There will be a stainless mesh at the front to allow air though - but keep rocks out. We'll be making a guard of some sort at the rear to protect the fuel fittings - again from rocks etc. thrown up by the back wheel.
This site uses cookies to help personalise content, tailor your experience and to keep you logged in if you register.
By continuing to use this site, you are consenting to our use of cookies.

")