Follow along with the video below to see how to install our site as a web app on your home screen.
Note: This feature currently requires accessing the site using the built-in Safari browser.
We noticed you are blocking ads. DO THE TON only works with community supporters. Most are active members of the site with small businesses. Please consider disabling your ad blocking tool and checking out the businesses that help keep our site up and free.
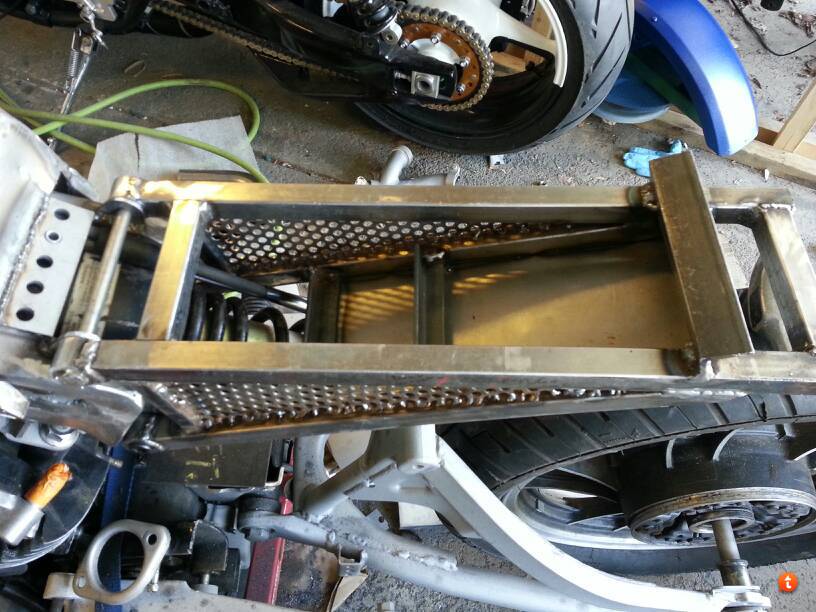
Thanks man! Ya there are much easier and faster ways to build sub frames for these bikes. But I have a mental problem not allowing me to do it that way...
In reality this bike I wanted it to have a super clean frame so I had to do that and not cheat with the faster ways. Even my cafe's version wasn't quite as clean as this one is, but my cafe version has some cool frame support bits so it make up for it.
I will say I am getting worn out from building these bikes though.
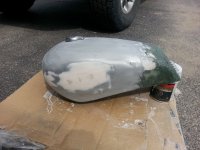
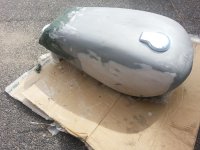
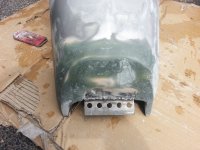
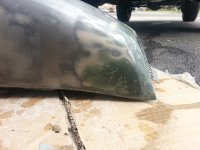
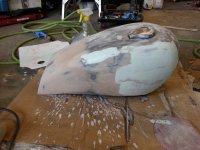
Was on bike-cation and now back to work. Well its time to do the tank. Oh dont we all love sanding? Well I de-badged it first and then started operation: Make tank look good, cause it looked like ass before.
Now if you are looking how not to bondo a tank please subscribe to this thread. :-X 8)
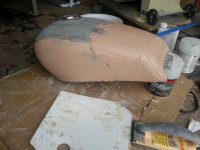
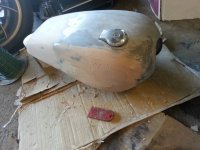
This is preparing for round two of the bondo process which I did the round two after these pictures. Whats that green shit? Thats long hair fiberglass, wish I had short hair, oh well. Thats going to be fun to sand... :-[
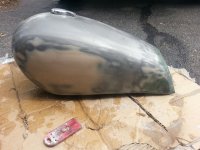
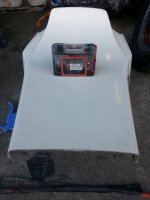
I cannot wait to see what the parts look like when put together. We'll have to wait for the tank to get done to see the full effect. Even on a "quick build", you don't want to rush the tank, as that's the centerpiece of any bike (as far as the viewer's eyes are concerned), no matter how much work all the rest of the build was. I like what you did with the tank, as I saw all the flaws and wondered how it would end up, and you worked them all out of the final shape.
Love the way you exposed the spring. Is there a shock swap that can be done on these old XV machines, to get a better performing shock in there? Maybe not for a "quick build" like this one, but I just got to wondering...
Ya I am trying not rush the tank but I am worried about the final finish regardless. I find primer will show some flaws but the base coat really starts highlighting things. I think I will use icing if I have to bondo again so I can see the different layers when sanding. I bought the premium bondo and really like working with it, more than icing I think too.
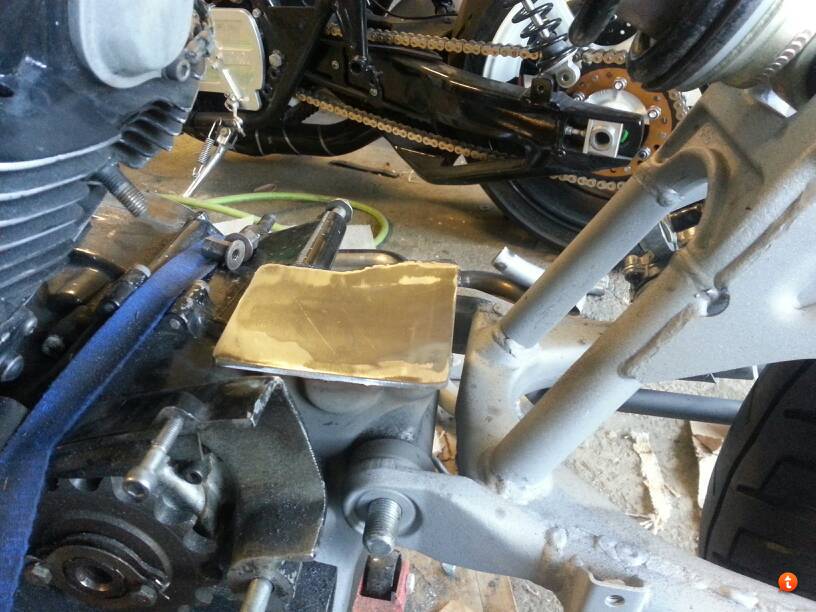
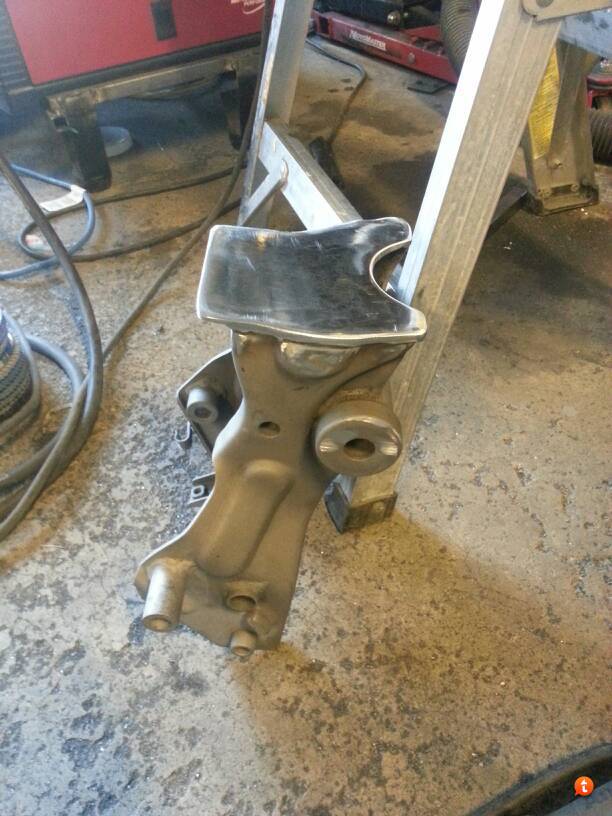
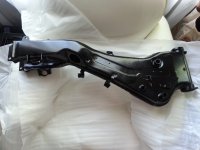
Ya I wanted to highlight the shock more in this build so I chopped the frame pretty high. Losing the lower mount involved a lot more work though so I'm not sure I would go that high again. I use speed triple shocks. I have one for this build as well. Just waiting on some custom bits from the machine shop to install it.
Looks like more cow bell... But that should be it! It was pretty smooth, just needed a slight finish
Seat is fully equal on both sides, what a bitch! (it had some manufacture imperfections I had to correct too). It's ready for paint. I need to paint this week so I can let it cure a week.
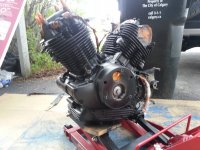
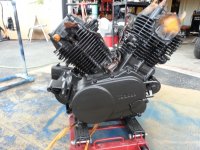
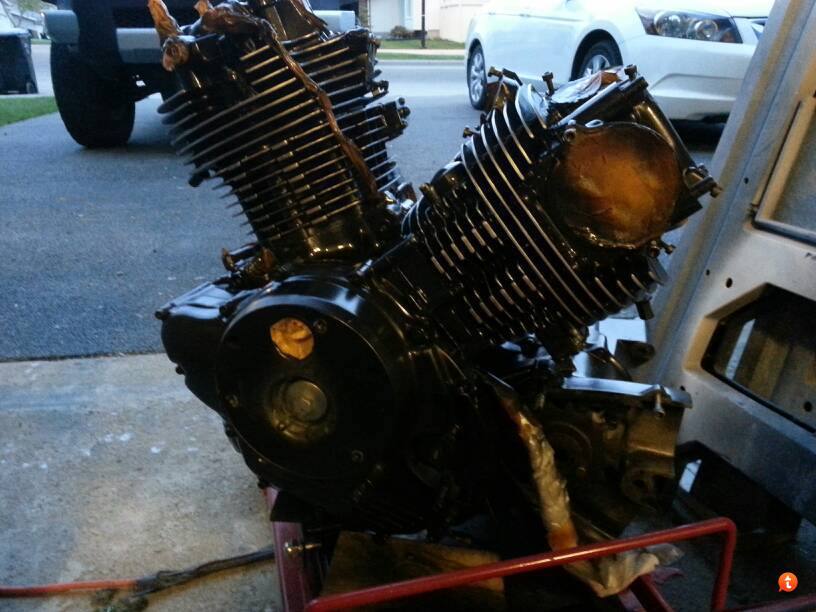
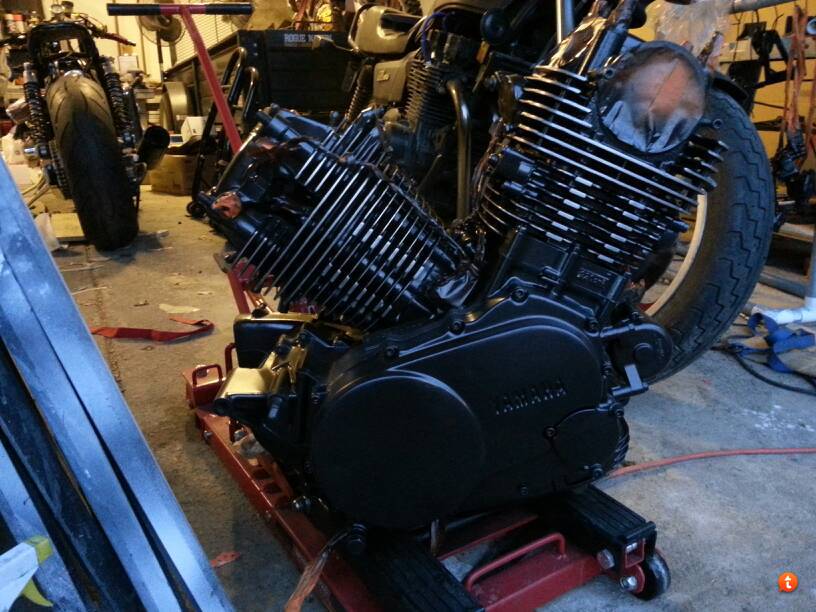
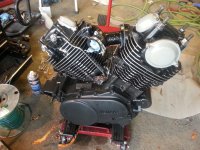
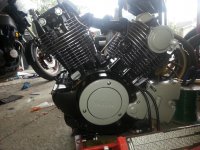
Engine paint stage 1 done. Needs cure then clear coat.
Thanks man. Ya the round side cover bits are powder coated silver all wrapped up and waiting for reassembly. Same with the all the upper covers.
Ya i did a trick, since I was powder coating 2 the same bike I got the engine bits powdered the opposite colors of the bike so I could 2 tone color both engines if that makes sense. My other bike will have silver engine and black covers.
Thanks man. Actually this one starts pretty good now. I did remove the starter spring though and I use 12 cell lithium batteries. Worst case a 4 brush starter resolves things which I have on my other xv.
The best thing is to make sure your pilot jetting is right so it starts quicker and puts less strain on the starter components. It's fairly easy to melt a vx starter if your not patient. An xv should cold start in one to two revolutions if it's jetted right.
It's funny when you start these bikes and it's not at the right cycle, you get that lull like the starter isn't doing anything as its scrounging the power to finish a non combustion compression stroke.
Sorry for the shit progress. I got back from a week in Quebec (mostly Montreal), the land of real poutine, $10 lap dances where you can grope till ones heart is content and 15% tax!.
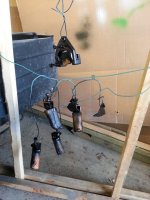
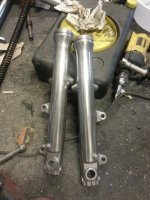
Back to business, today is a garage day, I got to finished the fork reconditioning, progressive springs install, lower forks (internally) new seals and oil to make the bike a rolling chassis again and I will mount the single carb manifold (its a bit of an ordeal as I have to make new gaskets and use..silicone) as it will be handy to do that without the frame installed. After that I will start the bolting on process.
Depending on how far I get this could be an exciting pics day, stay tuned.
Well it wasn't such an eventful day as I started messing with my FCR's for my cafe xv. I forgot I have an 3rd FCR so I conditioned that as I'm trying to use that instead of the Harley CV although I liked my filter setup on my CV, it will be backup.
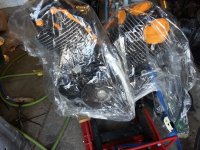
I made the gaskets and mounted the 2 into manifold. I mounted the engine bits are started installing the stainless screws. The paint wasnt good enough for me on the engine (minor runs on the cover, the paint I'm using is a little thinner than typical) so I was correcting that.
So I'm not too sure about the two tone (the silver) parts. I normally don't like the blacked out xv engines but my two tone is not sitting with me 100% at this point. Now what is silver I have powdered in black as well. I could swap them out which means my cafe will get the silver bits instead which is the same color as the frame and such so I will probably do that..
I also polished the fork ends again, mainly because I the first time I polished two lefts originally and then made the right one shinier, lol.
This site uses cookies to help personalise content, tailor your experience and to keep you logged in if you register.
By continuing to use this site, you are consenting to our use of cookies.