Follow along with the video below to see how to install our site as a web app on your home screen.
Note: This feature currently requires accessing the site using the built-in Safari browser.
We noticed you are blocking ads. DO THE TON only works with community supporters. Most are active members of the site with small businesses. Please consider disabling your ad blocking tool and checking out the businesses that help keep our site up and free.
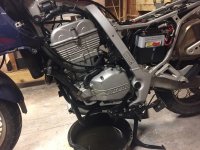
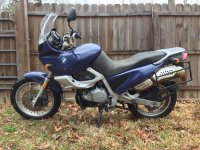
Over the winter I picked up this F650 ST. I had been wanting a newer, more reliable bike that I can use as a daily while I wrench on the vintage stuff. The seller disclaimed that it had some milky oil, and after doing some research on these bikes I narrowed down the possibilities to a faulty water pump seal, or a blown head gasket.
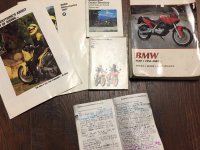
Once I got the old girl home, she looked pretty clean. About 50k miles and the motor should be barely broken in. The bike actually included all the original paperwork, and the maintenance records since new.
Besides the obvious coolant leak issue, a few cosmetic issues, leaking fork seals and some pretty thin brake pads will all get addressed.
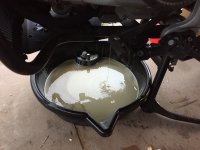
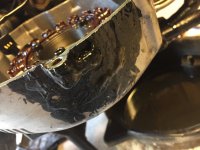
So I cleaned the carbs and fired her up to get the oil circulating so I could drain it and see what’s what. No bueno. Looked like a melted Frosty mixed with soot and poo.
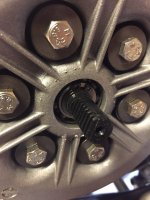
I decided to start with the simpler solution and replace the water pump shaft and seal, despite the fact that the maintenance records said it was done fairly recently. The water pump seal is basically a 20k mile maintenance item on these motors and from everything I can tell is the only crux of the Rotax lump.
After the water pump is done, I changed the oil and test ran the bike again just to get it warmed up. It looked ok in the OIF tank but draining out came the same frothy mess.
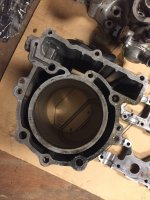
So into the motor we go. It’s a pretty straightforward motor and game apart pretty easily. Once I got the head off, it was pretty clear that the culprit was the head gasket.
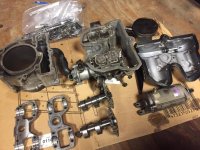
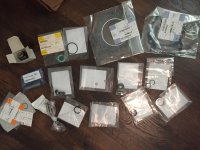
A pile of parts were ordered including new circlips, rings, a set of kibblewhite valves and seals, base and head gasket, etc.
I ended up replacing the thermostat since the PO had deleted it for some reason that is beyond me.
The whole top end went out to a local machine shop that builds racing motors. Cylinder and piston clearance measured within spec, and the original cross hatch could even still be seen on the barrel.
Machinist surfaced the mating surfaces between the head and cylinder. They pulled vacuum on the head and cylinder, skimmed about .003” off between the two surfaces, cut in the new Kibblewhite valves and shimmed the valves. I need to pop the valve cover off and check the clearances before I run it.
The last few months I’ve been building a new kitchen in our house from scratch and coming up to the home stretch on that project. So I hope to get back on this as soon as that’s finished.
Currently, the motor is back together, just needs the carbs installed and it’s ready for a test fire.
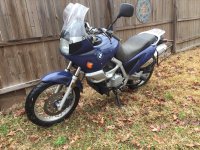
Plan right now is to get it running and ride it. I’m going to get some crash bars from Evil Chop and possibly wrap the plastics in white vinyl. Probably ditch the windscreen for something a bit more aesthetically pleasing, but I’ll see how this one performs on the highway before I go swapping anything out.
The kitchen is ramping down so I’ve been able to spend a little time on the bike.
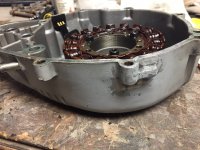
There was a big nasty blob of tar smeared along the bottom of the stator cover. I assume it was just weeping some oil and a PO didn’t feel like pulling the cover to replace the gasket. The cover itself is a little nicked up, so I’ll use some slightly thicker material to make a gasket and put a thin coat of Yamabond along that bottom edge to avoid any drips. I used acetone and a brass wire brush to get the crap off. What a mess.
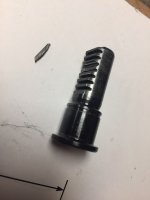
I pulled off the broken clutch actuator and luckily I found the missing spline hanging out in the recess where the actuator sits inside the Clutch cover. Glad I was able to recover the piece as it’s a big chunk and could’ve caused some major problems down the road.
I got the new ($85 ) actuator installed and the snap ring that holds it in place was slightly deformed. I ordered a pack of 300 assorted metric external snap rings from amazon for about $12 so I’ll swap it out for a new one before I button the cover back up.
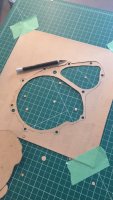
Cut out some gaskets for the left and right side covers last night, installed new snap ring, greased and reinstalled the clutch actuator and then finally sealed the engine back up. Of course I forgot to grease the splines so I had to pull the clutch cover off again to grease them up, on the plus side I can tear down that side of the engine pretty quickly now lol.
Got the carbs back on and all the cables hooked up. Unfortunately I made a rookie mistake and overtightened the clutch release arm and cracked the casting, so I’m going to have to order a new one of those.
I double checked the valve clearances before I buttoned up the top and they read as follows:
L R
Ex. .09 .14
In .07 .11
The spec for valve clearances is 0.10mm-0.15mm for both intake and exhaust, so the left side are both a bit tight. I was thinking I would just ride it for about 300 miles, then take it down to recheck the clearances and shim if necessary and take that time to retorque the head just to see if the clearances change at all. However I know that over time the intakes are likely to loosen and the exhausts are likely to get tighter. So, the more I think about it, I will open the valve cover back up and see what’s in there for shims and swap em around it possible to get the left side back in spec and I’ll just order in whatever shims I need. The machine shop said they changed out the shims after the installed the new valves but I’m not sure what they actually did.
I’m itching to get this thing on the road but I’ve waited this long I don’t really want to run it with tight valves.
Cool. I actually plan to keep it all in stock plastics (for now) but I'm going to vinyl wrap them in white. I think all the bits on this bike (except the side covers) are in good shape but I'll definitely take the extras if you don't need them. I was actually thinking about using them as a mold to make some one off fiberglass bits based off the original fairings but a bit more "edgy," we will see.
This site uses cookies to help personalise content, tailor your experience and to keep you logged in if you register.
By continuing to use this site, you are consenting to our use of cookies.


 ) actuator installed and the snap ring that holds it in place was slightly deformed. I ordered a pack of 300 assorted metric external snap rings from amazon for about $12 so I’ll swap it out for a new one before I button the cover back up.