Yamaha GRT-1 (Gravel Road Tracker Ver. 1) from the Northwest

makotosun

Avoiding creeping perfection!
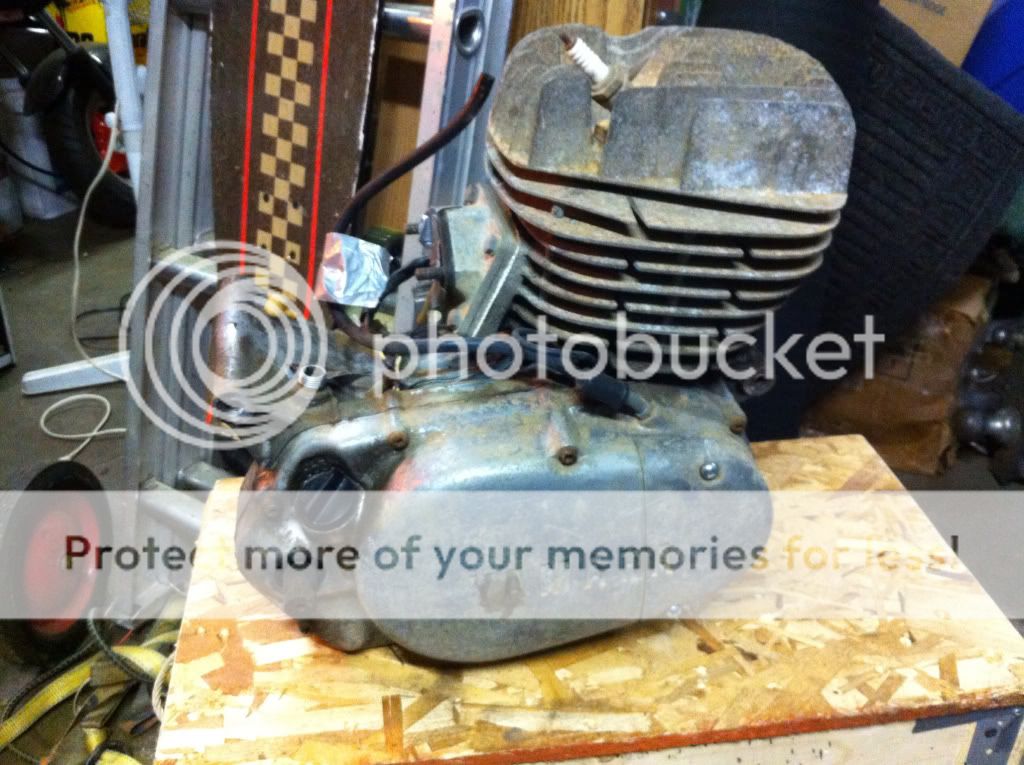
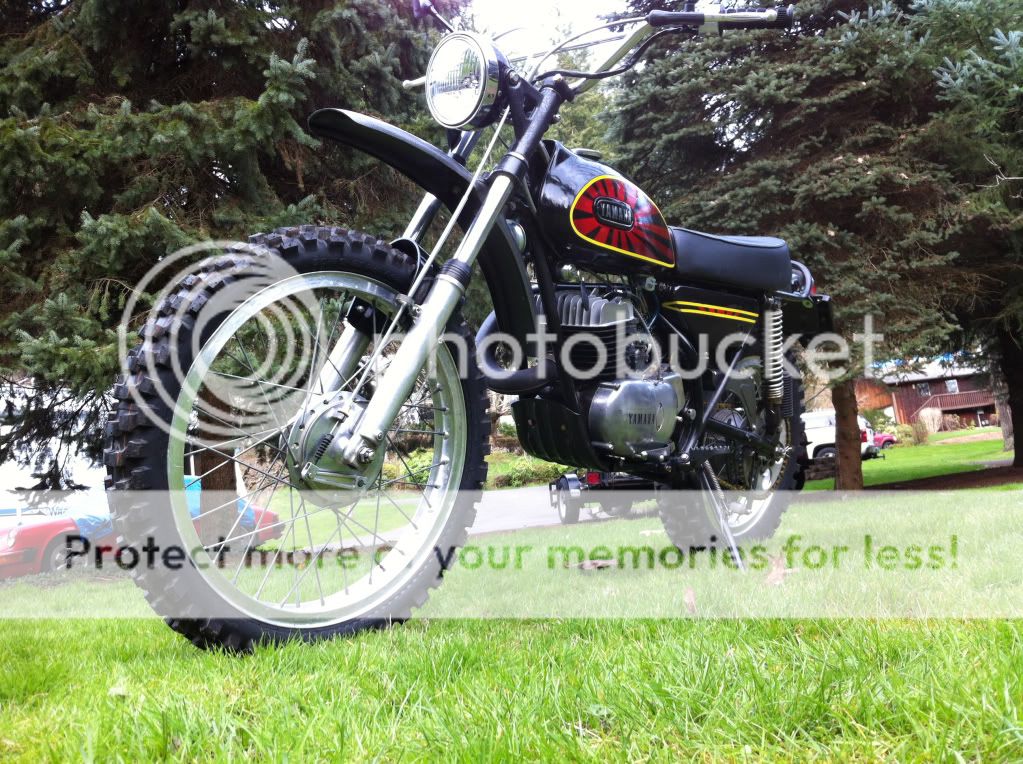
I don't know where to really put this build, but I have hinted about it with my signature for some time. It is really kind of a Motocross base, but it's intended use is more street than trail. Given the trends in bikes I see here I think it may be an interesting stepchild build.

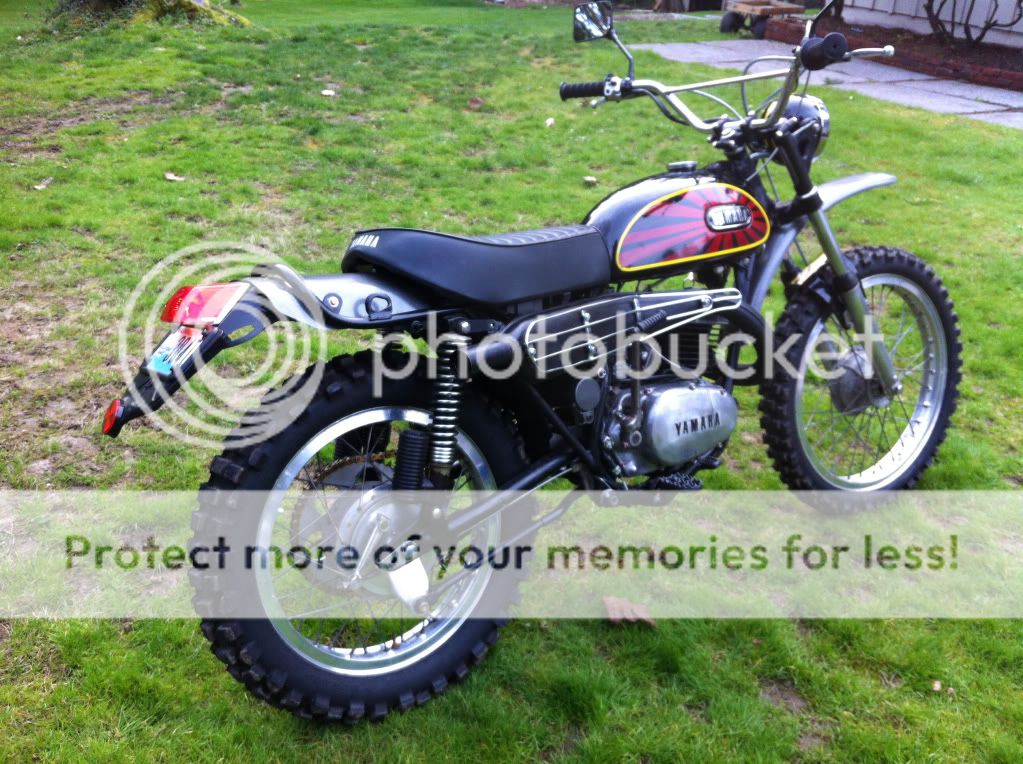
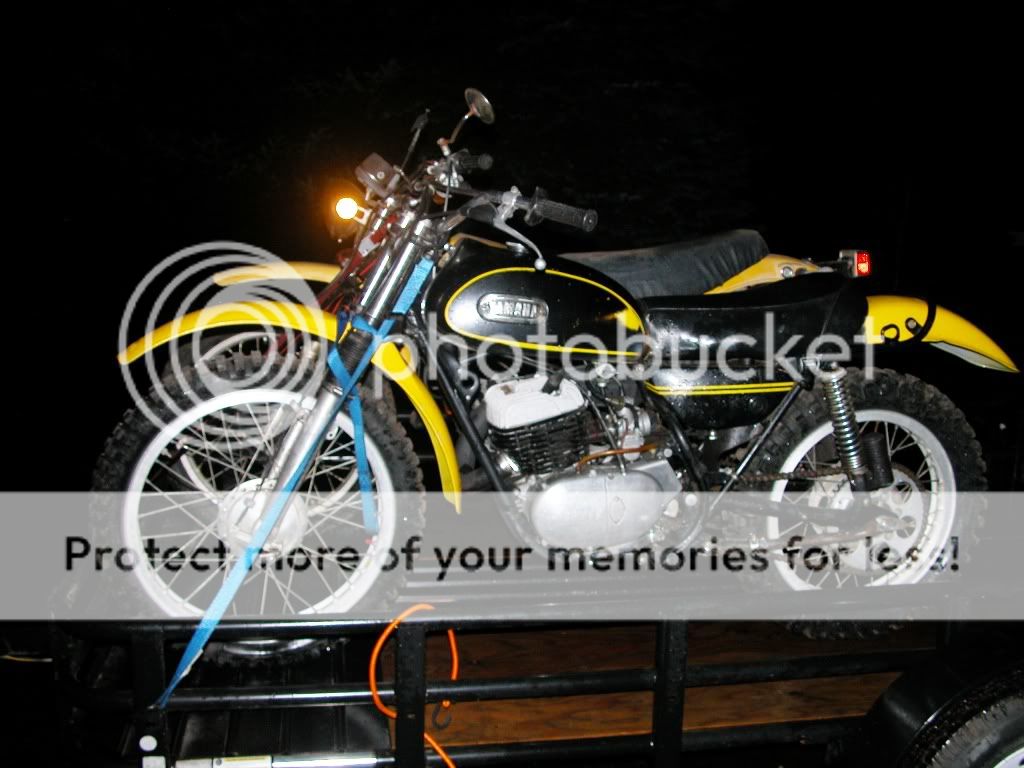
It all started in 2007, when I brought home a 1971 Yamaha DT1 that had been turned into a motocrosser back in the 70's. It had been ridden hard and put away wet a number of times, but the price was right and it had a tone of neat period correct race parts from back then. So one dark and rainy night in December, it followed me home . . .

christmas2007014.jpg


I needed good paperwork before I would really build in earnest, so after much trial and tribulation, (and a couple of years in storage) I was able to chase down the name of the last registered owner (two or three transactions before the one I acquired it from) who I discovered was living in "the home" and couldn't recognize anyone, much less sign over any paperwork. I was lucky. Turns out it was owned by a real motorhead who apparently raced it back in the day!

His brother was his guardian and was able to sign off, but not before I got the full story of the invasion of North Africa in WWII! A 4 hour round trip, an hour of stories, a trip to the Oregon DMV then a trip to the Washingto DMV and I have plates and a registration with a title in my name in transit! ;D

Some of the cool parts that came with the deal:

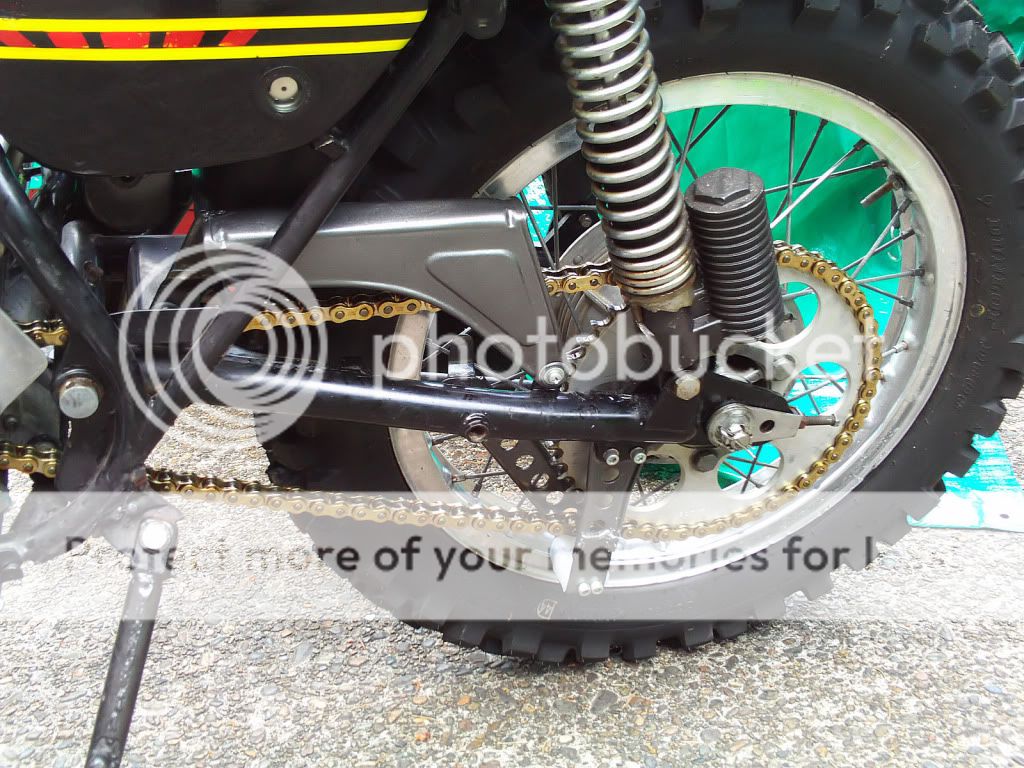
Akront Shouldered rims and hubs from a MX:

DT1_beginning002.jpg


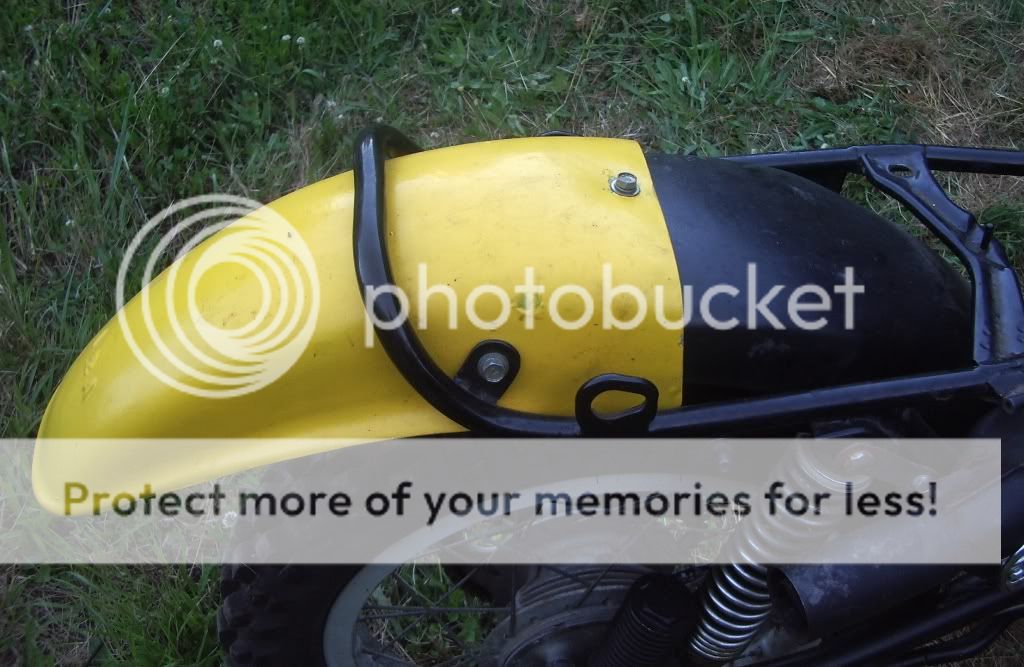
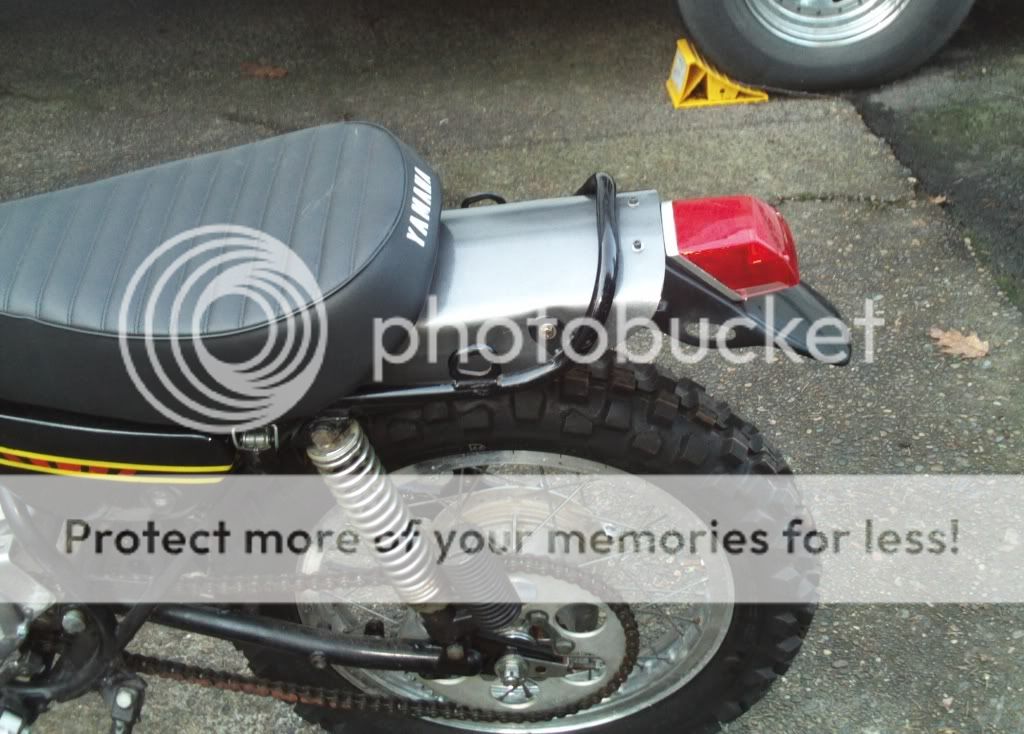
An A&A Racing http://www.aaracing.com/ period correct flat track rear fender:

DT1_beginning028.jpg


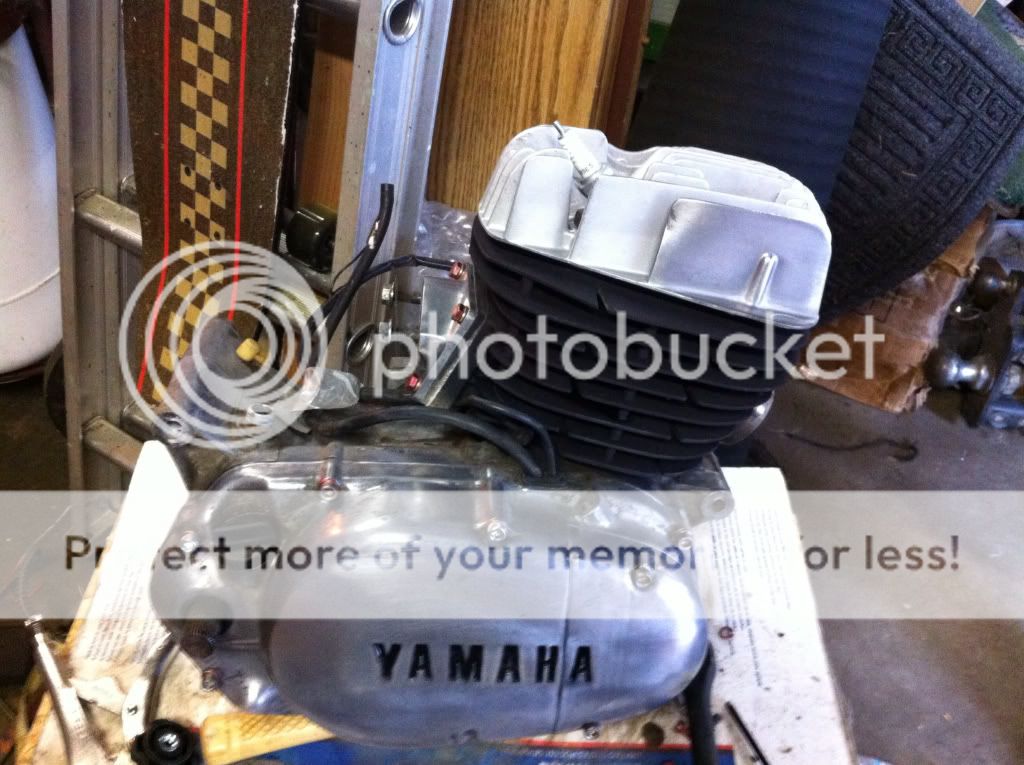
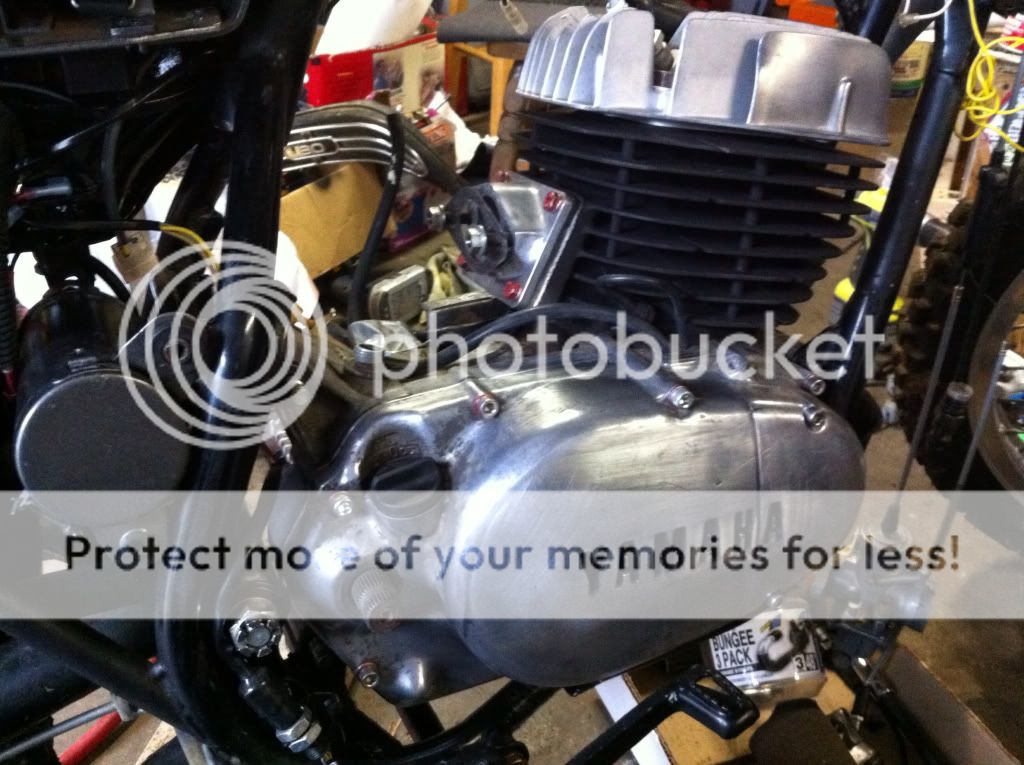
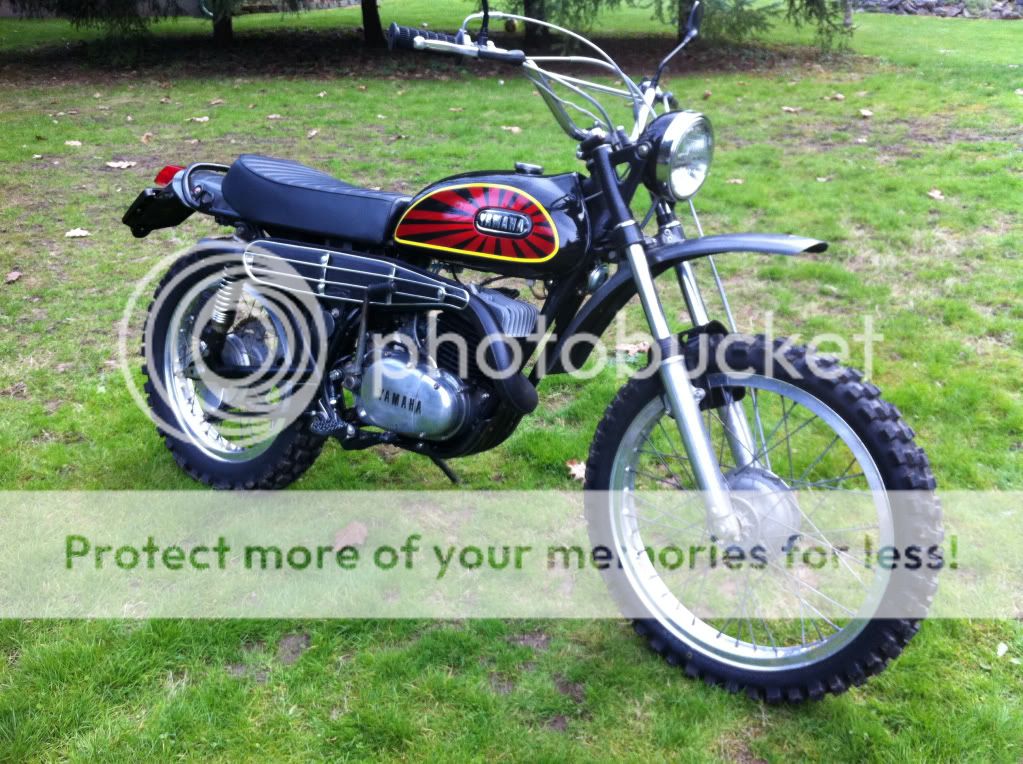
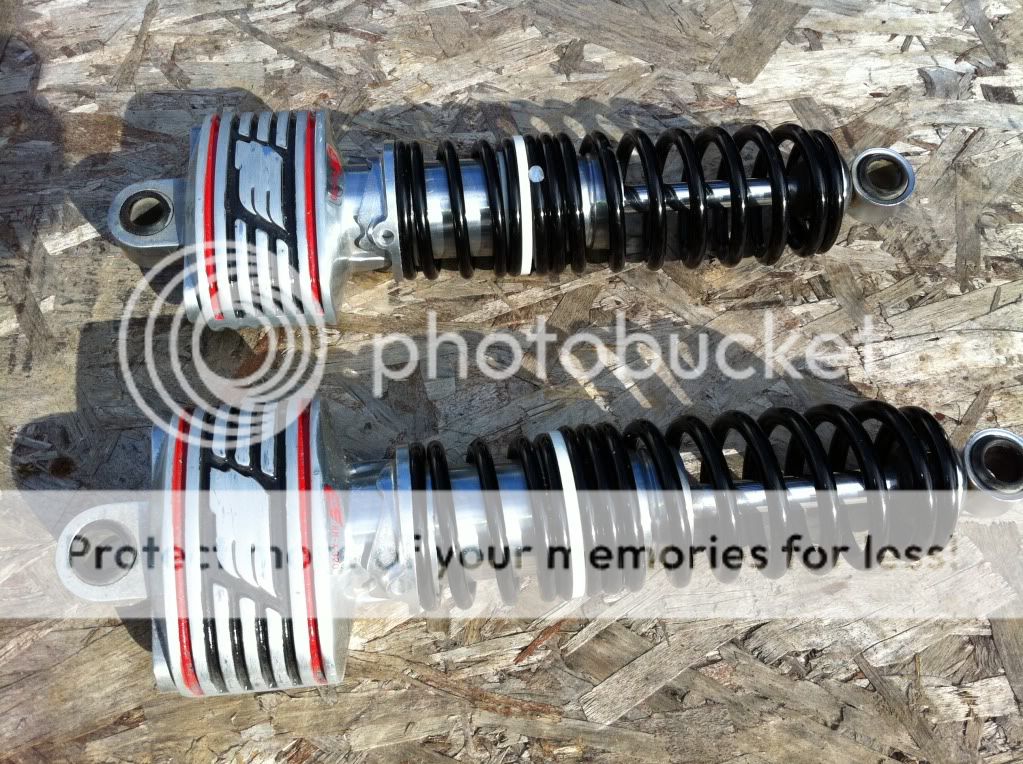
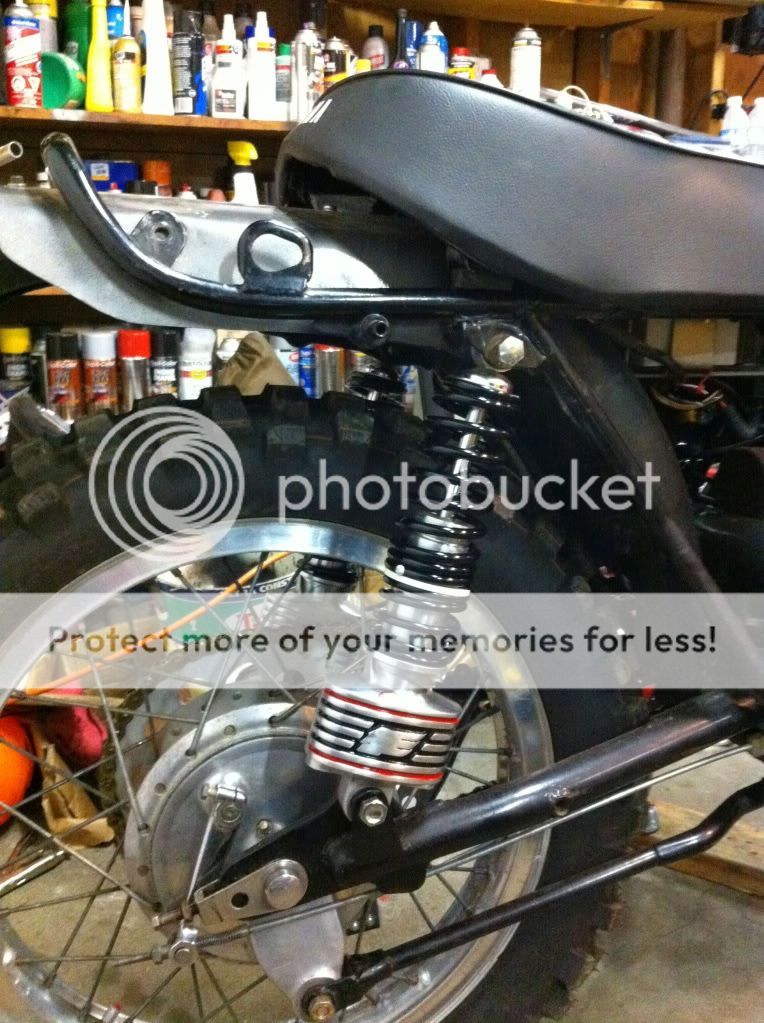
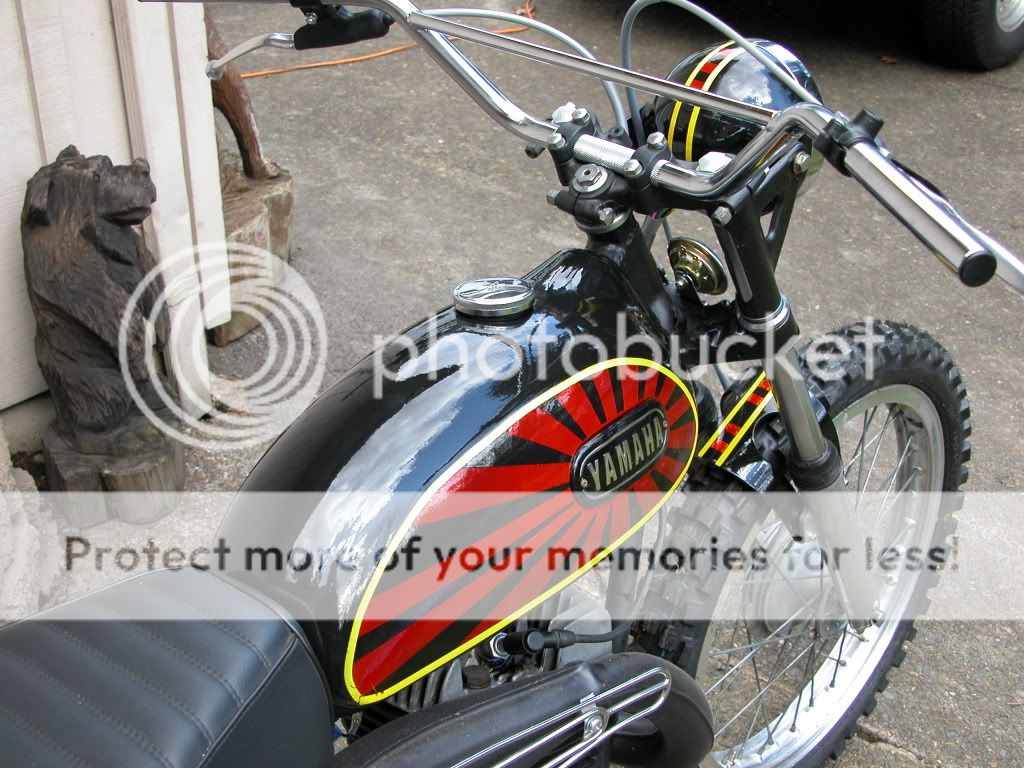
MX shocks and front end as well as completely stripped of street wiring, lighting etc. The seat was a ratty thing and it was set up to run pre-mix. A neat surprise was a frame coating that seemed to be an early version of powder coating!

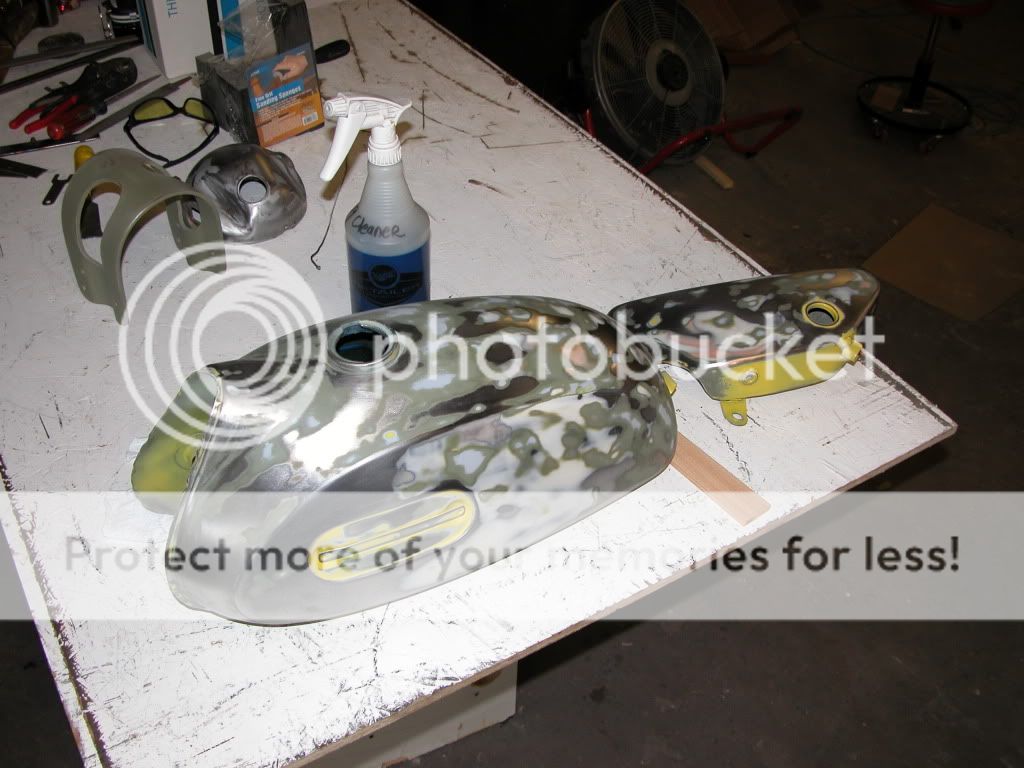
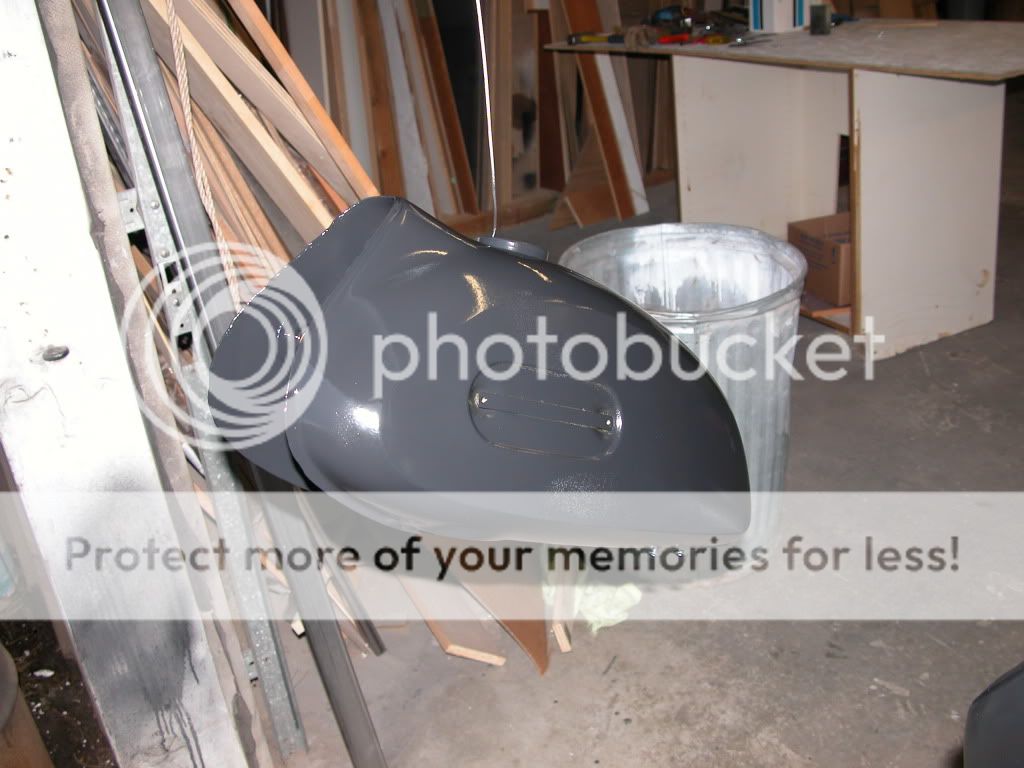
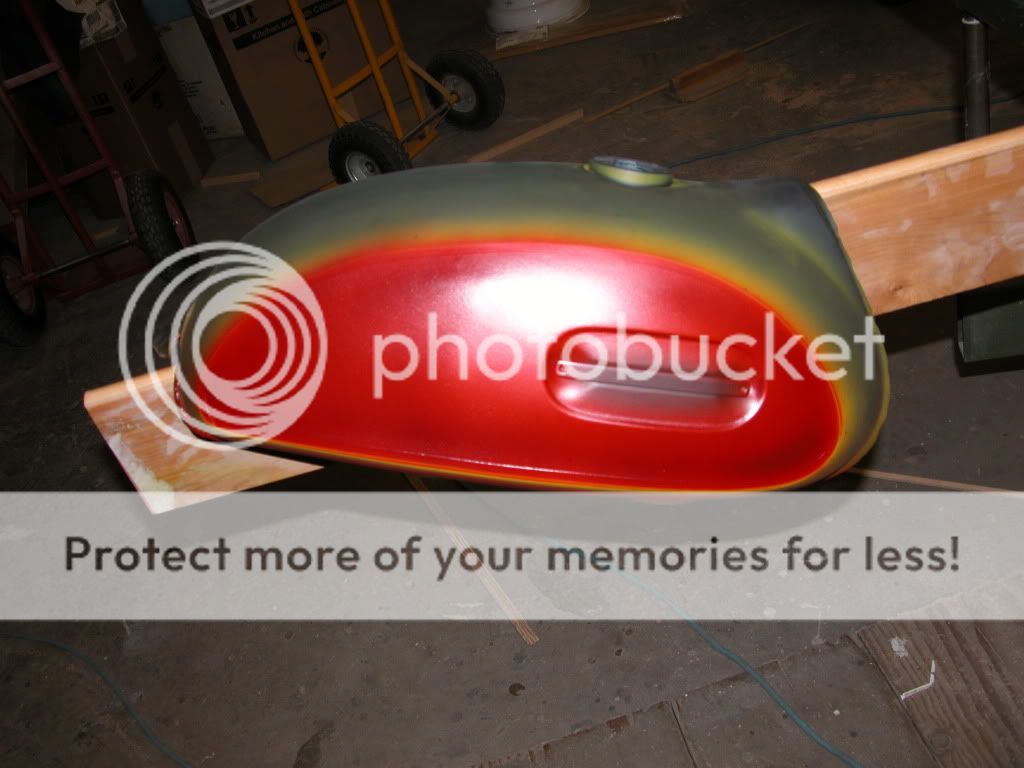
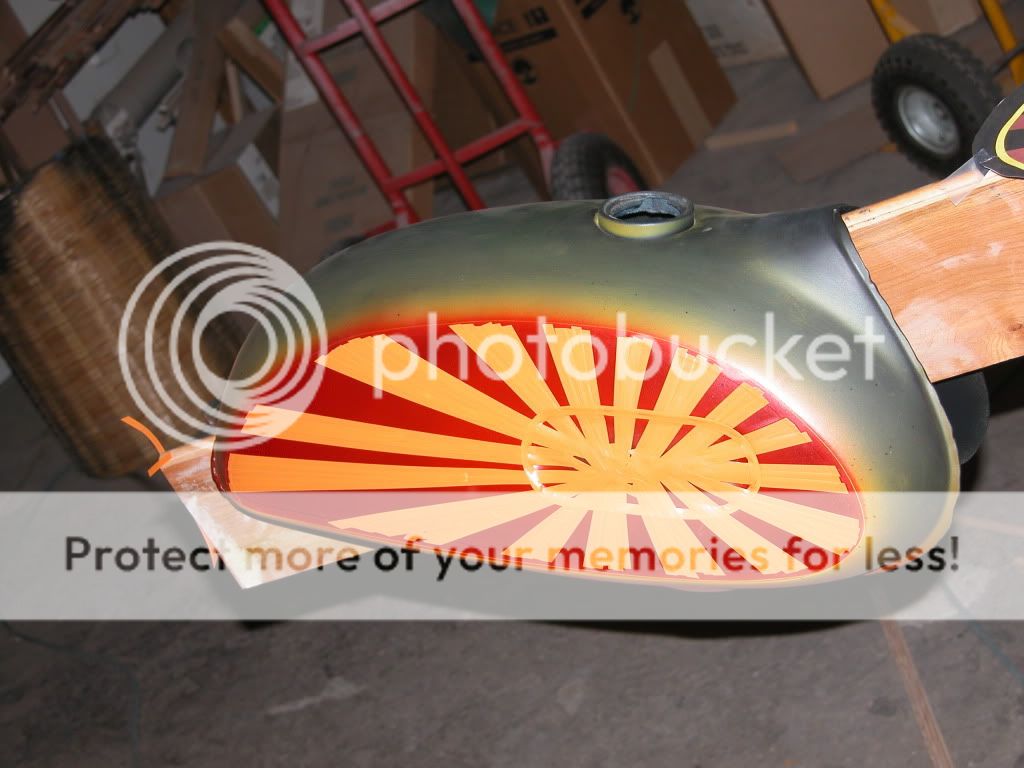
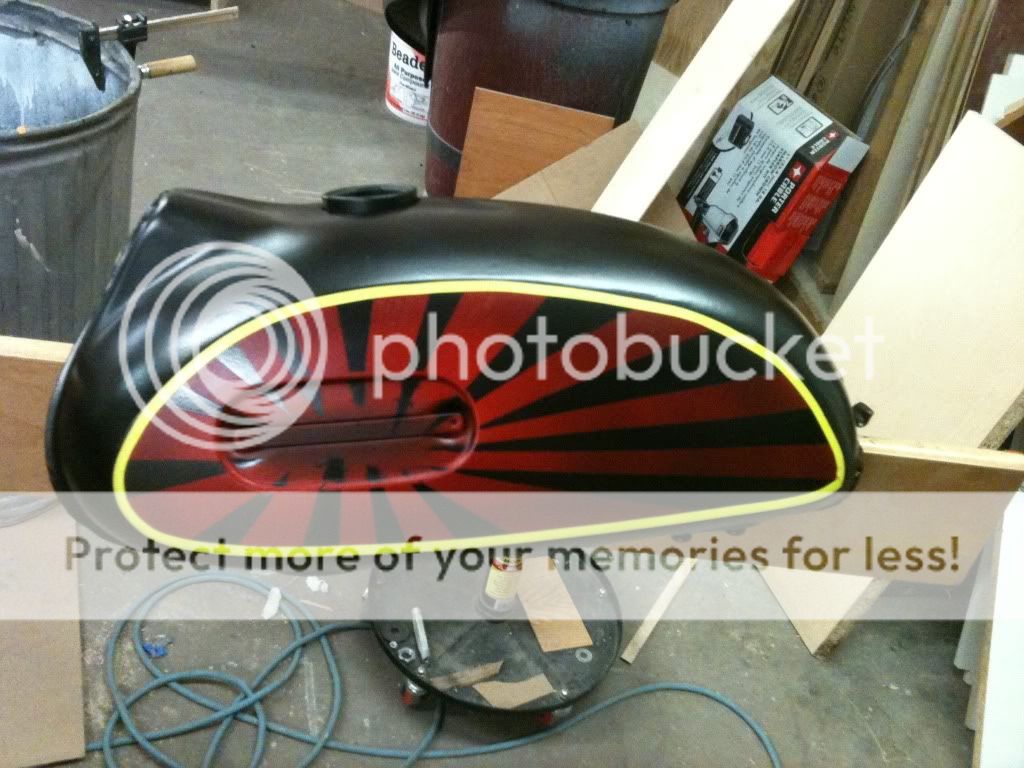
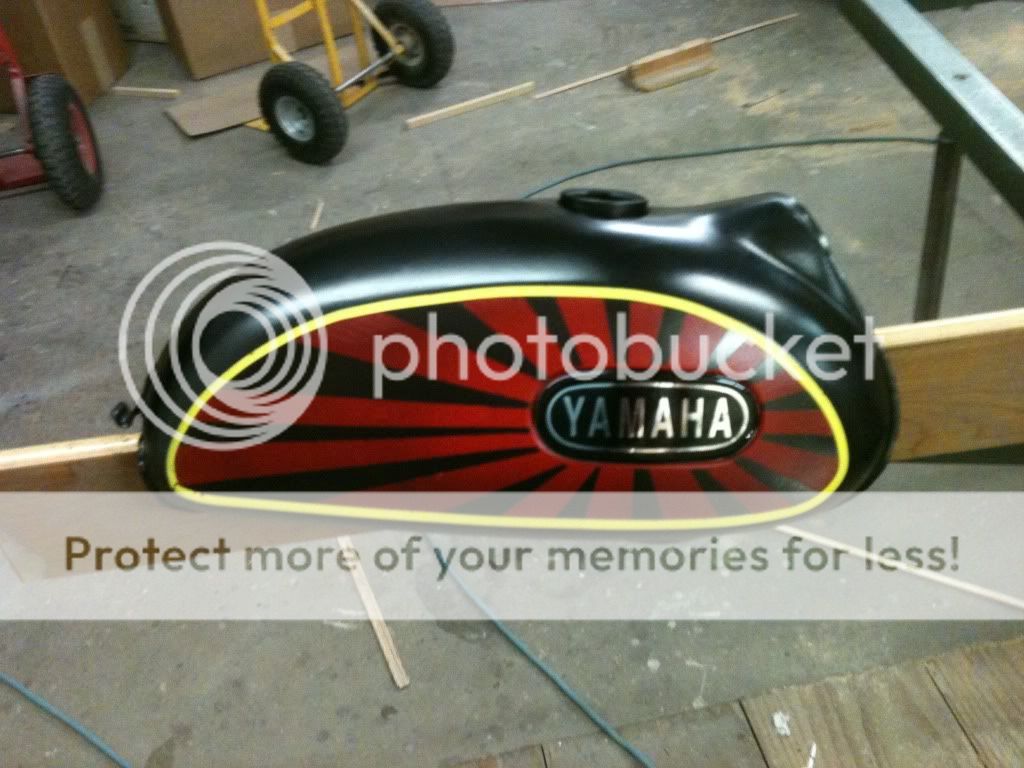
All in all a nice base for a full on build. I wanted to go with a flat tracker/MX inspired street legal bike that could have been build as a factory "Works" model. We'll see where this goes.
 
I started shopping E-bay for bits and pieces for a couple of years and tried to understand just what was good, bad and the like. I got the tank dipped by a place in Portland, Oregon called American Metal Cleaning http://www.americanmetalcleaning.com/. They do a tank for under $50 and it is clean as a whistle inside and out. No rust, liner, etc. It also exposes those nasty little pinholes that inevitably plague old tanks!

So off to my local radiator shop who soldered up the holes, and did a red kote tank lining for me. Popular with the Hot rod crowd and less likely to degrade like the other brands. Which left me with a nice clean canvass . . .

start_tanks.jpg


So what do we do now? I had some inspiration over the long cold winters with my computer graphics programs . . .

Graphic5_brocure2.jpg


Inspiration but since I had never done a custom paint job - a bit daunting.

So off to my buddy the hot rod builder who has a good place to work. We start with a base coat of PPG JP377 which is the nastiest stuff you can buy I think next to napalm. Even across the room it makes your nose burn! But the end result is amazing:

primed.jpg


I then began the experiment. Water Based auto paint from Auto-Air company which is the stuff custom painters use for airbrushing. Neat stuff as it goes on really thin, you can dry it with a hair dryer and re-coat in about 10 minutes. I used a cheap airbrush kit from Harbor freight to try this stuff out.

First a line of yellow followed by tape to emulate the original yellow stripe from Yamaha. Then a coat of the red background:

redside.jpg


It is hard to see, but I used a semi-opaque mix of black to darken the edges of the red so that the final look would be sort of a vignette effect so it would tend to age the finish:

Then the real taping ordeal begins:

taped.jpg


After you get that laid out (The taped sections will end up being red) you spray the whole tank black - also using the water based color coat. After half an hour you can remove the tape to reveal the slightly dull color scheme:

5cbbc150.jpg


Pre-clear coat:

99a5c03c.jpg


The next day a coat of PPG Omni Catalyzed Clear which almost looks like it is wet when it drys. I used three coats and the finished product is amazing.

glossed.jpg


I also did a custom layout on the headlight, oil tank and fork brace:

DSCN0744.jpg


That last shot is out of order, but I can't find the separate photos at the moment. More in a few minutes . . .
 
The bike originally was going to be converted from points to a DT400 CDI unit and the final iteration will likely have that done. I discovered that the later flywheel/stator units will bolt up to the early motors, but on this project I decided to just get the darned thing going. Since much of the infrastructure under the seat was missing, I decided to go with a simply foam air cleaner and a gel battery. The tray I made up will eventually hold the CDI unit as show in the photo.

electrics026.jpg


And a better shot of the paint scheme on the oil tank:

electrics028.jpg


The front fender is a vintage plastic high mount fender painted dark grey, but I wanted something different for the rear. I made up a pattern and transferred it to a sheet of 10 gauge stainless and cut it out.

FILE0002.jpg


FILE0005.jpg


Now the big question - how to make a nice bend in this stuff? It is really stiff. The answer is the Original Redneck Metal Brake. Simply screw a hefty bit of wood on top of the metal and into your wooden porch . . .

FILE0006.jpg


Carefully lift the longer side . . .

FILE0007.jpg


and then repeat for the other side . . .

FILE0008.jpg


Add to the bike and then add one of those conversion taillights made to make MX bikes into enduro models . . .

fenders2_4.jpg


So now we move on to other generic parts and pieces: Dunlop D-606 DOT knobby tires - decent street handling and wonderful on the gravel . . . The original 54 tooth aluminum sprocket is reused, Gold Western Power Sports chain etc.

chainguards.jpg


I also replaced all cables on the bike with new period correct grey sourced from Sudco.
 
So - like I said earlier in the story, the bike was titled as a DT1 250 but had an RT1 360 motor in it. I liked the idea of the big bore, but apparently it didn't like me all that much. I discovered why these things were called widow makers back in the early 70's.

A pair of very heavy shoes, though not boots, a bit of kickback and the next 6n months spent limping about like an old man . . .

c6e4df2f-c447-6a7d.jpg


c6e4df2f-c47c-327c.jpg


Yes - it hurt at least as much as it looks. :eek: My ankle is normally much more normal . . .

The bike went into storage for a few months while I licked my wounds and plotted on how to make it more manageable. Please note that the injury above happened AFTER I had installed an aftermarket compression release!

So as luck would have it, a good buddy of mine happened to have a nice barn find DT2 250 motor sitting in his garage. He checked it over and it seemed to have a decent bore, good shifting, and spark, but he know precious little else about it. We traded the motors and I spent a weekend cleaning up the nasty bit of aluminum.

Started out looking like this on Friday afternoon:

06a359a1b368922129f5a8d58f0712f3_zps96950d38.jpg


A couple of gallons of elbow grease, wire brushing, bead blasting, polishing, etc and it looked like this on Sunday afternoon:

2c4f66b7e62119b53645160ab0db4cb0_zps7d11038a.jpg


So - still not knowing if we have a good motor, tranny or anything else, in she goes for testing:

841155e1b0b13af6942c7219b8115a20_zps5b153759.jpg


So as luck usually never has it, the bike did have spark. It did seem to have decent compression. I added a rebuilt ebay carb and it started after a few stabs at the lever (which, I might add) is a lot more friendly than the 360 ever thought about being!)

The clutch is a bit sticky from sitting, and the shifter needs a tad bit of adjusting, but all in all the motor seems rideable for now. Probably going to get a new slug in the piston and a bore in a few months, but for now it will work.

I had installed a repop wiring harness built by the same friend who traded me the motor and am happy to say all of the electrics seem to work fine. It will become the test bed for the CDI conversion this summer, but for now, the 20 year old points (which still have yet to be cleaned, adjusted or timed) will do fine.

Some almost done glamour shots:

24354d0ecb3007b44edf4f9def964392_zpsf729a75e.jpg


9ff8c8792bee176aa5f12334a5da2579_zps26348e32.jpg


98c5196ffc2eecd4c34ada2a3b85191f_zps25ec3f7a.jpg


it also may be getting some more tracker styled bars and a small rack on the back. All mechanicals have been checked or replaced. New brake pads, tires/tubes, bulbs, wiring, new horn, fork seals and wipers, all cables, tank badges, added a voltage regulator and it will have some blinkers for street use. I also have a stealth trailtech vapor which I anticipate will go on the bike next.

All in all, this is a short summary of a 5 year project. I will add a few more shots as it moves into final form.

thanks for following along and hopefully it is tracker inspired enough to not get kicked off of the site . . . 8) I plan on riding this to work on a regular basis this summer!
 
Thanks - I have a number of additions which will be happening over the next week or so. Better sprocket ratios (cool NOS Gary Nixon Enterprises Alloy rear!) and some NOS Hammerheads! eBay has been good to me this past few weeks.

More pics when I get some more progress done.

Thanks again for the kind words!

-
 
Very cool bike! That tank really turned out well.Lots of nice details and fab work.I grew up on RT's and DT's and many other 2-stroke singles.This gives me the itch for another.
 
So I decided to upgrade the suspension a tad bit. I got a great deal on some NOS Redwing Hammerhead shocks with progressive springs. They came complete with the original box!

null_zps73e09b6a.jpg


They were really gorgeous, but I thought they were kind of plain on this application, so . . . A little color detail to the rescue!

null_zps46d1fb29.jpg


null_zpsddb6a270.jpg


A few more details coming before we are all done! Then the video cam will come out.
 
So I thought I would bring the collective up to speed on this old project. It finally got mostly finished :eek: even though a project bike is really never finished.

I added some gauges so I could keep the thing semi-legal:

1768a9d137cfd64260479d9091fafc40_zps1566517c.jpg


The speedo was the most difficult - added a mount for the magnetic pickup and epoxied the magnet into a spoke hole.


null_zpsa3774154.jpg


It seems to work just fine. I did the wire on the spark plug wire to get the tach working. Interestingly, with the old two stroke setup, I needed to simply lay the wire one time across the plug wire to get an accurate reading. Any more and it seemed to blast the reading off the scale. If you are using one of these on an old Yammy, you may need to experiment a bit.

The bike is not a garage queen. It is really nice around town on the street and catches a lot of eyeballs. It also is no slouch in the dirt as it really is set up for that. It make a trip for it's maiden voyage with me to Moab, Ut and got some great time on the trails there.


Moab-2013-260.jpg


The bike is not a garage queen, but it seems to attract more attention than the rest of my bikes. It got the nod from artist and photographer Chris Siege of Seattle for an impromptu photo shoot on Alki Beach in West Seattle.


SIEGE.jpg


10601080_10152614723079544_461333466_n.jpg


You can see more on the photo shoot at: http://www.wischt.com/machine/MKL-DT1.htm


Thanks for following along. 8)
 
Back
Top Bottom