Follow along with the video below to see how to install our site as a web app on your home screen.
Note: This feature currently requires accessing the site using the built-in Safari browser.
We noticed you are blocking ads. DO THE TON only works with community supporters. Most are active members of the site with small businesses. Please consider disabling your ad blocking tool and checking out the businesses that help keep our site up and free.
Interesting. I wasn’t aware that there had been this change. I just looked up the year and saw there was an earlier version, but a fairly straightforward run after that. I wonder if that will make replacements a snipe hunt? Or is there some forward compatibility there?
Would that alter the means of removing the basket from the shaft? Generally, I always play it on the safe side when I’m removing key components, so I hated to muscle it off.
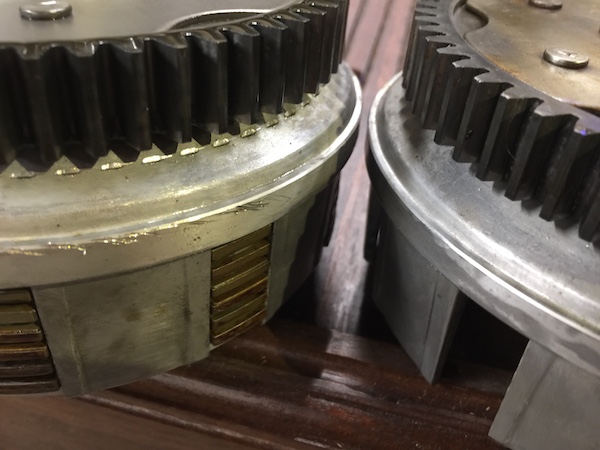
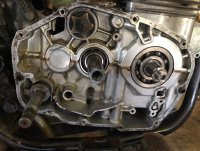
those gears are exactly where they are supposed to be. They are retained by rivets from the backing plate though the basket. The two gears on the crankshaft - inboard of the centrifugal oil filter are matched with the same tooth offset. The design is to reduce gear whine in a straight cut primary drive and avoid side thrusts from helical gears.
Scratch that...after looking at the website listed on your diagram I can see this is par for the course on the machining. Removing it is still up in the air.
Scratch that...after looking at the website listed on your diagram I can see this is par for the course on the machining. Removing it is still up in the air.
I’ve been skimming thru this thread, nice work so far. I’ve built a few 350’s but it’s been a little while. Are you having trouble removing the clutch basket?
If so, have you removed the oil pump? I believe the pump’s plunger mechanism attaches behind the clutch basket, and the pump housing needs to be unscrewed before removing the clutch basket and gears. With the clutch basket circlip removed wiggle the basket/gears and you’ll notice the resistance coming from the right side near the oil pump.
I agree completely. Great to see people contributing. I never realized there was such a large culture on these boards. There’s quite a few of them.
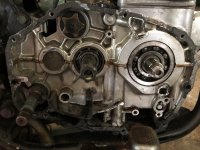
I did remove the oil pump. Once I got the basket about 3/4 off the shaft I was able to palm the both the pump and screen and slide them out. I went ahead and set them to the side so there was no pressure on the arm for the pump while I was working out how to get the basket removed. I almost feel like I might be too tentative with it. Like I said, I’m use to being mild since I’m typically working on other people’s equipment. Maybe I should just get on this thing and walk it off. Maybe I’m just not holding my mouth right. Tough call.
Overall, that day was productive. I completed the removal of most of the components under the right-side cover and started cleaning the compartment. I have changed my mind on the GSXR forks. I think I will knock those back out and go stock. Question for the knowing: is the front fender plus bracket a factor in stability?
I can see that would be the case. I wondered about it, mostly because I have the front fender but it appears to have been modified. I also have two extra forks. Thinking about putting the original stem/forks back just so I don’t have to constantly match parts. Just a thought.
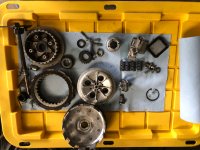
After I got a Cub Cadet off the bench that had a bad drive belt, I did this today. Believe it or not, this has certainly come a long way. I’ll still need to make another pass with soft Scotch Brite to remove the rest of the gasket, but this is progress. All the removed parts have been measured, cleaned and had some white lithium reapplied. I’ll try to reassemble tomorrow and might get a jump on cleaning the covers themselves.
This site uses cookies to help personalise content, tailor your experience and to keep you logged in if you register.
By continuing to use this site, you are consenting to our use of cookies.