SteveG
Been Around the Block
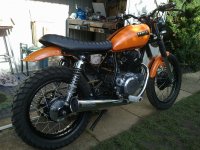
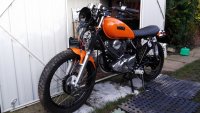
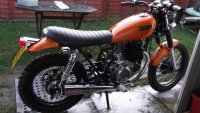
Hi Milky, I rubbed it down with heavy grit paper to get rid of the rust pitting then I wet and dried it smooth. It doesn't get rid of all the chrome but does key it enough for the primer. Then I primed (two coats) and wet and dried it, building up the layers until all the small blemishes were gone (about four times). Then I did the same with the top coat (removing any slight orange peel). When I was happy that the top coat was perfectly smooth, I rubbed it down again with 1200 grit wet and dry (goes dull all over) and added two coats of clear. You may have a little orange peel in the lacquer, but this can be taken out with rubbing compound when it has had two weeks to harden. This all process is very time consuming, but will leave you with a very good finish.
Rub down to key and remove rust.
Two layers of primer, wait 24hrs and wet and dry - repeat until smooth. About four times
Two layers of top coat, wait 24hrs and wet and dry - repeat until smooth. About four times.
Wet and dry final coat of paint with 1200 wet and dry until perfectly smooth and dull.
Add any decals.
Add two layers of lacquer.
Wait two weeks and gently remove any slight orange peel with rubbing compound.
* Make sure you remove any orange peel between coats of primer and top coat. Orange peel does not cover and you cannot fill in the dips with more paint - it just gets worse.
* Should have mentioned that I did this with rattle cans.
Cheers Steve