Follow along with the video below to see how to install our site as a web app on your home screen.
Note: This feature currently requires accessing the site using the built-in Safari browser.
We noticed you are blocking ads. DO THE TON only works with community supporters. Most are active members of the site with small businesses. Please consider disabling your ad blocking tool and checking out the businesses that help keep our site up and free.
First time poster here (but I've used the search and learned a lot!) hoping to both chronicle my bike build as well as meet a few folks and hopefully lean on you for help.
Anyway, nothing new to this group but I'm pretty darn excited about converting this SERIOUSLY UGLY '82 750 which I picked up last week for dirt cheap. If my build bores you please slap me silly but if you have sound advice along the way please by all means...
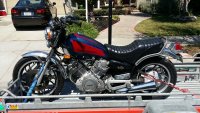
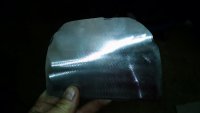
Here's what this super hero bike looked like when I dragged her home. My wife laughed out loud as she stood on the porch with coffee in hand.
A couple nights later (and more than a couple beers later) I brought down the house and scattered the bike to all corners of my garage. The good thing is that though this is a 30 -something bike, it's a california bike so no real rust to speak of....everything came apart with ease.
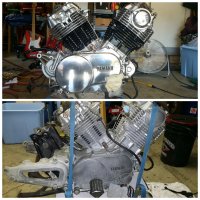
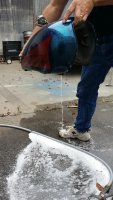
Well, last couple days have just been focusing on the hard and dirty part that we all hate doing but might as well get it out of the way. Engine cleaning sucks!!
After hours of degreasing, washing, acid bath, more degreaser, sanding, scrubbing, polishing and a bit of paint....it actually looks like a decent engine now. Still quite a bit to do but here's a progress pic showing a before/after.
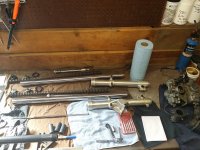
Waiting on a slew of minor parts so it's off to the suspension and carbs.
Hopefully will have enough parts to start the subframe/tank mount fab this weekend.
I took a trip down to my friend Robert Haas' shop, which btw is an adult wonderland for builders, to tackle the job. After getting Robert up to speed on what I had envisioned we quickly came to the agreement that if we were going to spend the time that we should just jump into the deep end.
So off we went...
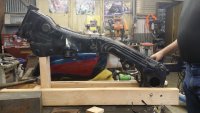
I built a simple frame jig to hold the frame at an approximate angle to how it will sit when complete. This should be close enough for us to get moving in the right direction.
Moving forward with a solid game plan we prep'd the tank for some welding by neutralizing the remaining fuel vapor.
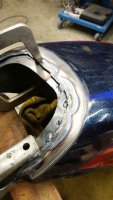
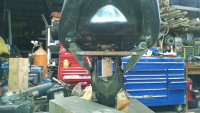
No black hole tank gaps on this build so 'off with her head!'...
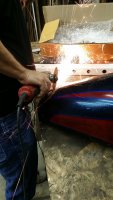
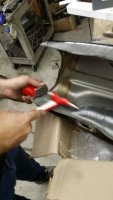
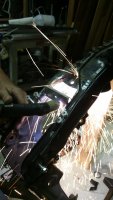
After lopping off the tank mount we went to work on the sheet metal. Robert hammered away with various sheet dollies to beat that tank into submission.
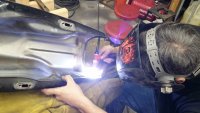
Got a good profile to the new edge but time to seal it back up so I don't experience a fire - bomb down the road from a tank leak. Robert added a nice rolled - over weld that we can build on.
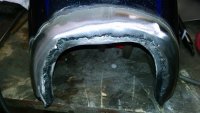
Last order for the day was to tack up a backing plate that will serve to reinforce and anchor the main piece. Patience required when stitching soda can thin metal...
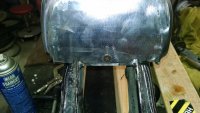
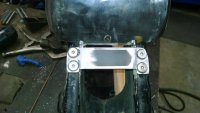
Constructing an end cap for the tank to fill that ugly hole. After welding up it puts me in the ballpark with minimal finishing work before paint (waaaaaaay down the road).
Nice work with the TIG man! I did my tank narrowing with an old 220 mig... so I have an appreciation for welding on tins. Looking forward to seeing what you build here.
Nice work with the TIG man! I did my tank narrowing with an old 220 mig... so I have an appreciation for welding on tins. Looking forward to seeing what you build here.
In addition to the build progress I'm also faced with some build decisions that could take this project deeper into the rabbit hole. But before I get into that.....first some more progress pics.
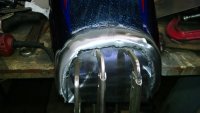
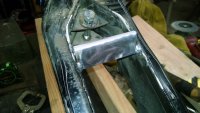
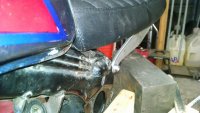
Got the rear tank mount welded up, drilled and then installed a threaded nut insert. Then drilled & mounted the tank. Ended up with about 1.875" rise to the rear of tank.
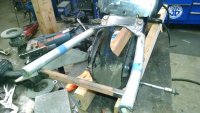
Now that the tank mount is complete the rear subframe build can now begin. The original plan to fab up a permanent subframe was scrapped for a removable piece so that the rear shock can still be accessed.
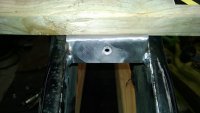
Again, using a thread nut insert to construct the upper mounting point on the frame and using 304 SS for the subframe mounting plates should give plenty of beef to support my lard arse.
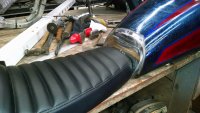
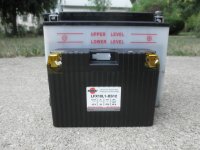
Here are a few more subframe progress pics. Decided to stay with the 304SS theme on the subframe rails. Next step will be to incorporate a substrate for the electronics to hide. Picked up a Shorai Lipo battery to keep it clean and light.
Don't you hate when a proverbial wrench is thrown into your plans?....even worse when you are the one who threw it in there. :slap:
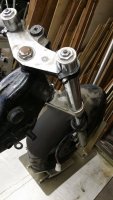
Last week on one of my visits down to Da'Glass shop (aka Tommy's) I walked in and my buddy says "I've got something you need to check out" and takes me over to his toy storage of bikes/trucks/motors/other bad-ass'ery and he proceeds to point to a mid-year R6 and asked if I wanted to use 'that front end' instead?
We'll I woke up this morning before heading back to Da'Glass shop (remember, this is a week later and after MUCH progress has been made) and thought that this was probably the best route for this build....that is if it was going to be done the right way.
Well, that decision to go with the R6 front end probably set the build back almost two weeks of 'free time' progress which really sucked but by the end of the day it was feeling like the high road and ultimately the right decision. So, today was more of a demolition day more than anything which involved pulling out the plasma cutter and lopping off some nicely completed work.
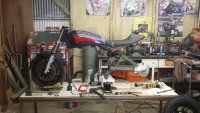
I gotta say though, the mock up looks pretty sexy!
If you guys don't mind, I have a question regarding my decision to go with the R6 front end.
My intermediate plan is to use the stock mags (xv750 rear & R6 front) to get rolling but my end game is to get this build on spoked wheels. I've already got the rear spoked hub figured out but I'm looking for guidance on any known dual rotor 36 spoked hubs that are a direct fit to this 1999 R6 front end? Any insight or leads on answering this question will warrant a drink on me! Thoughts?
Subscribed! Looking for a Virago myself. The only thing holding me back is that I don't know how to weld. How much work was that rear subframe (Hour wise)?
This site uses cookies to help personalise content, tailor your experience and to keep you logged in if you register.
By continuing to use this site, you are consenting to our use of cookies.