Follow along with the video below to see how to install our site as a web app on your home screen.
Note: This feature currently requires accessing the site using the built-in Safari browser.
We noticed you are blocking ads. DO THE TON only works with community supporters. Most are active members of the site with small businesses. Please consider disabling your ad blocking tool and checking out the businesses that help keep our site up and free.
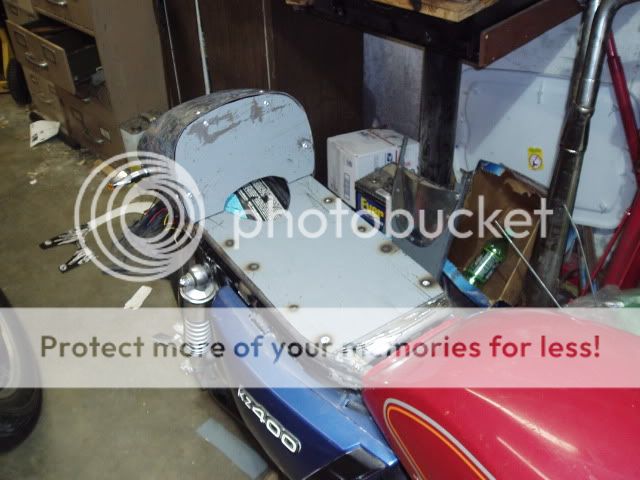
More progress made tonight at our weekly bike night. We got the gas tank bum stop welded to the seat frame and the seat pan cut out to fit around the rear inner fender. I still need to cut out some more sheet metal for the back rest but I have the cardboard template cut out so I can get some more work done at home. I sold my stock seat on Ebay today and bought the new tail light with the proceeds. Should be here soon I hope. In the meantime I printed out and foam core mounted a color pic of the new tail light at work and did a quick mock up in 2 of the pics. I must say it looks pretty realistic in the pics. ;D
I may have to post a build thread over in the seat forum when this is all said and done. It's turning out exactly how I pictured it in my head which is freaky as hell.
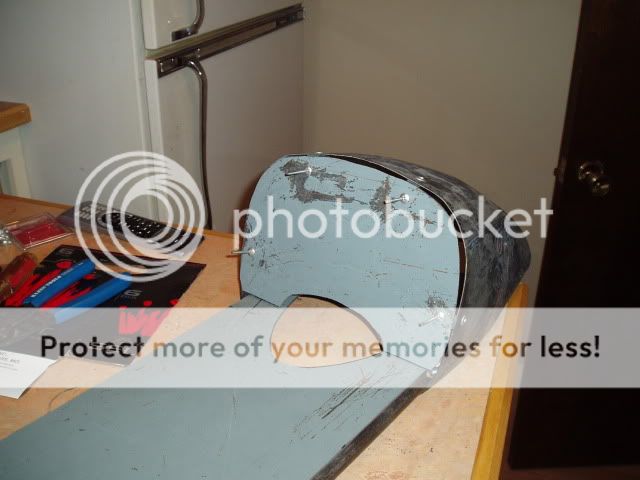
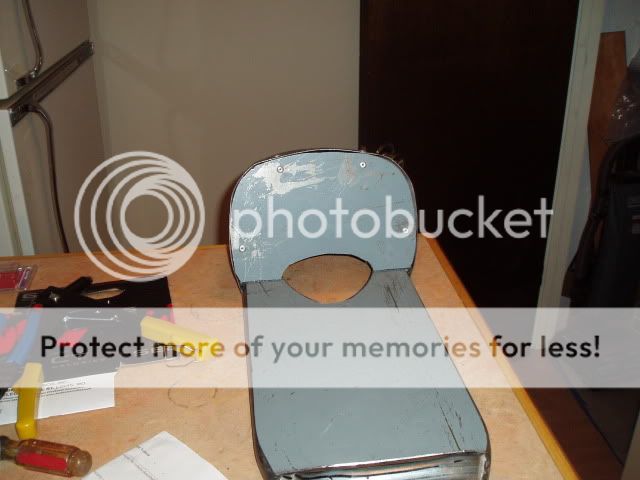
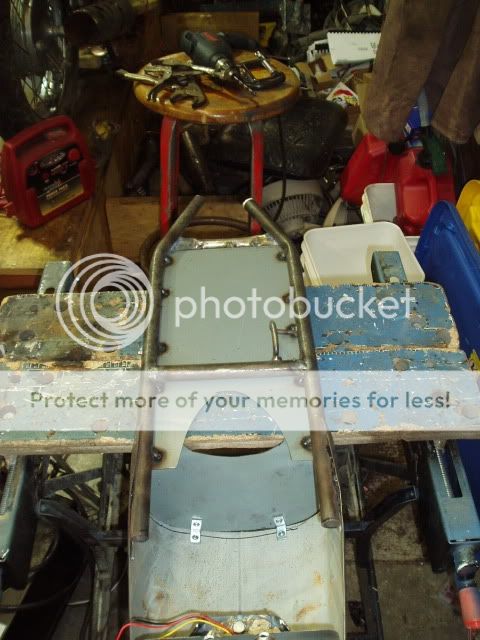
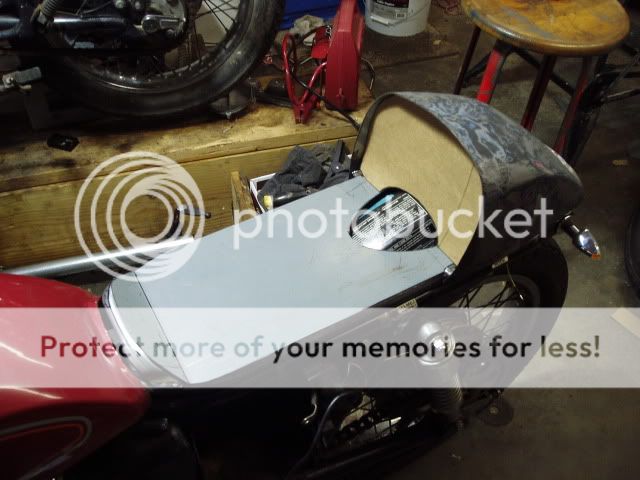
I brought the seat home with me last night so I could work on it here and amazingly enough I got some time to work on it. (doesn't hurt that the wife is out of town ) I stopped by the neighborhood Harbor Freight (way too close to home for my wallet) and picked up a pop rivet gun and 100 assorted rivets on sale for $3.99 and got to work on getting the back rest done. I cut it out of the same sheet metal I used for the pan. Some small L-brackets riveted to the inside of the gas tank end to attach the back rest.
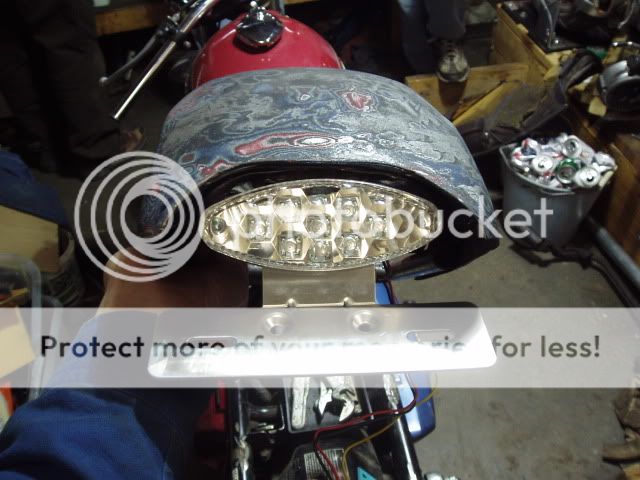
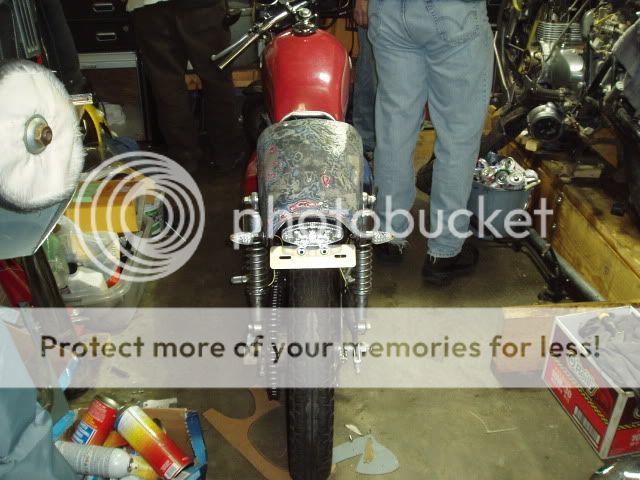
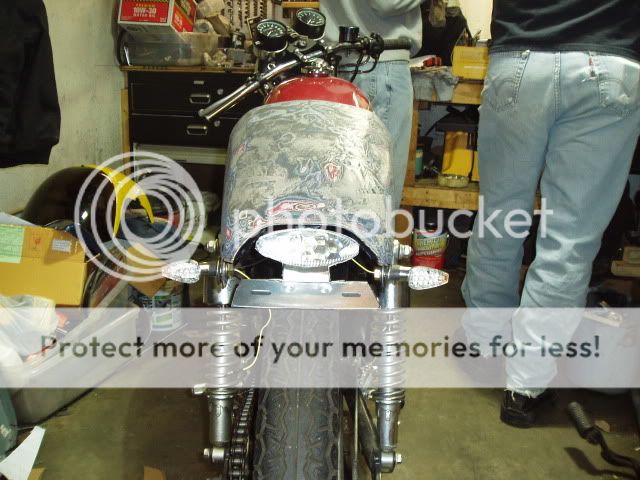
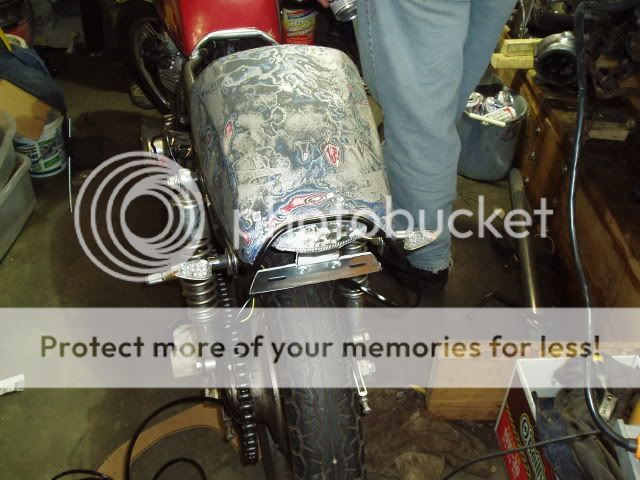
My new tail light arrived in the mail today just in time for our weekly bike night. ;D After searching through the misc L-brackets & such laying around I found what I needed and made up a mounting bracket. I'm loving it so far especially when it's lit up. Here's some quick pics.
I still need to get some split loom or heat shrink to protect the wiring for the signals and tail ight and probably coat the underside of the bump with some truck bed liner spray.
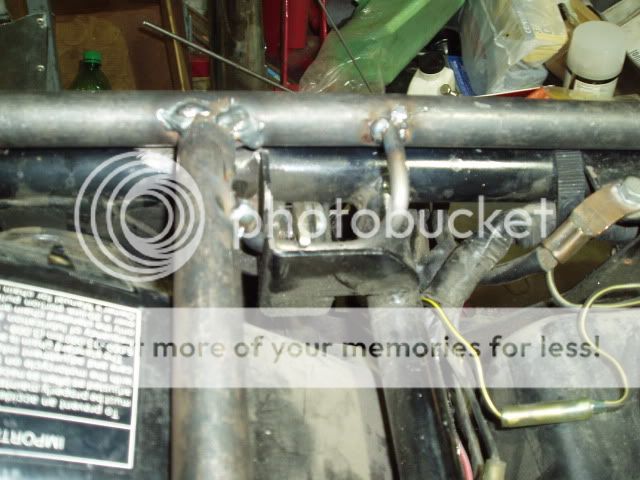
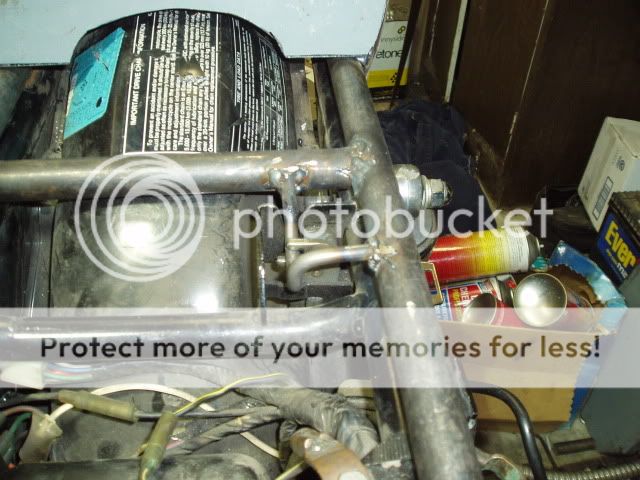
I also got the mounting and latching mechanism for the seat all figured out tonight. I just need to bend some some steel rod and weld it up to line up to the factory seat lock and a couple of tabs at the front to go into the ends of the tube frame and I'm set. The cross brace in the tube frame fits exactly between the inner fender and the tool tray so there's no play front to back when the seat is sitting on the bike.
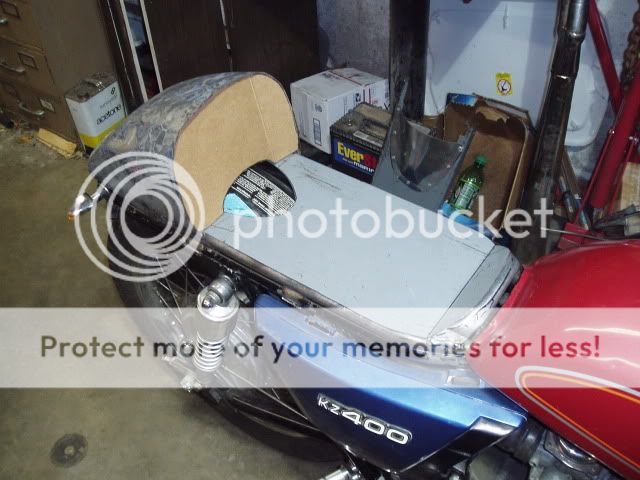
I got the latch mechanism sorted out last night for the seat. I'm using the factory seat lock to secure the new cafe seat using a piece of steel rod bent bent and welded to the seat frame that latches to the factory seat lock. I also got the seat pan welded to the frame once the mounting was all sorted out.Here some pics.
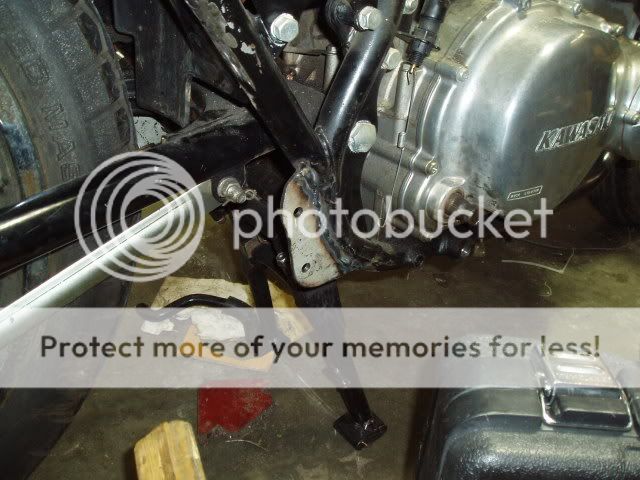
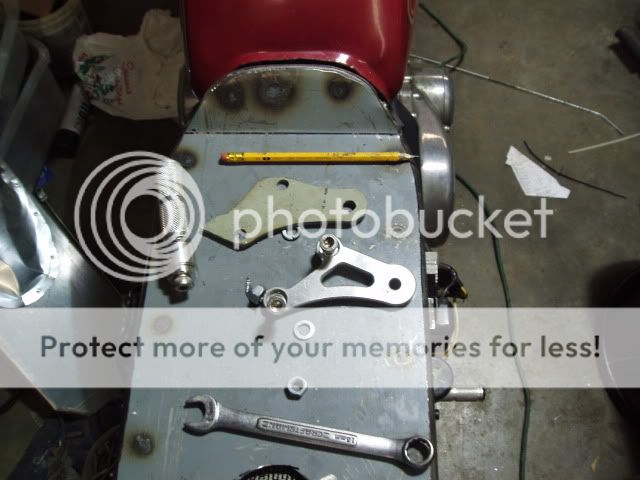
After spending 2 hours in the dentist chair this morning getting 3 crowns I decided to take the day off and work on the bike to take my mind off the pain. I got the plates welded on to mount my new rearsets so now I'm on to sorting out the brake and shifter linkages. Unfortunately it look like the shifter linkage that came with the rearsets is too long so I 'll have to find a shorter one and I think I'll make a new brake rod from scratch from some 1/4" rod bent to form and threaded to fit Here's some quick update pics.
My buddy Dave hard at work...
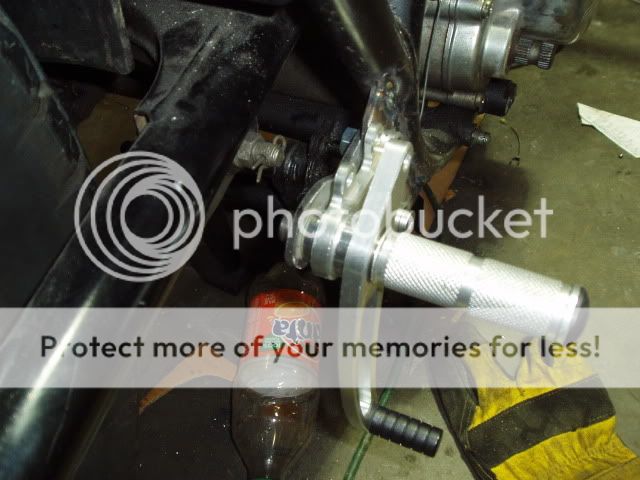
And the rearsets bolted to up to try them out for placement. They feel perfect. ;D
They still need some touch up grinding and painting of course but I'm quite pleased overall.
You may be able to modify that shifter linkage. Might be worth throwing a pic up or at least describing it a little. If its just a rod you could cut it down and rethread it. If its a rod that the ends thread into you can cut it redrill it and tap it. keep it up.
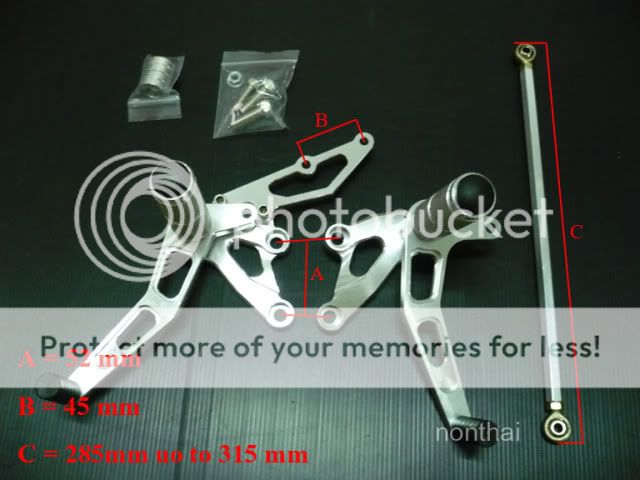
Here's the stock pic from the ebay auction. It will at least give you an idea of what I'm working with till I can get a better close up pic posted.
The ends are threaded about an inch deep on each end so the only way I can think to shorten it would be to cut some off each end plus shorten the threads on the ball joints but I'm not sure if that will be enough and would leave me very little adjustment room even if it is short enough.
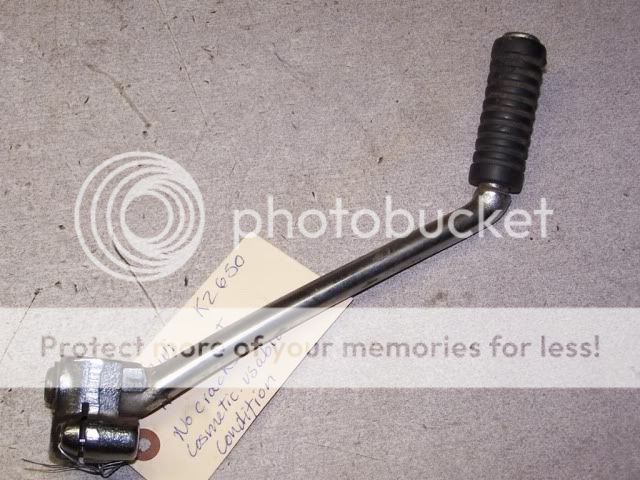
Oh yeah I forgot to mention a word of caution to the other KZ400 builders that the stock kicker won't clear the new rearsets when mounted where I put them. Fortunately another buddy has his CB550 in the garage as well so I borrowed his kick lever to see if it clears which it does but the grooves on the spline are a little different so I'll have to open it up nice and wide to slide onto the spline and then tighten it down. I'll probably pick up a CB550 kickstart lever sometime this week off Ebay. I'll post pics once I get it and get it on.
Just a word of caution, you may be better off in the long run bending your stock kicker to clear rather than mounting a Honda kicker. If you strip that spline you will most likely have to change out the shaft and that is no small job.
My stock kicker already sticks out far enough to hit me in the shin and it still doesn't come close to clearing so it' gotta go. I'll need some kind of swing out kick lever like the CB550. My current one only has the foot peg hinged to swing out not the whole lever.
The lever on the 78-79 KZ400a are different and will help to solve this problem. You may have to bend them a bit still, but they swing out like the honda, and they slip right on
Damn, I can't find a used 1978 kickstart lever to save my life. All I can find is NOS which is $145 & up! Do you guys think the splines would be the same on a KZ650 from the same year range? It looks very similair to the CB550 one I've been looking at for mock up as far as swing and size go.
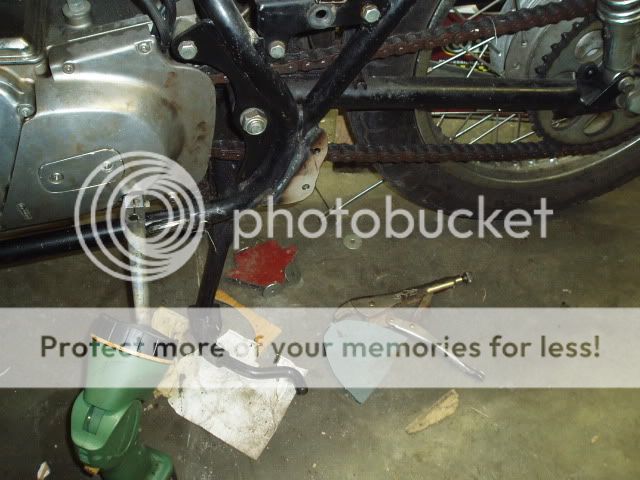
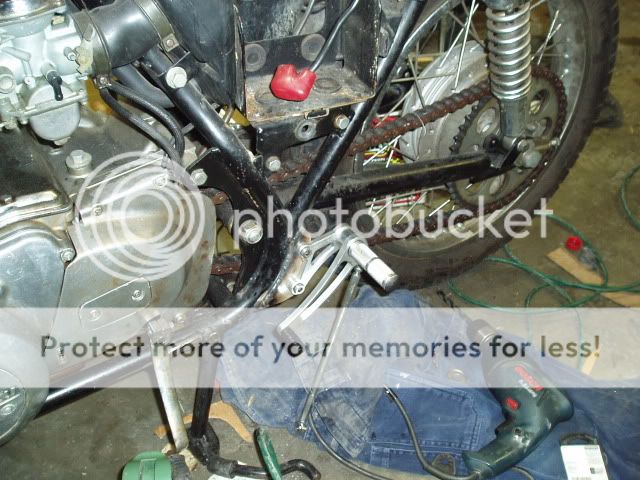
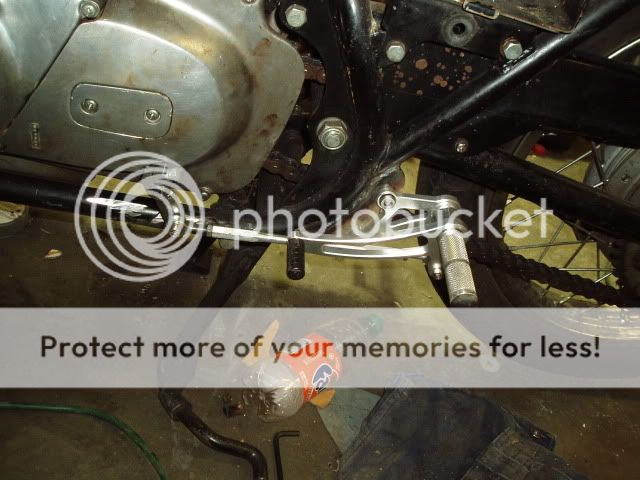
Some progress and and a major catastrophe narrowly avoided tonight at bike night. I got the linkage set up for the shifter and was getting ready to move on to figuring the brake side when I asked my buddy Dave to hop on the bike to try the shifter for a second opinion. He weighs probably 30 lbs more than myself and when he was bouncing on the pegs checking the feel of the placement he tweeked the aluminum rearset brackets. I'd somewhat questioned the strength of them before but they'd held up to my weight although somewhat bouncy. Since the mounting plates for the aluminum brackets were already cut drilled and welded to the frame I was shitting twinkies. I decided to cut another plate to bolt through on the back of the welded plates that matched the profile of the aluminum brackets so I could have a 3 point mount instead of just the front bolts to eliminate any twisting in the aluminum brackets. I needed spacers for the foot peg bolt which is now the 3rd mounting point but it is solid as a rock now. Here's some pics to make some sense of my ramblings...
New plate.
Brake side plate mounted.
And a pic of my earlier success in completing the shift linkage which still counts since I just needed to add the new plate to strengthen the existing work.
I know there are a couple of other members here who have bought the same cheap universal rearsets as me on Ebay so I'd like to warn them to make the mounting plates big enough to bolt in all three places to avoid twisting. I'll try and search for who they were but hopefully they're following along and read this. I'm sure I've deleted the old pm's like a dummy. :-[
This site uses cookies to help personalise content, tailor your experience and to keep you logged in if you register.
By continuing to use this site, you are consenting to our use of cookies.

")