MotoGuzzi 650 seat and tank

Steve Zodiak

Active Member
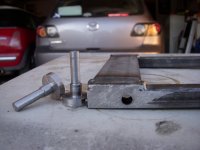
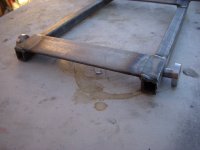
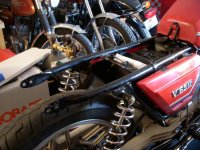
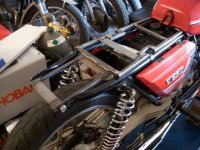
Well I decided it was time to spruce up my V65sp after 20 years of ownership and as custom parts are pretty much impossible to get for this bike there was no choice but to do it all myself.
After reading Slushie's thread on makiing his seat plus the other one around here about making a CB750 seat I got really enthused and decided to do the plug/mold technique.
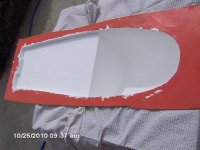
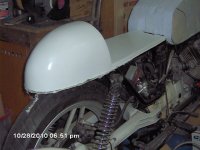
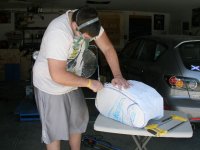
Here's few photos of the foam/wood plug on the bike and a couple after filler and sanding (lots of sanding). The lines on the front of the seat are for a guide. I drerw the vertical one in the center and measured of inch increments, then I drew a line each side of center (no specific distance) and marked them of every inch. I then drew horizontal lines through the marks and measured each side from the centerline to make sure the seat front is symetrical.
 
After all the filling and sanding the plug is glassy smooth. I do have a few spots around the base that neeed to be filled and sanded some more. In retrospect I wish I had raised the seat pan about 1/2" above the board to make this part easier.
 
Here's a photo of my son starting to shape the tank. We have a long way to go with that...
 

Attachments

  • P8310005.JPG
    P8310005.JPG
    66.8 KB · Views: 246
Here's the plug ready to get waxed and a mold made of it. If it wasn't 114° in the garage taoday :eek: I would have gotten it done.
 
looks really good! What type of foam did you use to shape with, it looks like pretty thick and white. I am really interested in making a custom tank, I'd love to see the progress on that!

bob.
 
This is looking really nice, and it is really cool that you used my thread to help model the process, good luck with the rest of the process.
 
Bob, I used "blue foam" which is used for insulation. It's much stiffer than the green florist foam and sands and shapes well.

Slushie -like I said before - thanks for the inspiration (and the list).

The class at the Petersen museum really helped having never done fiberglass before.

I should have my mold finished today. I put it on hold as I had to go off to the Barber vintage bike festival.
 
Here's photos of the mold before it was removed from the plug. The plug was extremely difficult to get out and it was destroyed in the process. However the mold itself came out perfect. I used Orange tooling gel (as it was on sale!).
 
Steve Zodiak said:
Here's photos of the mold before it was removed from the plug. The plug was extremely difficult to get out and it was destroyed in the process. However the mold itself came out perfect. I used Orange tooling gel (as it was on sale!).

That sucks about the plug being destroyed, but I actually had the same problem when I removed mine. Though my plug was completely wood, so it was a humongous pain. It really sucked too because I sunk hours and hours in to that plug all to be destroyed. But when I did my lay up I did it in a cold garage so I thought that maybe the wood shrunk in the cold and expanded more then the fiberglass did when it came back to room temp making removal almost impossible. You live and you learn right!
 
losing the plug was a bit dissapointing as I had put lots of hours into too. I was speaking with a guy that fabticates aircraft parts and he said the polyester resins tend to shrink so perhaps that's why things got really tight. I also read somewhere to use small wooden wedges around a mold to release a plug as they get tight and also to run warm water in it to help release the PVA. But that was all after I'd destroyed mine. As I said before the mold came out perfect so I should get a good seat out of it. I also read to not laminate weave over weave but to put chop between layers. The guy that gave us the class never mentioned anything about that. I'll make my desicion when I get to that point. The one thing I didn't like about using chop is it temded to get everywhere.
 
After looking back at pictures of your plug, it is very similar to mine, except that it is a little more bulbous in the hump. Meaning the widest part is not at the bottom of the hump but rather a 1/3 of the way up. So in order to get your mold out of the plug, the lower part of the mold in the hump area would have to deflect a little and that probably made it next to impossible to remove. Also the polyester resin shrinkage problem definitely doesn't help. What I have been wondering is can you use a polyester gelcoat, or tooling gel with an epoxy resin. If you have ever used the two resins, epoxy is much easier to work with, and is not harmful to your body. I know you can put one type of resin over the other but not vice versa. Not sure if its epoxy over polyester or the other way around.
 
Heres where we ended up...

The mold with a layer of gel coat (should have done two)...

Layer the fabric...

My son holding the seat freshly pulled from the mold :)

After a rough trim of the edge and placed on the bike...
 

Attachments

  • gel coat.JPG
    gel coat.JPG
    130.8 KB · Views: 216
  • Finished.JPG
    Finished.JPG
    133.4 KB · Views: 210
Looks perfect! Really great work, thanks for all the info and pictures and keep 'em coming. This makes me even more excited to get started on my glass projects.

bob.
 
We finally got around to mounting the seat. I didn't want to cut anything off the frame and wanted access under the seat so we made it work like the Guzzi original. The frame we made still needs to get cleaned up and painted but you'll get the idea here...
 

Attachments

  • Seat frame 2 mod.jpg
    Seat frame 2 mod.jpg
    258.5 KB · Views: 205
  • seat frame 3Mod.jpg
    seat frame 3Mod.jpg
    100.1 KB · Views: 213
  • seat frame 4MOd.jpg
    seat frame 4MOd.jpg
    202.5 KB · Views: 208
  • seat frame 5MOd.jpg
    seat frame 5MOd.jpg
    213.1 KB · Views: 198
Back
Top Bottom