
We noticed you are blocking ads. DO THE TON only works with community supporters. Most are active members of the site with small businesses. Please consider disabling your ad blocking tool and checking out the businesses that help keep our site up and free.
You are using an out of date browser. It may not display this or other websites correctly.
You should upgrade or use an alternative browser.
You should upgrade or use an alternative browser.
81 Yamaha SR250
- Thread starter yam81
- Start date


yam81
Been Around the Block
oh cool thats good to know! be better then people going to Photobucket all the time haha. oh the before picture is acutely the second bike i have two hahaha got both of them for $200 bucks have the top one at the mechanics seeing what it will need to be safetied so far new rear shocks and a front tire.


yam81
Been Around the Block
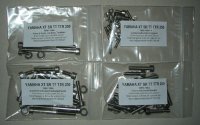
when i got the engine this is what it looked like ruff shape was the parts bike for the guy i got it off was sitting in his yard and some other people had been picking parts off it so iv been on ebay buying up the parts i need to complete the engine will post my recent buys right after this post of the dirty engine


yam81
Been Around the Block
engine after the first cleaning and tare down don't know how to get the dirt out of all the small little corners any ideas? its super caked on and hard, took a brass brush to it today and some wet sandpaper helped a little but still a lot left, also not sure if i should paint the engine with high temp paint


here are the covers i have yet to clean them up will just be polishing them i think, i will need to replace the left side cover there is a crack might JB weld it for now but i have until the spring to get a new one


here are the covers i have yet to clean them up will just be polishing them i think, i will need to replace the left side cover there is a crack might JB weld it for now but i have until the spring to get a new one


yam81
Been Around the Block
so when i first started to tear down the engine i found a hunk of metal in by the A.C. Generator that led me to tear the whole engine apart to make sure there were no chunks in the engine and if there was that they didn't do any damage. there was a lot of metal in the engine but thankfully they didn't do any damage! 

i think this is were the metal came from, unless it was from the old top end not sure it didn't come with the top end

i think this is were the metal came from, unless it was from the old top end not sure it didn't come with the top end


