
We noticed you are blocking ads. DO THE TON only works with community supporters. Most are active members of the site with small businesses. Please consider disabling your ad blocking tool and checking out the businesses that help keep our site up and free.
You are using an out of date browser. It may not display this or other websites correctly.
You should upgrade or use an alternative browser.
You should upgrade or use an alternative browser.
Down under, an idiot and a 400F
- Thread starter neevo
- Start date
neevo said:Can anyone identify the headers, I thought they were stock :-[
I'd need better pics to be sure, but they look like generic aftermarket 4-1 headers from the 70's that used to just slide into the collector. Hence you slide the stock collars over the collector ends, put the pipes in the collector and bolt them up.
neevo
Over 1,000 Posts
hillsy said:I'd need better pics to be sure, but they look like generic aftermarket 4-1 headers from the 70's that used to just slide into the collector. Hence you slide the stock collars over the collector ends, put the pipes in the collector and bolt them up.
No problem. Have you heard of a removable collar on the end or is all the crud on these things making them super tight?
neevo
Over 1,000 Posts
Ryanh said:Why are you taking them Off anyway?
The chrome trims are filthy, plus I am looking to have some dents taken out of the headers, and going to have them treated afterwards (chrome or something close).
neevo
Over 1,000 Posts
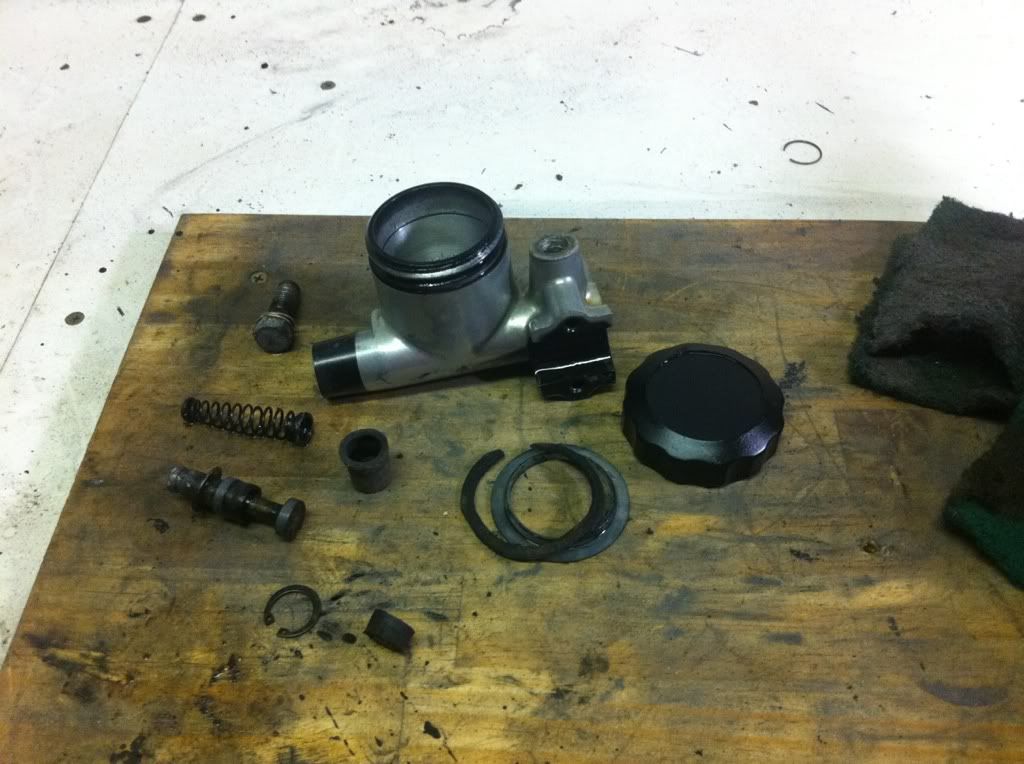
Tore into the master cylinder, god knows why, I just can't help myself. I think the reality of this build is that everything is going to be taken apart, cleaned right up or replaced/customised.
The master cylinder worked but the washer was rusted in there. Took a good thump with a drift through the other side to get it out. The surface looks fine inside but a rebuild kit is needed to put it back together. Nice and clean:
Went to my local truck fab place and bought some 6mm and a huge piece of 3mm aluminium:
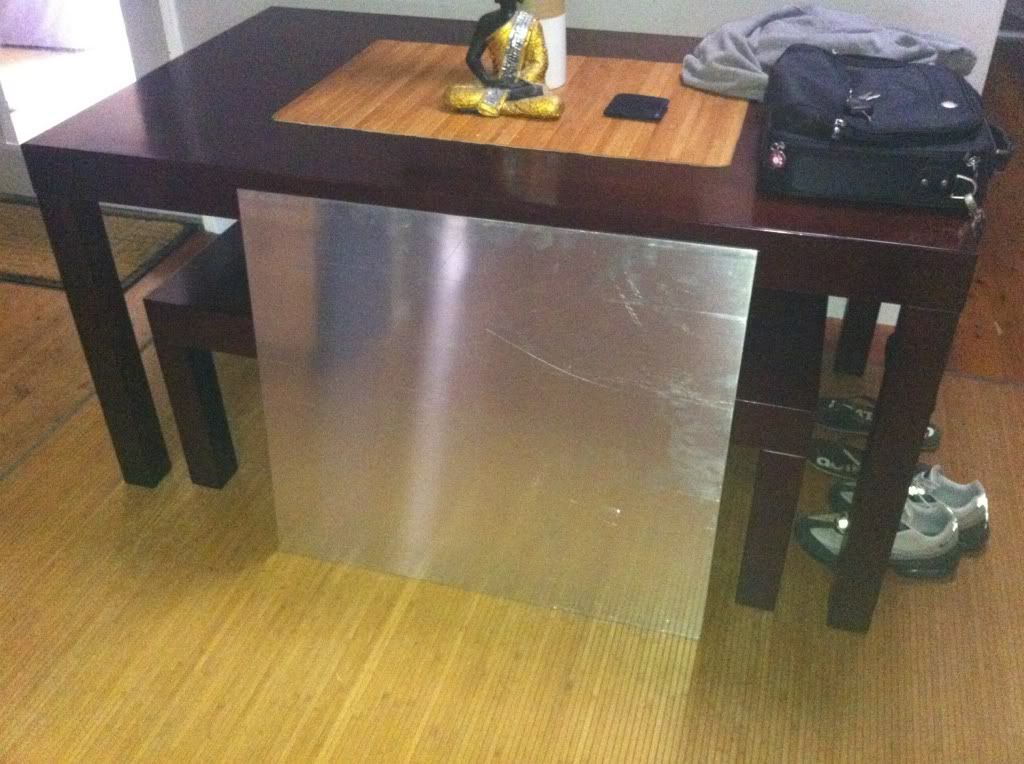
Going to make a custom mud guard for the bike out of this instead of putting the plastic one back on, anyone got suggestions on what to do with it? Was going to powdercoat with the frame if it doesn't get too chopped with road litter.
The 6mm got turned into a brake arm:
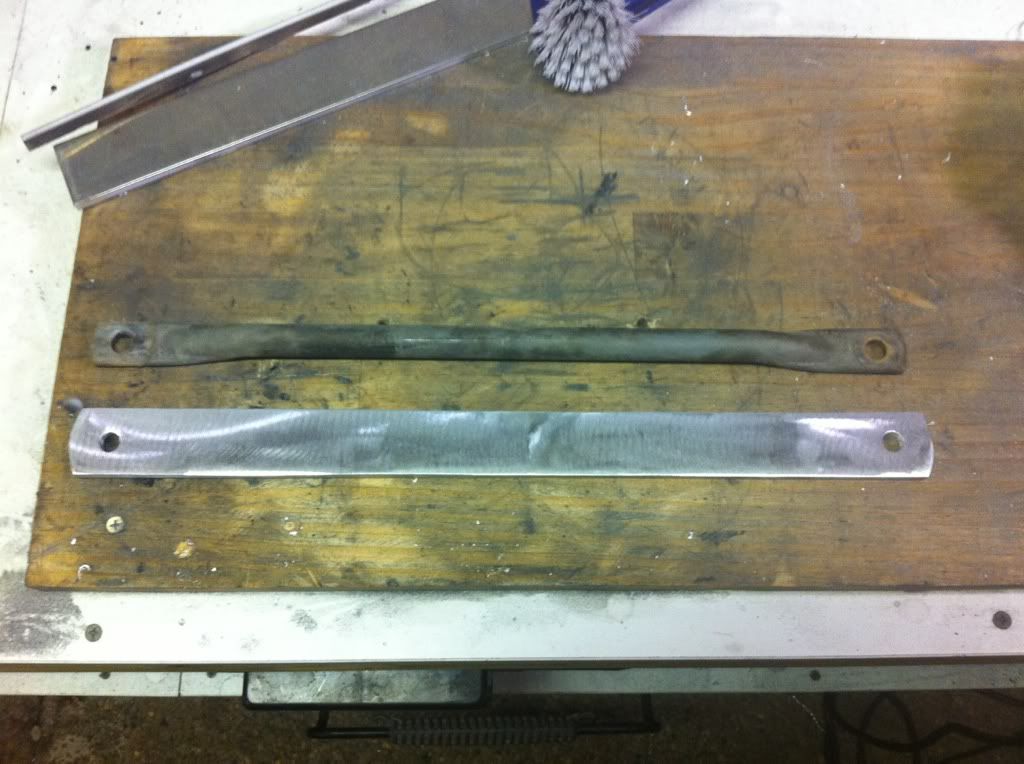
Needs some fine tuning on one edge, plus it's marked up for drilling alternately large and small holes:
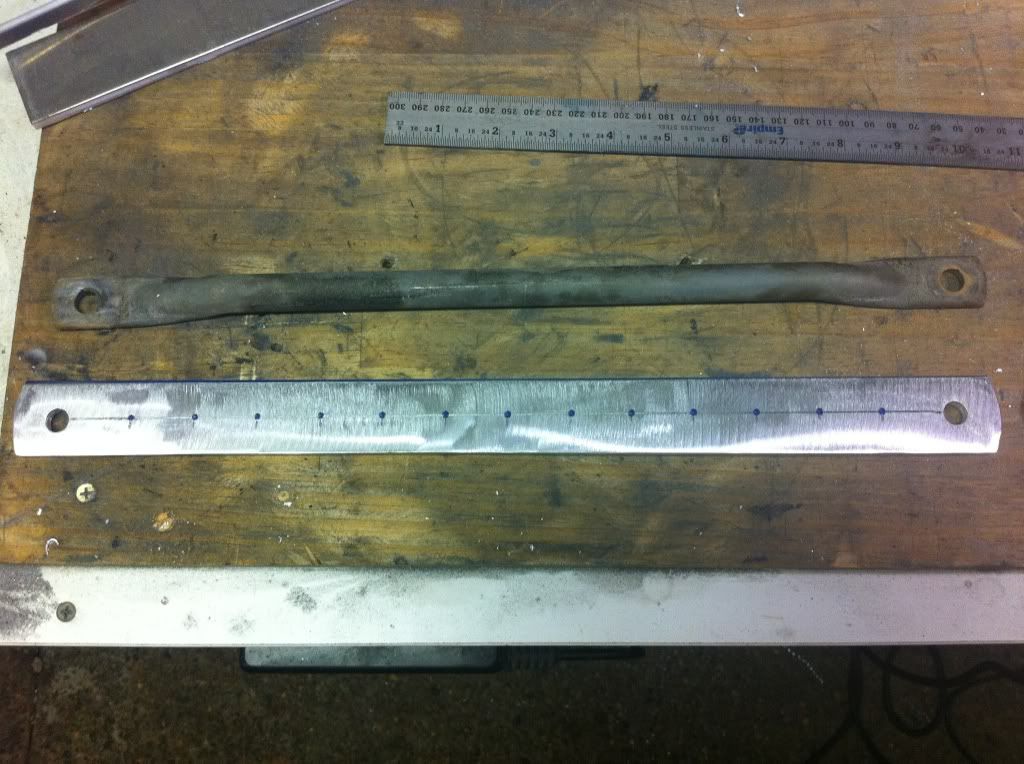
Eyeing up a few drill presses on eBay to do the job right, plus I can drill my brake disc with it too.
The master cylinder worked but the washer was rusted in there. Took a good thump with a drift through the other side to get it out. The surface looks fine inside but a rebuild kit is needed to put it back together. Nice and clean:
Went to my local truck fab place and bought some 6mm and a huge piece of 3mm aluminium:
Going to make a custom mud guard for the bike out of this instead of putting the plastic one back on, anyone got suggestions on what to do with it? Was going to powdercoat with the frame if it doesn't get too chopped with road litter.
The 6mm got turned into a brake arm:
Needs some fine tuning on one edge, plus it's marked up for drilling alternately large and small holes:
Eyeing up a few drill presses on eBay to do the job right, plus I can drill my brake disc with it too.
Ianmallee
New Member
Nice work...interested to see how the tank finishes. Planning to do the same with my tank. Not sure if I'll be cutting and welding it back up myself or to hammer it in.
Forget eBay on the drill press. Picked mine up from supercheap for $70 last week and think they're still on sale
Forget eBay on the drill press. Picked mine up from supercheap for $70 last week and think they're still on sale
neevo
Over 1,000 Posts
Ianmallee said:Forget eBay on the drill press. Picked mine up from supercheap for $70 last week and think they're still on sale
Really! Awesome!!!!!! Got some pics?
Edit: can't see them on the website, might have to pop in to check.
hillsy said:This is the stock system:
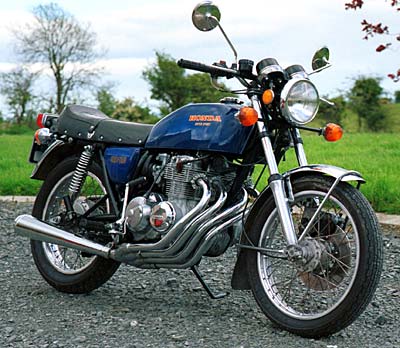
Specific to the 400f ...... and I think they are the most beautiful part of the bike.
Re: the headers - the pic shown is FACTORY STOCK. The only new bike I ever bought was the twin of the one in the pic. And as stated, one of the iconic parts of the bike.
To Remove the collars......................the usual goodly spray of WD40 / similar then.
tap the collars AWAY from the flanges -ie down the pipe about 2".
There is a FLAT SPLIT RETAINING RING WHICH SITS ON THE FLANGE. This then sits inside the recess in the finned collar and holds everything in place.
If you've managed to beat the collar off, then the split ring is a gonner !!!!!
I'll get a picture posted before COP today.
Here it is ...............

neevo
Over 1,000 Posts
Kwality said:Neevo - David Silvers in the UK sell an aftermarket master cylinder, complete with lever, that looks very similar to the OEM version, for about the same price as a rebuild kit. For your consideration.
Damn, that's annoying! That is veeeeery cheap for a whole assembly. Thrown a spanner in the works with that one. Thanks for the tip.
neevo
Over 1,000 Posts
Beachcomber I have taken those bits out already. The issue appears to be a solid collar on the end of the pipes, not sure if it's fixed on there or if I can hit it off. Will see how I go, it's got me scratching my head though.
I thought it may have been a removal part, something like this:
http://www.davidsilverspares.co.uk/CB400F-SUPER-SPORT-1976-USA/part_163014/
I thought it may have been a removal part, something like this:
http://www.davidsilverspares.co.uk/CB400F-SUPER-SPORT-1976-USA/part_163014/
Neevo, that's DEFINITELY how they come off.
I took the pipes off my 400F some years ago to give them a thorough clean up.Mine had only done 6,500 miles and was as new [ 20 years old ! ] and the collars came off easilly.
It's probably years of gunge that's stopping the collars from slipping off. The collar is NOT put on and then flange welded on the tube. If that were the case, there'd be no need for the split rings ???
Maybe a good root around with a wire brush on your drill ?
Kwality
Active Member
@Beachcomber - but what Neevo is dealing with isn't factory stock. As you say - with the stock headers, the cast collars just slip back down; the split collars fall out and the header can be removed. Then the cast collars will just slip off of the header. Easy.
What Neevo is dealing with isn't a stock setup - see back a page or two. The picture of the stock setup was posted for comparison.
What Neevo is dealing with isn't a stock setup - see back a page or two. The picture of the stock setup was posted for comparison.
Kwality said:@Beachcomber - but what Neevo is dealing with isn't factory stock. As you say - with the stock headers, the cast collars just slip back down; the split collars fall out and the header can be removed. Then the cast collars will just slip off of the header. Easy.
What Neevo is dealing with isn't a stock setup - see back a page or two. The picture of the stock setup was posted for comparison.
Ahhhh yes. RTFM....................!!!!!
neevo
Over 1,000 Posts
Used one of the templates on here to mark up my rotor for drilling. Got some A4 Avery stickers to print on so I could stick directly onto the rotor.
Major pain getting the size exactly right and had to overlay 2 but I think it's not too bad. Will be punching drilling guides then pilot holes followed by 2 size holes. Won't be chamfering but keen to know how people dress the disc afterwards. Here's the pics:
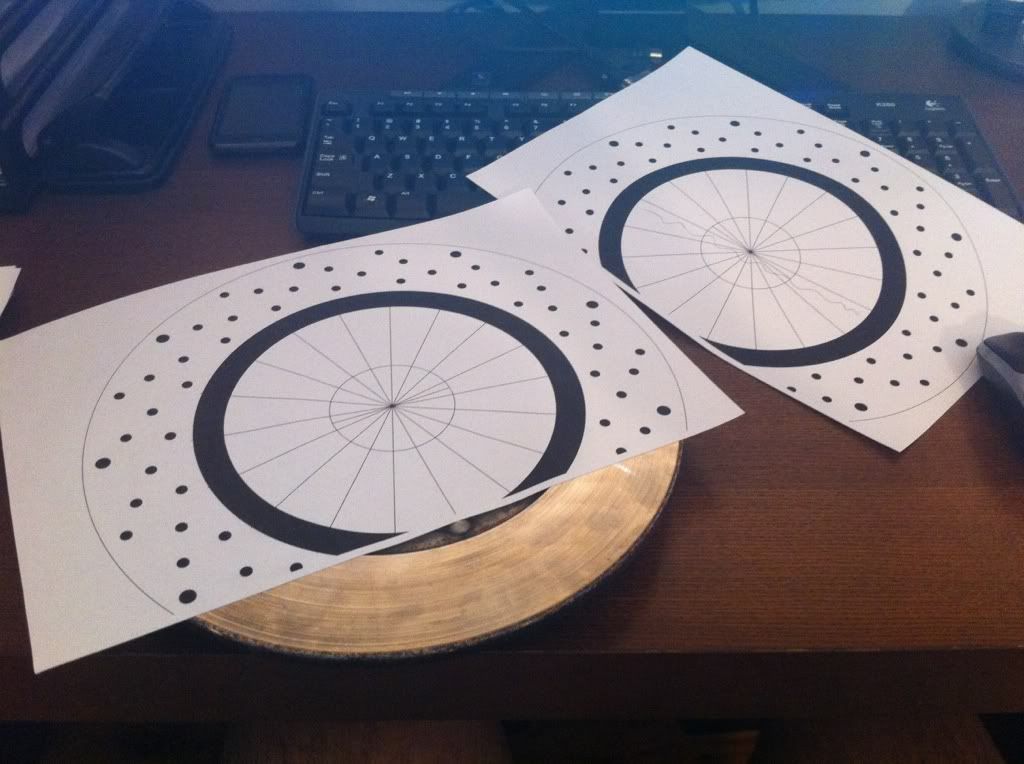
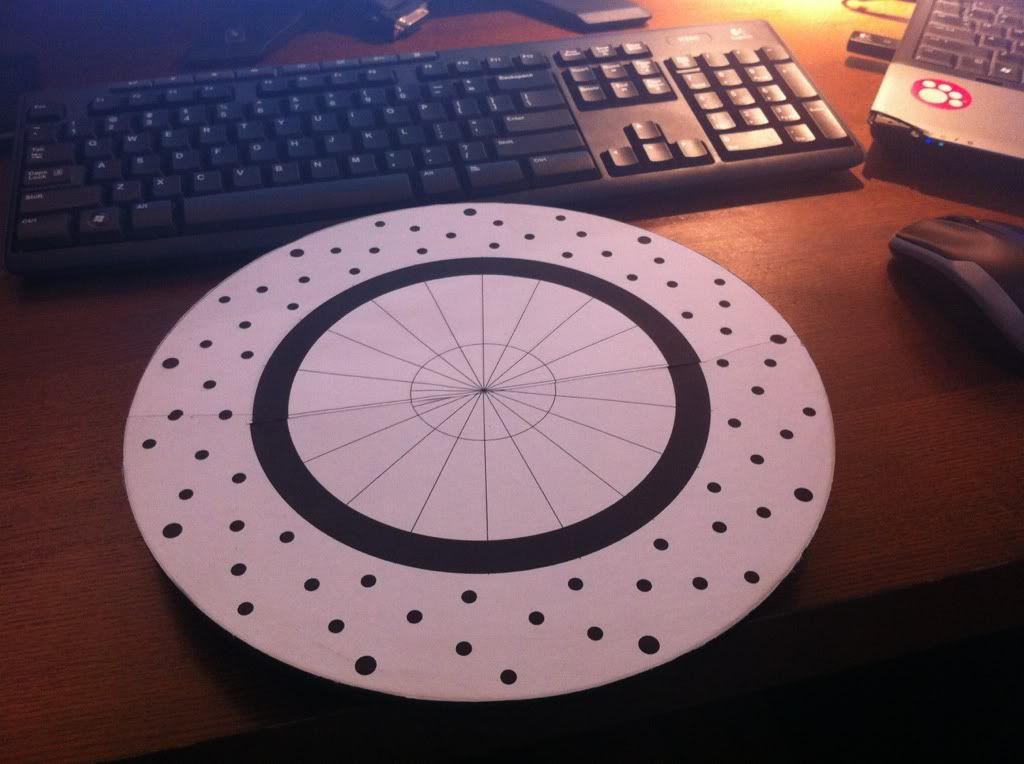
Major pain getting the size exactly right and had to overlay 2 but I think it's not too bad. Will be punching drilling guides then pilot holes followed by 2 size holes. Won't be chamfering but keen to know how people dress the disc afterwards. Here's the pics:
bikeboy
Over 1,000 Posts
neevo said:Used one of the templates on here to mark up my rotor for drilling. Got some A4 Avery stickers to print on so I could stick directly onto the rotor.
Wow. that's a lot of holes. and these disks are THICK. You're in for a bit of a marathon my friend. For shits and giggles, you should weigh the rotor before and after with some reasonably accurate (gram) scales. I chamfered my holes to make it a bit easier on the pads, but they've now worn down past that anyway, so not sure if it did/does any good. New disks are punched I believe, and have the sharper edges anyway.
Have fun!
cheers
ian
neevo
Over 1,000 Posts
bikeboy said:Wow. that's a lot of holes. and these disks are THICK. You're in for a bit of a marathon my friend.
Have fun!
Fark it
")
Doing it for aesthetics anyway so might as well have it pretty, even if it takes effin ages


