Follow along with the video below to see how to install our site as a web app on your home screen.
Note: This feature currently requires accessing the site using the built-in Safari browser.
We noticed you are blocking ads. DO THE TON only works with community supporters. Most are active members of the site with small businesses. Please consider disabling your ad blocking tool and checking out the businesses that help keep our site up and free.
For those of you that have ever wondered. Also, please feel free to call me out if you see mistakes! I'm a novice.
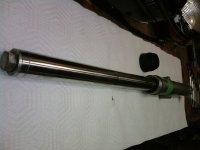
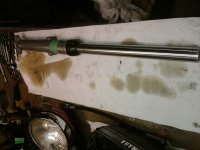
1. Fork assembled.
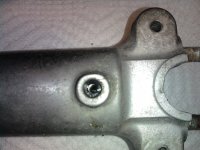
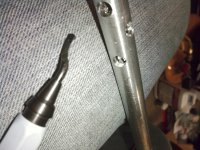
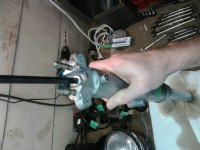
2. Remove fork bleeder screw & bleed for oil by pumping fork tube.
3. Remove top tube fork cap, preload spacer and the washers on either side of spacer.
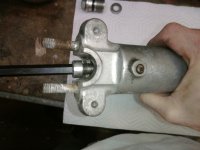
4. Bottom out fork and invert. Put pressure on exposed fork spring to keep damper rod from rotating while removing damper rod allen bolt.
5. Remove fork spring.
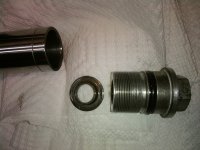
6. Remove dust cover and separate upper and lower tubes.
7. Remove damper rod circlip from bottom of upper fork tube.
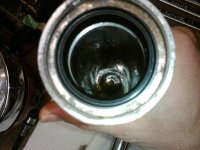
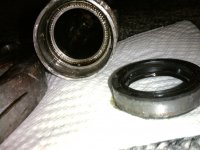
8. Inspect fork seals in the top of lower fork tubes.
9. Remove fork seal circlip and washer.
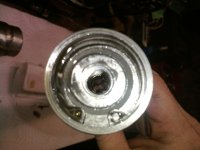
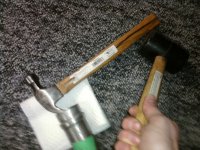
10. Fight to remove old seals. My method was perhaps unorthodox... ;D
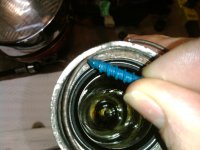
11. Clean up. & Replace old fork seal. I added a little grease to make the install a little easier. Then set the old fork seal on top of the new one and tapped it into place with a rubber mallet.
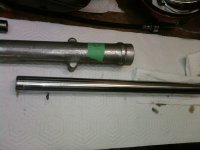
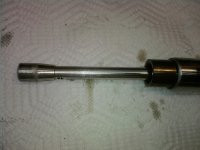
12. Go back to the bottom of the top fork tube. Remove damper circlip if not done already.
13. Slide out damper rod.
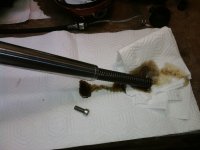
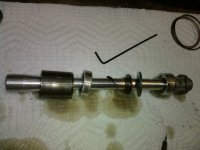
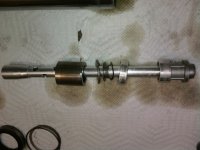
14. Complete damper rod assembly. *Note* I am not certain this is the correct arrangement of damper rod parts. This is how it appeared immediately upon removal. However it seemed to be at odds with my shop manual.
15. Here is what my damper rod looks like when ready to install...per shop manual (to the best of my knowledge).
This set of photos depict the changes made to the damper rod to accommodate Racetech cartridge emulators.
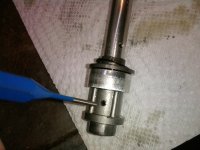
16. Remove roll pin from damper rod. Then remove all parts from the damper rod (be careful to keep things in order!
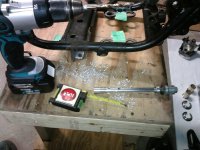
17. Drill out the two compression damping holes in damper rod to 1/4 inch. Then add 2 more pairs of 1/4 inch holes. A drill press works best. I didn't have a drill press. Drill the first extra set of holes 10mm above the existing compression holes, and drill them perpendicular to the originals. Drill the second set in a similar fashion, but 10mm below the original holes.
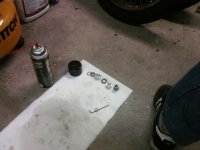
18. De-burr and chamfer the holes.
19. Clean with brake cleaner spray to remove all metal shavings.
20. The roll pin passes through both walls of the damper rod, across the open center of the rod, and keeps the top piece (which is threaded on) in place and prevents it from rotating. I've been told fork spring pressure would do this so perhaps its a redundant measure of security.
Cut the roll pin into two smaller pieces so that the center of the damper rod is open. Then locktight the threads, replace the top and hammer the two smaller pieces of the roll pin into place, to lock the top into place.
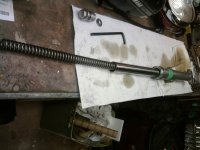
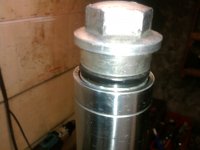
21. Fork damper rod now modified, reassembled and ready to reinstall.
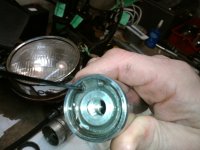
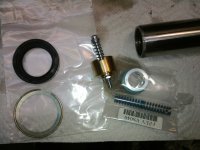
22. New parts installed during this rebuild (fork seal/washer/circlip, cartridge emulator for 34mm forks and emulator adapter (with piston ring)).
23. And new fork springs of course! In this case, Racetech .75kg straight rate springs.
24. Reinstall fork damper rod into bottom of top fork tube, reinstall circlip to keep it in place. Insert top fork tube into bottom fork tube and bottom out fork, so fork spring is exposed. Invert and put pressure on fork spring to keep damper rod from rotating. Reinstall Allen bolt, securing damper rod to bottom of lower fork tube.
25. Reinstall preload space and appropriate washers and fork cap.
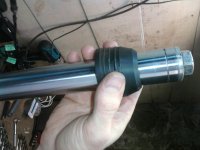
26. Reinstall (or replace) fork seal dust cover.
27. Job complete. Clean up - or repeat if this was the first of your two forks.
Hope this was useful. If nothing else, it's sort of an offshoot of my RD350 build thread...didn't want to bog that down with pages of pictures of the forks. Just having fun and trying to document the process.
10 - that will ruin the forks. Get a seal remover - cheap and available at Sears.
25 & 24. Reverse them makes it easier to tighten that bottom screw.
24. Use Loctite on the screw
Then remove the top cap and spring and fill with oil. Slowly work the slider up and down until the air bubbles are expelled
Set oil level.
Refit spring and spacer and top cap.
Loosen the fork caps while the forks are still on the bike. Makes things a lot easier later on....
You don't have to take the caps off / springs out to split the forks. If you use a rattle gun on the damper rod bolt it will come out easliy and then you can stand the fork up in a bucket to let the oil drain (much tidier / easier and allows you to go and get a beer). Don't lose the copper washer off the damper bolt.....
Then when you've finished your beer take out the circlip and pull the forks apart.
Thanks guys - I appreciate the tips. Will make it easier on me in the future. I'll have to remove the damper rod bolts and check for the copper washers - Didn't notice any, might have to replace. And add some locktight.
I jacked up one of my fork caps pretty good. I did loosen it while it was still on the bike, but one of them gave me fits and I got mad and vicegripped it. Still works, might replace for looks in the end though.
I wasn't a fan of the claw hammer fork seal strategy, but when I got online for tips it seemed like everyone fights their fork seals like crazy...and my fork lowers have clearly been through some battles before me, so I figured what the hell, if they break I'll get new ones. I guess I got lucky. Now I know better.
Agree with Hillsy on the cap removal but. . . . Be sure to leave the lower triple tree clamp tight, and LOOSEN the upper tree clamp before trying to remove the cap. The caps do not need to be as tight as their "bolt size" suggests. Just tight enough to not vibrate out. The "O" ring seals them. I have seen caps nigh on impossible to unscrew. . . until the triple tree clamp was loosened! Nothing to it after that!
Great thread andrewlk! Hope you will report on the RaceTech emulators upgrade once you start riding!
This site uses cookies to help personalise content, tailor your experience and to keep you logged in if you register.
By continuing to use this site, you are consenting to our use of cookies.

")