Follow along with the video below to see how to install our site as a web app on your home screen.
Note: This feature currently requires accessing the site using the built-in Safari browser.
We noticed you are blocking ads. DO THE TON only works with community supporters. Most are active members of the site with small businesses. Please consider disabling your ad blocking tool and checking out the businesses that help keep our site up and free.
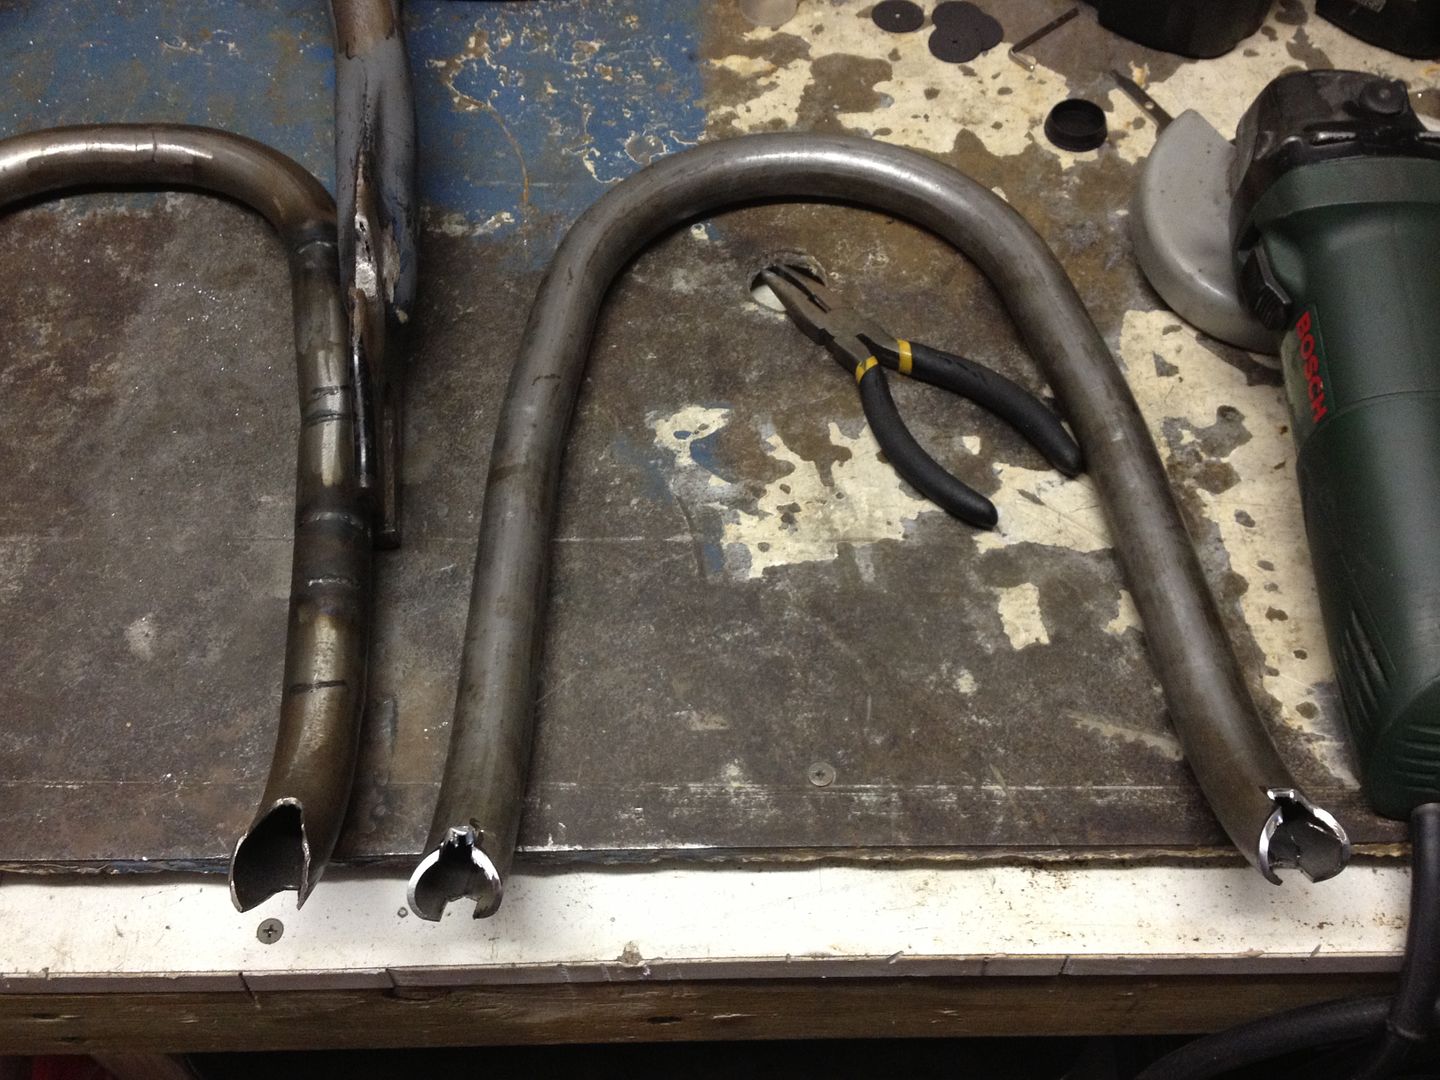
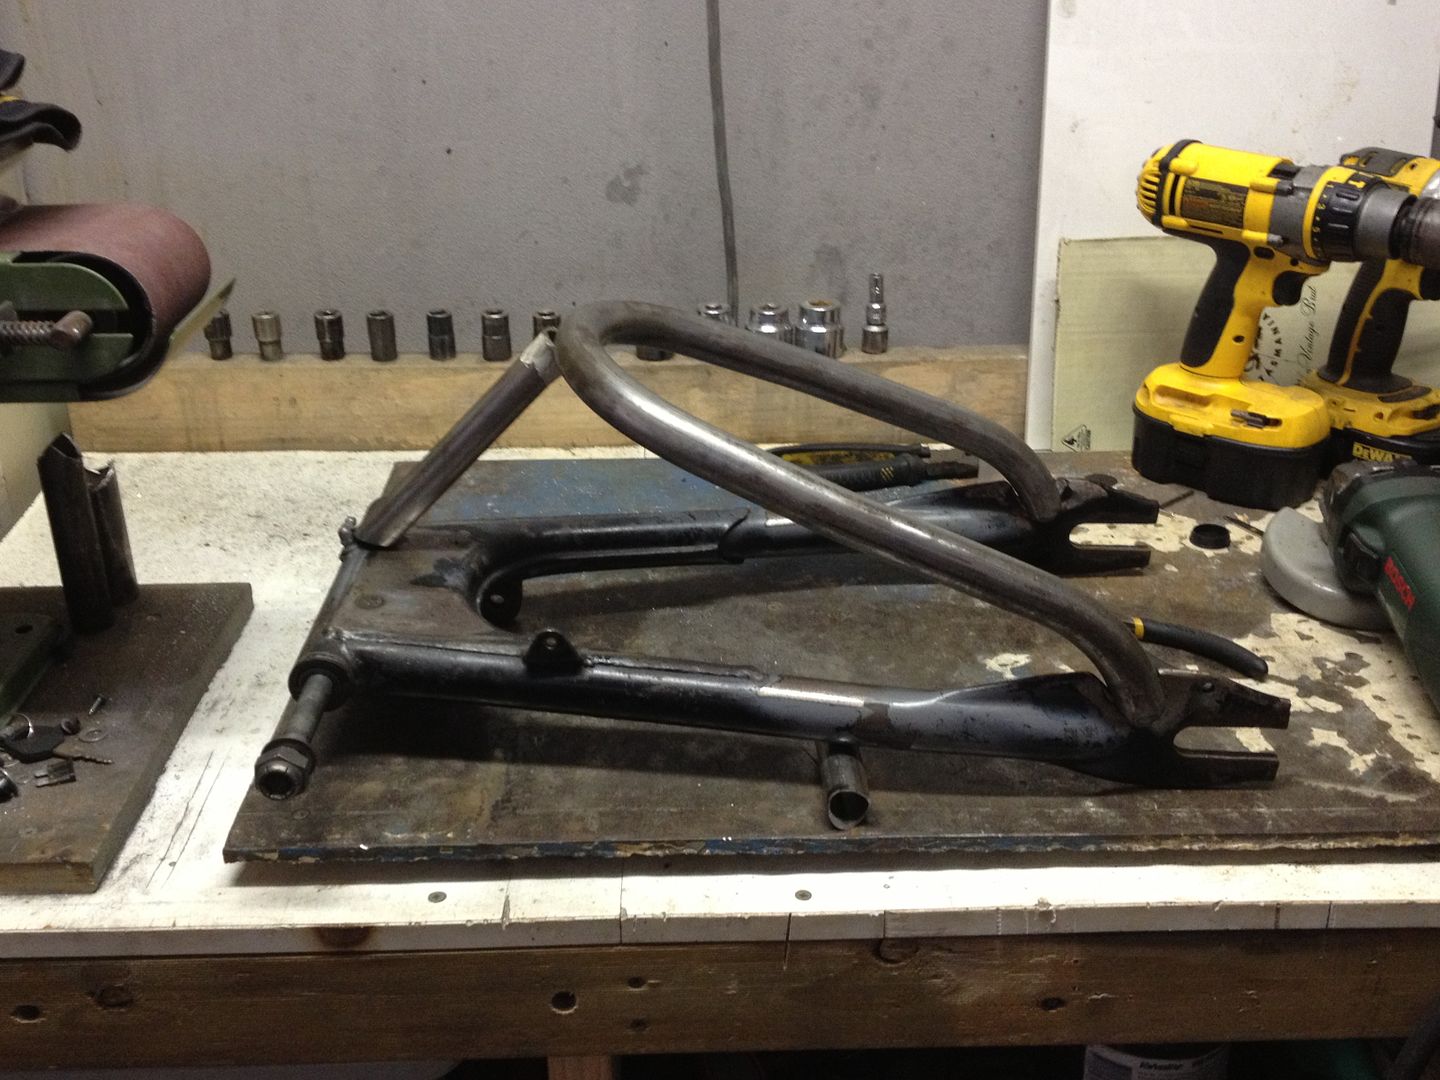
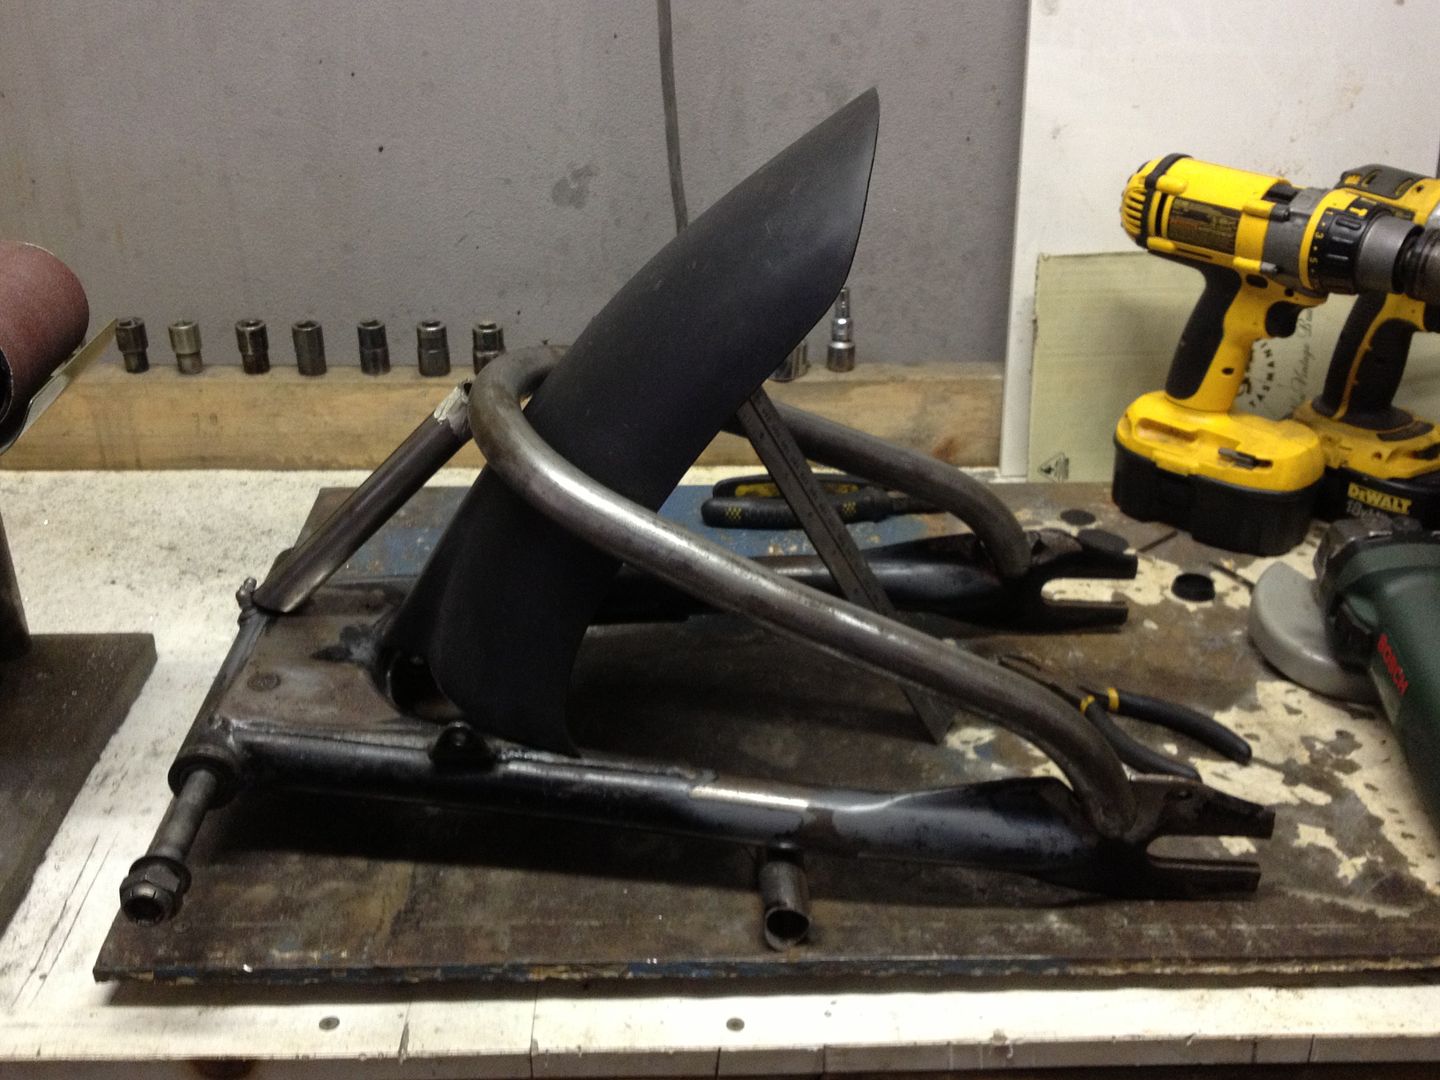
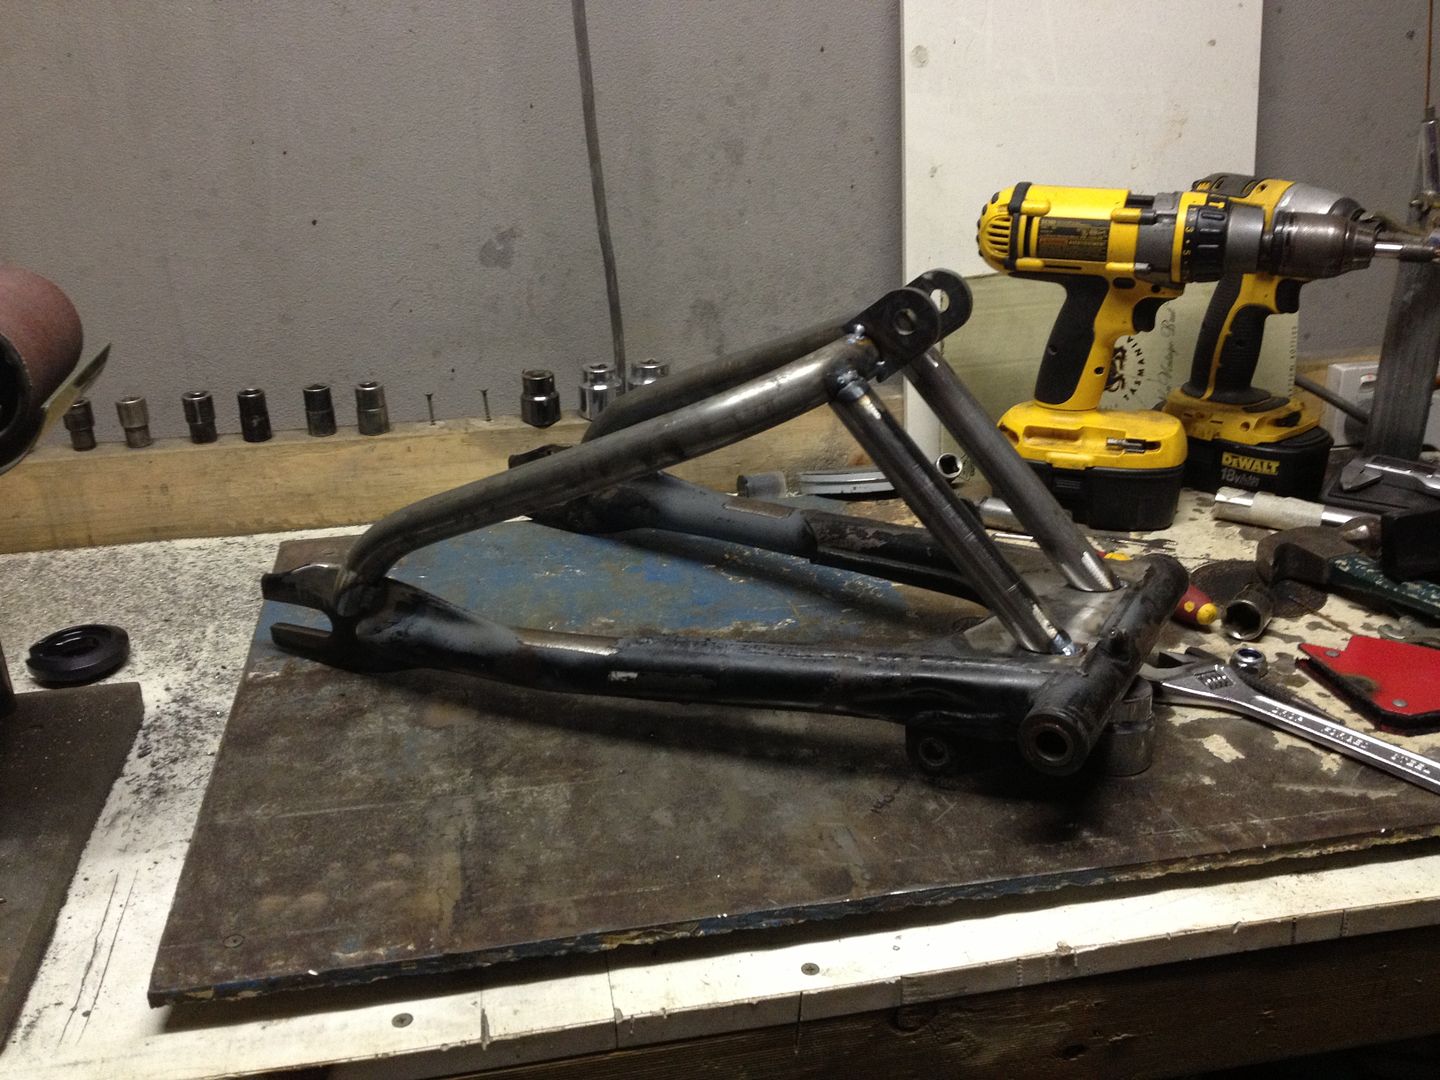
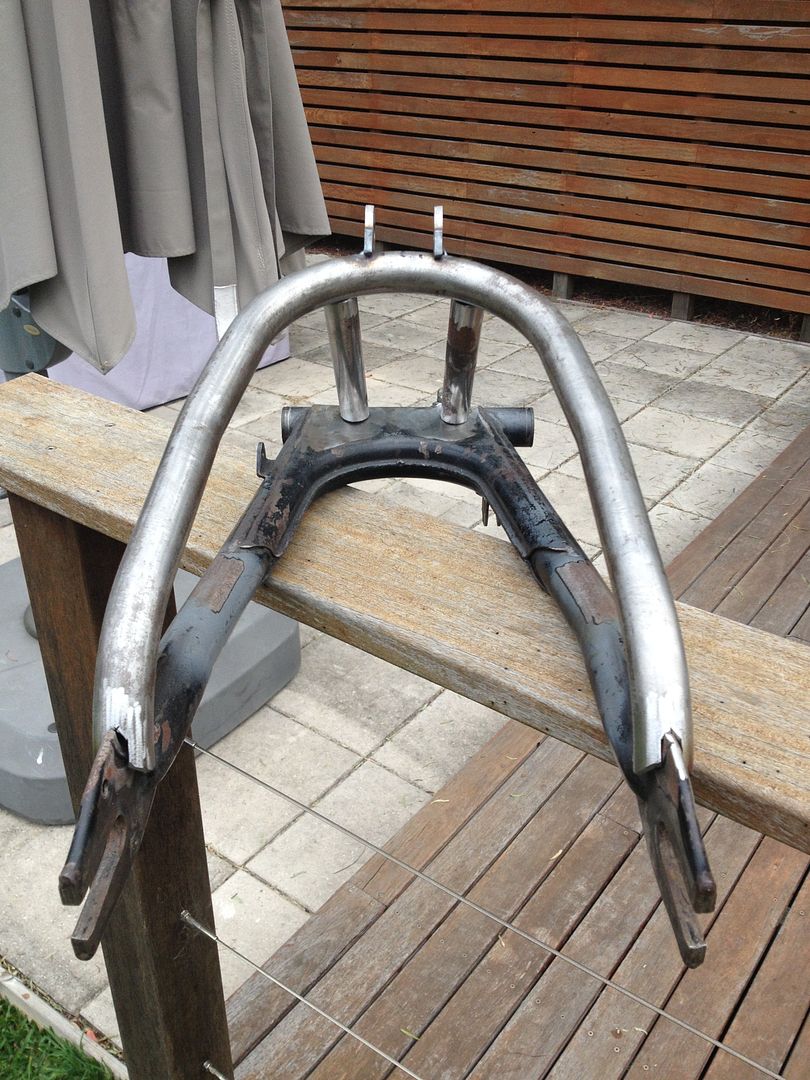
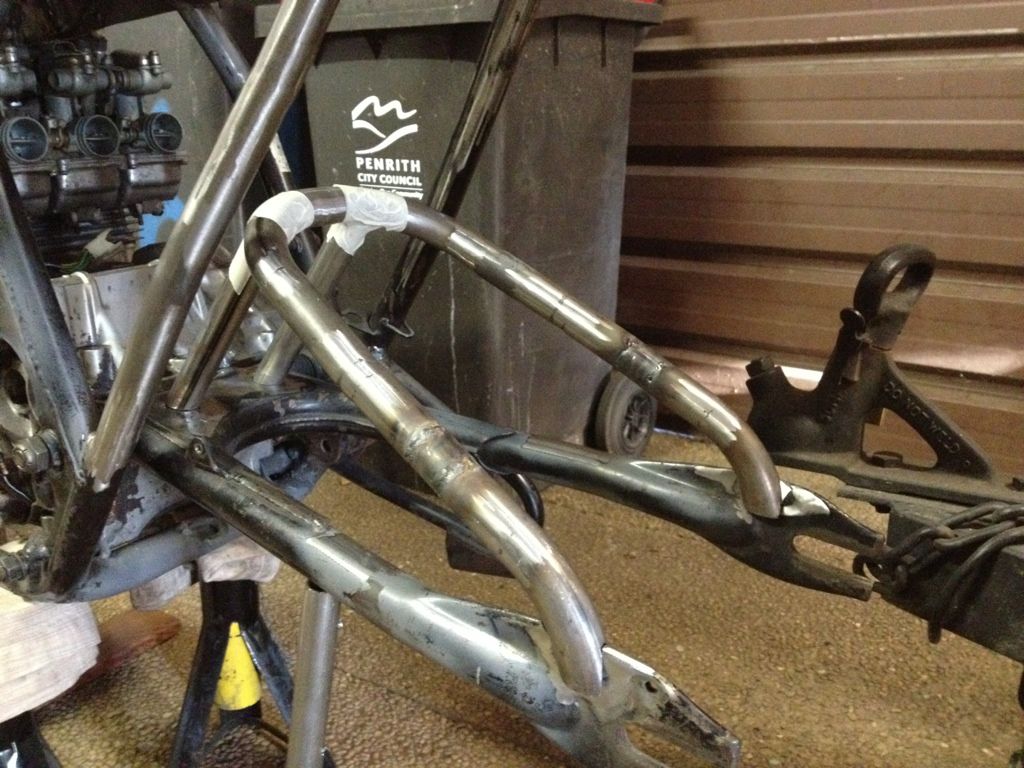
So tomorrow I'm going to be having a crack at welding in the swingarm brace. Here is the general idea, removed the lower shock mounts to accept the rear part of the brace, had a custom 25.4mm x 2mm tube bent up, will be supporting it on 2 uprights at the motor end and 2 mid way supports in the middle (22mm x 1.6mm):
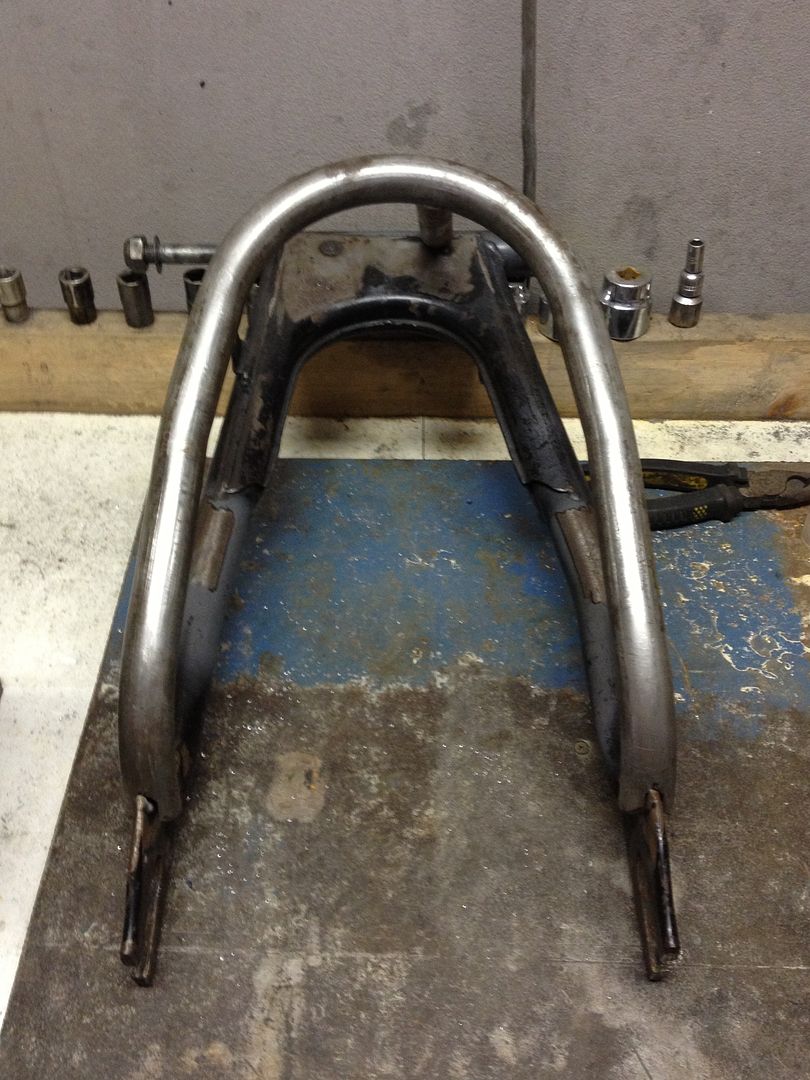
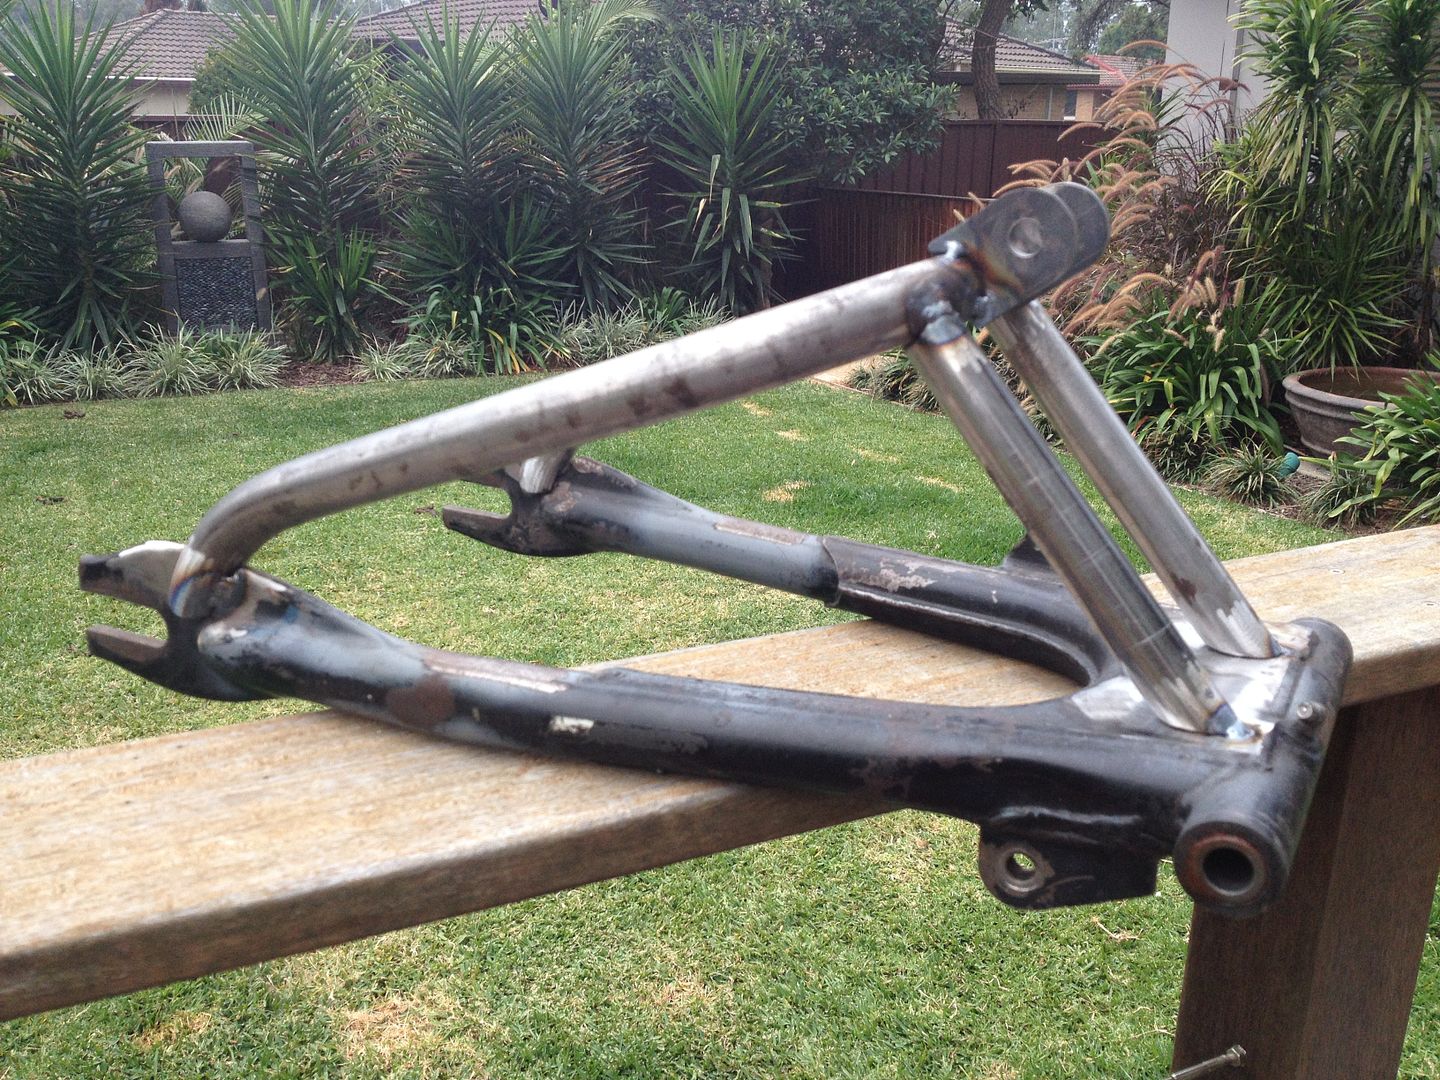
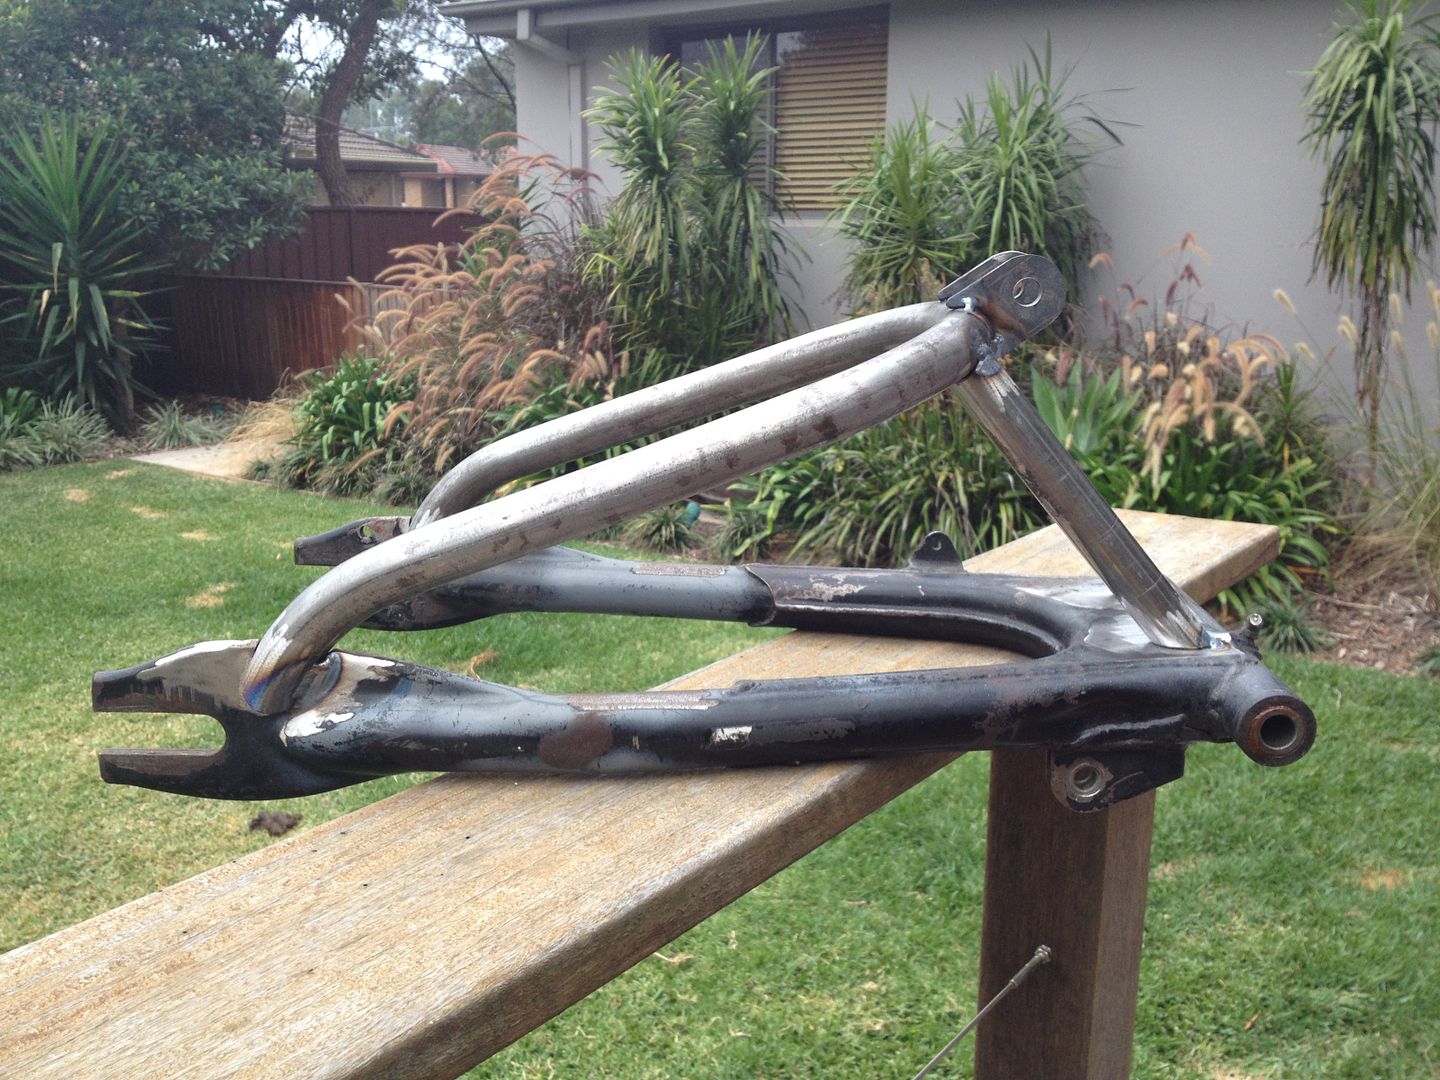
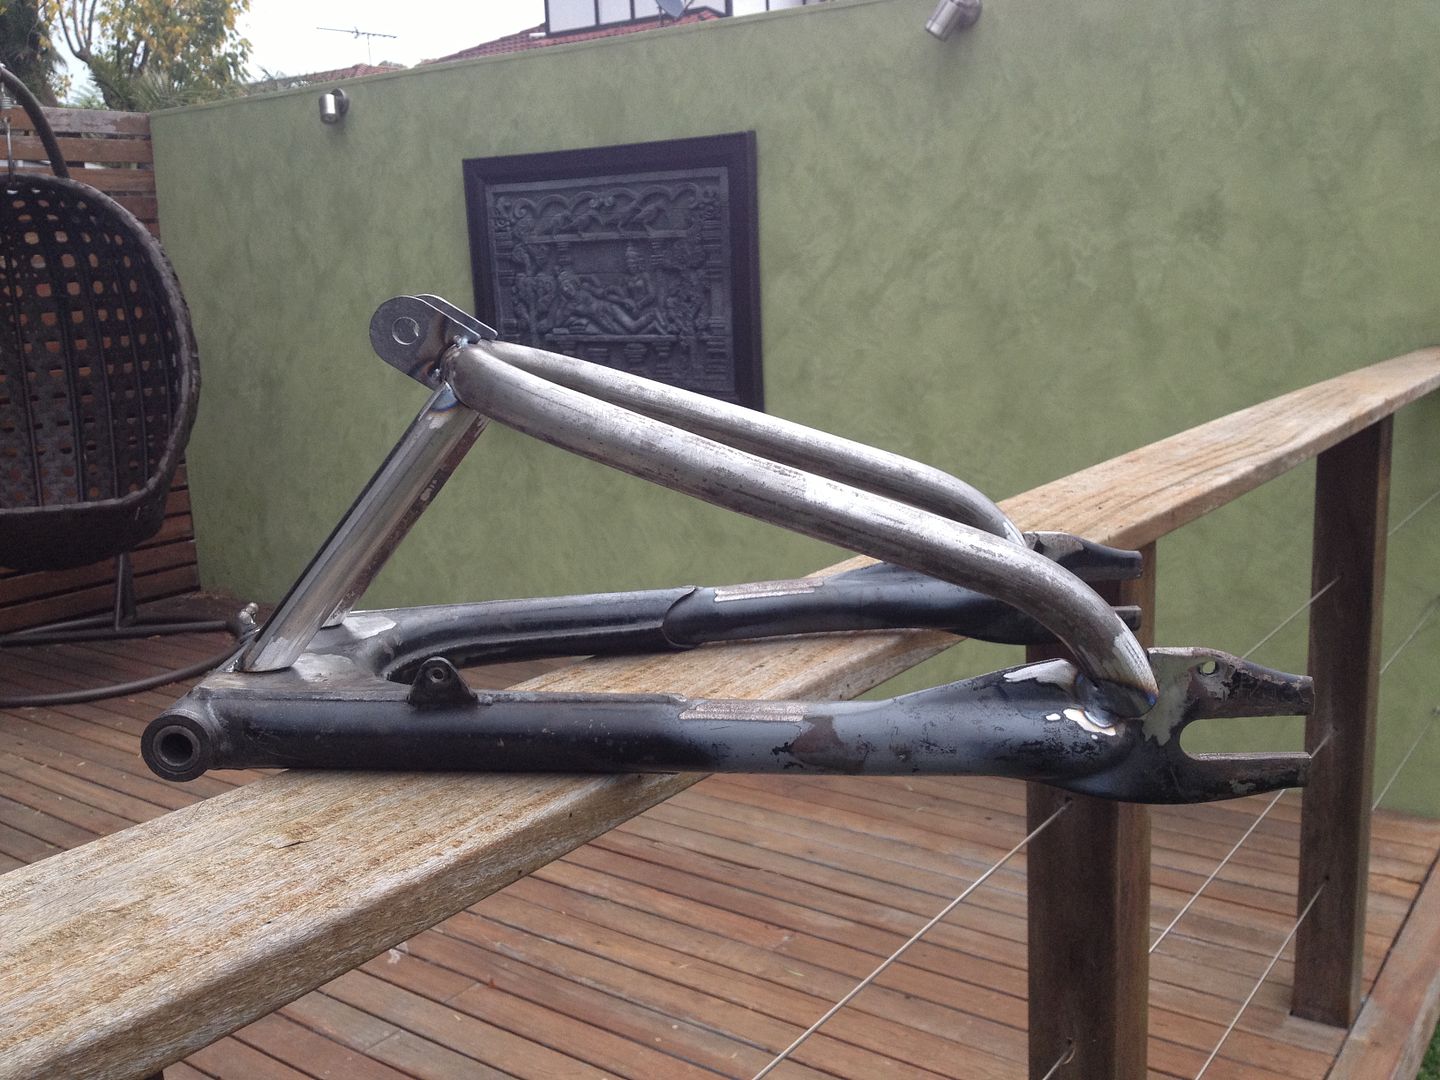
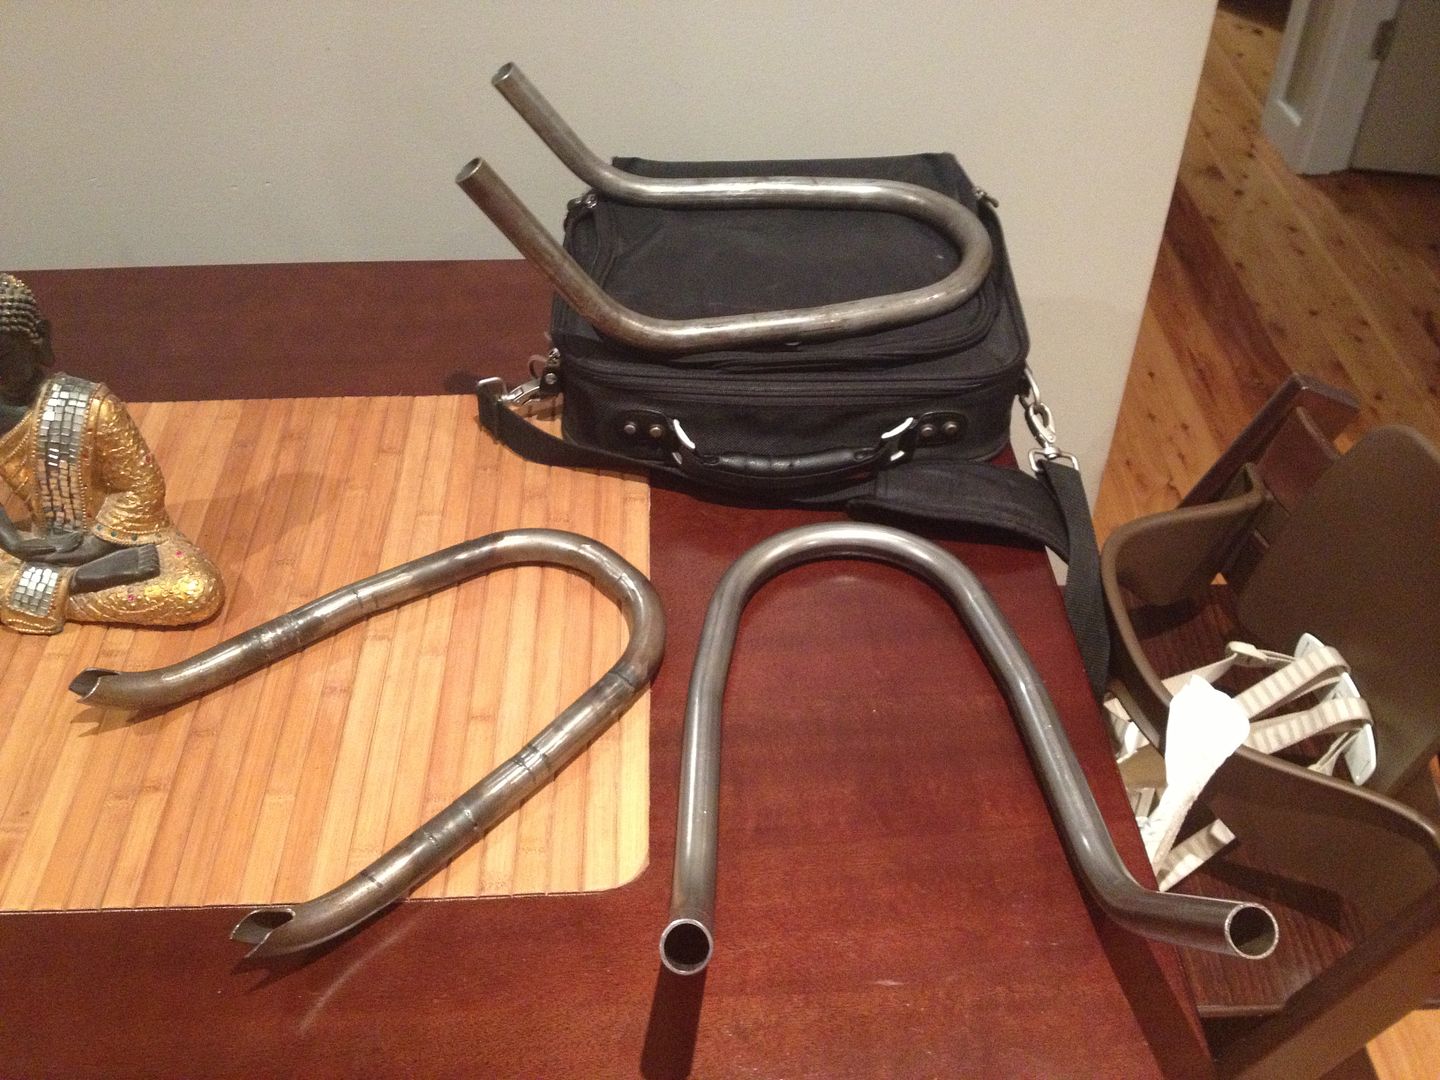
Here is the brace ready to go (based on my mockup above):
Questions:
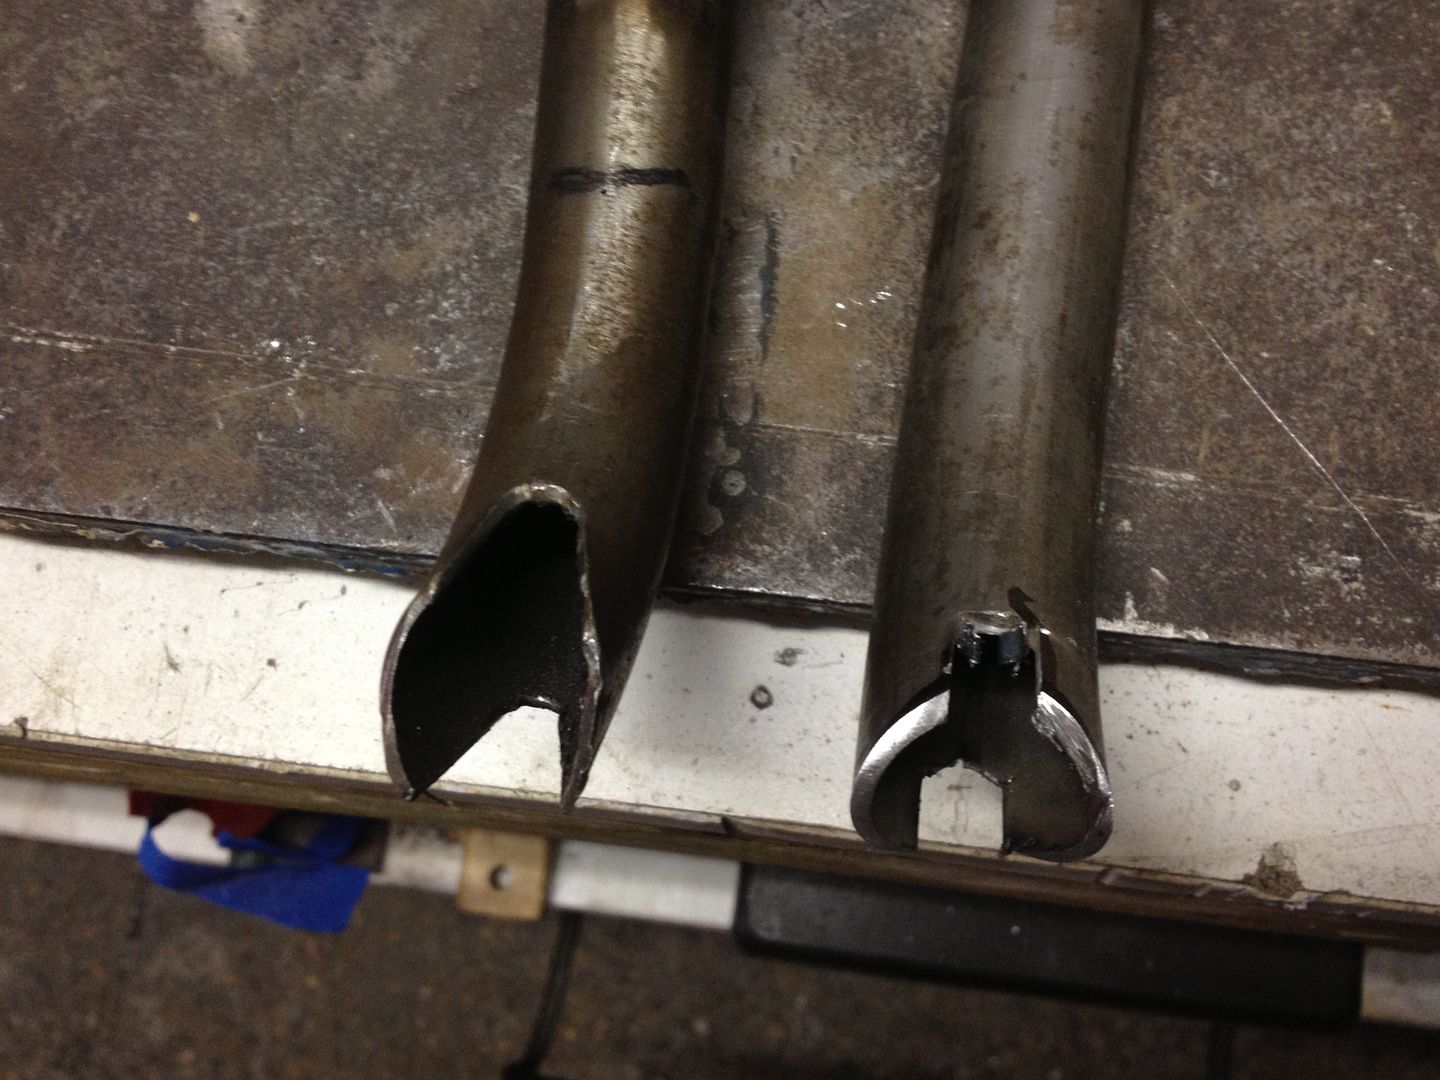
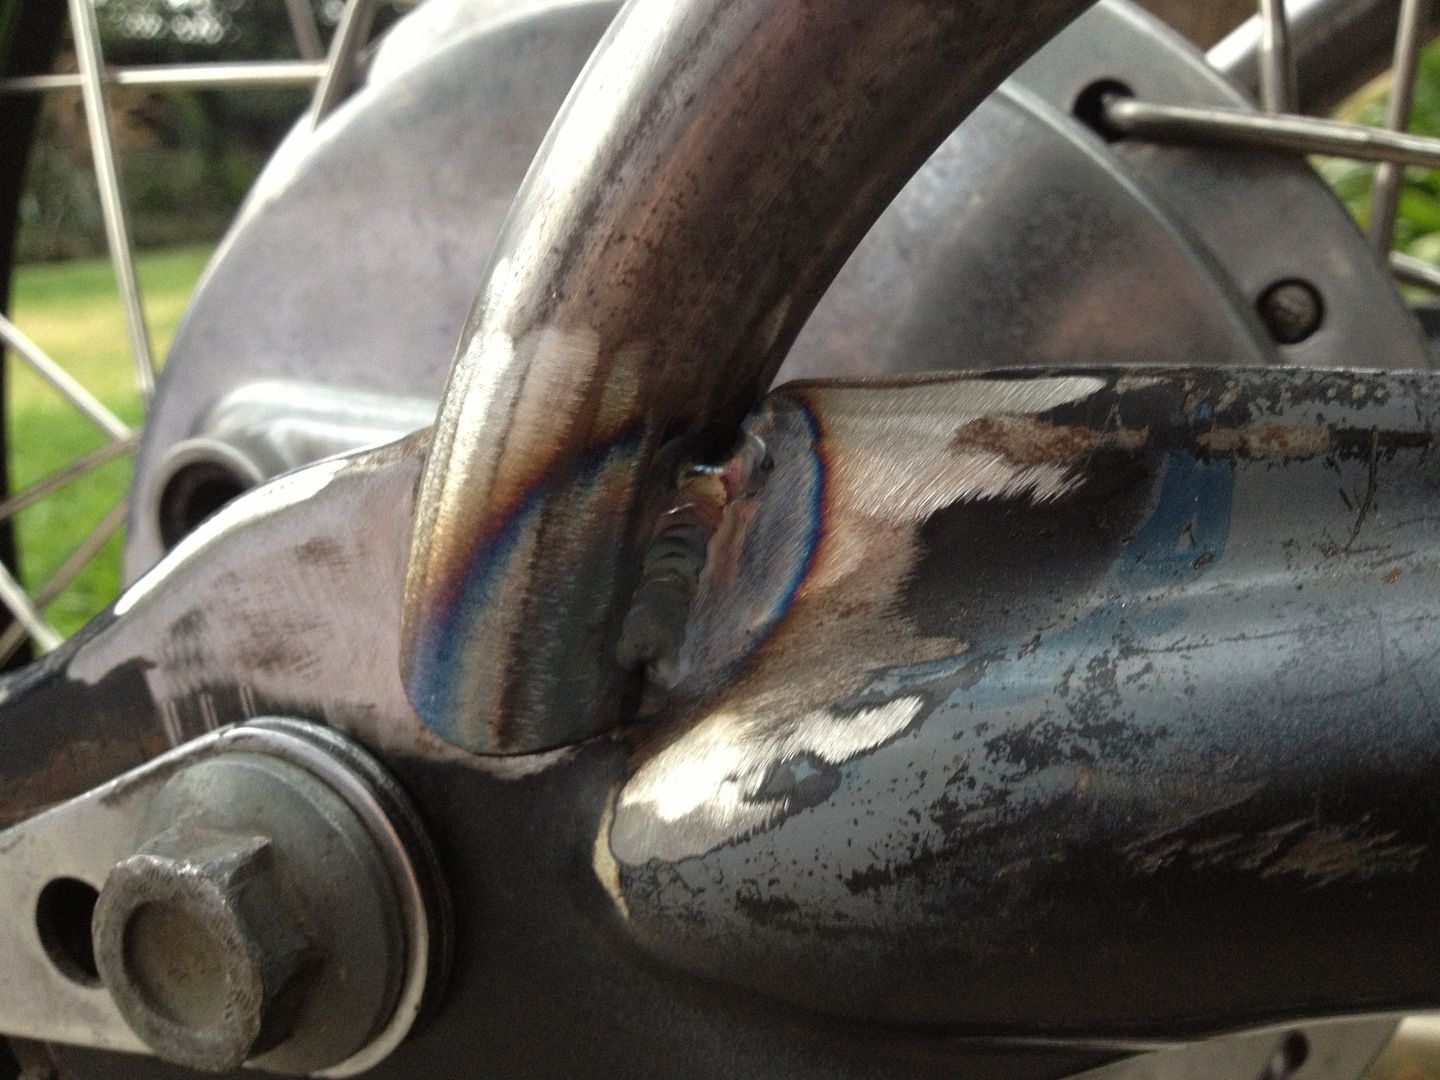
1. How is it best to notch the tube for a tight fit? I was thinking of eyeballing the low and mid point, then using a marker to mark the tube. Then use an offcut of tube to trace the shape. I don't have a notcher, only grinder, die grinder and belt sander. Thoughts?
2. I am concerned about warping the swingarm so I was going to tack it all up first (to test chain clearance etc), then slowly work 1/4 sections of tube to minimize heat buildup. Will this work or should I weld some square section to my steel plate bench and bolt the swingarm in to it to stop it warping?
That's a nice looking swinger you have there! Do you have access to a band saw? that would make a nice, straight notch for you. If not, I think your plan will be ok for notching your weld points.
+1 on working small sections to keep heat and warpage down, always work this way, especially when welding on suspension or bodywork (tank, fenders...)
No bandsaw unfortunately, but I'm pretty handy with the die grinder these days. I was thinking of getting a carbide bit to chop out the tubes, do you think that would be a better option than carving them up with the angle grinder?
take a peice of paper n wrap round a tube n tape. trace the radius to make a template. Then you can grind out the notch. If you can clamp down the swingarm it would be good,then tack,remeasure,tack remeasure,etc. then jump around from tube to tube welding til its all done. If you're worried bout movement,you can take some flat bar and weld the tubes together then cut off when finished.
You can get templates online that you then print and wrap around your tube. They're pretty cool - I haven't tried them yet but they look like they should work.
You can get templates online that you then print and wrap around your tube. They're pretty cool - I haven't tried them yet but they look like they should work.
I had the same thoughts on welding warpage as you and think the theory of welding in small increments may not have any eefect. I plan onlaying my first one on a flat surface and taking measurements at the 4 corners and ensuring the 4 corners lay flat. I will then weld as described above and see if there was any warpage or movement. The one I got the idea for was welded in a jig:
It was also made up of 4 different pieces and welded together where I was able to bend it out of one piece.
Intuitively putting the swingarm in a jig doesn't make much sense to me. I can't see the swingarm getting out of shape welding a brace to it. It's the brace that is going to change shape as you heat it up welding it.
Intuitively putting the swingarm in a jig doesn't make much sense to me. I can't see the swingarm getting out of shape welding a brace to it. It's the brace that is going to change shape as you heat it up welding it.
The Swing arm gets just as much heat when you're welding to it.
It seems to me that it's much more important to keep the Swing arm straight than the brace, a long as the swinger it straight the brace can be all caddywompus and it shouldn't matter too much. Obviously the best solution is to jig them all up as you weld it.
It's amazing how much metal can move when welding. I build table bases out of square tube and if you get just a little over zealous and heat it up too much you end up with something that won't sit square on the floor and have to start over again.
He's telling you right Tim, especially where the wheel mounts. A lil too much weld on one side and they can twist on ya. The wheel completes the structure and without it, its pretty weak.
If you do short welds you can avoid the metal warping. Also, after a series of welds let the whole unit cool down before you go any further. I have never had much problem with mild steel shrinking, but stainless is a whole other animal. A Jig wont really do much, in my opinion, since the metal is shrinking, when you take the unit out of the jig its going to do whatever it wants regarless. Just go slow and don't rush it. I'm no expert but this is coming from my experience only.
No prob, and just so know ya'll know the shrinkage of the welds cause the most distortion. Start your tacks on the outside of the frame, then quickly tack the opposing side so that it will pull the the other side back in place. Weld it all in a sequence from front to back alternating side to side so it's pull even against the structure. Thin stuff is when you actually have to worry bout too much heat and warping the meatel itself,but if it's at least .100" you'll be fine.
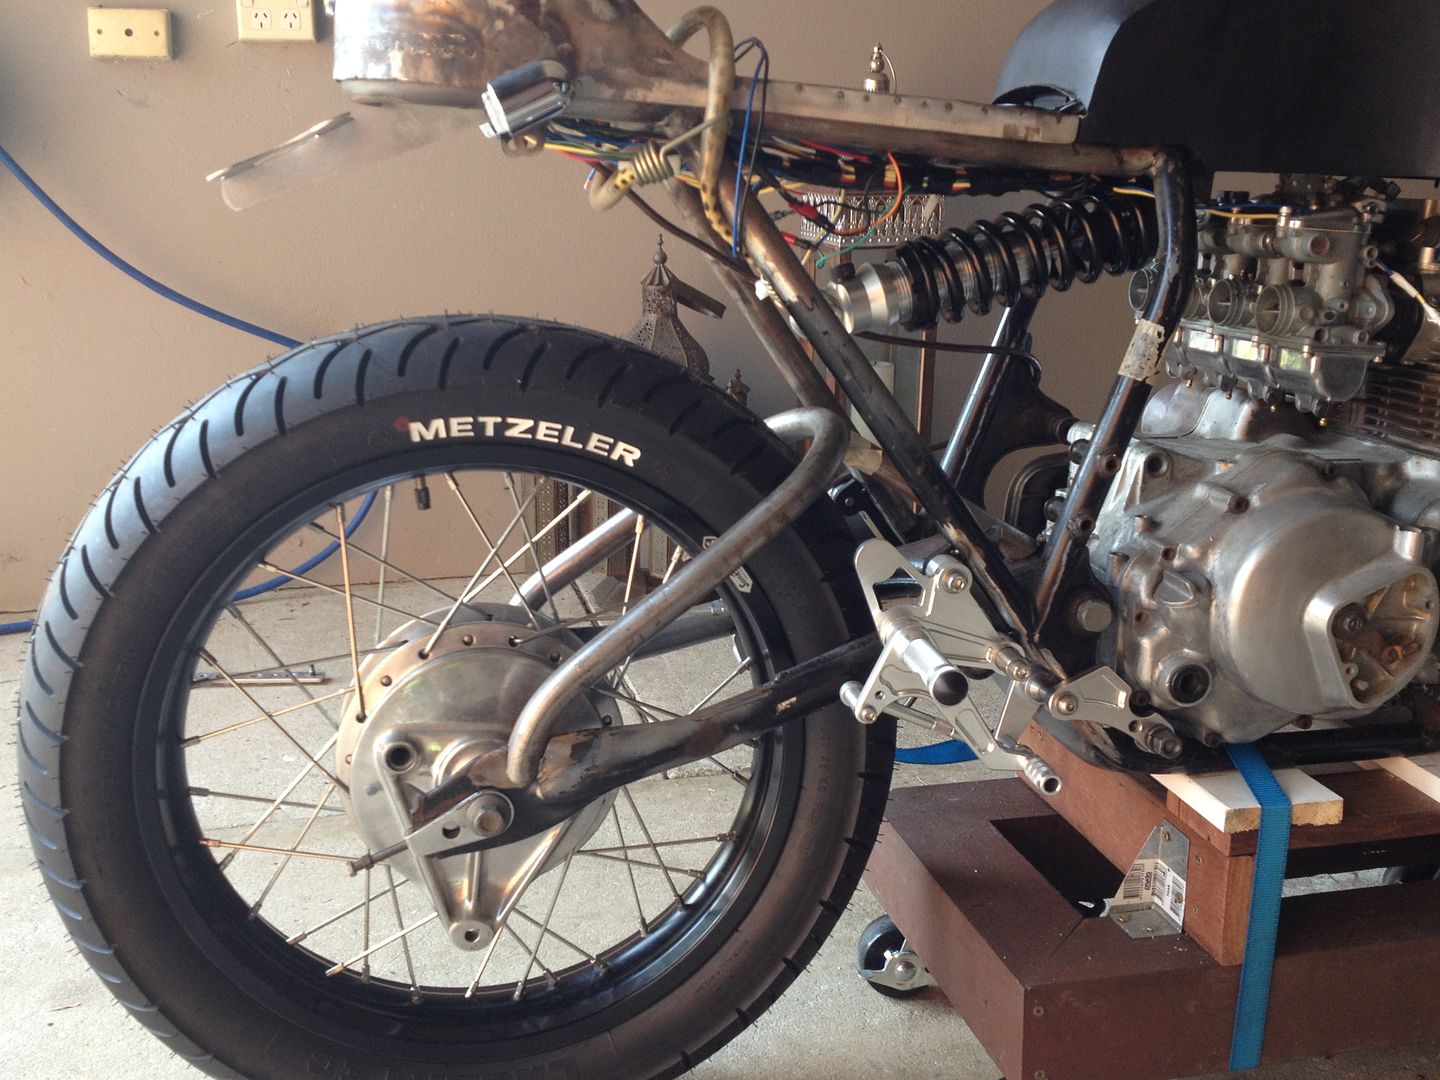
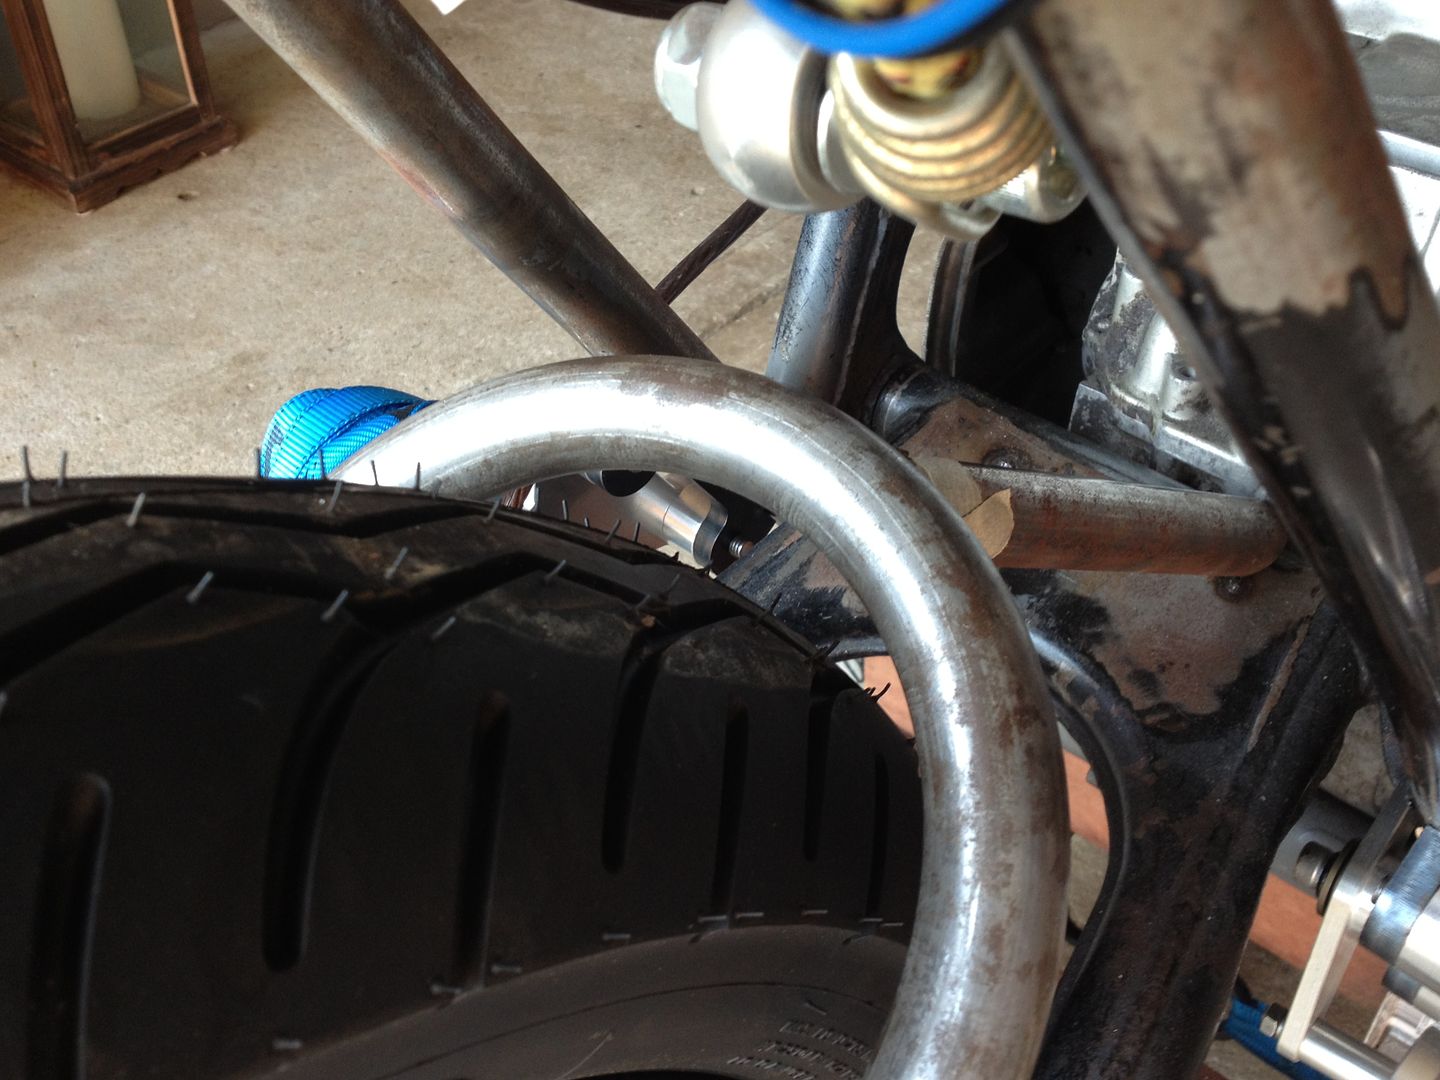
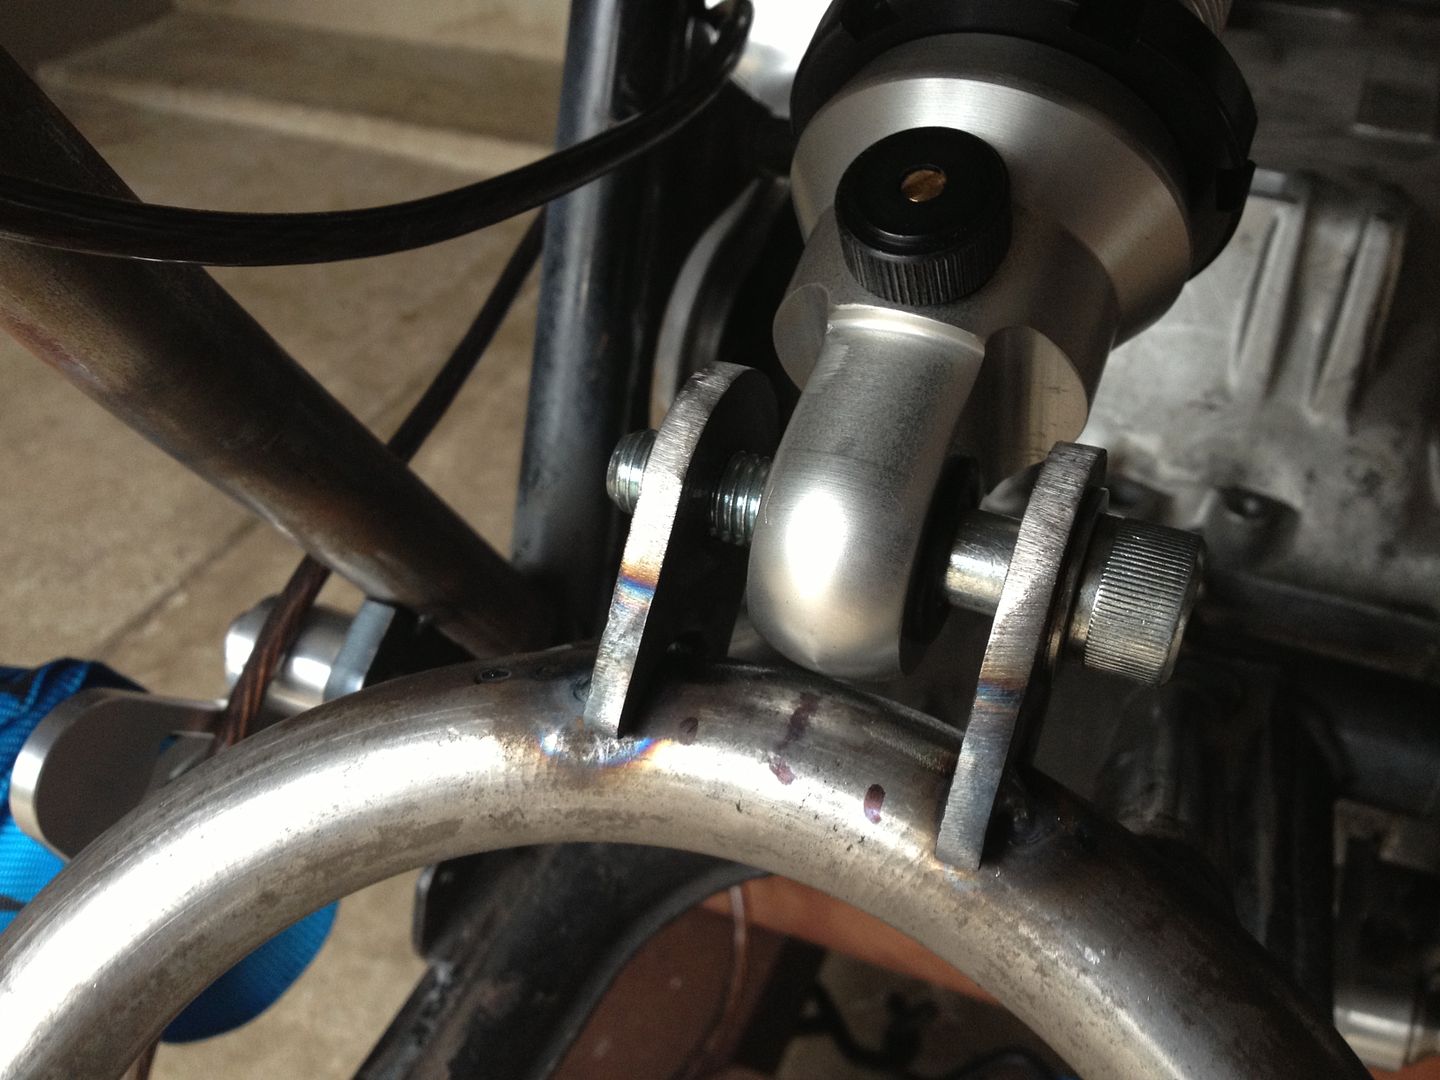
Base is done, however I still need to weld in the middle uprights:
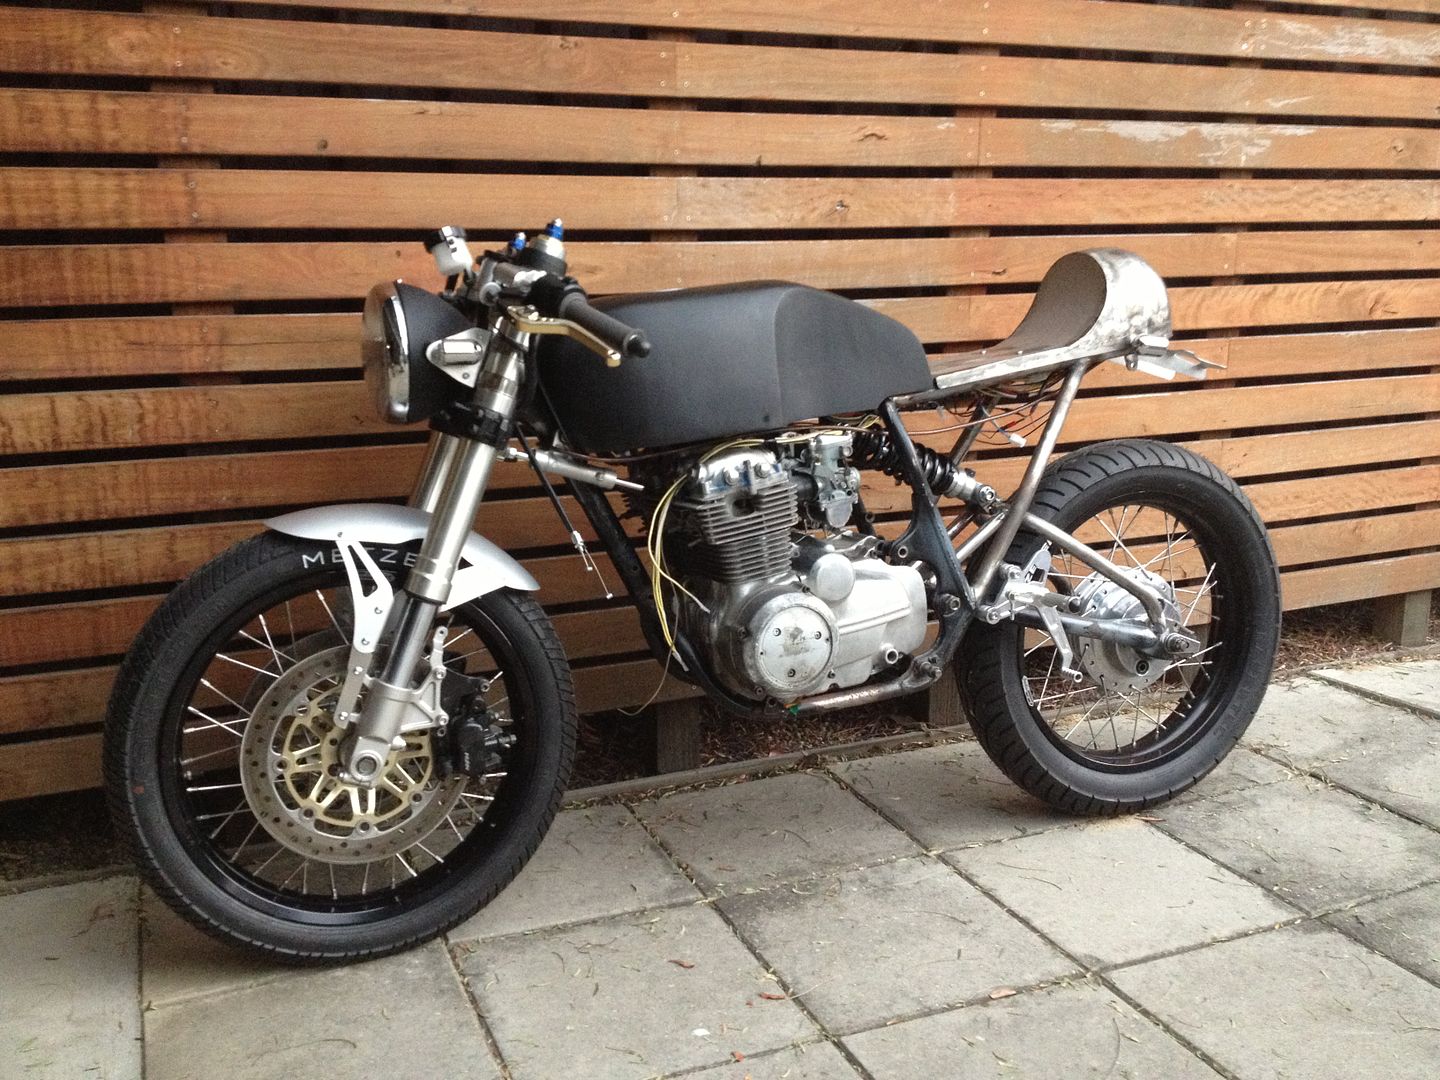
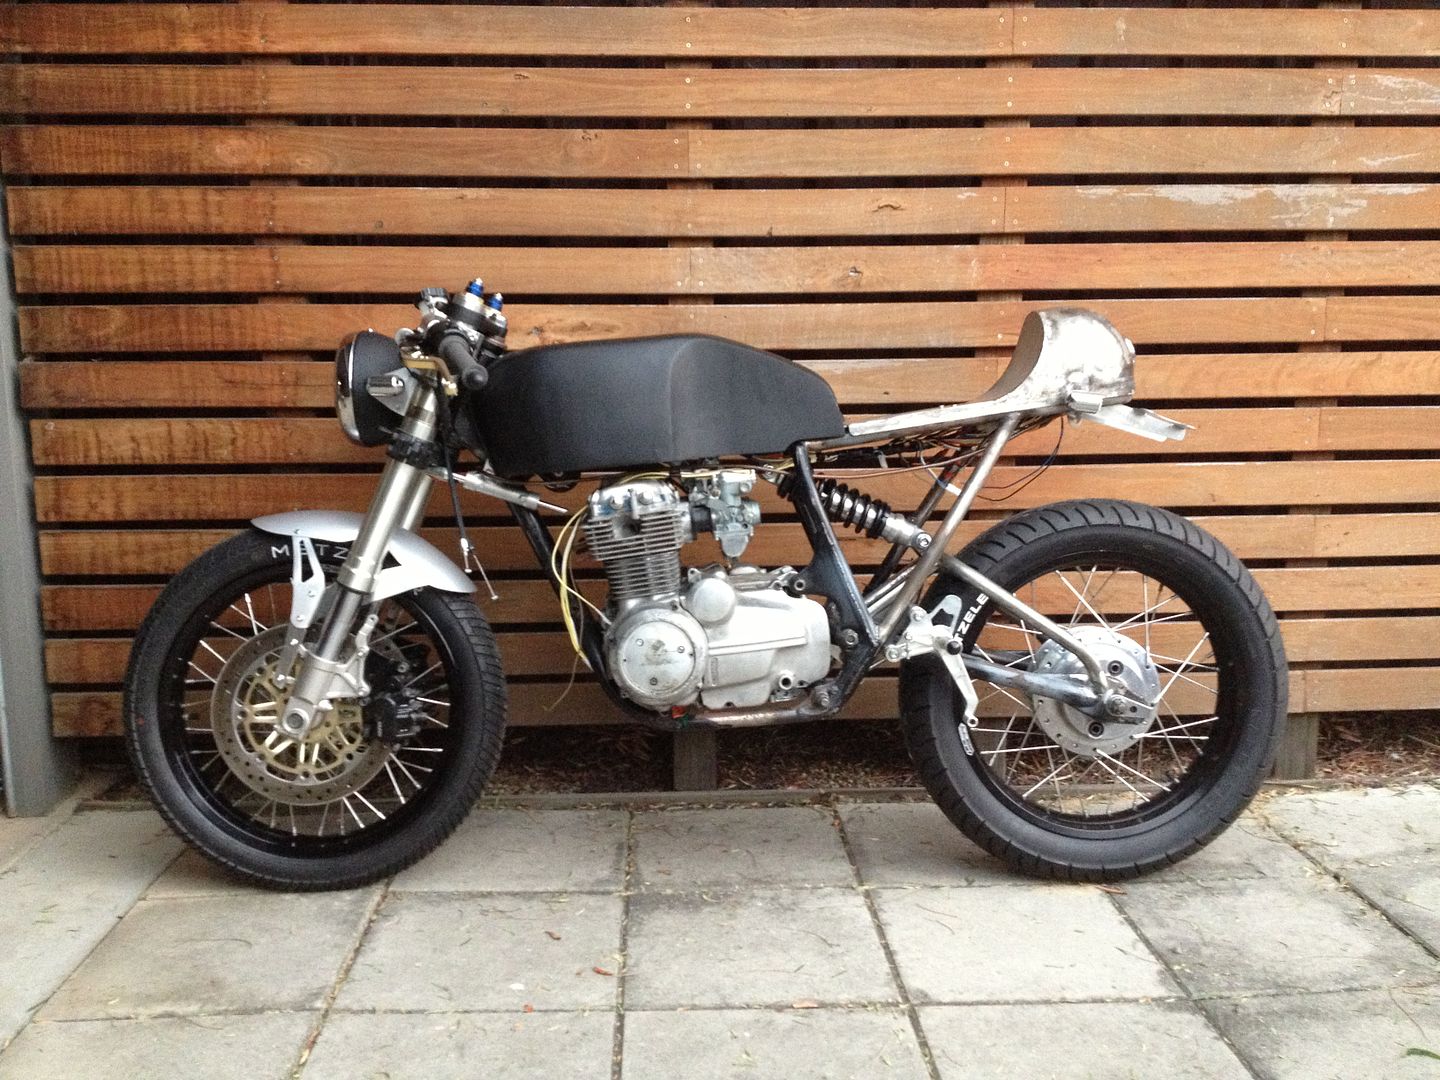
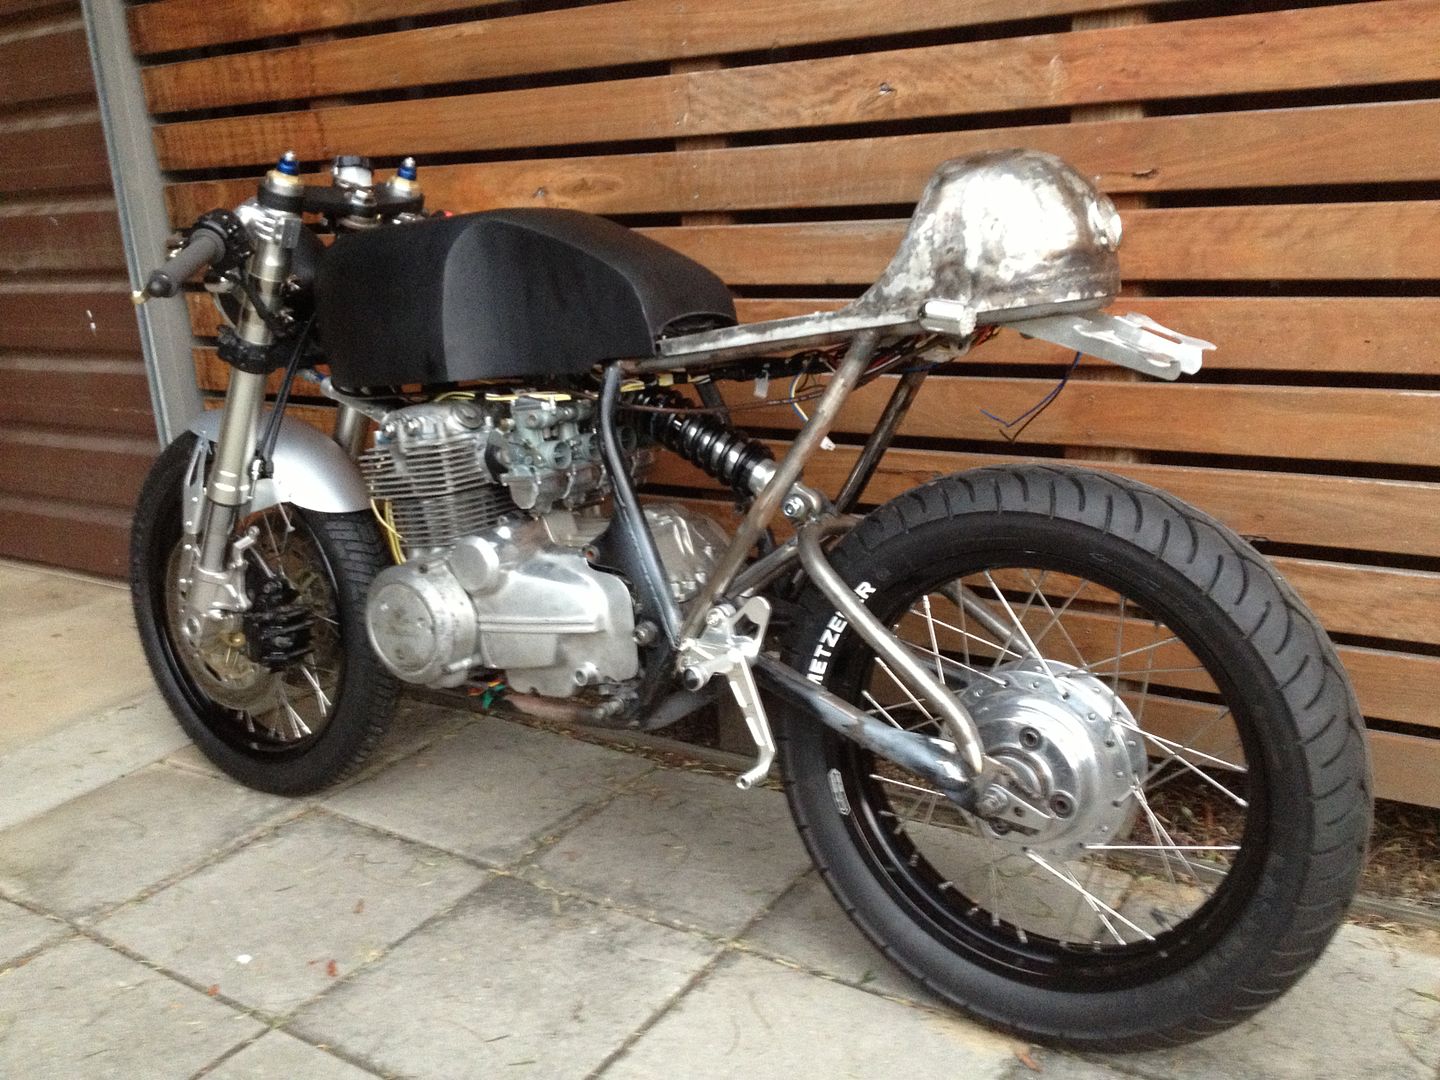
So my little bike is back up on its feet:
The rear end is waaaaay to far up in the air and that's because the spring is far to heavy duty. Almost zero static sag, so if I get a lower rated one it should sit 25-30mm lower. The bump stop is in the right place though so the rear wheel does not hit the subframe tray at full compression.
This site uses cookies to help personalise content, tailor your experience and to keep you logged in if you register.
By continuing to use this site, you are consenting to our use of cookies.


")