Hello all, I finally signed up on here after being advised to multiple times by a friend, and after much looking around on here. You guys have a nice forum on here with lots of great information shared. I thought I would use my first post to share my project that is nearing completion with everyone. I started out with a SP 1000 which was in fair shape. It was well used and rough around the edges, but had potential.
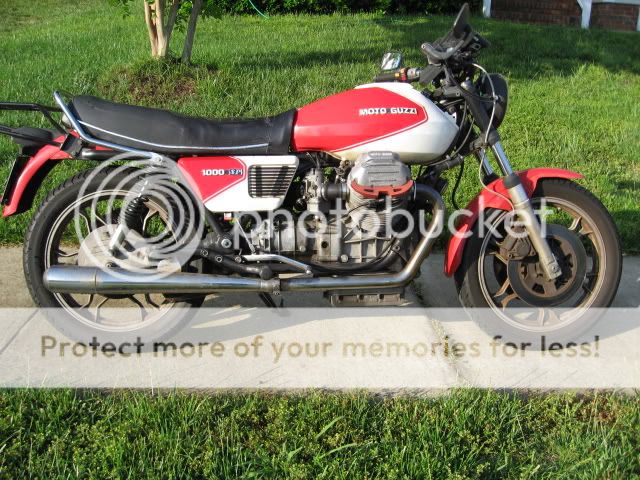
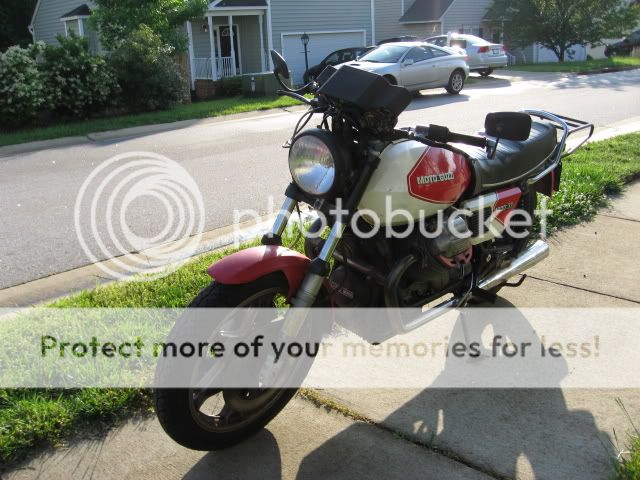
It was a solid bike but needed lots of TLC. The previous owner told me it had a new clutch and rings and a few other things he couldn't remember done by someone for him. It had been sitting for the last year or so mostly because he really just didnt ride anymore. He finally quit riding it when it would only shift from 2-3 gears and put it up for sale. It came with fairly new tires, and somewhere along the way it had a dyna ignition installed. The wiring harness was a real mess. It had many wires twisted and taped to make connections, unhooked hot wires, and all sorts of shotty work. It is a wonder that it was still running. It looked that the bike had recieved what maintenance was required to keep it on the road and that's it. I decided to make it into a cafe, and started unbolting the parts I would not be re using. The pile grew to be quite large.
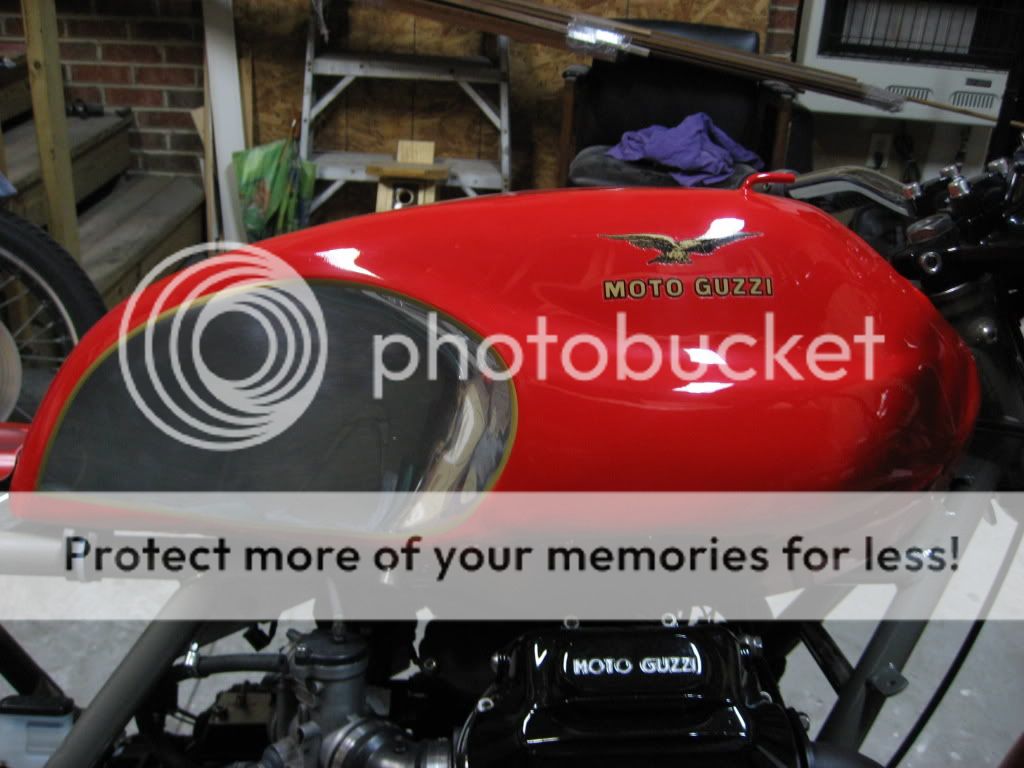
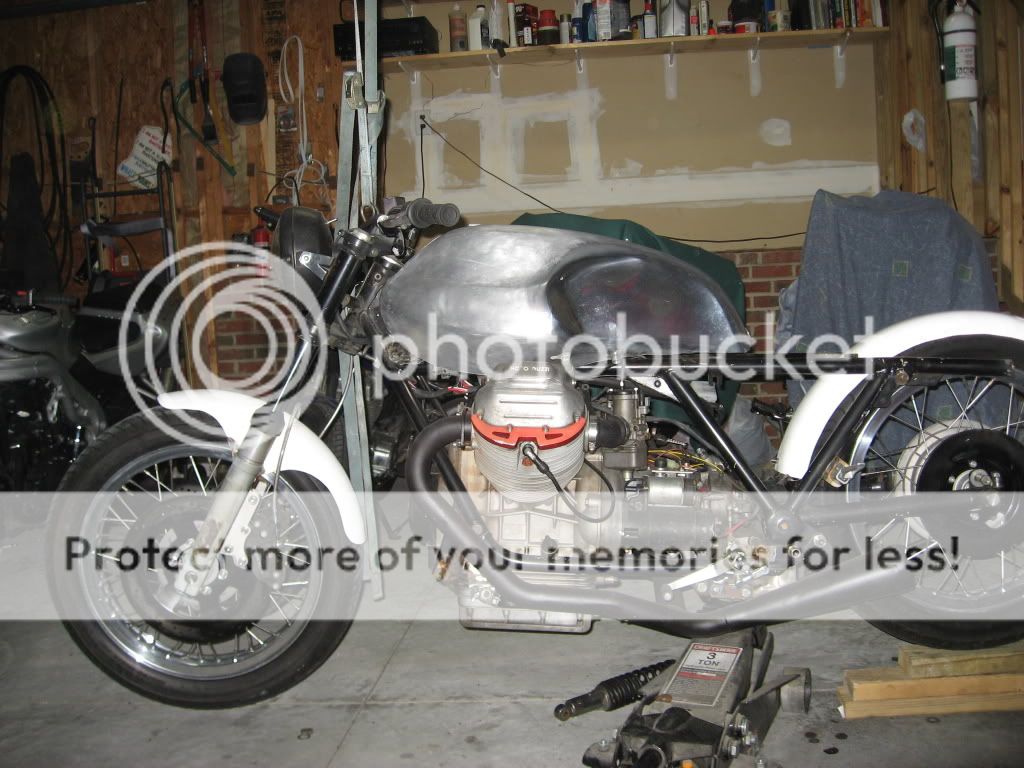
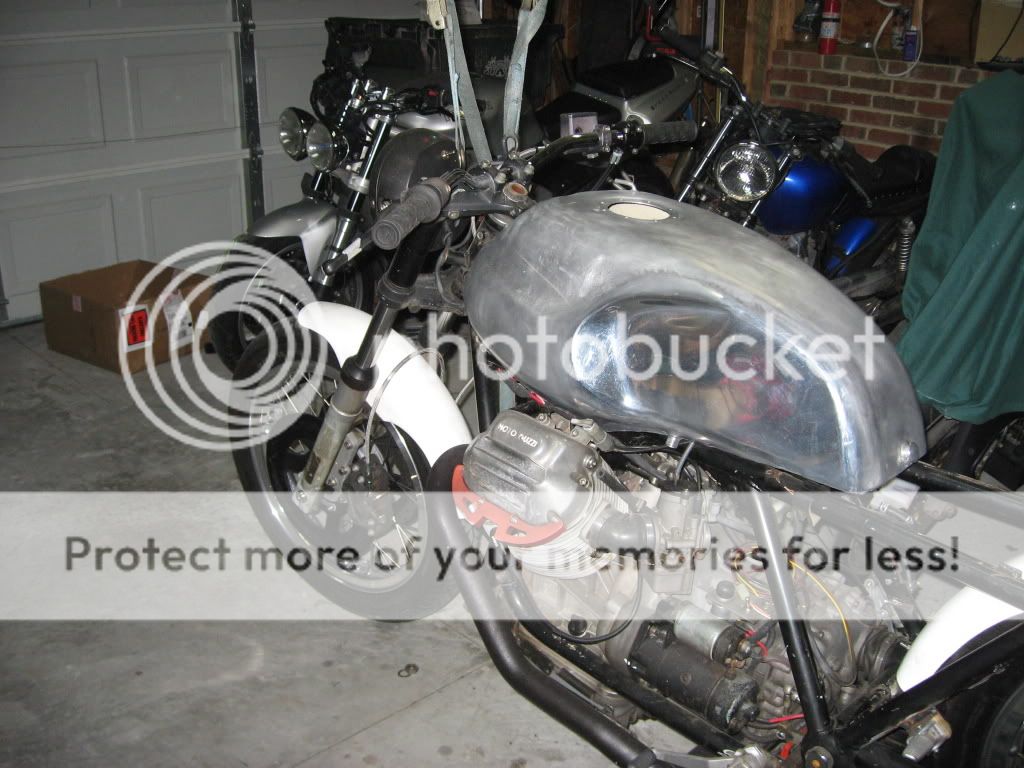
I found a tank on Ebay for it and modified a scrappy set of Bub's I had that used to be on my centauro. It took some bending, cutting and welding, but they now fit pretty well and they were free. That is the best price! I also made a new wiring harness and eliminated all options I no longer wanted. I will only have a main power switch, starter button, HI/LOW/OFF headlight switch, and a "secret" hidden kill switch. I added LED's in the headlight bucket for the neutral/batt/oil lights. I will not be running any other gauges except for possibly adding an oil gauge in the future. I soldered all connections and mounted all electronics under the tank. I fabbed up a few brackets to mount it all and modified the breather, making it smaller to create extra room for it all.
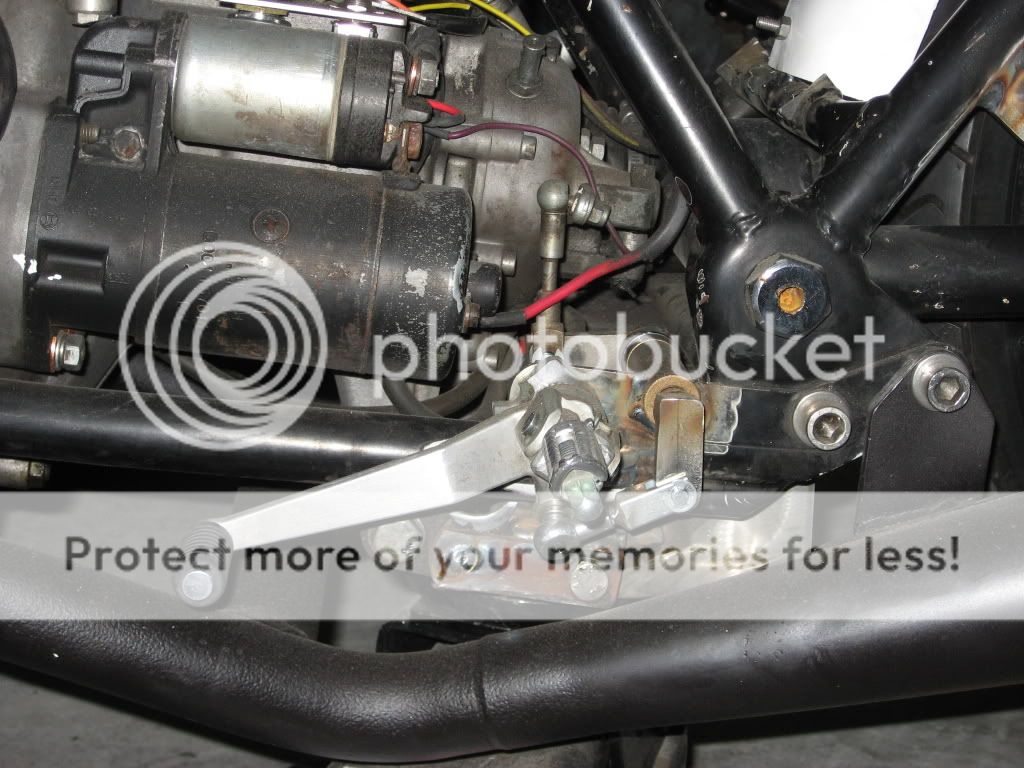
I mounted up a set of rearsets from an 08 Suzuki GSXR1000. The shift linkage all had to be fabricated and works well. It will require a little more modification to get it shifting better and prettied up a bit, but the hard part is figured out. The shifting problem the bike was sold over is due to a broken shifter return spring. It will shift fine if the shifter is manually moved back into the normal position to ready it for the next shift. I will have to install a new spring to remedy that issue. In the shifter side picture the new battery box is sort of visible. I made a battery box to fit under the transmission/swing arm area. It mounts on the lower transmission mount bolt where the centerstand used to mount. It is designed to hinge down for easy access when it is time for a battery swap or maintenance. .
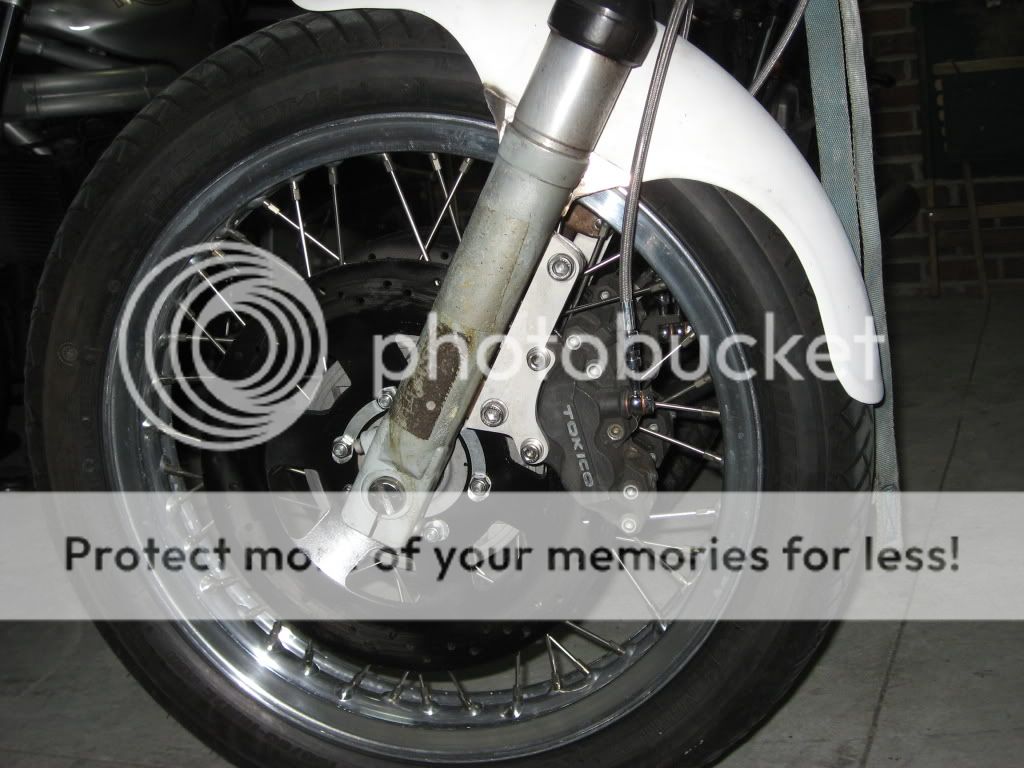
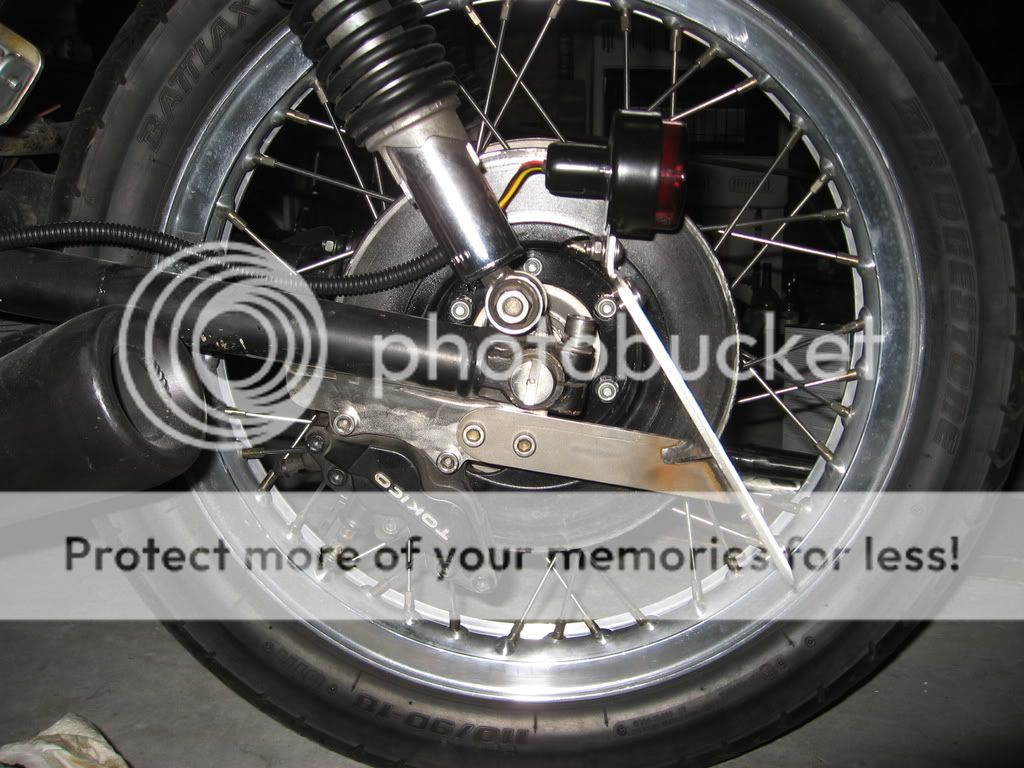
I machined up an adapter to mount a set of GSXR calipers. I am using a Ducati Monster front master cylinder, and the set up is powerful with a great feel. I got a friend to turn the rotors and I drilled them. I also swapped my mags for these spoke wheels which suit the cafe style better in my opinion. I found a guy that was looking for a set of mags and we did an even swap. It only cost me shipping and some time to make a spacer for the rear wheel.
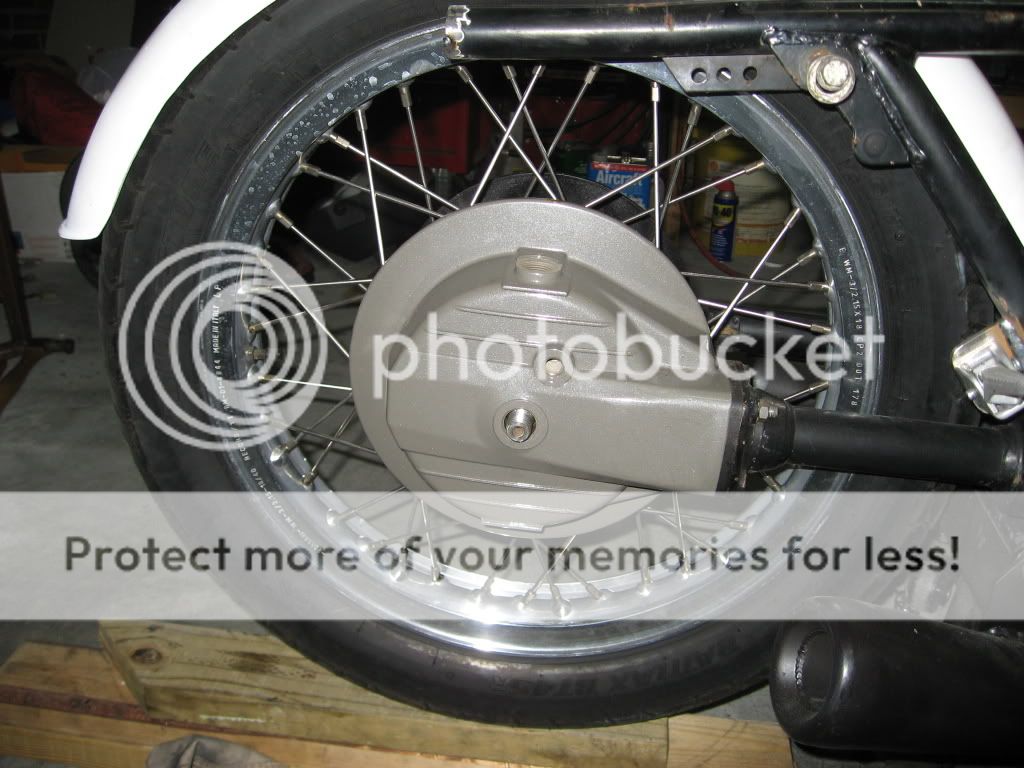
I had to take the rear drive apart to replace the worn out drive spline hub. I was planning on getting the frame powdercoated when it is ready so got the drive housing powder coated to match while it was apart. I was not planning on it, but it was apart.... so why not? Everything else looks pretty good in there, so with the new seals and all it should be good to go hopefully. I am doing the cush drive mod of removing some of the rubbers and drilling them. Hopefully that and additionally with the GREASE now installed it will not wear anymore. These drives are notorious for being really stiff with all the rubbers and will lock up if not greased, transmitting all the shock load directly on the drive splines.
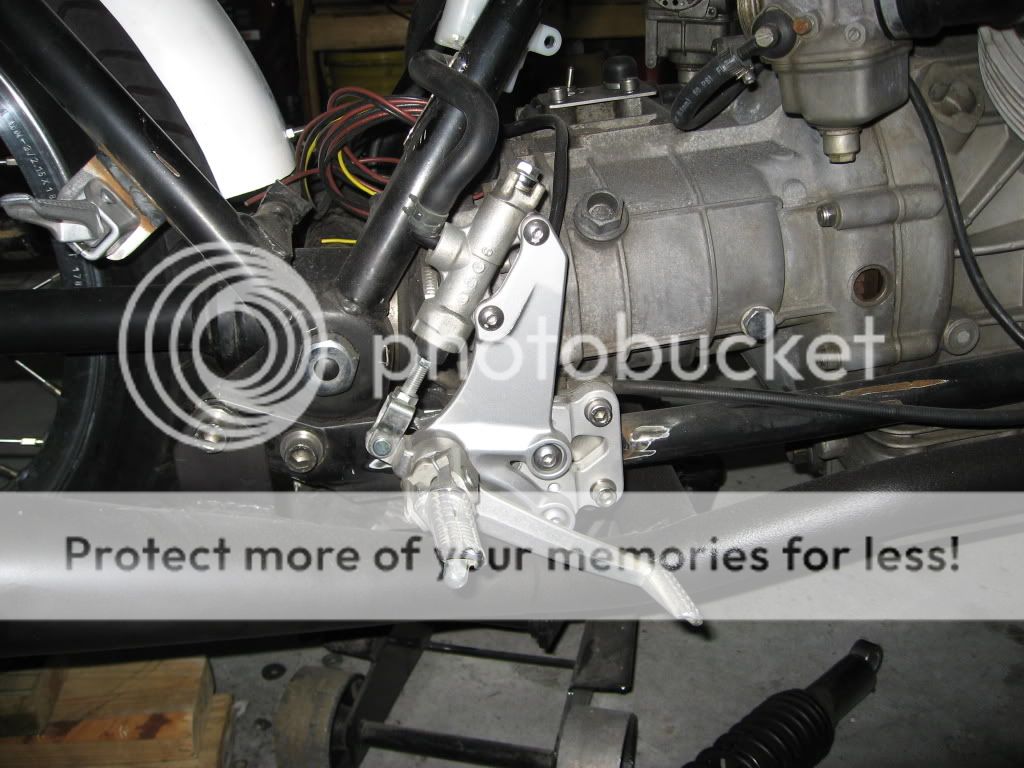
Here is a photo of the completed rear caliper mount. I made the caliper mount that will accomodate the same GSXR calipers I am running on the front. I also made the license plate- tail light mount that will bolt to the caliper mount. I decided to make a new bracket and use a new caliper instead of the stock one because the stock bracket would not work easily with the new wheels. I figured if I have to fab up something, I may as well do it and use a nice up dated caliper.
Here, the frame is finally prepared for the powdercoating.
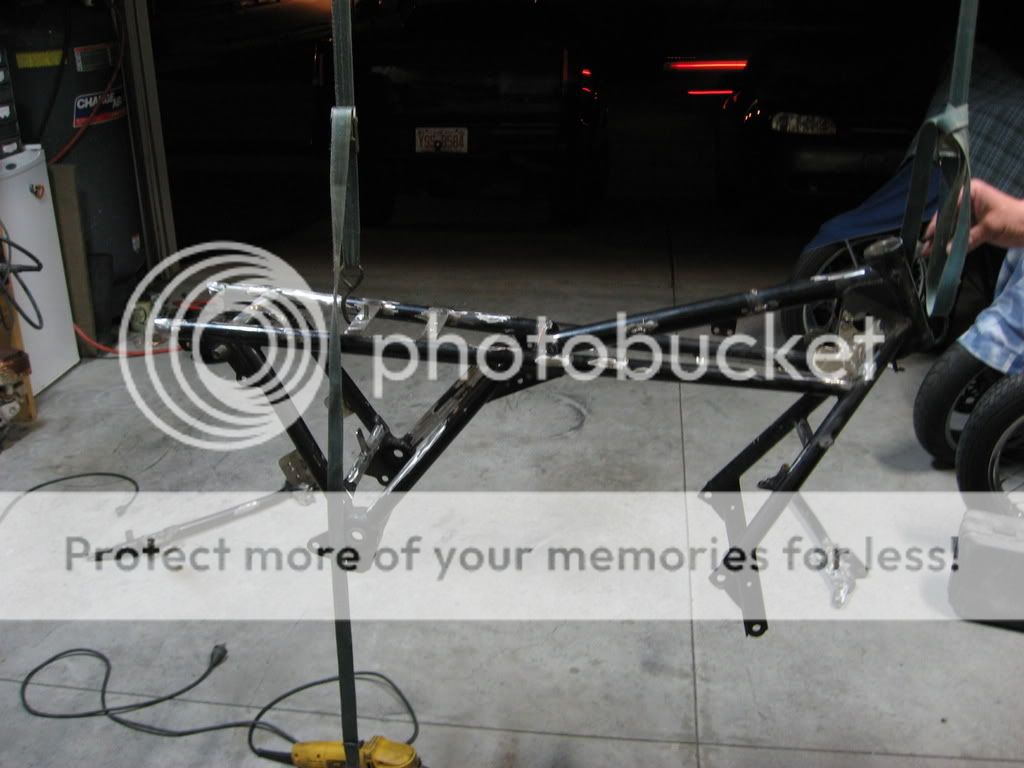
It took lots of grinding to clean up all the old tabs that will not be used. Many of them were not used on this bike to begin with. I suppose they are used on other models or something. I got my new tank, seat and fender mounts welded on along with brackets to secure the wiring harness and brake hoses later. I also discovered that the bearing in the swing arm that supports the driveshaft was locked up, and it did not want to come out. I had to weld a piece of scrap to it so I could knock it out from the back side. It took a bit of hammering to break it loose even then. Now I needed to clean up the engine....
It took lots of scrubbing to get it clean. It had not seen any soap for a long time before it made it to my garage. I like the bare aluminum look, but I thought it will be hard to clean up to make it look nice with bare aluminum, and I think it may be more effort to keep it nice looking.I decided to paint it...
Here are the parts back at home, now all nicely powdercoated. He got them done faster than I expected and I ended up playing catch up getting the engine ready.
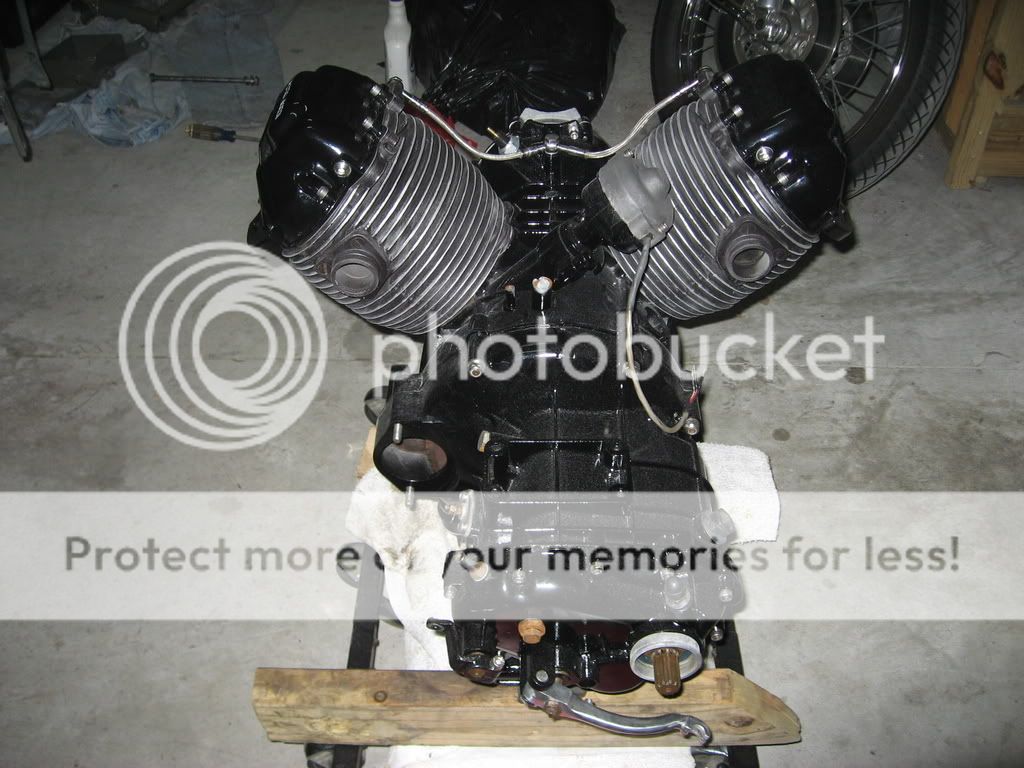
I cleaned and painted the engine and have got it back in the frame. It took a lot of work to get the grease gone and to prep it for paint. I used acid to etch it and it cleaned it up well. I think it came out nice, and hopefully it will last. I used automotive base coat/ clear coat paint on it everything except for the jugs and head which have high temp paint. I know people who have used this type of paint on car engines with success, so thought I would try it. It seems to be holding up so far...

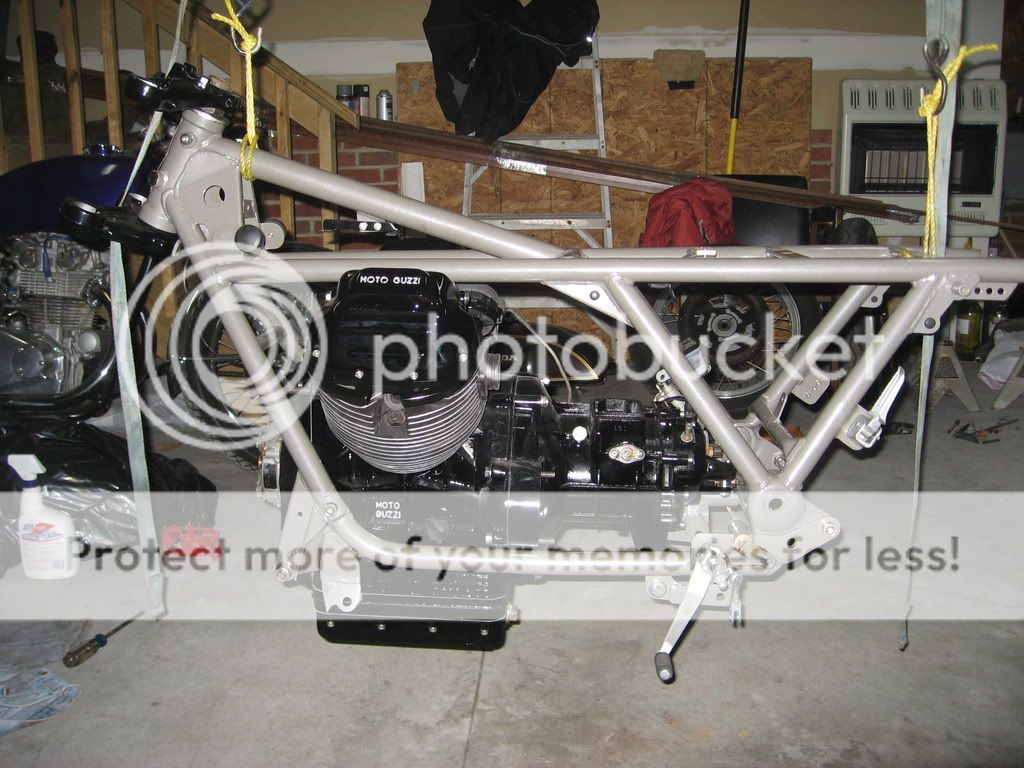
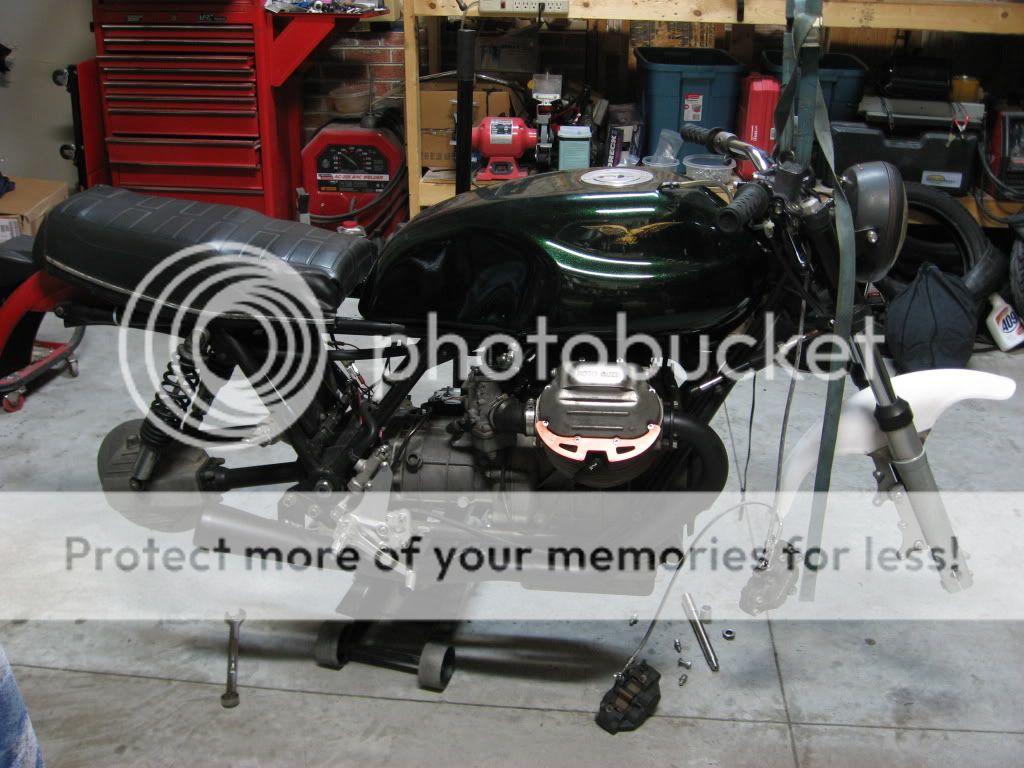
I now have it mostly back together. I got it running recently and finished almost all of the wiring.
I had not taken another shot of it since I got the engine back in, so I figured it was time. Here is the state it is in now. I have to work on my shift linkage because I am changing to heim joints, and to complete the body work. I also have a few other odds and ends to sort out but this will be general idea of how it will look...

I have had it out on 2 short rides so far just to give it a shake down and check things out. It all seems to be mostly in order. I can shift through all the gears and there is no noise from the trans or the rear drive. I am glad of that since it was my first time going into both of them. Also no oil leaks or any other problems except that I need to adjust the carbs to get it running better. On my second ride though it had to be brought home courtesy of Birdman's truck. We were out one evening and it shut down. We were in a dark spot with no tools, and we were un able to figure out the problem at the time. After we got it home we figured out that a crappy switch broke and killed the power to my coils. I am glad it was simple and have some (hopefully) more heavy duty vibration resistant ones on the way. If all goes well I will spray all the parts this weekend because I have now compelted the bodywork. I will post more pics soon....
It was a solid bike but needed lots of TLC. The previous owner told me it had a new clutch and rings and a few other things he couldn't remember done by someone for him. It had been sitting for the last year or so mostly because he really just didnt ride anymore. He finally quit riding it when it would only shift from 2-3 gears and put it up for sale. It came with fairly new tires, and somewhere along the way it had a dyna ignition installed. The wiring harness was a real mess. It had many wires twisted and taped to make connections, unhooked hot wires, and all sorts of shotty work. It is a wonder that it was still running. It looked that the bike had recieved what maintenance was required to keep it on the road and that's it. I decided to make it into a cafe, and started unbolting the parts I would not be re using. The pile grew to be quite large.
I found a tank on Ebay for it and modified a scrappy set of Bub's I had that used to be on my centauro. It took some bending, cutting and welding, but they now fit pretty well and they were free. That is the best price! I also made a new wiring harness and eliminated all options I no longer wanted. I will only have a main power switch, starter button, HI/LOW/OFF headlight switch, and a "secret" hidden kill switch. I added LED's in the headlight bucket for the neutral/batt/oil lights. I will not be running any other gauges except for possibly adding an oil gauge in the future. I soldered all connections and mounted all electronics under the tank. I fabbed up a few brackets to mount it all and modified the breather, making it smaller to create extra room for it all.
I mounted up a set of rearsets from an 08 Suzuki GSXR1000. The shift linkage all had to be fabricated and works well. It will require a little more modification to get it shifting better and prettied up a bit, but the hard part is figured out. The shifting problem the bike was sold over is due to a broken shifter return spring. It will shift fine if the shifter is manually moved back into the normal position to ready it for the next shift. I will have to install a new spring to remedy that issue. In the shifter side picture the new battery box is sort of visible. I made a battery box to fit under the transmission/swing arm area. It mounts on the lower transmission mount bolt where the centerstand used to mount. It is designed to hinge down for easy access when it is time for a battery swap or maintenance. .
I machined up an adapter to mount a set of GSXR calipers. I am using a Ducati Monster front master cylinder, and the set up is powerful with a great feel. I got a friend to turn the rotors and I drilled them. I also swapped my mags for these spoke wheels which suit the cafe style better in my opinion. I found a guy that was looking for a set of mags and we did an even swap. It only cost me shipping and some time to make a spacer for the rear wheel.
I had to take the rear drive apart to replace the worn out drive spline hub. I was planning on getting the frame powdercoated when it is ready so got the drive housing powder coated to match while it was apart. I was not planning on it, but it was apart.... so why not? Everything else looks pretty good in there, so with the new seals and all it should be good to go hopefully. I am doing the cush drive mod of removing some of the rubbers and drilling them. Hopefully that and additionally with the GREASE now installed it will not wear anymore. These drives are notorious for being really stiff with all the rubbers and will lock up if not greased, transmitting all the shock load directly on the drive splines.
Here is a photo of the completed rear caliper mount. I made the caliper mount that will accomodate the same GSXR calipers I am running on the front. I also made the license plate- tail light mount that will bolt to the caliper mount. I decided to make a new bracket and use a new caliper instead of the stock one because the stock bracket would not work easily with the new wheels. I figured if I have to fab up something, I may as well do it and use a nice up dated caliper.
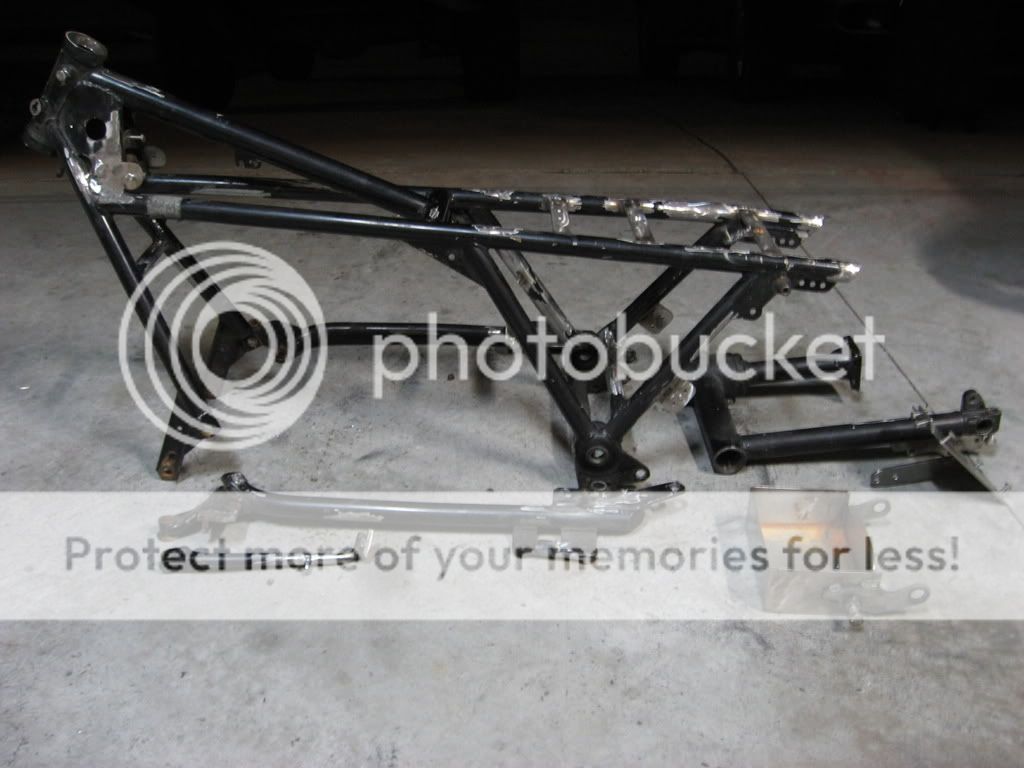
Here, the frame is finally prepared for the powdercoating.
It took lots of grinding to clean up all the old tabs that will not be used. Many of them were not used on this bike to begin with. I suppose they are used on other models or something. I got my new tank, seat and fender mounts welded on along with brackets to secure the wiring harness and brake hoses later. I also discovered that the bearing in the swing arm that supports the driveshaft was locked up, and it did not want to come out. I had to weld a piece of scrap to it so I could knock it out from the back side. It took a bit of hammering to break it loose even then. Now I needed to clean up the engine....
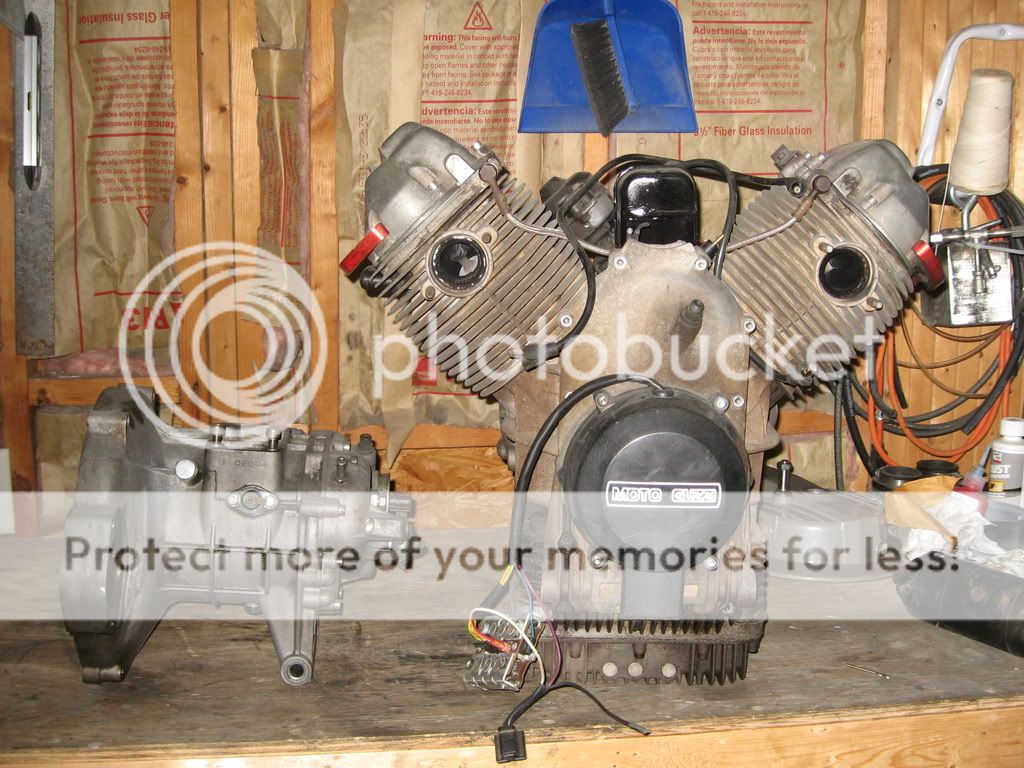
It took lots of scrubbing to get it clean. It had not seen any soap for a long time before it made it to my garage. I like the bare aluminum look, but I thought it will be hard to clean up to make it look nice with bare aluminum, and I think it may be more effort to keep it nice looking.I decided to paint it...
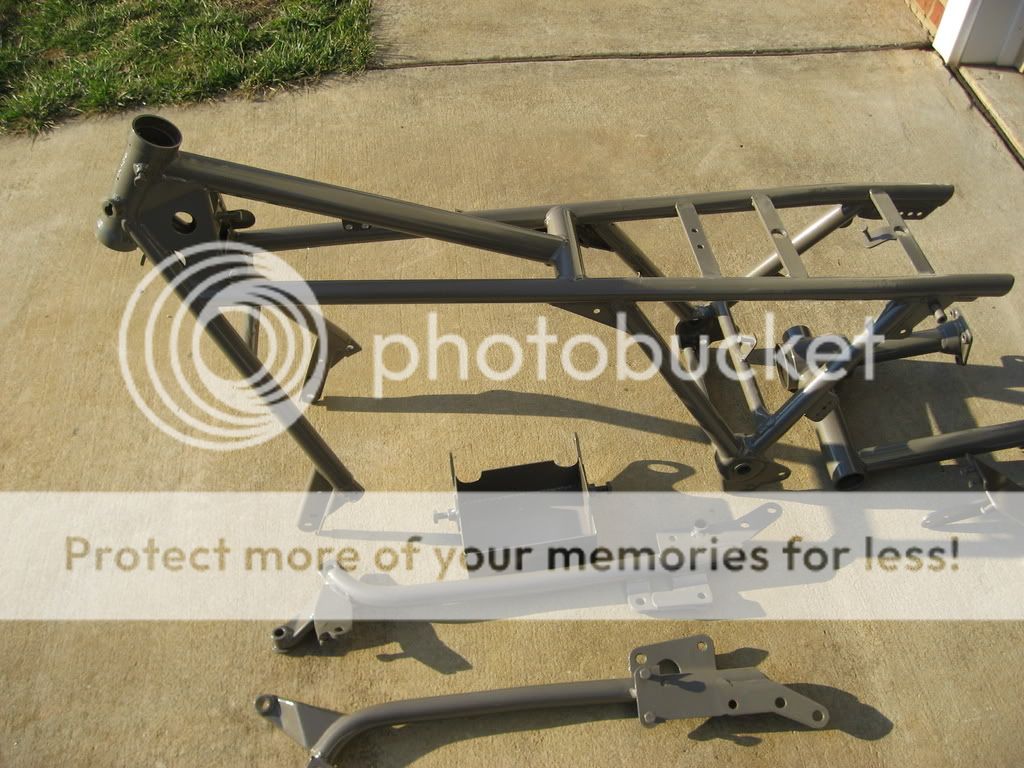
Here are the parts back at home, now all nicely powdercoated. He got them done faster than I expected and I ended up playing catch up getting the engine ready.
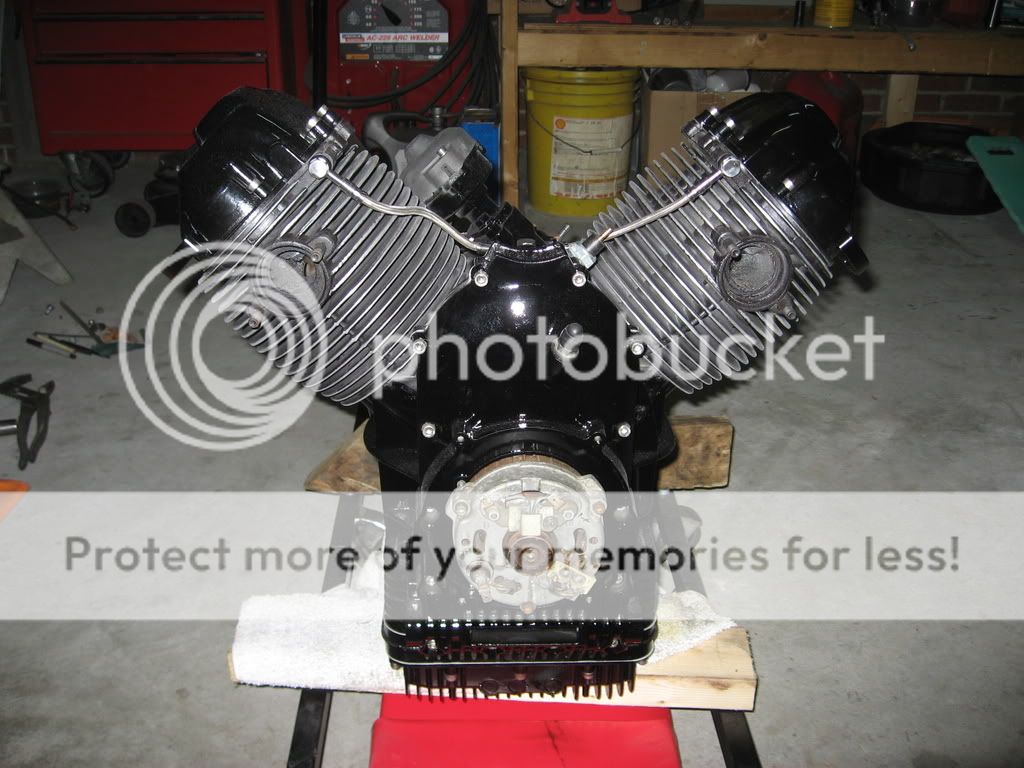
I cleaned and painted the engine and have got it back in the frame. It took a lot of work to get the grease gone and to prep it for paint. I used acid to etch it and it cleaned it up well. I think it came out nice, and hopefully it will last. I used automotive base coat/ clear coat paint on it everything except for the jugs and head which have high temp paint. I know people who have used this type of paint on car engines with success, so thought I would try it. It seems to be holding up so far...
I now have it mostly back together. I got it running recently and finished almost all of the wiring.
I had not taken another shot of it since I got the engine back in, so I figured it was time. Here is the state it is in now. I have to work on my shift linkage because I am changing to heim joints, and to complete the body work. I also have a few other odds and ends to sort out but this will be general idea of how it will look...
I have had it out on 2 short rides so far just to give it a shake down and check things out. It all seems to be mostly in order. I can shift through all the gears and there is no noise from the trans or the rear drive. I am glad of that since it was my first time going into both of them. Also no oil leaks or any other problems except that I need to adjust the carbs to get it running better. On my second ride though it had to be brought home courtesy of Birdman's truck. We were out one evening and it shut down. We were in a dark spot with no tools, and we were un able to figure out the problem at the time. After we got it home we figured out that a crappy switch broke and killed the power to my coils. I am glad it was simple and have some (hopefully) more heavy duty vibration resistant ones on the way. If all goes well I will spray all the parts this weekend because I have now compelted the bodywork. I will post more pics soon....