
We noticed you are blocking ads. DO THE TON only works with community supporters. Most are active members of the site with small businesses. Please consider disabling your ad blocking tool and checking out the businesses that help keep our site up and free.
You are using an out of date browser. It may not display this or other websites correctly.
You should upgrade or use an alternative browser.
You should upgrade or use an alternative browser.
CAFE CREME - BOARD.....TRACKER
- Thread starter beachcomber
- Start date
It almost has a seafoam green tint to it; one of my favorite colors. I think it will sit well with the ivory you chose!
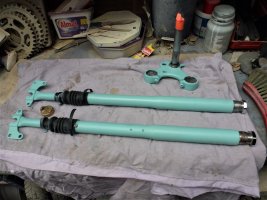
Yes, I'm pleased with the colour combo. Really pops in daylight.
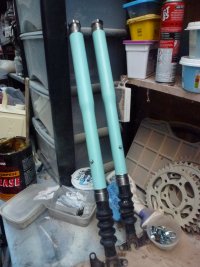
Both colours are satin finish to get closer to 1900s presentation. Some colour charts give it as green - others blue. Bianchi list it as Celeste Blue and is still used on their top of the line racing bicycles. Thanx for your continued interest.
Those 10 minute jobs that turn into 2 hours !!!
My pal fitted the bushes [ including 2 extra per leg ] for me, but unfortunately left one of the original staking pegs in one of the legs.
First leg took me 10 minutes to assemble .............. the second one almost 2 hours, mainly getting the old peg out which was 11" into the leg. Of course, I didn't discover this until the legs were painted ! Check first ?? Well yes I did - trial assembly, but in the "good" leg.
Serves me right for being lazy and not checking everything beforehand. Oh well, it's done now.
Attachments
NoRiders
Over 1,000 Posts
Well done....I discovered the fork legs on the Honda are handed and different lengths, by 9mm. Ordered a leftside leg only to find it was too long, supplier insisted it was a left leg...so stripped out the rightside to find it was a leftside.....like the one I'd ordered...:/Those 10 minute jobs that turn into 2 hours !!!
My pal fitted the bushes [ including 2 extra per leg ] for me, but unfortunately left one of the original staking pegs in one of the legs.
First leg took me 10 minutes to assemble .............. the second one almost 2 hours, mainly getting the old peg out which was 11" into the leg. Of course, I didn't discover this until the legs were painted ! Check first ?? Well yes I did - trial assembly, but in the "good" leg.
Serves me right for being lazy and not checking everything beforehand. Oh well, it's done now.
Carry on Beachy.
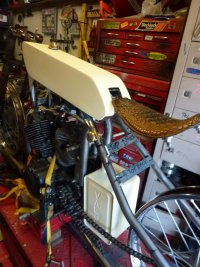
Starting to take shape!
Yes, I can see the frame for the jigs !!!! You've no idea what a lift that was.
Next job is to finish off the tacking [ he ran out of wire !!! ] and then I will check the mounting positions for the accessory brackets - footrests, gear and foot brake etc. - then it's tear down - remove the wheel bearings and get them off for powder coating and get the frame fully mig welded.
I changed my mind about mounting for the "tank" - originally was going to be a leather strap, but now I'm going to secure it direct to the top frame tube via some brass allthread and 2 nice brass domed nuts.
Unfortunately I have an issue with the Valor fuel cell ........ the rear exhaust is very close and would have to go through a couple of right angle bends to clear. No big deal if you are a welder ................................
Plan B will be a belly tank under and behind the engine, capacity will be slightly bigger at 1.5 imp. gallons. Not a job I can tackle but I'm hoping my pal Uncle Rob of this parish can oblige.
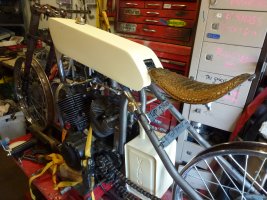
Coming on nicely now. starting to resemble a bike instead of a collection of parts!
Yes MT - been a long time coming ! Now becoming a collection of parts again [ !! ] as the POC mock up gets pulled down for the frame to be fully welded, bearings stripped from wheels [ for powder coating ].
Had to skip the mounts for the foot pedals and gear / brake , but I did get a rough mock up before stripping down.
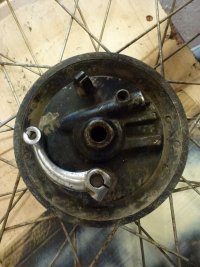
I was able to finalise the front brake plate position and by a stroke of luck the lower fixing screw for the bottom clevis of the front fork hoop can be aligned with the original Honda brake torque slot.
Only major headscratching now is how to get the rear exhaust header in to clear the fuel cell. No big deal if you are a welder / fabricator - there is room - but I need to be able to mock it up accurately for someone else to fabricate.
I need to get the seat and tank back in place and securely attached so I can sit on it and figure out the ergonomics - I want to be able to ride it !! One day.
Attachments

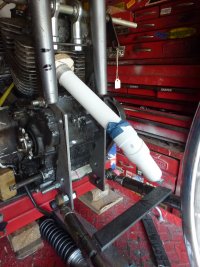
Just done a POC for the headers using plastic plumbing fittings. No way the rear will clear the Valor fuel cell, so I'll have to go with under engine cell as my KZ750 Cafe racer. Plenty of room, just another outsource job. Two options for the rear header - the sexy version and the boring version.
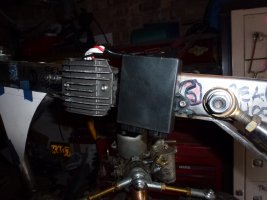
Did a check on the under "tank" electrics and the starter relay is too big enough to fit on the side - have to go underneath or maybe on top of the main tube.
While I was mocking up the rear header it became obvious that the gearlinkage [ hand change ] would cause difficulties in removing fitting the exhaust - so that's got to be moved. Fortunately it can be mounted off the rear frame down tube to the engine.
Attachments
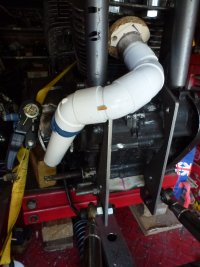
I measured up the practical space for a fuel cell behind the engine, but dropping down through the lower frame tubes. Bizarrely I can get a greater capacity with a simple rectangular cell without the aggro of going under the engine as was my original thinking. I can easily get 1.5 imp gallons, whereas the Valor can was of course a gallon.
Also makes the rear header much simpler to knit. Been out with the plastic plumbing fittings again this afternoon and got a couple of reasonable alternatives.
Also makes the rear header much simpler to knit. Been out with the plastic plumbing fittings again this afternoon and got a couple of reasonable alternatives.
Using the pvc piping to mock up exhaust is a pretty brilliant idea
You do what ya gotta do with what you've got !!!
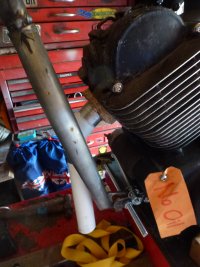
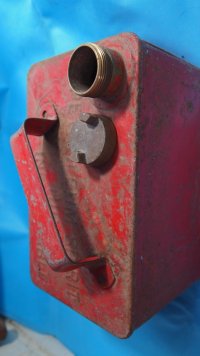
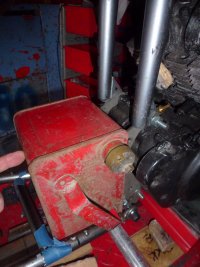
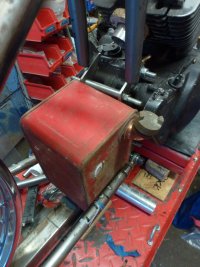
I've now scored a 1 gallon [ imp ] petrol can which fits perfectly behind the engine but will give additional clearance for the rear header.
I'll have to mount it vertically and move the filler through 90 degrees. BTW - the brass cap that came with the can is worth £35 on it's own !!
I was quoted anywhere between £95 and £135 for a simple rectangular tank in aluminium ! The vintage can - £10, plus a couple of brass hose tails and a 90 degree bend for the filler and job done - total £15.
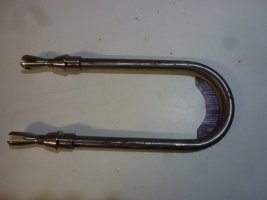
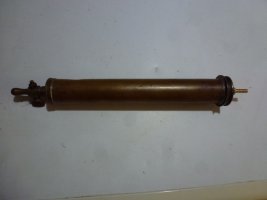
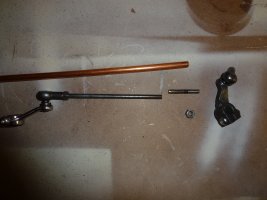
The vintage brass syringe pump has been modified to be a fuel log as it comes with it's own tap. Just had to fit a brass hose tail to the other end for the inlet supply from the electric fuel pump.
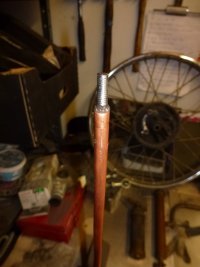
I was looking for a vintage look for the gearchange [ hand ] rods, so came up with the solution to cut off the ends from the original linkage [ Honda traillie ] and insert them into the correct length copper tube. Used my best new friend Epoxy resin - perfect.
I'll have to mount it vertically and move the filler through 90 degrees. BTW - the brass cap that came with the can is worth £35 on it's own !!
I was quoted anywhere between £95 and £135 for a simple rectangular tank in aluminium ! The vintage can - £10, plus a couple of brass hose tails and a 90 degree bend for the filler and job done - total £15.
The vintage brass syringe pump has been modified to be a fuel log as it comes with it's own tap. Just had to fit a brass hose tail to the other end for the inlet supply from the electric fuel pump.
I was looking for a vintage look for the gearchange [ hand ] rods, so came up with the solution to cut off the ends from the original linkage [ Honda traillie ] and insert them into the correct length copper tube. Used my best new friend Epoxy resin - perfect.
Attachments
Awesome man.. great score on the fuel can! Looking forward to seeing how it sits in the frame, also like your idea for gearchange linkage.
Thanx Luugo,
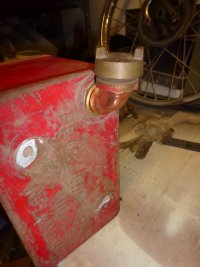
the tank actually sits BETTER than the original Valor can. It's in the same position but now sits between / below the lower frame rails. Pix tomorrow.
BTW, coincidentally the "new" can was also made by Valor !! What's the chances.
It was one of those lightbulb moments when I did a "whatif" the original rod fits inside a 6mm bore copper tube. That is a practical solution to get the lengths I want and also gives me the bonus of a period look.
And 20 minutes later the POC fuel cell !!!
Fits perfectly and gives me 1 imp gallon. I'm hoping to find someone who can solder the neck / filler elbow and also the 2 brass hose tails [ for fuel supply ] and a breather take off.
If not - I've still got 3 packs of resin glue !
Fits perfectly and gives me 1 imp gallon. I'm hoping to find someone who can solder the neck / filler elbow and also the 2 brass hose tails [ for fuel supply ] and a breather take off.
If not - I've still got 3 packs of resin glue !
Attachments
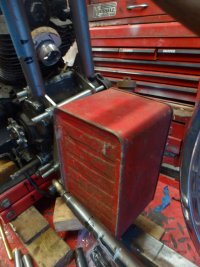
Fits right in there slick.
Almost as if it was meant to be !!!!!


