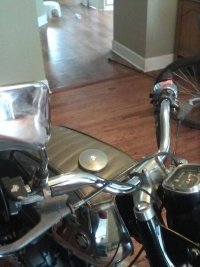
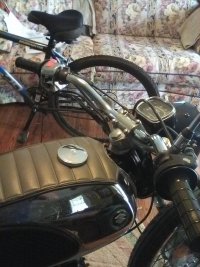
1963 Suzuki Colleda Black Betty cafe-ish build

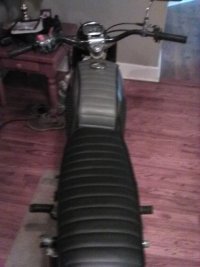
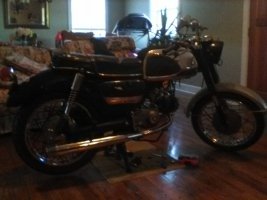
Pipe is just kinda hanging there ATM , working on exhaust bracket and footpeg today, I had to bend the pipe slightly where the head pipe meets the megaphone, one mounting bolt will have to be ground down slightly because it hits the brake pedal and the exhaust pipe bracket will get a cut grind and reweld to get it to sit just right, also thinking about extending the flange on the head pipe slightly 1/8 or so .

I have that much extra length in the exhaust studs to compensate. a new footpeg bracket will have to be built for the right side that comes up at a sharper angle and bends up and around the pipe then ends up back at the same height it is now, just maybe a tad farther outboard. There is plenty of adjustment in the rear brake pedal setup to put the bralke pedal wherever it needs to be.
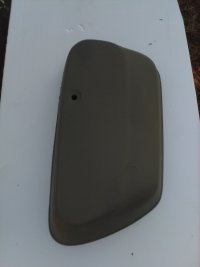
 

Attachments

  • IMG_20201226_075344 (2).jpg
    IMG_20201226_075344 (2).jpg
    263.8 KB · Views: 164
Last edited:
I am going to bolt the stock peg assy back on and see what is what before I cut this up any further, exhaust bracket is done except for welding should be 100% done tomorrow afternoon. Exhaust fits like a glove now.
 
The stock footpeg bracket works but damn it's ugly ,the footpegs are ugly and it hangs down way more than I like , the bracket that bolts to the engine is a much cleaner setup and works correctly with the heel toe shifter I made for it, the good news is the stock bracket has the correct bend in it to fix the other bracket with , for today I will just ride it with the stock footpeg bracket, sometime next week I will combine the two brackets to make what I need. Both brackets are about the same diameter so I think some kind of half lap weld joint is in order, The exhaust bracket is welded , painted and installed, that part worked out perfectly.
 
Got a little free time so I whipped out a seat cover, kinda digging it

!The front fender is next on the hit list.
 

Attachments

  • IMG_20201231_162650.jpg
    IMG_20201231_162650.jpg
    569.8 KB · Views: 155
  • IMG_20201231_162723.jpg
    IMG_20201231_162723.jpg
    522.1 KB · Views: 149
Thanks it wsn't the first try but I got it on the second go around, I also whipped out a tank pad today and installed it, slowly covering the ugly up , front fender and sidecovers are next.
 

Attachments

  • IMG_20210109_165250.jpg
    IMG_20210109_165250.jpg
    319.7 KB · Views: 139
  • IMG_20210109_165321.jpg
    IMG_20210109_165321.jpg
    399.7 KB · Views: 143
  • IMG_20210109_165333.jpg
    IMG_20210109_165333.jpg
    389.4 KB · Views: 145
So this is my starting point on the sidecovers, my theory is if this is the starting poit there is no way to go but up right ?

Anyway tomorrow they go in the muratic acid bath, I will probably weld up the emblem holes, after that they get sprayed gloss black polyurethane and I am thinking of doing a reverse and with the panels chrome wrapped instead of black like they are now.

We will see how it goes.
 

Attachments

  • IMG_20210117_164057.jpg
    IMG_20210117_164057.jpg
    464.6 KB · Views: 145
  • IMG_20210117_164107.jpg
    IMG_20210117_164107.jpg
    458.5 KB · Views: 141
I changed out the old superbike bars for Daytona bars today, just a bit more rise and pullback than the superbike bars , I think they match the bike much better and the riding position is now spot on. plus more chrome is always a good thing bling bling !
 

Attachments

  • IMG_20210212_112203.jpg
    IMG_20210212_112203.jpg
    561.3 KB · Views: 123
  • IMG_20210212_112156.jpg
    IMG_20210212_112156.jpg
    696.3 KB · Views: 132
Front fender is repainted and reinstalled, I rattle canned it with Rustoleum silver -gray lacquer and clear, I laid down 7 or 8 coats of clear so in about a week I will buff it out, the old rusty bolts were replaced with stainless steel button head allen bolts, still working on the sidecovers.
 

Attachments

  • IMG_20210219_170909.jpg
    IMG_20210219_170909.jpg
    425.1 KB · Views: 125
  • IMG_20210219_181944.jpg
    IMG_20210219_181944.jpg
    342.7 KB · Views: 124
First sidecover , emblem holes welded up bondoed and in primer
 

Attachments

  • IMG_20210219_170847.jpg
    IMG_20210219_170847.jpg
    299.8 KB · Views: 127
Back
Top Bottom