
We noticed you are blocking ads. DO THE TON only works with community supporters. Most are active members of the site with small businesses. Please consider disabling your ad blocking tool and checking out the businesses that help keep our site up and free.
You are using an out of date browser. It may not display this or other websites correctly.
You should upgrade or use an alternative browser.
You should upgrade or use an alternative browser.
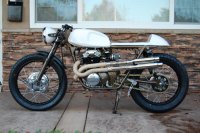
1970 Honda CL350 Cafe Racer Project Bike Newbie
- Thread starter plyzo
- Start date

deepwaterimports
Over 1,000 Posts
looking amazing bro
plyzo
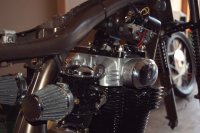
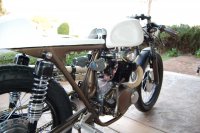
1970 Honda CL 350
I had a clutch question. I removed the cover where the clutch cable goes in and was wondering if the clutch rod can come out or will that screw things up? how can I test that the clutch can be engaged without the cable? I ran a stock cable but with clipons now the cable is way longer so having it shortened. I was not able to engage the clutch at all but want to make sure its working. Any thoughts?
") haha...motor is looking lovely man!
haha...motor is looking lovely man!plyzo
1970 Honda CL 350
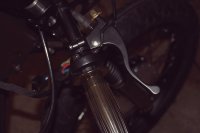
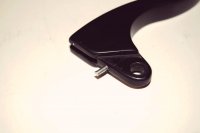
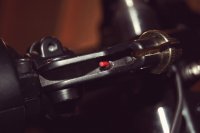
Front Brake switch to brake Lever created
So I worked on modifying a lever that I ordered from Dime City so that it could have a brake switch. I was going to go with one of the cables that has the integrated switch and was going to heat shrink it so it would match all my black cables but then decided to work on switch integration with the lever. I found a switch online and drilled a hole in the brake lever housing and then screwed in the switch. I then drilled a small hole in the lever so that i could add a piece of aluminum rod that would stick out enough for it to activate the switch. So far it seems to work great, soon will have the bike all together and will test it out on the road.
So I worked on modifying a lever that I ordered from Dime City so that it could have a brake switch. I was going to go with one of the cables that has the integrated switch and was going to heat shrink it so it would match all my black cables but then decided to work on switch integration with the lever. I found a switch online and drilled a hole in the brake lever housing and then screwed in the switch. I then drilled a small hole in the lever so that i could add a piece of aluminum rod that would stick out enough for it to activate the switch. So far it seems to work great, soon will have the bike all together and will test it out on the road.
Attachments
Nestorpants
New Member
Love those grips. Great job on the whole bike.
CoryCory
Ridin a CL350 and buildin a CB350 Cafe
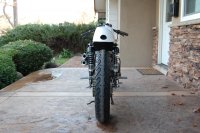
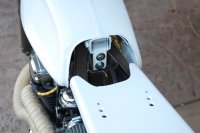
One of the coolest builds I have seen. Like the bike a lot. I was wondering what tires you have on the bike and the size. I need to get tires for me CB350 and not sure which ones to get. I also love the way you did up the rear of the frame to fit up with the seat. I think I'm going to steal that idea and do it with mine. Keep it coming.
plyzo
1970 Honda CL 350
Rpino7 said:CLEAN! CLEAN! CLEAN!!
8)
I would have went with a egg shell white with tank, seat, headlight. but none the less.
a beauty!
mad points in my book!
I wish I could keep my build this pristine!
I agree, the white I selected is actual an off white but I would of liked to have had it be more of the color of the wrap. Oh well next time.
Thanks for the comment.


