Follow along with the video below to see how to install our site as a web app on your home screen.
Note: This feature currently requires accessing the site using the built-in Safari browser.
We noticed you are blocking ads. DO THE TON only works with community supporters. Most are active members of the site with small businesses. Please consider disabling your ad blocking tool and checking out the businesses that help keep our site up and free.
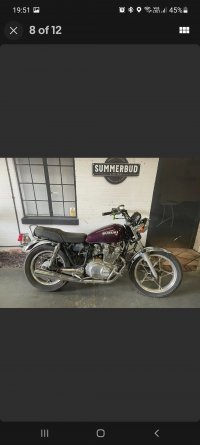
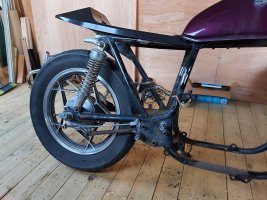
Good evening, thought I would start a thread on my "getting back into the fold" project bike.
I gave up bikes about 18yrs ago after riding since I was 16, mainly due to having a family and lack of time /money due to bigger commitments.
However, the time and opportunity is now upon me to get stuck in again!
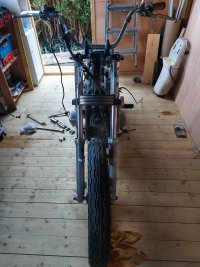
So, I bought this US import (we didn't get the 450 in the uk) cheap, not run for a number of years but all there.
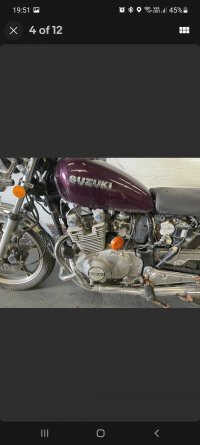
Despite not running for what looks like a VERY long time, the engine turns over fine by hand, with good compression.
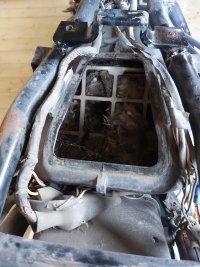
Upon initial inspection I found a mouse nest in the airbox that had been used for multiple broods, the urine had filled the bottom of the airbox and float bowls at some point so everything in the floats was seized solid and a tad smelly!
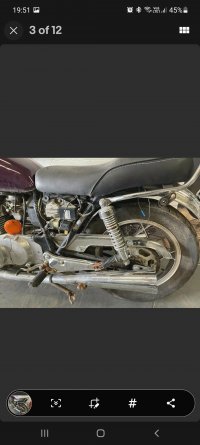
So, the strip down and check over begins!
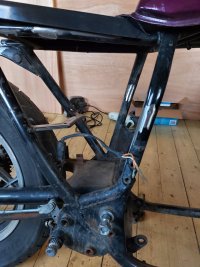
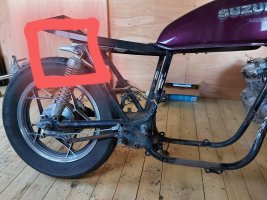
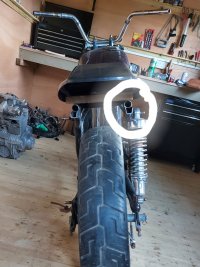
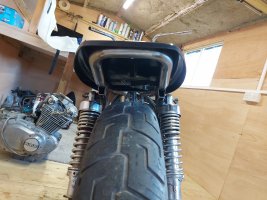
So, next job is a full strip down, I removed all the trim and parts that will not be used again.
I still find it amazing how well built older bikes are, everything is made to last, pretty much forever, each front footpeg weighs a pound, so far it's been releived of 45kg of weight that will not be added again.
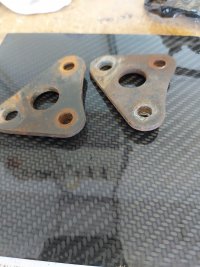
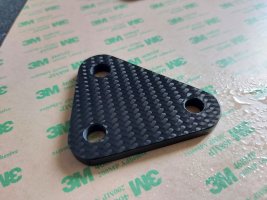
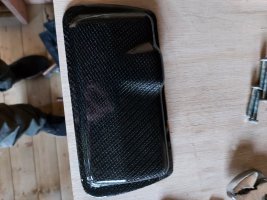
I work as a carbon composites technician so I'll be using a little carbon fibre in details, such as the engine mounting plates, headlamp brackets etc.
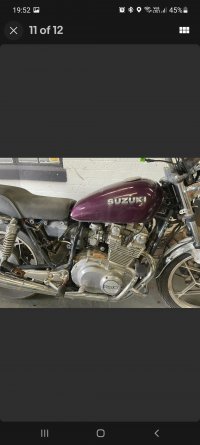
Couple of update pics.
De-lugged the frame as above pics, I'll be keeping the battery where it should be, the solenoid will be mounted elsewhere etc
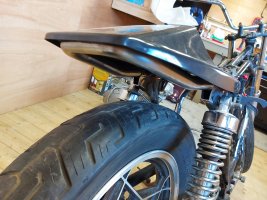
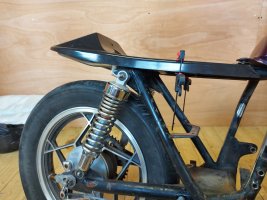
The seat unit is a generic tracker / cafe thing it'll have a brown leather seat.
Colour scheme will be black and gold, with black stainless fixings where there's polished surfaces, and stainless fixings where there is a black finish, brass washers on everything.
Cool, it's seems a little quiet in here I thought.
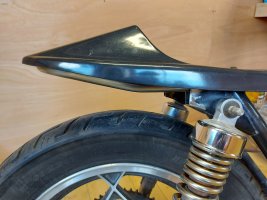
The carbon mounts have been finished today, just a little laquer and polish after final baking.
I used about half a metre of pre-preg to layer them up, 18 layers thick and cooked between 2 slabs of aluminium.
It probably looks a bit backward stripping a bike that hasn't run for so long and starting to modify it without hearing it, but it has good compression, a spark and just needs fuel, it'll run when it needs to.
The carbs have been in the ultrasonic cleaner and came out fine, just need new diaphragm rubbers as the old ones are a little stiff.
That tone arm is fantastic.
The starter cover looks great as well.
I wonder just how much weight you could strip off just by replacing those parts with carbon.
Cheers guys.
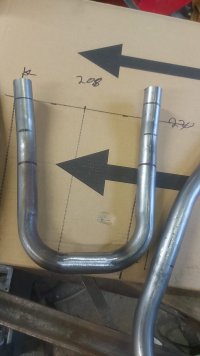
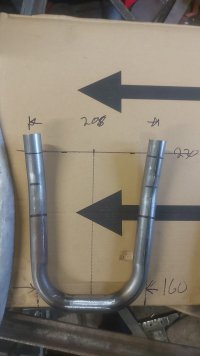
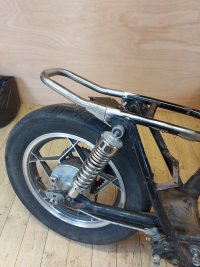
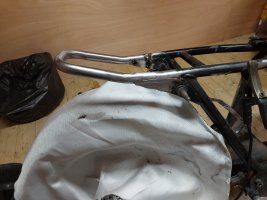
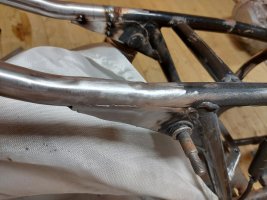
Next job is to weld in the rear frame / seat tube, it's an odd shape as it needs to be fairly square at the back and tapers narrower at the back.
So, I may have to adjust the gusset angle just behind the shock mounts.
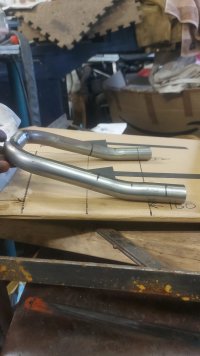
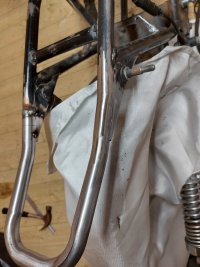
Couple of pics as an update, I finally have power to my workshop so grindy and weldy things can happen!
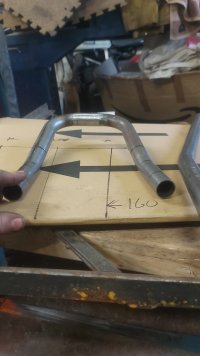
Managed to clean up the frame rails and offer up the seat hoop, I cut the gusset part of the frame off square, then sliced pieces from the offcut to reshape it before welding it back on.
I had to do this because my hoop is tapered narrower towards the rear and the gusset parts were straight.
This site uses cookies to help personalise content, tailor your experience and to keep you logged in if you register.
By continuing to use this site, you are consenting to our use of cookies.