We noticed you are blocking ads. DO THE TON only works with community supporters. Most are active members of the site with small businesses. Please consider disabling your ad blocking tool and checking out the businesses that help keep our site up and free.
You are using an out of date browser. It may not display this or other websites correctly.
You should upgrade or use an alternative browser.
You should upgrade or use an alternative browser.
1981 GS450T street tracker, uk.
- Thread starter Dazzo
- Start date
Aleczanda
New Member
So, the wrinkle finish paint is a no go!
It absolutely will not wrinkle in a few areas no matter what I tried, worth a go i guess but it's not happening.
So to plan B, sand the paint smooth and use it as a tough undercoat for a 2K satin black paint.
Raptor liner paint can provide a similar finish and is not such a bitch to spray on.
Sent from my iPhone using Tapatalk
Not a great deal to report, but the frame is sanded smooth again and primed/painted in 2k satin black, I'll get some pictures tomorrow.
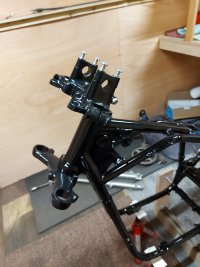
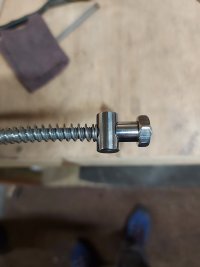
And just been fitting some new swingarm bearings, they are needle rollers so a bit delicate to be punching in, I used a long threaded bar with some washers / spacers and wound them into place.
And just been fitting some new swingarm bearings, they are needle rollers so a bit delicate to be punching in, I used a long threaded bar with some washers / spacers and wound them into place.
Attachments
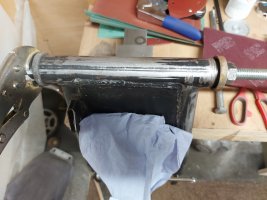
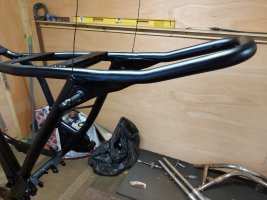
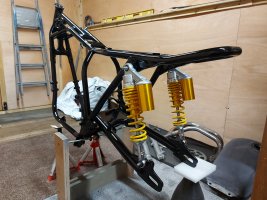
So, the frames done! Pleased with how it's turned out finally, the hoop and bracing look nice and smooth thankfully, I'll give it a few days to harden off before fitting the swingarm etc back in.
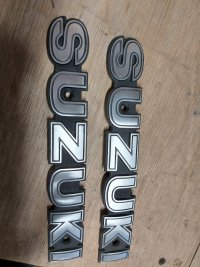
Also did some work on the tank badges while I was bored, they are a very soft alloy and we're fairly battered.
I cleaned them up and satin blacked them, then went over the face of the letters with a fine paper to remove the paint and give them a brushed look finish.
Also did some work on the tank badges while I was bored, they are a very soft alloy and we're fairly battered.
I cleaned them up and satin blacked them, then went over the face of the letters with a fine paper to remove the paint and give them a brushed look finish.
Attachments
Well, after leaving the paint for a good few days I decided I didn't like it,
It just looked a bit, I don't know, thin!!
So went again and this time gloss black followed by 2k clear, swingarm in the same.
Looks much better and nice and tough.
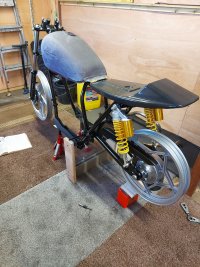
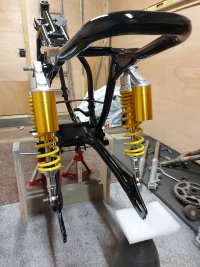
Got to loosely put a few bits together for a bit of a mental boost.
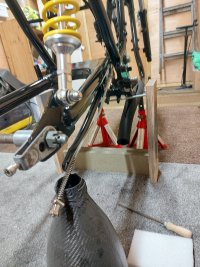
I have extended the thread down the swingarm pivot as I won't be using the old footrest hanger plates that it passed through, so I can cut it to a shorter length to suit.
It just looked a bit, I don't know, thin!!
So went again and this time gloss black followed by 2k clear, swingarm in the same.
Looks much better and nice and tough.
Got to loosely put a few bits together for a bit of a mental boost.
I have extended the thread down the swingarm pivot as I won't be using the old footrest hanger plates that it passed through, so I can cut it to a shorter length to suit.
Attachments
Aleczanda
New Member
Well, after leaving the paint for a good few days I decided I didn't like it,
It just looked a bit, I don't know, thin!!
So went again and this time gloss black followed by 2k clear, swingarm in the same.
Looks much better and nice and tough.
Got to loosely put a few bits together for a bit of a mental boost.
I have extended the thread down the swingarm pivot as I won't be using the old footrest hanger plates that it passed through, so I can cut it to a shorter length to suit.
Looking good

Sent from my iPhone using Tapatalk
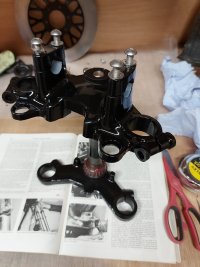
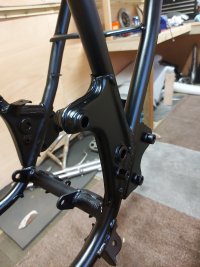
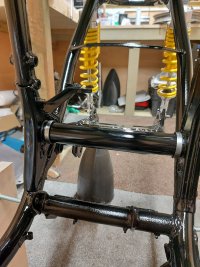
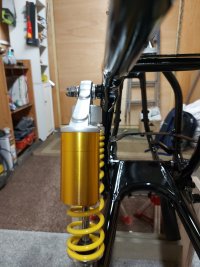
Guys, I need some help.
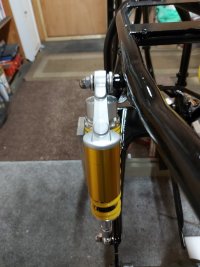
I'm currently trying to get some measurements for a couple of spacers for the rear shock upper mounts.
But both sides are different and I can't grasp why, it would seem the standard shocks would have been at slightly different angles to each other.
One side (the chain side) has a captive spacer on the top shock mount that isn't on the right hand side.
Why would this be?
Attachments
Aleczanda
New Member
Guys, I need some help.
I'm currently trying to get some measurements for a couple of spacers for the rear shock upper mounts.
But both sides are different and I can't grasp why, it would seem the standard shocks would have been at slightly different angles to each other.
One side (the chain side) has a captive spacer on the top shock mount that isn't on the right hand side.
Why would this be?
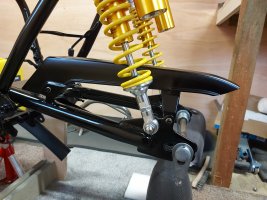
I think it’s for chain guard clearance.
You can see the diagram quotes an extra washer on the other side to space it out.
Sent from my iPhone using Tapatalk
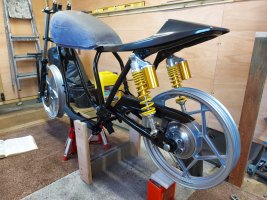
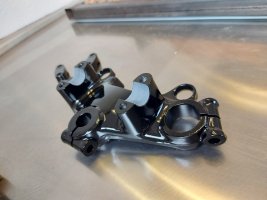
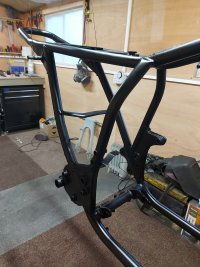
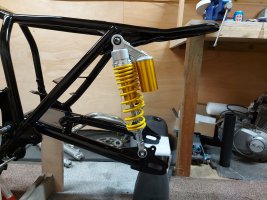
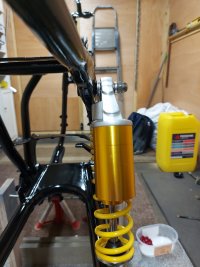
Got a little progress this week, got the brake rod and torque arm done, nice stainless adjusters instead of the rusty and seized old ones.
Got the shocks fastened up with thick stainless washers.
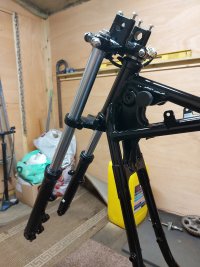
And rebuilt and painted the forks, loosely fitted while I decide on oil weight and levels.
Hoping to get the wheels painted this week so I can get it back on its wheels over the holidays.
Got the shocks fastened up with thick stainless washers.
And rebuilt and painted the forks, loosely fitted while I decide on oil weight and levels.
Hoping to get the wheels painted this week so I can get it back on its wheels over the holidays.
Attachments
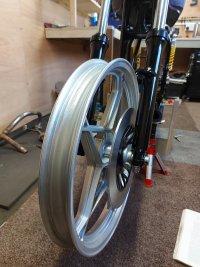
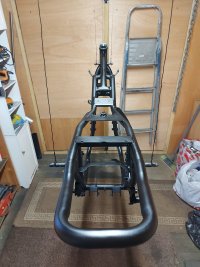
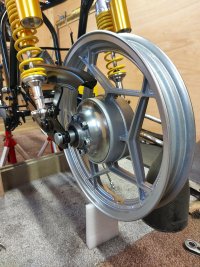
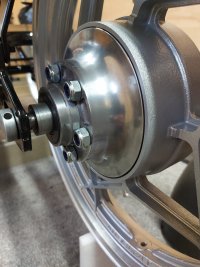
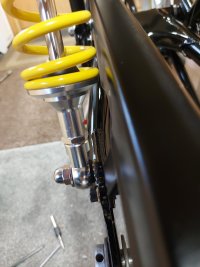
Bit more today, got the wheels prepped and painted, went with a glittery silver to contrast with the black, and cut down the chain guard as the shape didn't follow the chain run around the rear sprocket, also trimmed the front of it by around 3".
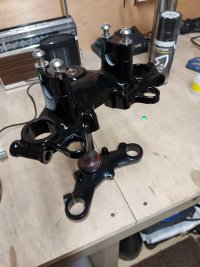
Now it's fitted you can see why it has the captive spacer on the top shock mount, it's quite close to the shock bottom.
Now it's fitted you can see why it has the captive spacer on the top shock mount, it's quite close to the shock bottom.
Attachments
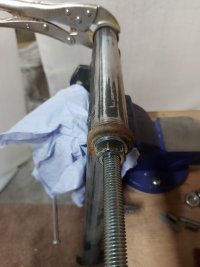
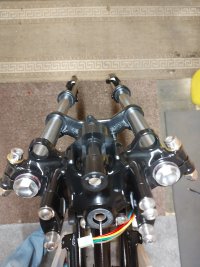
Forks are back in, new bushes, seals and dust covers, 10wt oil.
Just need disc bolts and tires and it's a roller again.
Did a quick mock up to make sure it looks like I want it to.
I reckon it's a goer.
Just need disc bolts and tires and it's a roller again.
Did a quick mock up to make sure it looks like I want it to.
I reckon it's a goer.