'73 CB350 - Project: ITBLMSAISIOF

ndromb

Been Around the Block
ITBLMSAISIOF (If This Bike Leaves Me Stranded Again I'm Setting It On Fire)

I picked up this 1973 Honda CB350 in late April this year. It had 6,000 miles on it and had been stored for a long time. It was pretty clean, but had been dropped at some point--the left headlight bracket, turn signal, and lever had been replaced.


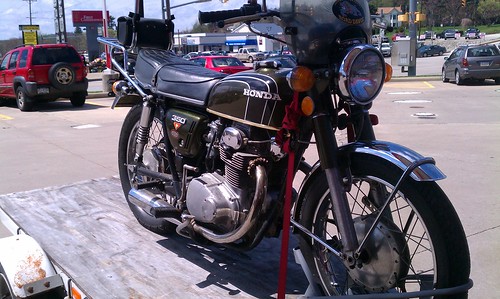
IMAG0506 by ndromb, on Flickr

It had a rack/sissy bar combo on it, along with a really ugly windshield--they were the first things to come off.


IMAG0507 by ndromb, on Flickr

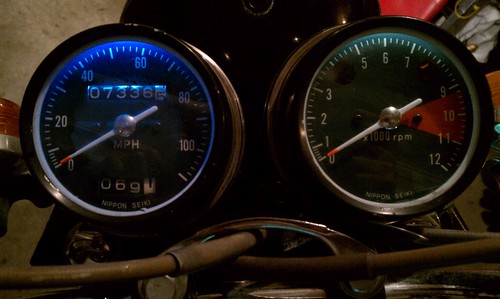
Next, I replaced the gauge lights and brake light with LEDs. It was a nice improovement, but the turn signal indicator bulb cannot be replaced with an LED with the stock flasher relay. I'll replace that when my LED replacement for the turn signals come in.

IMAG0588 by ndromb, on Flickr

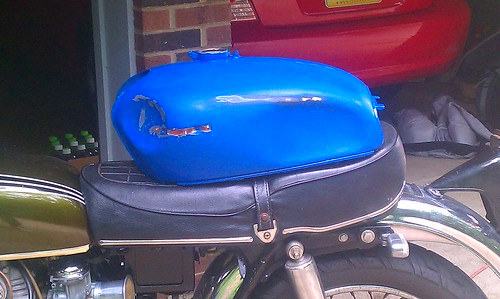
It ran fine for a week or so, then I noticed the right carb overflowing. Turns out the carbs were filled with gas.

Here is the ultra-fine pinholes that let the gas in:

IMAG0762 by ndromb, on Flickr

Here is the gas:
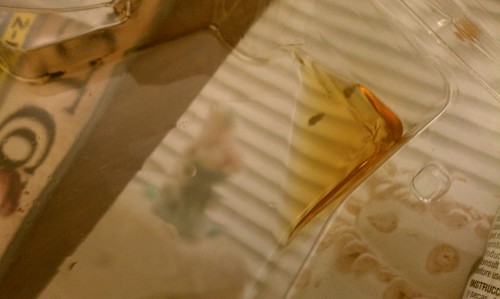
IMAG0765 by ndromb, on Flickr

(My girlfriend loved me doing this at the dining room table.)

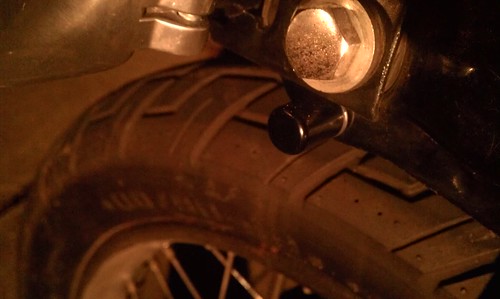
While I was in there fixing a leaking gasket, I popped in the starter hole plug from Crazypj.


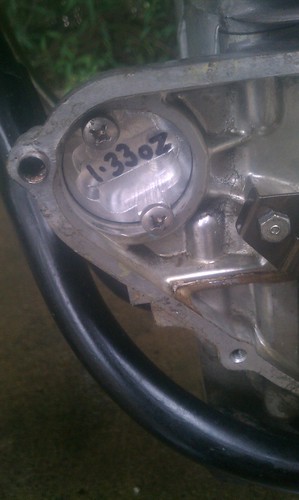
IMAG0802 by ndromb, on Flickr


IMAG0805 by ndromb, on Flickr

Chopped the front fender. Before:

IMAG0808 by ndromb, on Flickr

After:

IMAG0810 by ndromb, on Flickr

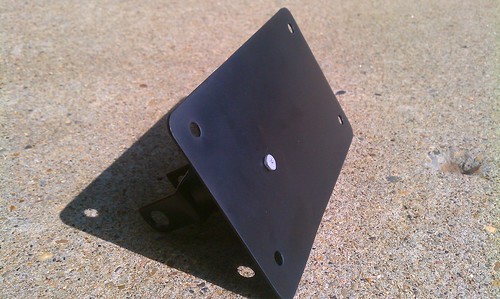
At some point, the lens for the high-beam indicator flew out. This is my replacement:

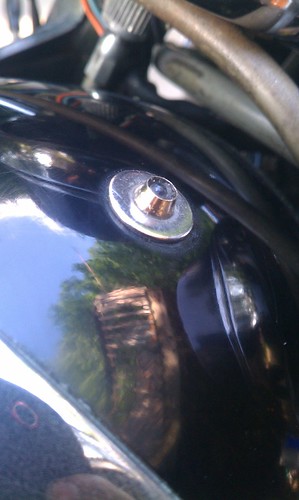
IMAG0821 by ndromb, on Flickr

It consists of a cheap 3mm LED and bezel from eBay and two stainless washers. The bezel's threading wasn't long enough to fit a washer before the nut, so I lead solders the nut onto the washer.

IMAG0819 by ndromb, on Flickr

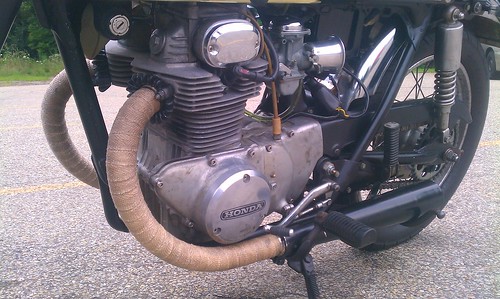
I put in an order with DCC--got some turn signals and headlight brackets so I could throw on the Tarozzi clip-ons I got off a forum member.


IMAG0849 by ndromb, on Flickr

I also got a tapered roller steering bearing kit bearing and some other odds and ends.

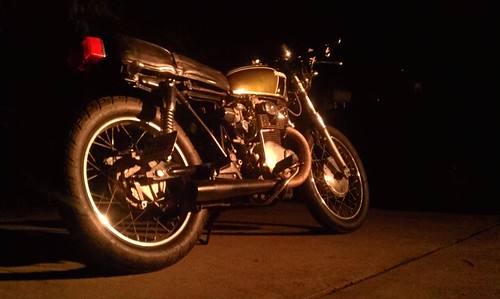
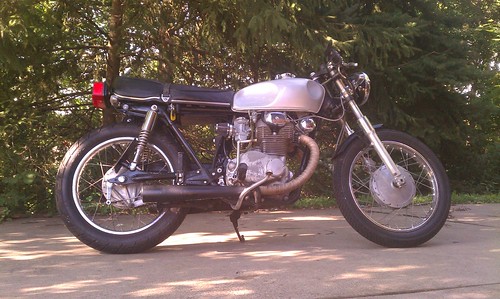
This is how it sits now:

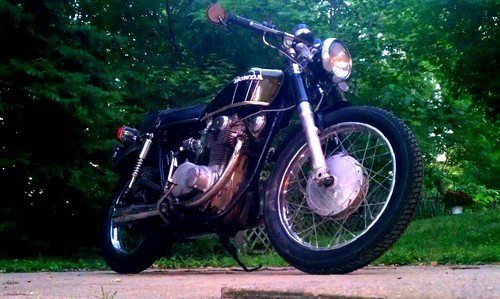
IMAG0857_edit0 by ndromb, on Flickr
 
I haven't been updating, but I have made some decent progress.


IMAG0919 by ndromb, on Flickr
Exhaust painted and wrapped

Building the battery box:

IMAG0936 by ndromb, on Flickr
It's made of 5 pieces of 22ga sheet steel I cut with an angle grinder.


IMAG0941 by ndromb, on Flickr
I didn't have access to a press brake, so I cut the pieces, spot welded them together, went back and stitch welded them, and then ground the welds smooth.


IMAG0939 by ndromb, on Flickr
Box assembled, but need the make accommodations for mounting.


IMAG0947 by ndromb, on Flickr
Fitted


IMAG0970 by ndromb, on Flickr
Box is painted and mounted. The battery is a 10.5AH sealed AGM-style that fits in there quite nicely. The voltage regulator and rectifier are also in there.

Now to the tank:

IMAG0926 by ndromb, on Flickr
I drilled out the spot welds the best I could without going through the tank.


IMAG0925 by ndromb, on Flickr
One side popped of clean--I drilled one of the welds too deep on the other.


IMAG0929 by ndromb, on Flickr
Just started banging away at it with a high density nylon tear drop hammer.


Knee and bar dents by ndromb, on Flickr
This is how it sits right now. I'm pretty happy with how it turned out.

I am hoping to get it painted and re-coated inside before Mods v. Rockers in Pittsburgh this Saturday.
 
Cool stuff. I'm looking to do something similar to my bike to hide the battery. Is this battery box visible from the side without the side covers on?


If so, would you be willing to post or pm the dimensions of that box? Looks perfect!
 
tbolish said:
Cool stuff. I'm looking to do something similar to my bike to hide the battery. Is this battery box visible from the side without the side covers on?


If so, would you be willing to post or pm the dimensions of that box? Looks perfect!

You can see less than an inch of it. I'll post pictures tonight
 

IMAG1013 by ndromb, on Flickr
This is my super-slick swivel lock license plate mount.


IMAG1014 by ndromb, on Flickr
Here is it mounted in the horizontal (legal) position.


IMAG1015 by ndromb, on Flickr
Then, all you have to do is press in the button and twist into place.


IMAG1034 by ndromb, on Flickr
I didn't want to run the wires/didn't want wires running along the swing arm, so I mounted a single LED bolt light to the from directly about the plate. How well does it work? It's not super bright on the plate, but I think it's enough light to keep me from getting pulled over.


IMAG1019 by ndromb, on Flickr
Until I fab a new seat, I made these brackets to mount the factory light.


IMAG1020 by ndromb, on Flickr
Above.

How it sat last night:

IMAG1033 by ndromb, on Flickr

tbolish, as you can see, the battery box sticks out a littler, but it's barely noticeable. I tried to mount it so the back end of the box kind of blends into the curved gusset of the frame.
 

IMAG1036 by ndromb, on Flickr
I painted the tank silver. The color is probably temporary, as I haven't decided on color, and silver is a safe neutral choice. I lined it with POR 15 tank liner and accelerated the 92hr drying time with a heat gun and compressed air. It seemed to be cured fine in about 15 hours.


IMAG1042 by ndromb, on Flickr
Tank mounted


IMAG1043 by ndromb, on Flickr
This is how it sits now.

Between getting the tank on there and seeing a bunch of great builds at Pittsburgh Mods V Rockers, I am going to have to fast track building a seat.
 
ndromb said:

IMAG1013 by ndromb, on Flickr
This is my super-slick swivel lock license plate mount.


IMAG1014 by ndromb, on Flickr
Here is it mounted in the horizontal (legal) position.


IMAG1015 by ndromb, on Flickr
Then, all you have to do is press in the button and twist into place.


IMAG1034 by ndromb, on Flickr
I didn't want to run the wires/didn't want wires running along the swing arm, so I mounted a single LED bolt light to the from directly about the plate. How well does it work? It's not super bright on the plate, but I think it's enough light to keep me from getting pulled over.


IMAG1019 by ndromb, on Flickr
Until I fab a new seat, I made these brackets to mount the factory light.


IMAG1020 by ndromb, on Flickr
Above.

How it sat last night:

IMAG1033 by ndromb, on Flickr

tbolish, as you can see, the battery box sticks out a littler, but it's barely noticeable. I tried to mount it so the back end of the box kind of blends into the curved gusset of the frame.

Looks great, I really like the license plate holder idea as well. Nice Job!
 
Thanks! There are a few flaws in the construction of the plate holder--the tubes don't nest perfectly, and the holes for the pin are a tad too big--both resulting in a little play.

I'll probably build another one when I get a chance and sell this one.
 
Hey!
My son and I are working our way through a cb360. So far we are progressing well, but I hit a snag changing the turn signals. I noticed you installed the same ones (or so it appears). Dual Filament in the front, single in the rear. They light up fine and on cue, but don't flash. Does the stock relay work with more modern lights? The new fronts have 3 wires which i think i figured out the right configuration on but...
Also, according to the wiring diagram in the Clymer, the relay should have Black, Dark Green and Gray but mine is only Black and Gray. Any ideas?
Thanks, Chuck
 
cb(x) said:
Hey!
My son and I are working our way through a cb360. So far we are progressing well, but I hit a snag changing the turn signals. I noticed you installed the same ones (or so it appears). Dual Filament in the front, single in the rear. They light up fine and on cue, but don't flash. Does the stock relay work with more modern lights? The new fronts have 3 wires which i think i figured out the right configuration on but...
Also, according to the wiring diagram in the Clymer, the relay should have Black, Dark Green and Gray but mine is only Black and Gray. Any ideas?
Thanks, Chuck

I have single filament signals in the front and rear. The wiring for my stock flasher was grey and black, but I swapped it our for a LED compatible unit.
 
Back
Top Bottom