I covered the gap with the seat on this bike with a seat otherwise similar to yours and the same tank. I think the hump idea is fine that you have going, but it does cause you to have to make a nice joint at the tank and an additional transition at the seat where the foam is. It's a good idea to at least mock up your foam so you can get an idea of the finished lines of the bike before you invest too much time in styling you might want to change if you didn't have so much in it already. If you are going for a more rearward looking seat, an RD400 tank is about an inch longer and a fairly easy swap (holds more gas too, a real asset on an RD!). An inch does not sound like much, but visually it makes the tank seem a lot longer and the solo seat a lot shorter than you would think from an inch.
We noticed you are blocking ads. DO THE TON only works with community supporters. Most are active members of the site with small businesses. Please consider disabling your ad blocking tool and checking out the businesses that help keep our site up and free.
You are using an out of date browser. It may not display this or other websites correctly.
You should upgrade or use an alternative browser.
You should upgrade or use an alternative browser.
74 RD350 - Anything more than 2 strokes is a waste
- Thread starter jchek779
- Start date

jchek779
Leave the gun. Take the cannoli.
^^^Wow, great looking bike.
One of the next things I'll be working on is installing a flush mount gas cap. It looks like you've done some work to that tank - how did you remove the stock cap mount? I can't tell 100% if the portions that stand proud of the tank sheet metal are welded/brazed/etc. I don't want to just start hacking away without having an idea of how the cap mount is supposed to come out.
One of the next things I'll be working on is installing a flush mount gas cap. It looks like you've done some work to that tank - how did you remove the stock cap mount? I can't tell 100% if the portions that stand proud of the tank sheet metal are welded/brazed/etc. I don't want to just start hacking away without having an idea of how the cap mount is supposed to come out.
runmikeyrun
Been Around the Block
Just read this whole post.
Wow.
I had an RD250 as a young man, same year/color so this project is a little close to my heart. Bought it from my great uncle for $200 at age 16 (1993). Tore it to pieces in the basement that winter, restored it as well as a first bike project will be, and rode the shit out of it for years. It was a lot faster when I was 160 lbs LOL but with the 350 conversion it will be much quicker, not to mention with the shorter 250 gearing. Wheelies all day.
Anxiously awaiting updates. the modern suspension/brakes/etc look awesome. Someday I'll work on shoehorning a Banshee motor into a Ninja 250 frame (a guy from an RD board did it years ago) but until then...
Again, she looks fantastic.
Thanks for the kind words jchek, I built this over 20 years ago, so I can't remember exactly what I used for the cap. Pretty sure it was from a new-at-the-time Kawasaki - sorry don't remember the model, but the work would be about the same regardless, and they are much more common these days. Someone gave me the cap and I found a crashed tank to cut the mounting flange out of. I just cut the mounting flange out of the donor tank with an inch or so of the sheet metal and cut a hole to match in the rd tank. As I recall I thought it would be easy, but the RD tank was a lot more curved and narrow than I anticipated compared to the much wider flat portion of the new cap opening and it took a lot more finessing of the tank to get it to look right. Keep that in mind if you are going to do something similar, it was only a very slight difference, but it was tricky to keep the tank from looking weirdly distorted. Aside from that, I jut welded it together with a mig machine, ground the high bits of the weld down and a little body work. Actually, it reminds me I experimented on that tank and used lead instead of plastic filler - it was fun, but won't do it again! Here is the best pic I can find of it.
Attachments
Hey check this out!! Just saw this in another post!! I don't think it is the same tank, but it sure does look like the same cap!
Tune-A-Fish said:A Ninja Tank for A Petcock

jchek779
Leave the gun. Take the cannoli.
^^^Thank you for the help. Mine won't be quite so difficult to do as that. I picked up one of the pop up flush mount cap/bung combos. I hate that it's going to reduce the tank capacity with how deep the bung sits, but it's a lot easier than trying to find a donor tank, cutting it out, welding it in, and so on.
Well, I'll be keen to see your results. FWIW, the cap on that bike, or filler neck I should say, goes down inside the tank probably an inch so and reduces how much gas you can put in like your saying. Really compounds the already absurd milage it gets with those 34mm carbs and 290 mains! Just as well as I rarely drive it anyway.
jchek779
Leave the gun. Take the cannoli.
I was able to wrestle the seat (literally wrestle) pan off the bike yesterday and trim things up. The whole point of the front hump was to aid in the transition from tank to seat. I wanted a nice line for the seat pan that matched the lower line on the tank. I had a brain fart when i trimmed the front of the seat, and cut it wrong. Now there is the gap between the very back of the tank and the very front of the seat pan down at the lower line.
I've decided that this seat pan will be used to get the bike functional and get me riding. It's already the end of April and I want to focus on firing this thing up, debugging, and then next winter I'll worry about perfecting the aesthetics.
Up next is to mount all of my electronics and finish wiring the bike. I have to weld in a flush mount gas cap and I still need to come up with a headlight mount also. A few months back, I saw a post on how someone used dairy clamps and some aluminum fabrication to make a headlight mount. It looked awesome. I searched for hours last night trying to find the post/pics but had zero luck finding it. If any of you guys reading this know what I'm talking about and where to find the post, I'd appreciate the help.
Attachments
Patmanbbe
Been Around the Block
lchris21 said:next it was on to the headlight..............
have been tossing a few ideas around about mounting brackets, not really liking anything off the shelf I've spotted, or not being willing to part with big bucks for stuff i did like. The I came across these pipe clamps. Quite cheap and fitted the upper part of the R1 forks nicely. They are pipe hanger brackets used in Dairy's, just chop off the welded on pipe boss and there we have a polished stainless bracket ready made.
Got 4 of them chopped , then set about making some brackets for the headlight. Cut and drilled some 3mm stainless plate then folded them in my home made sheet bender. Mounted that up, but still undecided whether to have it in the upper or lower position.........????
http://www.dotheton.com/forum/index.php?topic=63558.msg728402#msg728402
^^^Whoomp there it is!!!
jchek779
Leave the gun. Take the cannoli.
PatmanBBE said:http://www.dotheton.com/forum/index.php?topic=63558.msg728402#msg728402
^^^Whoomp there it is!!!
Awesome - thanks for the help in finding this and thank you to Ichris21 for sharing.
My question is whether the front "hump" is intended to be covered by the seat upholstery or will be painted like the rest of the body work. I have made similar (though smaller) architecture to keep space for a tool kit which goes half and half under the tank and seat on an RD. But I covered it with the seat so it was rendered invisible. The seat doesn't need any foam there unless you are very short legged! Otherwise, a good point, though a lot more work to the tank than just the cap.johnu said:Seeing that you are already going to modify the tank with the flush mount filler I would have just modified the rear of the tank so that you don't need that hump part on the front of the seat.
jchek779
Leave the gun. Take the cannoli.
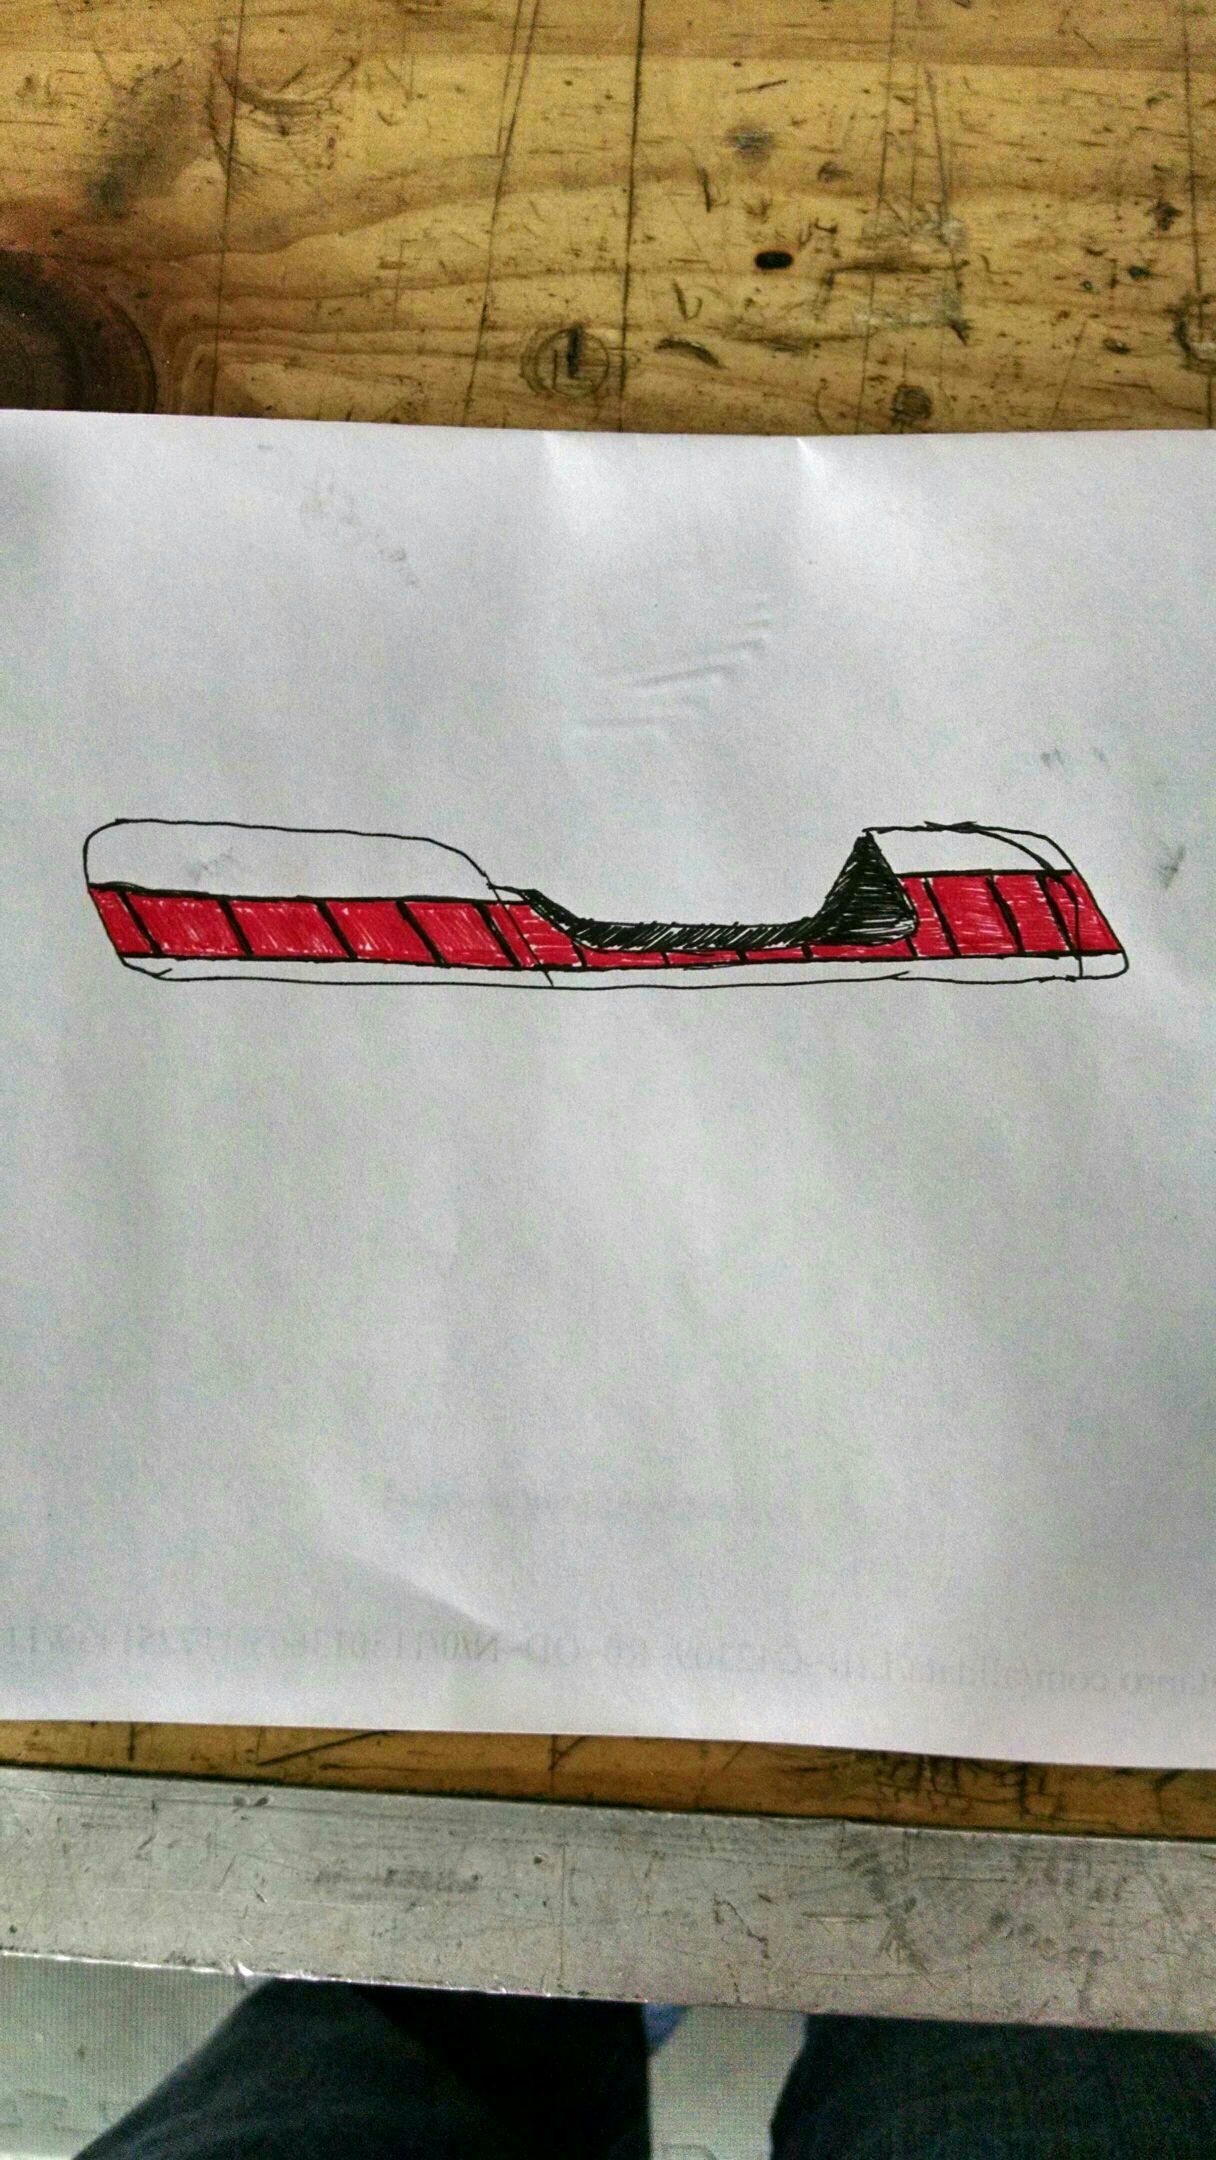
I'm planning to paint the front hump in line with the body colors. The seat will not follow the contour but rather butt up flush with it.
The most rearward portion of the tank that I was trying to hide is a seam that is pinch welded. That'd be a project in itself to try to eliminate it.
I've attached a sketch I came up with months ago and what I was working towards. Disregard how it looks like I drew the seat cover going up the hump
The most rearward portion of the tank that I was trying to hide is a seam that is pinch welded. That'd be a project in itself to try to eliminate it.
I've attached a sketch I came up with months ago and what I was working towards. Disregard how it looks like I drew the seat cover going up the hump
You could carefully bend down the seam (hammer and dolly - I have done this myself) and then weld in a half moon shaped piece of sheet metal. Probably require a bit more body filler than you might like, as it is hard not to have low areas above the seam, but it would be quick and easy if that's the goal. Nothing wrong with your existing plan though - I really like maintaining space for the tool bag, which gets too small if your seat is low and flat right up to the tank. Looks like your scheme makes for a good bit of volume in an easy to get to space presuming you hinge the seat like stock. If you decide to do that, consider making new hinge centers as low as possible at the edge of your pan. The stock hinge points are very high and create problems when the edge of the pan rotates under them. The stock latch is very easy to reincorporate.
jchek779
Leave the gun. Take the cannoli.
jpmobius said:You could carefully bend down the seam (hammer and dolly - I have done this myself) and then weld in a half moon shaped piece of sheet metal. Probably require a bit more body filler than you might like, as it is hard not to have low areas above the seam, but it would be quick and easy if that's the goal. Nothing wrong with your existing plan though - I really like maintaining space for the tool bag, which gets too small if your seat is low and flat right up to the tank. Looks like your scheme makes for a good bit of volume in an easy to get to space presuming you hinge the seat like stock. If you decide to do that, consider making new hinge centers as low as possible at the edge of your pan. The stock hinge points are very high and create problems when the edge of the pan rotates under them. The stock latch is very easy to reincorporate.
I didn't plan to hinge the seat pan. It will be velco'd to the frame in a few spots. I ran the electrical yesterday which took up the space under the rear of the tank. Fortunately, I have plenty of room in front of the battery to add a small tool pack.
From what I can tell, that spot at the very rear of the tank is a pinch welded seam. I'm see what you're saying about hammering it flat, but I'm not sure I want to take that big of a bite. I have had the idea just like you mentioned in forming and welding a piece to that spot in order to aid the transition from tank to seat. I have a lot of options here that I'm mulling over.
jchek779
Leave the gun. Take the cannoli.
I ended up having to dissect the wiring harness and chop/cut/solder everything to lengths I wanted. When I wanted to shorten a wire, I simply cut it off right at the bullet connector, drill out the old wire/solder, and then solder it to the end of the new length of wire. It kept things clean. Once I'm done shaking down all of the wiring, I'll clean things up and wrap the wire bundles.
I also made a rear brake light/turn signal - license plate mount combo. I forgot to take a close up, but what I have is an LED brake/tail/turn signal combo from eBay that stick with 3M tape. I cut and bent some sheet metal to mount the light and license plate combo, which mount under the seat pan. It's visible from the rear and clears the rear tire at full suspension compression.
I also made a rear brake light/turn signal - license plate mount combo. I forgot to take a close up, but what I have is an LED brake/tail/turn signal combo from eBay that stick with 3M tape. I cut and bent some sheet metal to mount the light and license plate combo, which mount under the seat pan. It's visible from the rear and clears the rear tire at full suspension compression.
Attachments
![IMG_20150501_112338052[1].jpg](/data/attachments/61/61297-073dce2688934c8da5b591b5a08139a9.jpg)
![IMG_20150501_112401593[1].jpg](/data/attachments/61/61298-f7b7f4782b308f6428f2b2e913f228c5.jpg)
jchek779
Leave the gun. Take the cannoli.
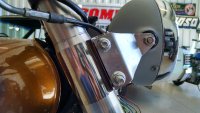
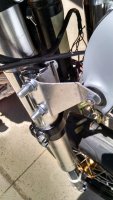
I needed a means to mount a headlight bucket. I settled on using some 2" stainless exhaust band clamps available from the local auto parts store. These things are sorta-kinda ugly in raw form, but should be hidden for the most part and clean up with some better hardware.
I mounted the clamps onto my fork tubes and started with some thin cardboard for a mock up. From there, I went to the .083" aluminum sheet and with the hacksaw, made some "rough drafts."
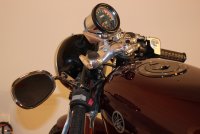
I want the headlight to look centered in the fork triples from the front view, but in line and flowing with the rest of the bike from the side. Right now, as pictured, the headlight is sitting a little too high for my liking. I took the time to draw the brackets up in Solidworks so that I can make a few different iterations on paper to see what the final brackets need too look like.
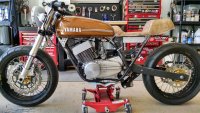
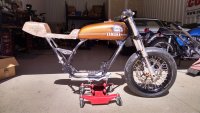
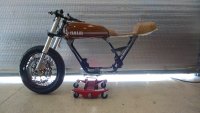
In the meantime, here is the mock up of what the bike will look like for the time being.
I mounted the clamps onto my fork tubes and started with some thin cardboard for a mock up. From there, I went to the .083" aluminum sheet and with the hacksaw, made some "rough drafts."
I want the headlight to look centered in the fork triples from the front view, but in line and flowing with the rest of the bike from the side. Right now, as pictured, the headlight is sitting a little too high for my liking. I took the time to draw the brackets up in Solidworks so that I can make a few different iterations on paper to see what the final brackets need too look like.
In the meantime, here is the mock up of what the bike will look like for the time being.