'75 suzuki gt250...Buzzing around the block

Re: '75 suzuki gt250...Seat pad construction, pic heavy

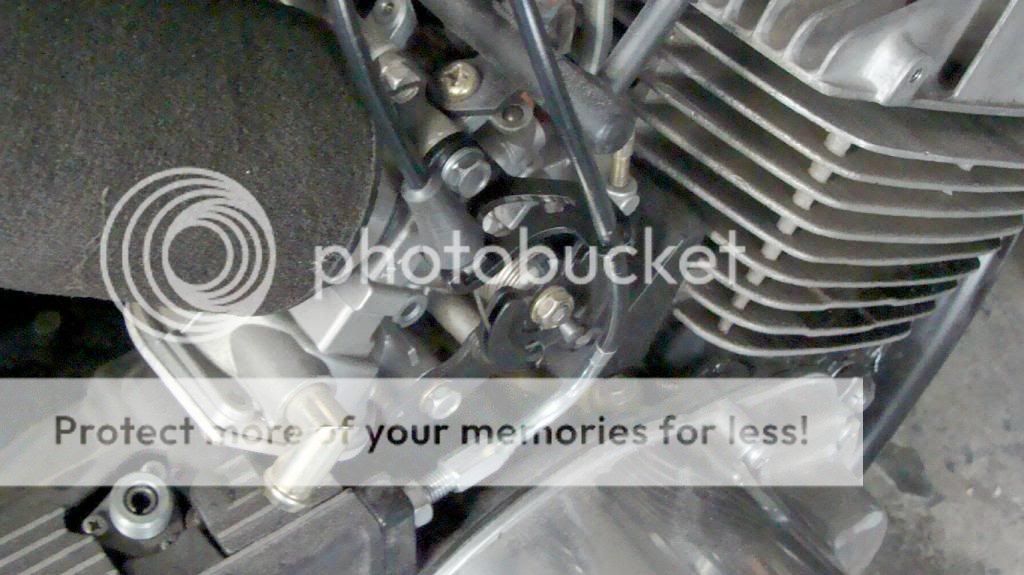
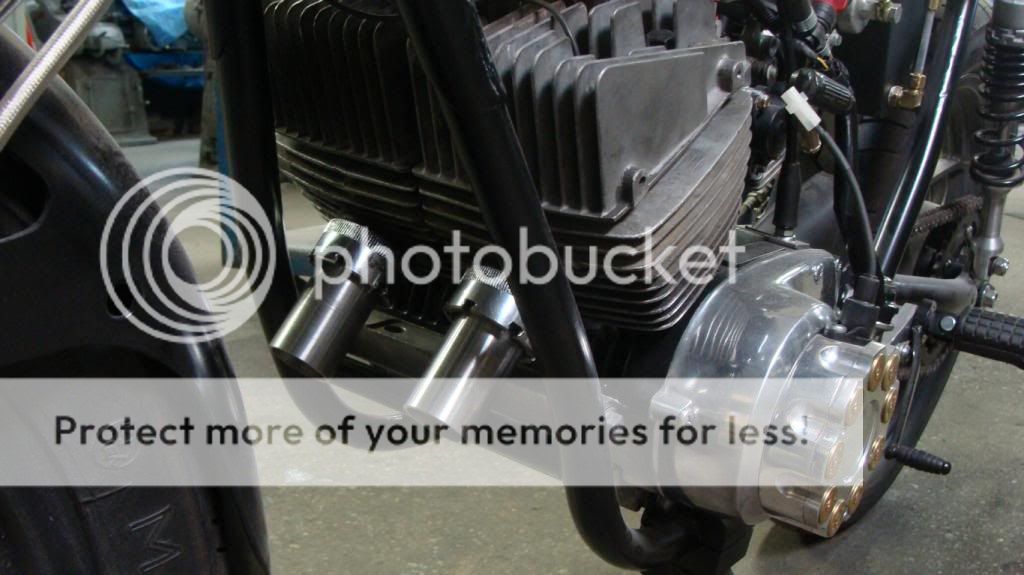
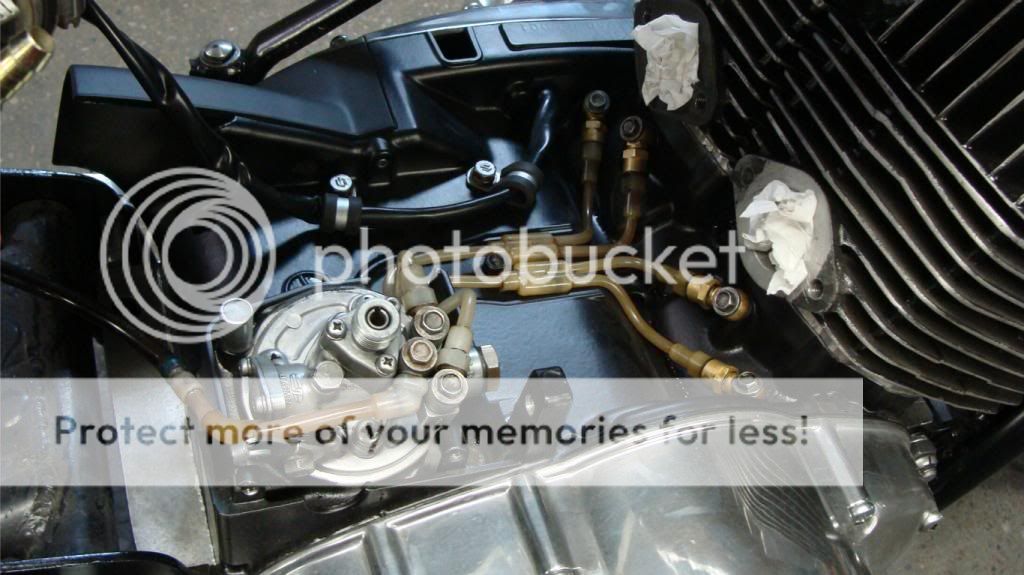
I got a few more hours put in. I got the powerdynamo flywheel installed and timed. The oil pump system is now in. I think I'm going to pull the clutch cover so I can prime the pump rather than turning the motor over by hand. You can see the oil lines going to each of the crank bearings and cylinders. The center bearing is lubricated by the transmission oil.

DSC01769_zpsa022879d.jpg


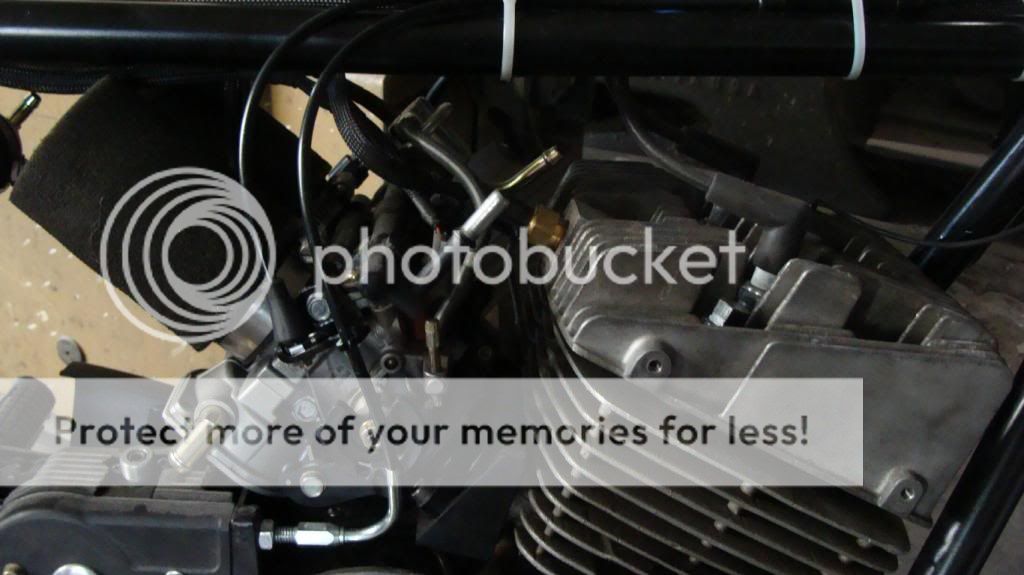
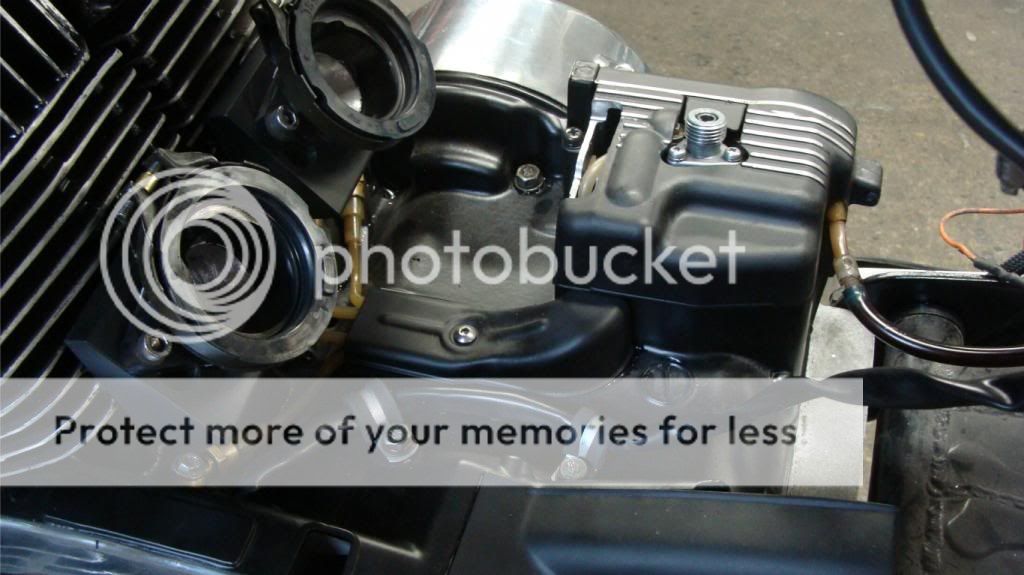
Here it is with the covers on. You can see the relief I dremeled out of the pump cover for the throttlebodies.

DSC01770_zpsaea9f8fd.jpg


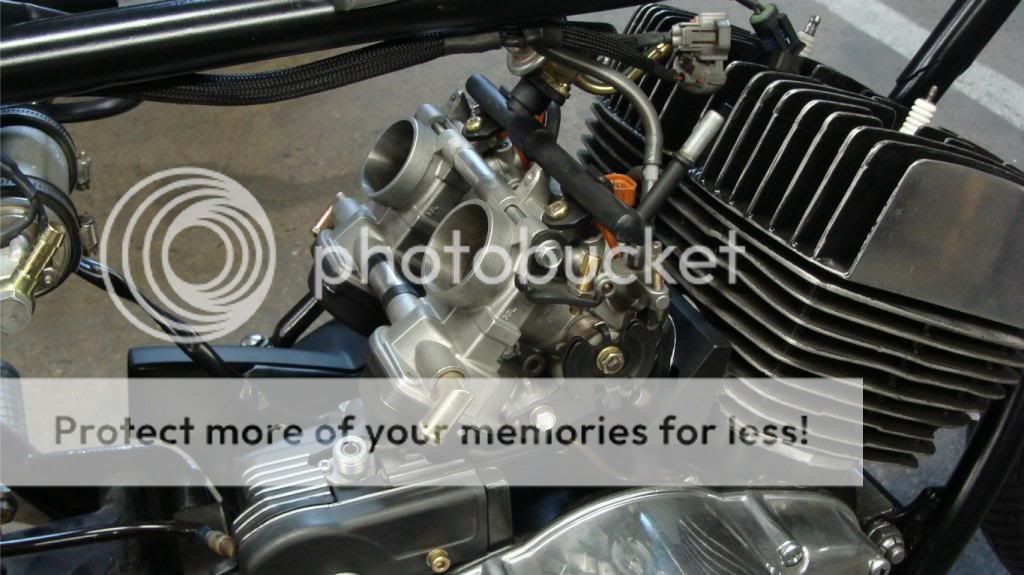
With fresh gaskets, the throttlebodies are mounted. I can focus on the wiring and making up a new throttle cable. I used the original before, but I only need a 1 to 2 splitter, not a 1-3.

DSC01771_zps7f945c14.jpg
 
Re: '75 suzuki gt250...Back from the dead

I figured out the correct dimensions for the new cable and sent them off to motion pro to have a new cable made up. I also revisited my tail lights. I wasn't convinced that the two leds would be adequate during the day and wanted something larger. I ended up with this:

DSC01816_zpsb546bdf6.jpg


I originally was going with two lights, but ended up with one.

DSC01817_zpsb8015dff.jpg


DSC01818_zps749762d8.jpg


DSC01831_zps5e300678.jpg


DSC01832_zps579b53d3.jpg


DSC01833_zps36fa7ec2.jpg


And the final product:

DSC01834_zpsfd123a82.jpg


DSC01835_zps1cfc12ae.jpg


DSC01836_zps40765219.jpg


DSC01837_zpsba0ce653.jpg
 
Re: '75 suzuki gt250...Back from the dead

That light is STUNNING. Brilliant work.

Sent from my SPH-L710 using Tapatalk 2
 
Re: '75 suzuki gt250...Back from the dead

indicators look great. well done mate she is going to be one beautiful bike when its done.
 
Re: '75 suzuki gt250...Back from the dead

I'm impressed with your patience designing and making that tail light
I'm going to have to 'borrow' the idea for my indicators
The chrome is already peeling off the cheapies I bought (only lasted about a year or so).
Something new for me to make ;D
 
Re: '75 suzuki gt250...Back from the dead

Thank you for the compliments. While I dread doing more electrical work, I decided to move onto the seat pad. From before, I simply stretched some vinyl over some thin plywood and called it good. Well, I wanted something better than that. I was ready to have a professional upholster do the seat for me. Of course why pay someone to do it when you can learn a valuable skill? So off to craigslist to find a decent sewing machine that can handle vinyl and heavy duty thread. I came across a 1960's Phaff model 332. It's a free-arm with a large table that swings up and down. It has a strong motor and all metal gears and components so it can handle a bit more material. It has no problem sewing through four layers of vinyl, just a bit touchy on the foot pedal. I look way too happy than I should have when I was testing it out:

DSC01851_zpsd8187fb6.jpg


I watched some youtube videos on how to pleat and practiced with that. After I got my pattern, I tried to figure out how to sew up the sides without making it look like crap. This is what I ended up with:

DSC01858_zps9eece1cb.jpg

DSC01859_zpsa82dd6ba.jpg


I was happy with the pleating, but I couldn't decipher how to get a good edge. After carefully looking through pics online, I reverse-engineered one and this is what I got. I'll start from the beginning:

The top layer is vinyl with 1/4" foam, then headliner as the backing for the thread:

DSC01860_zps55237626.jpg


I got the pattern on the vinyl:

DSC01861_zps4d791995.jpg


And got the pleats sewn on, including once around the perimeter:

DSC01862_zps5f90134b.jpg


It is now trimmed and a second line around the perimeter is sewn to keep the edge flat for the needle.

DSC01863_zps2361c304.jpg


This is where I had difficulty last time. In this one, I used one strip to go across the back, and one to wrap around the sides and front. With some careful stitching, I lined up the back at the correct angle and combined the edges. It turned out much better than I thought.

DSC01864_zps314dfcde.jpg

DSC01866_zps4d18bed5.jpg


It's even good enough for a close up:

DSC01865_zps73deaf0b.jpg


If anyone is interested in the financial side of the seat making, I spent $150 on the machine. It was very fair price for all the accesories and overall condition of the machine. I probably spent close to $60 in vinyl, foam, thread, etc. The cool part is if/when I want to make up another seat for myself or friends, it'll only be about $30 in materials and a few hours of my time.

Here's a crude ms paint with the seat attached. I'll bring it to work next time and get an actual pic. At work I've got a couple quarts of a opalescent silver/grey with a tinge of green. It was some test paint for a '61 e-type thats getting some work done. Its free for me to use and looks amazing with a good clear coat on it. However, I still think I want the candy gold. The pic below is what it would most likely look like if I went with the opalescent silver. Thanks, Joe

DSC01819_zps632e8353.jpg
 
Re: '75 suzuki gt250...Seat pad construction, pic heavy

second seat came out pretty good, did you only make one 'practice' seat?
I have to make seat for 360, got vinyl, thread, sewing machine (tried it out while wife was in work, it stitched 3 layers pretty easy, I'll have to try with 4 layers and work up to a max thickness ;) )
 
Re: '75 suzuki gt250...Seat pad construction, pic heavy

Yep, one practice seat and a few scraps to practice sewing the corners. I was able to get the wiring finished for the dash. I've got power to both gauges, headlight, and tail light. I still need to verify power to the microsquirt and wire in the sensor. I attached a short video showing the pretty lights. I've contacted AEM(o2 sensor+gauge) about possibly changing out the led backlight so it'll match my other gauge. Thanks, Joe

http://youtu.be/zoNNuekLhLw
 
Re: '75 suzuki gt250...Electrical almost done, video

I machined up an aluminum adapter to mount the new powerdynamo coils on the original mounts. I weighed the new coils and mount with the old coils and I save about 18 ounces. I also made up a sheet metal clamp that will go around the forks for my speed sensor. I originally had a hose clamp holding it on and this will be a bit more tasteful.

DSC01891_zps61dc009c.jpg


DSC01889_zps0ca9469c.jpg
 
Re: '75 suzuki gt250...Electrical almost done, video

Nice, I like carving on bits of metal ;)
 
Re: '75 suzuki gt250...Electrical almost done, video

Over the past month I've been knocking off the little things, slowly working my way back to a running engine. I measured my old throttle cable and got a new one made up by motion pro. The measurements were perfect and makes it look factory. while fitting the 350 cylinders, I was unaware on how worn out they've become. I've since fitted the original 250 cylinders back on until I can get the 350 cylinders freshened up. Suzuki apparently didn't make pistons for the t350 any larger than 2nd oversize, so these cylinders would be scrap. However, wiseco made much larger oversize pistons, but are much harder to come by. I happened to find some on ebay and purchased them. They are 6th oversize, or 63mm(original being 61mm). That'll bump my capacity from 320cc to 336cc. I'll be testing and tuning the fuel injection with the 250 cylinders to keep the wear down on the good stuff.

DSC01962_zps90808059.jpg


DSC01963_zps29c93925.jpg


DSC01928_zps36bb78fd.jpg


All of the wiring is done. When I plugged in the microsquirt into the computer and put power to it, the fuel pump would kick on, but no signal to tunerstudio. After 6 or so hours of troubleshooting, I figured out that the signal is good all the way to the 35pin connector. Something is messed up inside the case. I've had the cases apart before and its a simple board for what it does, but I'm unable to troubleshoot beyond what I've done. I sent out the microsquirt to be checked out, luckily under warranty.
I've got the ignition system wrapped up. Even kicking the bike over by hand the spark is incredible. I've got just a few things needed to be done before starting. Assuming the computer issue is fixed, I've got to add a return line on the gas tank and figure something out with the exhaust. The 250 cylinders use a slightly smaller header. What I plan on doing is machining new "collets" for the cylinder that would extend out 2 inches. I'll then weld up a new header that'll slip over it, like many of the yamaha rd pipes do. By making new headers, I can have a tapered header that I've been thinking about, and I'll also be able to re-position the pipes to look better.

Heres the pipes mounted like normal:

DSC01906_zps3ee6539a.jpg


You can see how I needed to lower the end of the exhaust to not interfere with the chain. This makes the belly of the pipe stick out of nowhere and to me it looks awkward. The next pic is how I want the exhaust to hang. You can see the top of the pipe is parallel to the bottom of the frame:

DSC01954_zps1315f8c2.jpg


The new header will look something like this:

DSC01958_zpsde4a4609.jpg


That header is still parallel, but I was able to keep the new header length the same as before, so the tuned length doesn't change. I've got some construction paper to see what the new header will look like, and will need to pick up some 2" steel rod to machine out the new collets. After I get the microsquirt back and everything buttoned up, I'll be able to get the tank stripped, a flush mount gas cap grafted in, and a candy gold paint job. Also at some point I need to change out the front tire to the correct michelin pilot activ to match the rear tire. Getting there...
 
Re: '75 suzuki gt250...Electrical almost done, video

I've made progress involving the exhaust. I machined up the two collets. The only material I had to work with was a solid steel rod 2.25 dia, so it took about 2 hours a piece to machine them up.

DSC01992_zps14f92ca7.jpg

DSC01991_zpsebce5da6.jpg


After countless hours working with my cad program, I came up with the proper dimensions to make up the new header. It is 8 cones in total, 6 of them for making the 120 degree curve. Overall it turned out exactly what I wanted. I still need to machine the collets back a bit, so that'll raise the exhaust a little bit. My original idea was to have a parallel wall, but I ended up doing a tapered header of 1.5 degrees.

DSC01995_zps06119017.jpg

DSC01996_zps0337a69a.jpg

DSC02001_zpsc78bfd17.jpg

DSC02000_zps769086de.jpg


I haven't heard back on the microsquirt, but hopefully sometime this week I'll get news, either good or bad. I've got some steel ready to be cut for the actual headers, but I'll need to pick up some argon as well.
 
Re: '75 suzuki gt250...Electrical almost done, video

You, are having entirely too much fun 8)
Pipes look great
 
Re: '75 suzuki gt250...Electrical done, onto headers

Pipes look awsome. What fairing is that? i am sure it was n the thread somewhere but I can't find it now. Really think it makes the front end of the bike.

Gary
 
Re: '75 suzuki gt250...Electrical done, onto headers

The fairing is a Dunstall replica from airtech streamlining. http://www.airtech-streamlining.com/vintage/Dunstall.htm
It's close to the ones you can buy on ebay for $70 shipped, but it doesn't look as "cheap".
 
Re: '75 suzuki gt250...Electrical done, onto headers

Joe, nice work! I am also working on making pipes right now for my GT500 Suzuki here's my build if you are interested http://www.dotheton.com/forum/index.php?topic=20290.550

Are you going to tig weld the cones?
 
Re: '75 suzuki gt250...Electrical done, onto headers

Yep, heres a pic of a set of pipes I've had on it earlier:

DSC09553.jpg

DSC09526.jpg


I'm on my 4th set of pipes, so my thin metal welding has improved. Not only that, but the patience to get the cones square and perfect so I don't need any filler rod has gotten better. I don't think there's anything more frustrating than stopping and starting over and over on exhaust when it should just be a continuous flow.
 
Re: '75 suzuki gt250...Electrical done, onto headers

Yes well that looks good, I will be gas welding my pipes. I am using 22ga sheet, what are you using?
 
Back
Top Bottom