
We noticed you are blocking ads. DO THE TON only works with community supporters. Most are active members of the site with small businesses. Please consider disabling your ad blocking tool and checking out the businesses that help keep our site up and free.
You are using an out of date browser. It may not display this or other websites correctly.
You should upgrade or use an alternative browser.
You should upgrade or use an alternative browser.
'81 TR1 build.................(yup another Mojave tank combo!!)
- Thread starter lchris21
- Start date
trek97 said:Its bad ass.
Thanks......., I though old ichiban moto was looking in on the build with that comment ;D ;D
dannywrx88
Been Around the Block
This is goin to be awesome
Sent from my iPhone using Tapatalk
Sent from my iPhone using Tapatalk
Ichiban Moto
Bad Ass Cafe' Style
Bad Ass ! ;D
Holy thread resurrection Batman......nearly 6 months later
Wow 6 months gone......time to kickstart this thread for the Winter 2016 build season. With the long winter nights soon to be upon us, its time to get back in the garage. Plan is to try and get this thing on the road for Spring 2016......
Managed to get some smallish jobs done over the summer, and made a start painting, powder coating and cleaning up stuff.
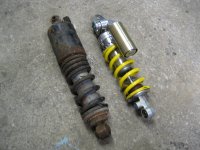
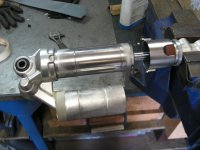
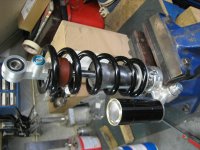
On with the pics...First up was the shock for a makeover...
Wow 6 months gone......time to kickstart this thread for the Winter 2016 build season. With the long winter nights soon to be upon us, its time to get back in the garage. Plan is to try and get this thing on the road for Spring 2016......
Managed to get some smallish jobs done over the summer, and made a start painting, powder coating and cleaning up stuff.
On with the pics...First up was the shock for a makeover...
Attachments
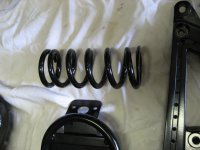
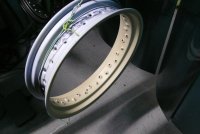
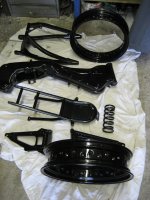
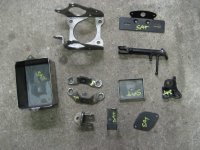
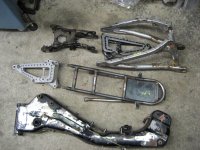
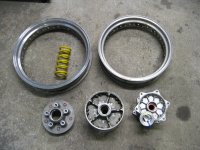
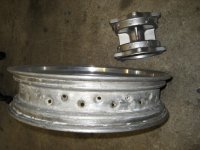
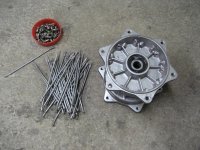
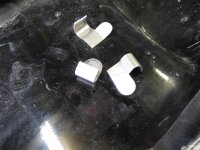
Made a start stripping down wheels, frame, brackets etc ready for powdercoating.
Overall was happy with the results, but the coater had a problem with the wheel rims. They were pretty poorly pitted, and needed doing twice. I was still not happy with them so have decided to flat them back, fill in the pitting with some polyester filler, prime and wet paint them myself.....
Overall was happy with the results, but the coater had a problem with the wheel rims. They were pretty poorly pitted, and needed doing twice. I was still not happy with them so have decided to flat them back, fill in the pitting with some polyester filler, prime and wet paint them myself.....
Attachments
-
 P1160895.JPG516.1 KB · Views: 239
 -
 IMG_4689.JPG2.8 MB · Views: 242
 -
 IMG_4685.JPG2.6 MB · Views: 252
 -
 IMG_4671.JPG2.9 MB · Views: 245
 -
 IMG_4667.JPG707.2 KB · Views: 251
 -
 IMG_4661.JPG2.9 MB · Views: 235
 -
 IMG_4655.JPG567.1 KB · Views: 244
 -
 IMG_4255.JPG3 MB · Views: 247
 -
 IMG_4188.JPG3.1 MB · Views: 242
 -
 IMG_4185.JPG754 KB · Views: 238
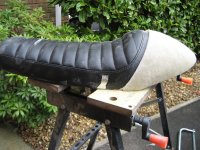
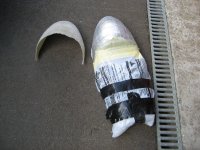
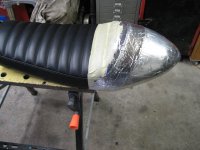
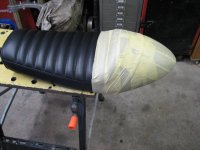
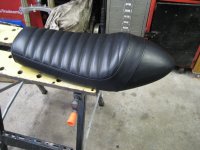
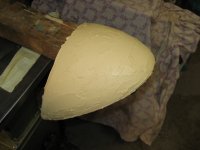
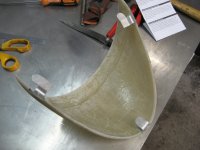
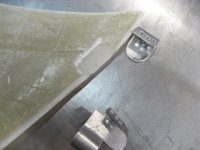
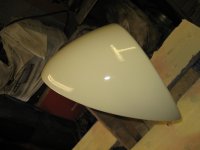
Was never 100% happy with the seat "look" as its got a bit of a "Bobber" look about it, so decided to make a seat cowl from fiberglass. This will be painted the same colour as the tank and should give it more of the cafe look I'm after.........
Attachments
-
 IMG_5211.JPG568.3 KB · Views: 263
 -
 IMG_5204.JPG2.8 MB · Views: 275
 -
 IMG_5199.JPG2.9 MB · Views: 279
 -
 IMG_5184.JPG2.8 MB · Views: 252
 -
 IMG_5178.JPG2.8 MB · Views: 246
 -
 IMG_5175.JPG2.8 MB · Views: 258
 -
 IMG_5173.JPG602.5 KB · Views: 233
 -
 IMG_5170.JPG2.7 MB · Views: 251
 -
 IMG_5167.JPG2.7 MB · Views: 256
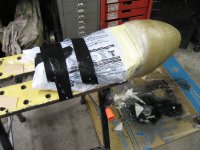
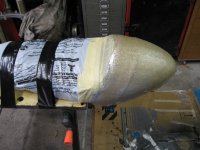
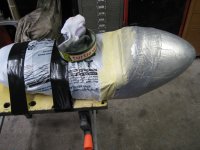
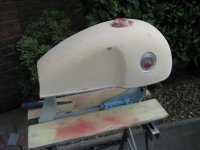
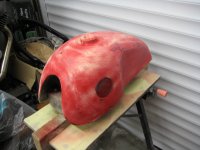
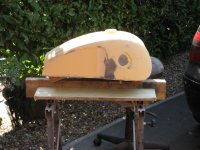
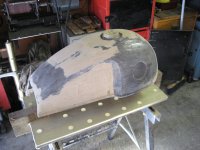
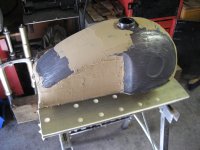
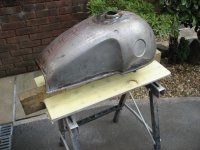
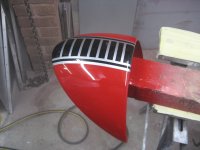
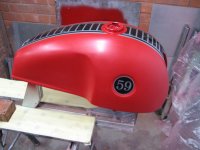
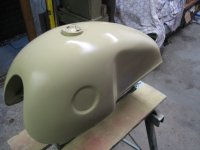
Next onto the tank.............This had been dropped several times during the fabrication work so was looking in a sorry state. Its been the single most time consuming part of the build, and its still not painted !!!! filing, sanding, filling, sanding, repeat............
Also messed around with the Yamaha speed-block pattern I'm planning on using for the paint job. Plan is to paint it myself, something I've never done from scratch. Just used normal rattle cans for the odd repair job over the years, but I've got the gun and paint ready to give it a go....
Also messed around with the Yamaha speed-block pattern I'm planning on using for the paint job. Plan is to paint it myself, something I've never done from scratch. Just used normal rattle cans for the odd repair job over the years, but I've got the gun and paint ready to give it a go....
Attachments


What a transformation, from "Trailer Trash Meth Head" to "Lean N Mean, Ultimate Fighter".
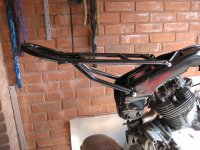
The Exaust, has the best thought out rear cylinder exit routing I've seen yet, I was hoping something similar was possible for when/if I get an XV.
Do make sure the tank's paint can withstand gas/petrol, I rattle can painted a tank black and white in a similar design to what you are planning, a hard stop caused some gas to escape from the cap and it stained the white paint. :'(
jungalist
Been Around the Block
J-Man said:Do make sure the tank's paint can withstand gas/petrol, I rattle can painted a tank black and white in a similar design to what you are planning, a hard stop caused some gas to escape from the cap and it stained the white paint. :'(
You just need some 2 compound clear coat. that way the gas can't solve your paint. or let a painter do it, they always use 2 coumpound lacquer.
crazypj
Split personality, I fake being smart
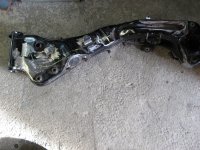
XVRacer said:Nice solution on the rear brake bracket. The other one would have caused wheel hop when braking.
The manifolds look good but I suspect they will transfer too much heat to the carbs and potentially boil the fuel in bowl.
Because it's been a while since I looked at this build I went back to the beginning and re-read it (I forget all sorts of stuff ;D )
Stainless will transfer less heat than aluminium and being thinner, will be much easier to insulate from external heat source
Thanks!crazypj said:Because it's been a while since I looked at this build I went back to the beginning and re-read it (I forget all sorts of stuff ;D )
Stainless will transfer less heat than aluminium and being thinner, will be much easier to insulate from external heat source
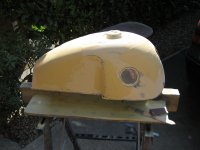
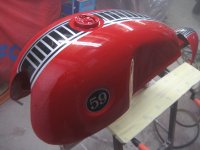
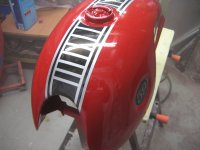
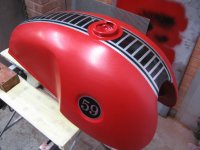
Finally the end of the tank......................well nearly ;D
Just a bit of flatting and compounding to finish off when the clear coat hardens. Its been a steep learning curve for my first gun paint job. Overall it worked out pretty good for an amateur....
Just a bit of flatting and compounding to finish off when the clear coat hardens. Its been a steep learning curve for my first gun paint job. Overall it worked out pretty good for an amateur....
Attachments
-
 IMG_5388.JPG2.7 MB · Views: 242
 -
 IMG_5393.JPG2.7 MB · Views: 208
 -
 IMG_5394.JPG2.7 MB · Views: 178
 -
 IMG_5383.JPG579.5 KB · Views: 183
 -
 IMG_5382.JPG2.6 MB · Views: 192
 -
 IMG_5373.JPG2.2 MB · Views: 192
 -
 IMG_5371.JPG2.4 MB · Views: 170
 -
 IMG_5317.JPG1.9 MB · Views: 183
 -
 IMG_5296.JPG2.6 MB · Views: 189
 -
 IMG_5387.JPG2.7 MB · Views: 232
redwillissuperman
Keep it simple- engine, wheels, bars
I kinda liked it matte red.
Sent from my iPhone using Tapatalk
Sent from my iPhone using Tapatalk


