
We noticed you are blocking ads. DO THE TON only works with community supporters. Most are active members of the site with small businesses. Please consider disabling your ad blocking tool and checking out the businesses that help keep our site up and free.
You are using an out of date browser. It may not display this or other websites correctly.
You should upgrade or use an alternative browser.
You should upgrade or use an alternative browser.
1983 Honda 750 Nighthawk
- Thread starter chickenStripCharlie
- Start date
chickenStripCharlie
Coast to Coast
If it were me I'd shoot for at least 1mm. this isn't really an area you want to hedge your bets.
Got it. Thank you. 1mm is reasonable. I was hoping people would not chime in with more than that.
(The reason it is tight is because the fork legs were not touched. The machinist said it would take too long for him to set them up in addition to the calipers, so i told him no, i'm not paying.)
chickenStripCharlie
Coast to Coast
how much meat did he take off the caliper? Could you chamfer one side with a file for a little more clearance?
I didnt take the pistons out to verify material thickness yet, but I'm at my comfort level right now with how much has already been taken off. I dont want to take anymore off.
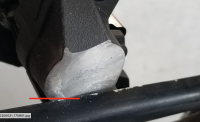
This should give you a better idea.
sharpen the edge of the comstar into a cutting edge that way if there is any contact it will fly cut the caliper and clearance its self.
haha. no, dont do that. but If i was being a cheap ass Id ride to a rough bit of road at low speed and casually mash the brakes and see if anything happens. if it was gonna be catastrophic later it might leave a witness mark under those circumstances. still would prefer 1mm clear.
haha. no, dont do that. but If i was being a cheap ass Id ride to a rough bit of road at low speed and casually mash the brakes and see if anything happens. if it was gonna be catastrophic later it might leave a witness mark under those circumstances. still would prefer 1mm clear.
chickenStripCharlie
Coast to Coast
sharpen the edge of the comstar into a cutting edge that way if there is any contact it will fly cut the caliper and clearance its self.
haha. no, dont do that. but If i was being a cheap ass Id ride to a rough bit of road at low speed and casually mash the brakes and see if anything happens. if it was gonna be catastrophic later it might leave a witness mark under those circumstances. still would prefer 1mm clear.
One side is ok. Slight mis-measurement in wheel spacers? Or perhaps manufacturing tolerance in the wheel. Probably the latter, actually, as a few of the spokes do stick out a bit more than others.
I will think about it more and decide what to do. I actually found the OEM calipers in a box i thought i threw out. As they are 2 piston, there is a ton of room on the inside of them. So with that in mind, i might also just do what IRK did in post #44 above using the same forks ..... IF i can find dished rotors that would work for my hub. I'd rather go with these for a cleaner look, but we'll see
")
I'll keep posting updates
sav0r
Coast to Coast
On various racing cars I've had there's been as little clearance as like 3mm between various parts and the wheel ID. The main downside is that when you get a piece of gravel or another foreign object stuck between whatever the part is and the wheel it tends to machine your wheel in half and cause a rather abrupt deflation that is worse than a normal deflation because your tire only has one effective side wall.
In your case, I have a hard time believing you'll ever see a piece of gravel stuck between the spokes and the caliper. And it would have to be something really stout to actually stop the wheel, those spokes are likely to self clearance first, not saying this is something you want to try out... Also, clearance is rather binary, either you have it or you don't. Unless you expect thermal expansion or the previously mentioned debris to be an issue.
Here's a wheel in my office that I turned into a clock that was sawed in half by a nut on the left rear upright lower going into turn 4 (no chicane) at Mid Ohio while going about 135mph. I surprisingly did not crash but it likely cost me pole position and a race win as I had gotten pole, reset the lap record, and won the race the day before in a convincing manner.
chickenStripCharlie
Coast to Coast
On various racing cars I've had there's been as little clearance as like 3mm between various parts and the wheel ID. The main downside is that when you get a piece of gravel or another foreign object stuck between whatever the part is and the wheel it tends to machine your wheel in half and cause a rather abrupt deflation that is worse than a normal deflation because your tire only has one effective side wall.
In your case, I have a hard time believing you'll ever see a piece of gravel stuck between the spokes and the caliper. And it would have to be something really stout to actually stop the wheel, those spokes are likely to self clearance first, not saying this is something you want to try out... Also, clearance is rather binary, either you have it or you don't. Unless you expect thermal expansion or the previously mentioned debris to be an issue.
Here's a wheel in my office that I turned into a clock that was sawed in half by a nut on the left rear upright lower going into turn 4 (no chicane) at Mid Ohio while going about 135mph. I surprisingly did not crash but it likely cost me pole position and a race win as I had gotten pole, reset the lap record, and won the race the day before in a convincing manner.
Valid points, but this bike will never see 130mph or hard braking repeated enough for thermal expansion to be an issue, i don't think. That said, i'm going to do more testing on here for sure, before i commit to this solution.
The rocks are definitely more of an issue on car calipers. Has anyone had this be an issue on a bike? I haven't heard of any cases. The car rims being a large surface area cylinder are just ideal of trapping a rock and wedging it in between the bigger calipers.
I think you'd have to really be one unlucky SOB to run into the rock pebble problem on a bike.
chickenStripCharlie
Coast to Coast
I ended up reworking the front piece with more rounded corners to hug the tank better. He plan is to weld this to the seat pan and use several mounting points to eliminate the taco problem.
This being 18 gauge steel, I might just secure with bolts and jb weld to smooth out instead of welding.
I think it will work well.
Questions:
1. What glue should I get?
2. Has anyone tried to reuse the stock seat foam material??


This being 18 gauge steel, I might just secure with bolts and jb weld to smooth out instead of welding.
I think it will work well.
Questions:
1. What glue should I get?
2. Has anyone tried to reuse the stock seat foam material??
pidjones
Over 1,000 Posts
Seat foam - go to a carpet store and get (free left-over if available) "rebond" carpet padding. Glue with 3M 80 (home improvement store) and trim with electric carving knife (NOT the wife's - you can find them cheap on ebay). Build layers until you get the shape you want.
I use a rasp to fine-tune the shaping of seat foam.
I say that like I do it all day - I did it once 13 years ago.
https://www.dotheton.com/index.php?...ail-light-mount-and-license-plate-bracket.11/
I say that like I do it all day - I did it once 13 years ago.
https://www.dotheton.com/index.php?...ail-light-mount-and-license-plate-bracket.11/
chickenStripCharlie
Coast to Coast
Seat foam - go to a carpet store and get (free left-over if available) "rebond" carpet padding. Glue with 3M 80 (home improvement store) and trim with electric carving knife (NOT the wife's - you can find them cheap on ebay). Build layers until you get the shape you want.
Isn't that stuff a little too firm? I was really hoping to rework the stock seat foam to the right shape ...... if possible, because it seems more comfy
I've used 3M super 77 and it's a great adhesive. What's different about 80? Is it better? or just better for foam type materials?
Thanks!
pidjones
Over 1,000 Posts
80 is permanent and strong. They put headliners in with it. Carpet padding is firm, so your butt doesn't sink down to the frame. Maybe if you weigh like 140 pounds you could go softer. I went to a foam store - they sell all sorts. The guy told be get carpet rebond padding. After initial shape with the electric knife, you can fine tune with course grit on a side grinder. If you can find some thin, firm neoprene you could put a final smooth layer of that down but if you think ahead your final padding foam layer will do.

chickenStripCharlie
Coast to Coast
that seems too firm for me. I"m going to try and use the stock seat foam material first and see how that goes.
chickenStripCharlie
Coast to Coast
Damn. Got the pan finished up tonight ... but the stock seat foam ain't gonna work with the flat pan. It raises up in the rear too much and it's no good.
The pan turned out awesome, I think.
Got 8 bolts holding the two together. Not sure if I should smear on some JBWELD as well for good measure.
Not to toot my own horn, but almost a shame to cover it all up


The pan turned out awesome, I think.
Got 8 bolts holding the two together. Not sure if I should smear on some JBWELD as well for good measure.
Not to toot my own horn, but almost a shame to cover it all up
Maritime
Over 10,000 Posts
that turned out well. Are you in Canada or USA? I have used a closed cell kneeling pad you can get from Princess Auto in Canada. It isn't the dense stuff like the puzzle piece mats you can get its firm but also squishy. Hard to describe but like thick neoprene. I made a cafe seat and covered a piece of that with vinyl then attached it to the seat. It was 8 hr comfortable. I road from Moncton, NB to Brifdgewater NS all back roads, 1 stop for lunch and 8hrs total and my but was fine.
This is the one. When you squeeze it you'll see why it's so comfortable. 2 layers of that with a cover would be all day long comfort and still thin and sleek.
https://www.princessauto.com/en/detail/15-x-20-in-kneeling-pad/A-p8099442e
This is the one. When you squeeze it you'll see why it's so comfortable. 2 layers of that with a cover would be all day long comfort and still thin and sleek.
https://www.princessauto.com/en/detail/15-x-20-in-kneeling-pad/A-p8099442e
DesmoDog
Been Around the Block
I used what looks like the same type of foam pidjones did. The upholstery guy I used recommened it and it turned out to be more comfy than I was expecting.
I used a carving knife and a belt sander to shape mine. Ended up doing it in seperate pieces and gluing them together, worked out fine. The mistake I made was putting a curve on the base where it met the bum stop, it made it harder to attach the cover when it was done. I'm pretty sure he put a thin layer of foam over all of it before covering it to smooth everything out a little.


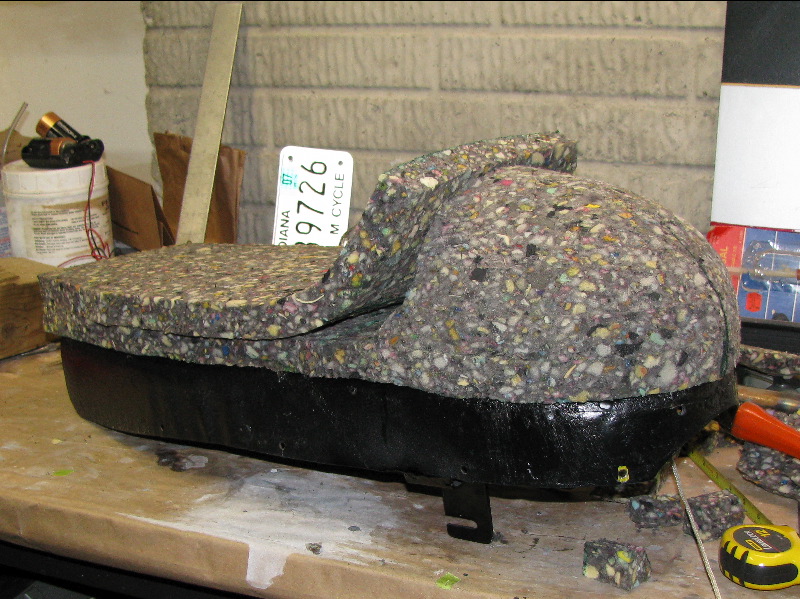
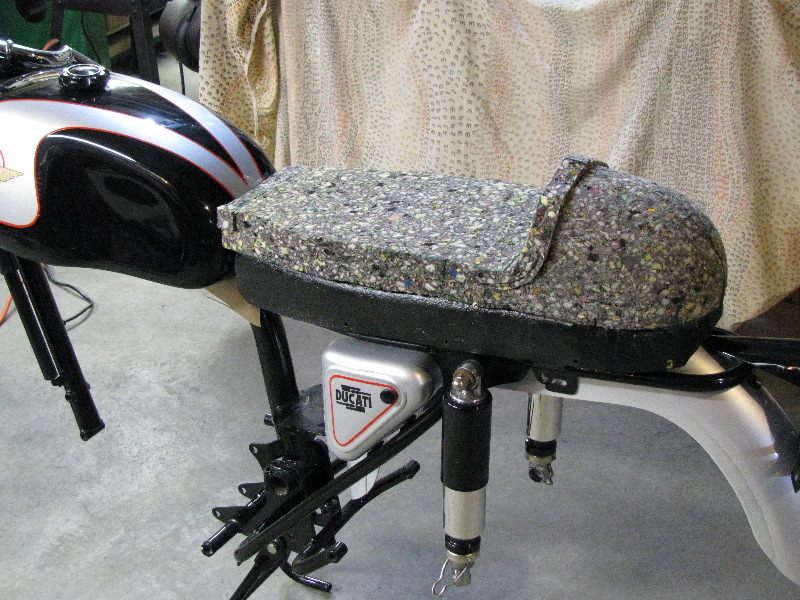
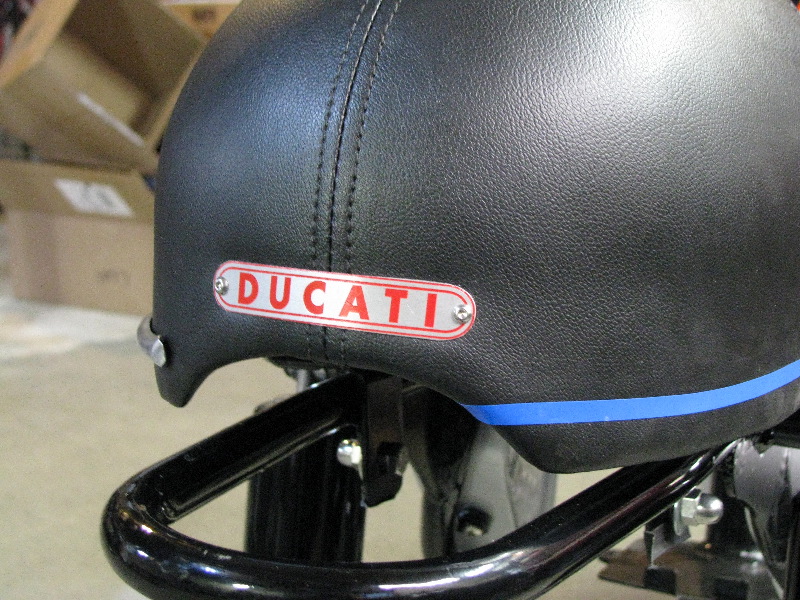
I added the badge and trim strips after the recovering was done.
I used a carving knife and a belt sander to shape mine. Ended up doing it in seperate pieces and gluing them together, worked out fine. The mistake I made was putting a curve on the base where it met the bum stop, it made it harder to attach the cover when it was done. I'm pretty sure he put a thin layer of foam over all of it before covering it to smooth everything out a little.
I added the badge and trim strips after the recovering was done.
chickenStripCharlie
Coast to Coast
that turned out well. Are you in Canada or USA? I have used a closed cell kneeling pad you can get from Princess Auto in Canada. It isn't the dense stuff like the puzzle piece mats you can get its firm but also squishy. Hard to describe but like thick neoprene. I made a cafe seat and covered a piece of that with vinyl then attached it to the seat. It was 8 hr comfortable. I road from Moncton, NB to Brifdgewater NS all back roads, 1 stop for lunch and 8hrs total and my but was fine.
This is the one. When you squeeze it you'll see why it's so comfortable. 2 layers of that with a cover would be all day long comfort and still thin and sleek.
https://www.princessauto.com/en/detail/15-x-20-in-kneeling-pad/A-p8099442e
BC, canada!
Thanks for the link. I'll have a look next time I'm at PA.
The seat pan sits directly on the frame rails. Should I use some rubber strips in between? The stock pan sits on about 5-6 rubber cushions, but is stamped and more rigid. Thinking a strip of rubber around the perimeter of the pan
(Which I guess I would have to add after the upholstery?) Thoughts?


