college kid with a dream (1977 xs400)

What should i do to the tank?

  • Bare metal with clear?

    Votes: 23 43.4%
  • Bare metal with gold or red stripe?

    Votes: 21 39.6%
  • or save myself some time and just paint it!

    Votes: 9 17.0%

  • Total voters
    53
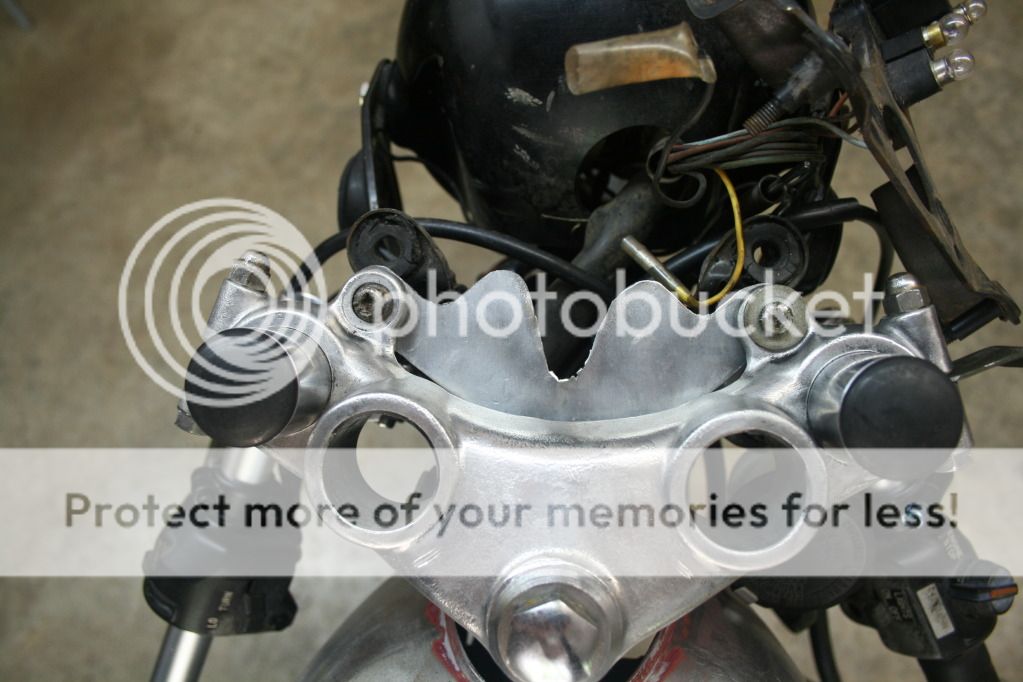
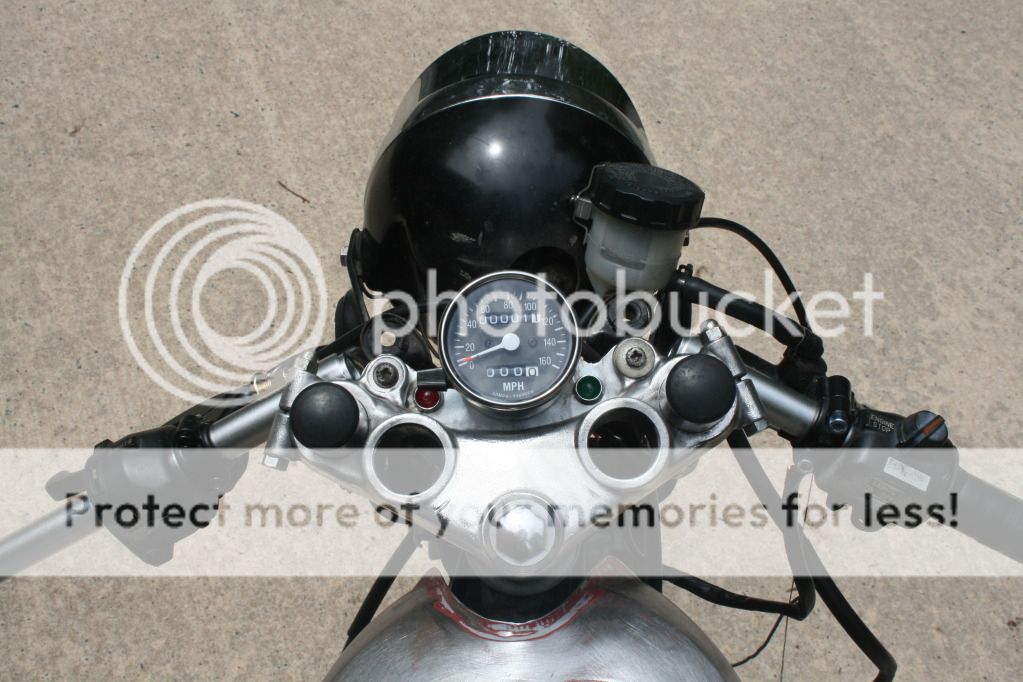
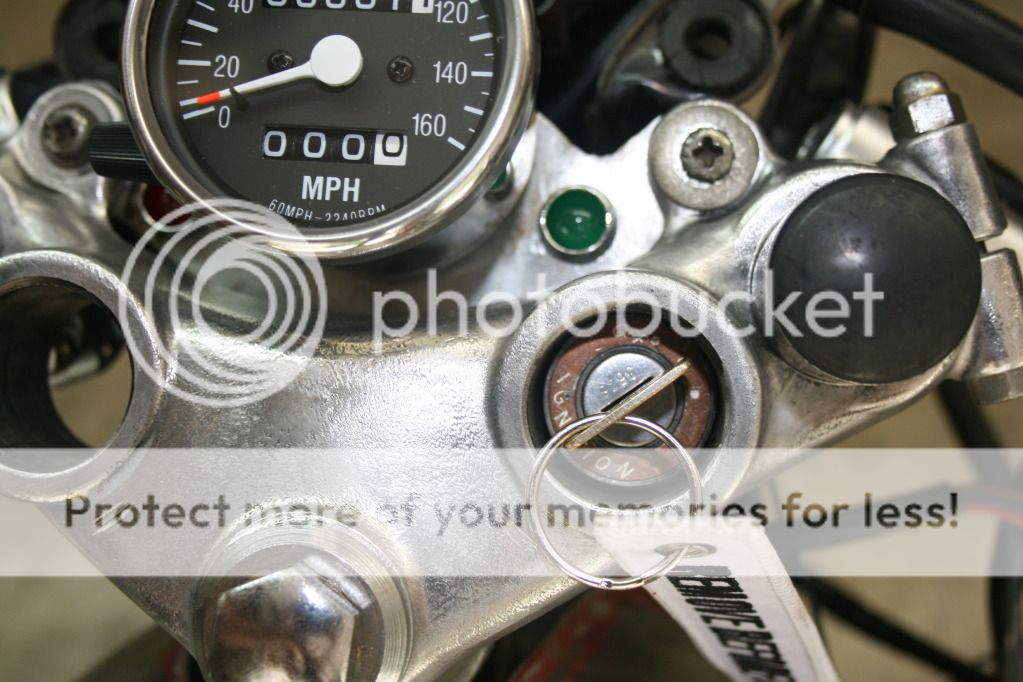
Well i just caught my 2nd wind! I got tires and clip-on handle bars in the mail today! My handle bars came early they are cheaper ones from e-bay they were said to be chrome but they are not witch for me is better because they are not shinny witch will match my bike.

IMG_3581.jpg


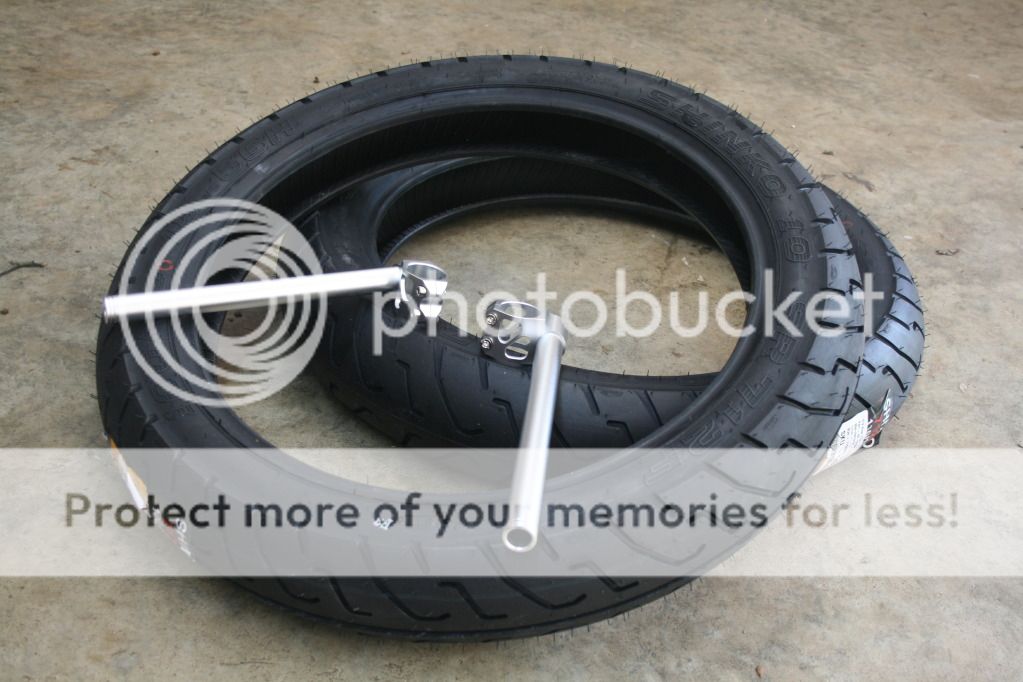
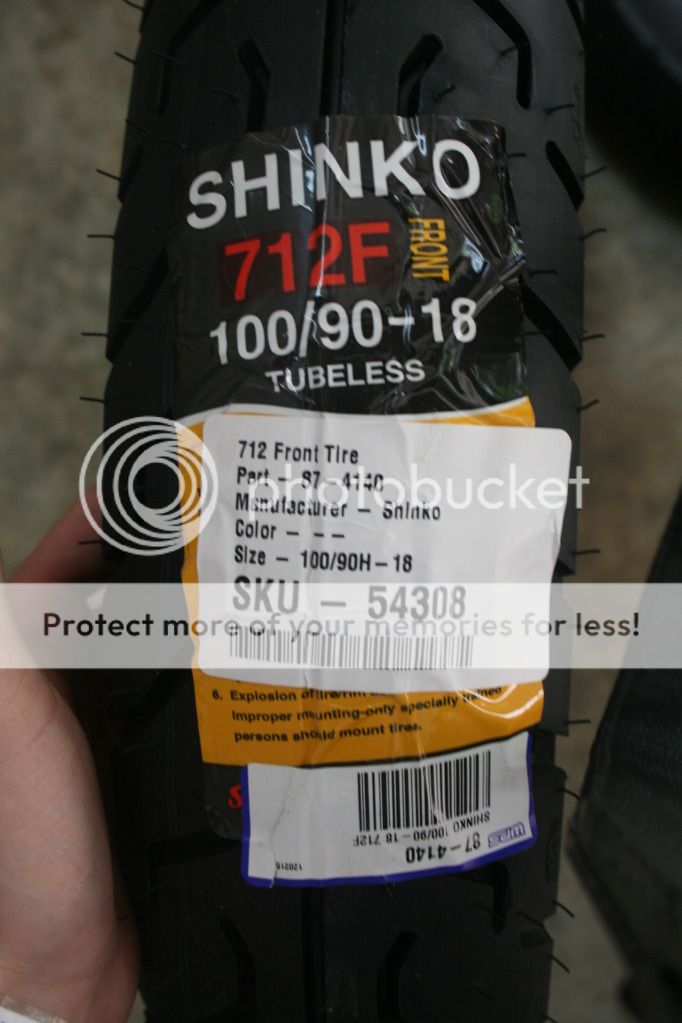
Got my tires too! some tires my friend has on his CB350 he like them so i think they will be grate!

IMG_3582.jpg


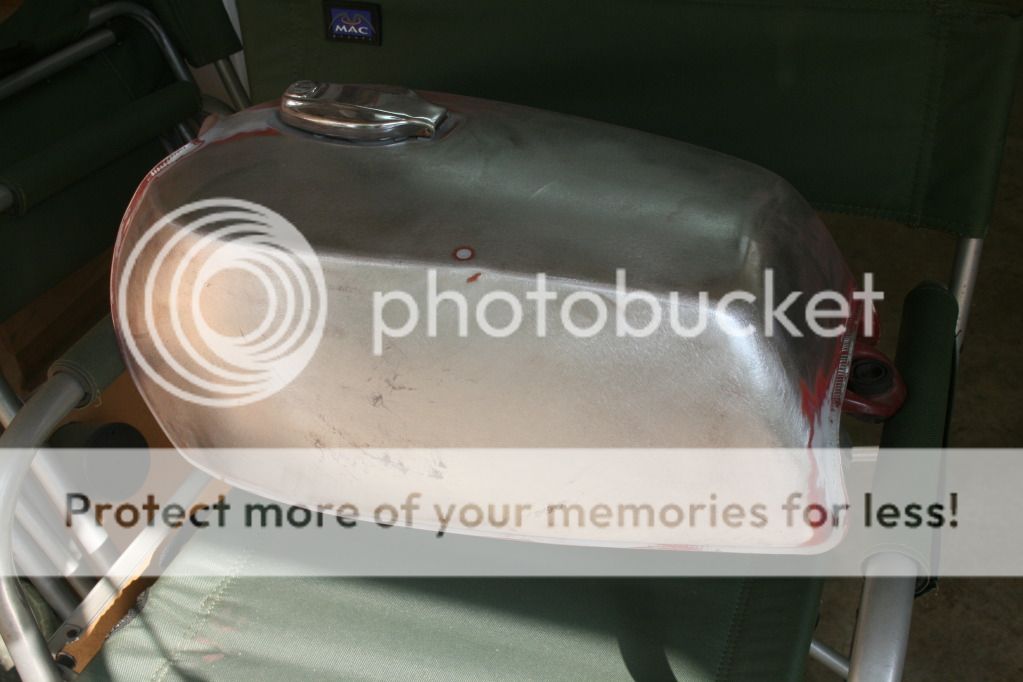
Also started sanding the tank. Looks good but there were some small dents that will show with bare metal.

IMG_3583.jpg


IMG_3584.jpg
 
Does anyone know if you can spray clear coat on top of surface rust? I want to let my tank get some light rust on it to give it a old look.
 
honda53rider said:
Does anyone know if you can spray clear coat on top of surface rust? I want to let my tank get some light rust on it to give it a old look.

i don't think the clear would stick well to the rust but I'll let someone chime in. I also don't know if it would stop that rust from spreading if it's already under the clear coat.
 
I have those Shinkos on my Honda, and kinda like em. The ones I'm using are rated at 140mph I believe. Good tires for the price.
 
Ya fuggers that's what i thought but i cant leave it bare bemuse i would be sanding it all the time to keep it clean. And thanx pterodactyl iv had a lot of people say the tire was good. And as far 140mph i don't think i will have to worry about doing that fast on my little bike.
 
You can keep the tank clear.
There are lots of ways to do it without sanding it all the time.
I asked this question a while ago here at the forums http://www.dotheton.com/forum/index.php?topic=34384.0

Some use WD40, Clearcoat or Oil to give it a permanent good looking touch.

I gave my tank to my painter to have it painted matte black, he than removed the paint from my knee dents and used sandpaper to give it a used look. And on top he put matte clearcoat.
He promised me it will keep 4ever ;)
And I am really lucky with the results ^^

PICS:
tank.JPG


tank2.png
 
Great job so far! I just wanted to mention, do check (if you haven't already) that you have good fuel flow from the tank and put in a small inline filter from a lawnmower/chainsaw shop. Lot of times guys think they have carb probs but really they aren't getting good flow. Don't mess with lighter fluid, start by priming down the spark plug holes with gas, install the plugs and get her burping reliably (proofs the timing and tests for at least modest compression). It may be that the vacuum thing on the petcock is not getting enough suck to open and allow fuel to flow. It might be good to try and replace it with a simple petcock with no vacuum complication.
 
Hey thanks d9canada but all the test i have run with the bike have been with a fuel cell and new clean gas with a clear gas line to check and see if the gas was good. So sadly it was not the gas tank or the petcock. I wish it was that easy but it wouldn't be as fun it it were that easy right? But still looking for another set of carbs im looking at a basket case xs400 its about 2 hours away the guy wants $200 for motor carbs frame forks wheels and some other key parts so i might pull the trigger on that some time soon.

Ya raoulduke that looks grate! Nice bike to what is it? And for my tank i was waning to give it a old rustic look. Something like this. But this guy left the stripe from the original paint witch im not able to do.

yamaha-xs650-2.jpg


Here is more pic of the bike

http://www.bikeexif.com/yamaha-xs650-2
 
Look for a product called permalac. It's made to protect bare metal. I talked to a rep and u can even let the tank rust, spray permalac on, and it will keep the rust from spreading, and protect it from any more rust from forming.
 
Oh man, I've been lookin around and I can't find a thread I read yesterday.. damn!

Anyway, there is a thread here somewhere where the guy did exactly what you are doing with the rusted look. He's doing his tank and cafe seat. He posted some good pictures. I'm sorry I can't find it but no doubt if you search carefully <not that rust is a common word!> you should find it.

Happy Easter!
 
Found it!

http://www.dotheton.com/forum/index.php?topic=31581.60
 
honda53rider said:
Ya raoulduke that looks grate! Nice bike to what is it? And for my tank i was waning to give it a old rustic look. Something like this. But this guy left the stripe from the original paint witch im not able to do.

My bike is a Ducati 900SL.
And yeah, John Ryland and the guys at Classified Moto really create lots of nice bikes.
Have you seen there Yamaha ?

Ewing_6346_top_F.jpg.scaled1000.jpg


Awesome! More pics: http://johnryland.posterous.com/

And for your old rustic look what about this one http://thehookie.de/Yamaha-SR-250 ?
I talked to him, and the only thing he did to the tank was to cover it in a smal film of old oil.

I really like it thoug.

greetings
 
Ya that SR250 looks sweet! And d9canada that paint looks crazy sweet! might have to look into that! Looks like alot of work but well worth it.

I was also flipping around the web and found this (don't know how many of yall are into cars like this but i think the look sweet!)

IMG_1894-500x333.jpg


Buy a BMW then poor muriatic acid all over the hood and that's it!

Don't think ill ever do that to any of my cars or my bike but looks kinda kool.


Also does anyone have carbs for a 1977 XS400 im getting despite for a set now...
 
great thread, i just read start to finish. i think i may have to buy that basket case xs400 ive had my eye on all week. thanks for the motivation!
 
Thanks man! ya well he never got back with me one it so i dont know what he is doing with it.

Well i got it running!!!!!!!!!!!!!!!!!!!!!!!!!!!!!!!!!!!!!!!!!!!!!!!!
It has been sitting for 3+ years and i got it back to ridding condition! its not pretty or safe or legal but was able to ride it a few miles up and down my road! I swapped the needle from the xs650 carbs into the bad carb that came on the bike and got it to fire. sounds good to, a little loud but im going to get an exhaust some time. It is firing in the right cylinder well, but the left only fires if i give it the beans. Im going to say its bed jetting with the headers and no pods running stock jets. But it is running on both when im ridding it but not when idling. The front brake also seems a little sloppy but only rode it once so i cant judge it off one run. The rear bake is rebuilt now but the bleeder valve is broke off in the brake so im going to have to get an extractor and a new valve so i can get the back brakes running.
Other notes the handle bars seemed way to hard to turn at speed, i know the momentum keeps it straight but i think that the bearings are gummed up so i need to pull them and get some new grease in there. I pulled the rear wheel off the wash it and get the brake off the back end, and i also greased everything and it rolled relay smooth now.

Also going to need to get the wheels blasted and cleaned up, and the new tires on there.

Does anyone know a really good inspector in NC my bike is not perfect but i need it to pass a inspection before they will sign the title to me...

Does anyone know what kind of tool i need to get the nut that sits under the top triple tree clamp, it kinda looks like a crown nut but the crowns are on the sides.
 
Well lots to tell and see

First off im waiting to get the wheels sandblasted to clean them up then i can get the new tires on the bike. But today was spent wireing and mocking up parts.

Got the new speedo from FedEx and a new clutch pull came at the same time.

IMG_3757.jpg


IMG_3767.jpg


So i started taking out the old dash to build a custom single gauge one. The old dash was kinda hard to get out mainly because of the mess of wires that run out of it.

IMG_3759.jpg


IMG_3765.jpg


I then took the bracket that came with the speedo and mocked a plate up out of some card board

IMG_3769.jpg


Then i had to cut out the plate with a jigsaw (i really needed a band saw to cut it) but it came out alright.

IMG_3771.jpg


I also found some nice LED's to use in the dash, im not running turn signals (as of now) so i garbed a green (neutral) and red (oil). here is how it looks all mocked up, still need to wire it all but im waiting for some wire convectors.

IMG_3776.jpg


IMG_3779.jpg


IMG_3780.jpg


Then i started looking for a place to install the key and i found it fit down in the original handle bar mounts, so i found a way to mounit it to the new plate to hold it in place. I like the way it turned out because you cant see the key so it helps to keep it clean.

IMG_3782.jpg


That's how we are sitting now just waiting for new jets to come from mikes xs along with some brake parts and new headlight bracket!
But im getting closer
 
Nice work! i just read this post for the first time.
At the beginning, the metal you found in the oil is part of a "c" clip. This holds the clutch basket in place. I found exactly the same thing in my engine. I would suggest taking off the right side cover to make sure it has been replaced with a new one. Make sure it is seated fully in the grove. Also check your clutch push rod for straightness at this time. (mine was broken in 2)
If you remove the left side engine cover you can remove the starter and chain. No need to split the engine cases. You do need to block off the hole that will be left. Also the bolts that hold the starter cover on the top of the engine thread into the starter itself so there is no easy way of reinstalling the cover. Mind you, it is not really neccesary.
Have you adjusted the valves yet? A lot of the time the intake side dosn't get adjusted because you have to remove the tank to get access. If your valves are out of adjustment it will make it verry hard to get your carbs adjusted properly.
The wrench for the steering bearings is called a "c" spanner (or at least thats what the British call it. Good luck finding one.
Cleaning inside of fuel tank. Block off all of the openings. Pour in industrial degreaser and a handfull of drill point screws. Close cap and shake well. Pour out crud and drill points. repeat with cleaner only. Pour out and pour in some MEK or acetone to get the realy oily stuff out. You might be happy at this point but if you want to remove all the rust I would add some Evaporust, then dump out and add fuel.
 
Hey thanks Weezy! iv read ur post a few times. The bike looks good and i like that headlight mount. I just ordered a new clip mounts for my light hopefully they will come it soon.
I will have to check the C clip on the clutch side cover when i go the change the oil. (witch should been soon) Also can you just pull the clutch rod out? My buddy did on his CB350 and it came out fine but knowing my luck it will be connected to something inside of the trany and ill have to spit the case to right my mistake.

As far as the valves go they have all been set right with factory gap. I also found a "c" spanner on mikes XS and its coming in the mail with the new jets headlight bracket and brake bleeder nipples. ( i also broke off the nipple into the rear brake caliper. I might try and drill it out and tap ia out to fit a bigger one from the auto parts store. I have a spare caliper that has a broken nipple in it and i might test it on it before ruining the caliper i just rebuilt.)

I am about to wire up the new dash and new tail light now and still waiting for the green light to get the wheels sand blasted.

From there all i believe i have to do is fix/replace steering bearings, get proper jetting, clean out the gas tank, new tires, fix the battery box (just needs minor tweaking), Mount all wiring for under the seat (open for ideas), build the seat (iv started but waiting on a sewing machine, and the plywood to finish bending), Get the mirror from my buddy, and i should be ready to ride only painting will be left!

But i know something will come up that needs to be fixed it always happens that way.
 
Back
Top Bottom