Follow along with the video below to see how to install our site as a web app on your home screen.
Note: This feature currently requires accessing the site using the built-in Safari browser.
We noticed you are blocking ads. DO THE TON only works with community supporters. Most are active members of the site with small businesses. Please consider disabling your ad blocking tool and checking out the businesses that help keep our site up and free.
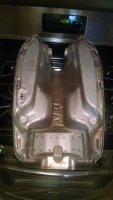
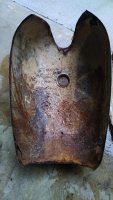
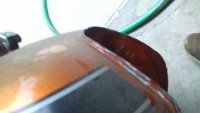
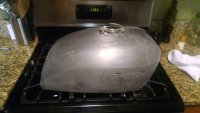
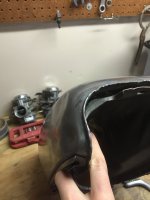
So I have a '71 CB 350 tank with a cluster of dents (pictures below). I've tried doing some dent pulling with the suction cups and hot glue method. That didn't do much, if anything. The dents are in the furthest corner from the opening in the tank so I can't get something in there to push it from the inside.
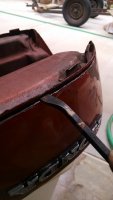
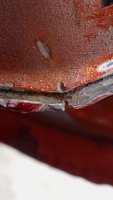
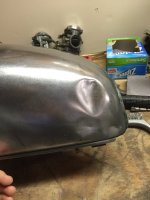
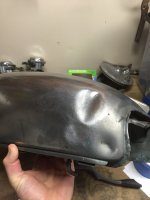
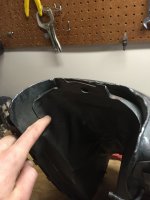
I want to leave most of the tank bare metal with some stripes (then clear coat it) for my cafe project, otherwise I'd look into filling the dents. So my idea is to cut a hole on the inside of the tank where I'm pointing in the last two pictures. I think I should be able to work the dents out from the inside pretty nicely. Then I can have the tank welded back shut on the inside, hiding the color change in the metal and whatever other imperfections show.
What do you guys think? Anyone tried that method? Any suggestions or warnings? I appreciate any help, thanks!
try to find someone with a stud welder and try getting the dent out that way first. cutting holes is always a gamble with getting it sealed back up fuel-tight and lining kits are no fun to deal with.
Ok thanks, that's an option. I'm just concerned with how smooth I will be able to get it with pulling from the outside. Since its going to be bare metal it will show dents easily.
My thought on cutting a hole was that I'd be able to get inside with something with a rounded head and really smooth/roll the dents out completely.
Ill try to find someone with a stud welder before I cut any holes though. Thanks!
Anyone live near Olympia, Wa that has a stud welder?
Using a torch, a stud welded on, slide hammer, lots of grinding and sanding etc. there will be far more hours and nearly the same $$$ to get the bare look as painted.
If you are doing this yourself you won't be happy with the results. If you pay so one you won't be happy with the bill. If you do pull this off and are happy with the results, you won't be happy with how thin the tank will be there and how easily dented it will be.
pretty radical but you could try cutting the tank up (after getting all the fumes and gasoline traces out,or it will be a good bomb)on the bottom and then you can work on the dens form inside.
some crazy puch fans in austria do this to sandblast the inside of their tanks (heavily corroded)...the trick is to find someone to weld the tank back up so its not leaking...its a PIA....
If you hate bondo, but want an easier and powder coatable option, fill with JB weld. Resists denting better than bondo and probably as well as lead. Plus the fumes won't mess with your nervous system.
Kamn - I thought about the blood pressure cuff thing, but again it's in that far corner and might be a real pain to position. And as far as I know those are the factory welds.
Cosworth - Heatshrink? Is that the method I've seen with people heating the dent up then cooling it rapidly with compressed air or dry ice?
I might just have to take Tim's advice and embrace the character of the bike...
You heat up the dent (acetylene torch) with a stud attached/welded and pull the dent out. It helps to pull it just a bit "out" then ball peen the back down a touch when cooled. Then grind off the stud and grind/sand the piss out of it to make it pretty.
Cooling? Nothing fancy, just using a clean old rag soaked in water to keep warpage down where you don't want any distortion(s).
This tank is saveable for raw finish, but it would be at high cost or high time if you owned the skills.
Google PDR in your area... the dent doctors can rub that out decent with tools that reach inside and use pressure to pop it the the good guys can really work magic... like gypsies they follow hail storms haha.
Here's one split, I have every step if you want it, but if you stay just at the edge of the seam you can split it and re weld it with one of four weld processes best to worse TIG, Gas/braze, gas weld MIG and even really old school lead solder. just remember to ad alignment notches along the cut edge for reassembly tack weld points.
This site uses cookies to help personalise content, tailor your experience and to keep you logged in if you register.
By continuing to use this site, you are consenting to our use of cookies.

")