Follow along with the video below to see how to install our site as a web app on your home screen.
Note: This feature currently requires accessing the site using the built-in Safari browser.
We noticed you are blocking ads. DO THE TON only works with community supporters. Most are active members of the site with small businesses. Please consider disabling your ad blocking tool and checking out the businesses that help keep our site up and free.
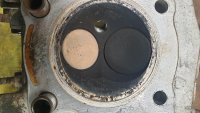
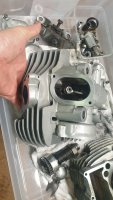
Continued to remove the front cylinder head and cylinder. It had some carbon buildup on the intake valve but The exhaust valve was a white rusty colour. I'm sure that indicates something amiss but haven't come to a conclusion yet. The Interweb suggest nothing more than the additives they put in modern fuel.
Removed the valves from both heads and cleaned them up and started the long task of cleaning 40years worth of gunk from the heads.
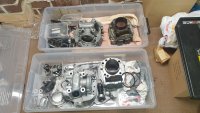
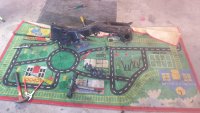
I've separated each cylinder into it's own plastic box and labelled parts because my memory is rubbish and hopefully it helps when the time comes to out it all back together.
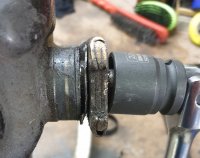
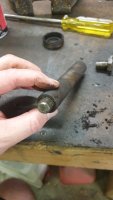
After almost 4 weeks of trying to remove the swing arm pivot bolt I decided to tale the angle grinder to it. SUCCESS!
I need to have a new bolt made up but I got it out.
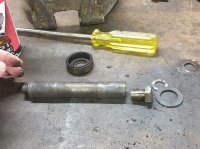
I needed to use a dremel to remove most of the dust cover and I then had just enough space to get the angle grinder in to cut the bolt.
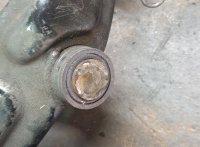
Once out the it was plain as day what the issues was and the bolt and spacer were nover going to come apart while they're still inside the frame.
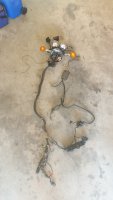
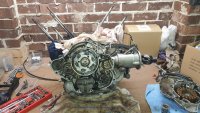
Pretty much done with the 'taking things apart' stage. Only thing still together is the crank case and I'm more than a little scared to split it, even though it will make prepping and painting so much easier.
I haven't planned much past this so really need to take my finger out and make a decision on which way to go next.
Going to start looking for someone to vapor blast all the pieces and work out how I'm going to prep the crank case without getting crap inside it through the pistons.
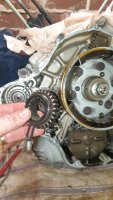
Even though I managed to get the pivot bolt out, the needle bearings wouldn't budge. The rollers pretty much fell straight with the first hard hit but it was the outer race that had welded itself on the inside of the shaft. After 4 hours or trying different methods to get them out with heat and brute force I had to carefully carefully cut them out with the dremel.
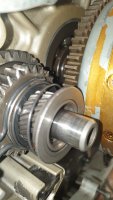
I thought I'd finished taking things apart but forgot about the famous 'Virago Box of Rocks' starter gear so thought I'd better take a look.
I've read plenty of 'final fixes' for the box of rocks but they all start and end with...get a good battery and make sure you have a good earth... so that's what I'll do.
I was planning to just flip the gear around but have since found out that they're only hardened on one edge so flipping it around doesn't fix the problem for very long., so I'll order a new gear.
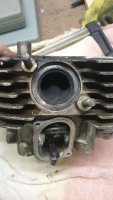
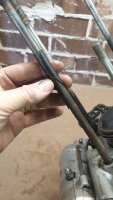
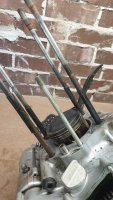
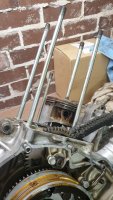
Can't seem to find any reference to these plastic sleeves on the cylinder bolts. They're only on the front cylinder and they dont seem to make an appearance on any of the exploded parts diagrams or parts lists. One is cactus and the other 3 could do with replacing as well. I'm sure they're there for a reason but not sure why they're only on the front cylinder.
Sunday started off tenderly after a visit to the local pub the night before. With the pubs having been closed for several months and not being a big drinker I forgot to pace myself and tried to keep up with the bigger fellas. Do we ever learn...
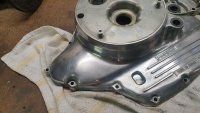
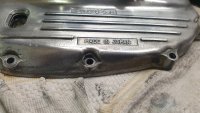
I decided to see if I could clean up a side cover, it was pretty grimy and had a lot of oxidisation. Starting off with the scotch pads and moving onto the wet'n'dry it cleaned up ok. I managed to start to get a reasonable shine before the drill with polishing pads and bench grinder/buffing wheel played havoc with my hangover headache so I gave up and laid on the lounge for the rest of the day
This site uses cookies to help personalise content, tailor your experience and to keep you logged in if you register.
By continuing to use this site, you are consenting to our use of cookies.


")