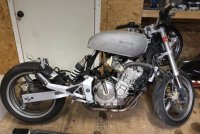
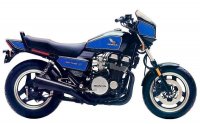
I picked a 2006 Honda Hornet up from a guy that had started to turn it into a café racer. lucky for me his skills didn't match his ambition. The rear part of the frame was already cut of and old cb tank was on the bike, but I have different plans. My idea was to combine an old 80's classic with a more modern chassis. Yes 1985 Honda CB700sc Nighthawk. My plan is to take the basic style of the old and combine it with the new with a slightly more modern look.
We noticed you are blocking ads. DO THE TON only works with community supporters. Most are active members of the site with small businesses. Please consider disabling your ad blocking tool and checking out the businesses that help keep our site up and free.
You are using an out of date browser. It may not display this or other websites correctly.
You should upgrade or use an alternative browser.
You should upgrade or use an alternative browser.
Honda Hornet 599 Retro-Mod
- Thread starter JAGspeed
- Start date
Love this plan.
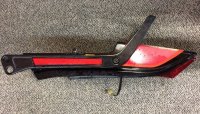
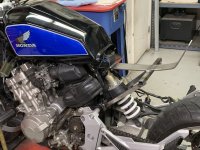
Found a clean tank and tail section from a Nighthawk. Fitted the tank up and made the front mounts for it. I also trimmed the Hornet side panels a bit. I going to try and tie the side panels into the Nighthawk grab rail somehow. I am going to use the stock airbox just had to trim it a little bit to fit the tank. The tank definitely looks bigger on the Hornet and I could only bring it so far forward before it touched the triple clamp at full lock. It cleared the backbone ok but I will have to remount the coils slightly to fit.
Attachments

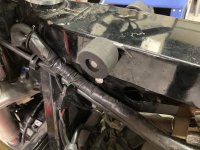
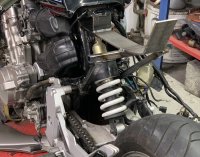
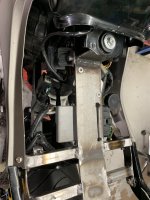
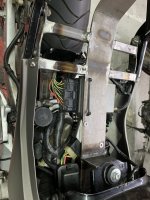
Made more progress on the sub-frame to support the seat , tail section, and side panels. I will mount all the electronics to the sub-frame and try and keep them relatively close to the stock location so I don't have to cut and rewire a bunch of stuff.
Attachments
Neat.
I connected the Hornet side panels to the Nighthawk grab rail had to do quite a bit of trimming to make it look right. I was able to join them enough so when I make the seat it should look fairly seamless. Also welded up the mounts for the grab rail. Trimmed the tail section down and mocked it up. The grab rail is really just for more of an authentic look considering I have reduced the bike to a single seat.
Attachments
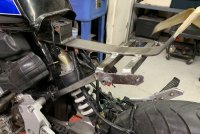
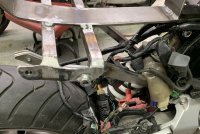
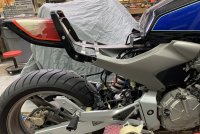
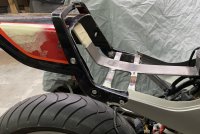
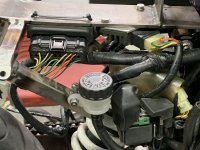
Made my mounts for the electronics. I kept everything close to the original mounting position that way I won't have to cut up the wiring harness. I used a smaller brake reservoir for a better fit under the seat. Also I lowered the position of the grab rail to give it a sleeker look but in doing so It made it wider at the top because the side rails came up at an angle. I bought a 2nd center piece so I could lengthen it to fit. Cut both pieces and welded the 2 longer parts together. I cleaned up the welds and bolted it back together.
Attachments
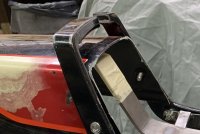
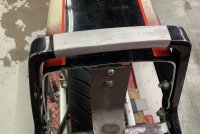
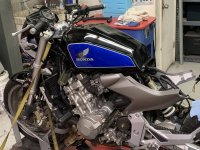
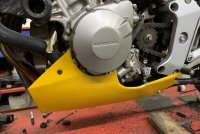
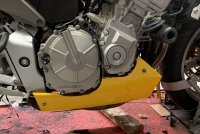
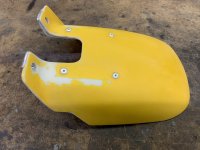
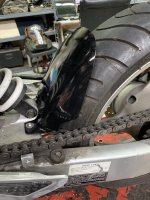
I wanted a small belly pan that fit the shape of the tank and tail. I had a lower fairing lying around off a Chinese pocket bike so I cut and shaped it down to fit. Then made a couple of brackets to hold it in place. Also used a rear hugger fender off a mid-sized pocket bike. I added some support to it and painted it black. I had to tap a couple holes in the swing then mounted it up.
Attachments
JustinLonghorn
No Purple Hearts, No Blue Ribbons
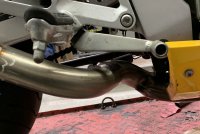
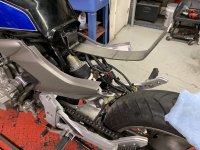
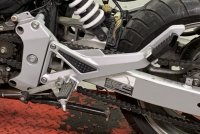
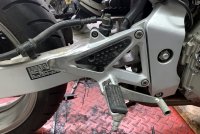
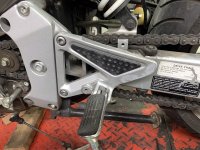
I cut off the passenger pegs. I left a little room on the backside of the right rear set to possibly use as an exhaust mounting point.
Attachments
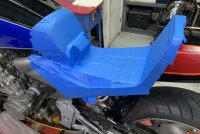
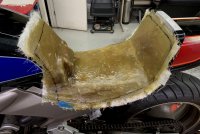
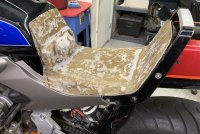
Started on my fiberglass seat base. I taped off everything so I could make a form fit base for the seat. I used a release agent over the tape so it could be removed easily. I then laid down several layers of fiberglass. After trimming it up I set it back in place, fits like a glove. Just need to layer in some seat foam and shape it up.
Attachments
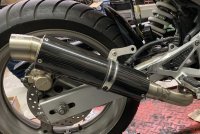
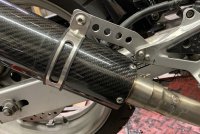
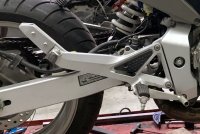
Worked on the exhaust system. The stock system exited through the swingarm and out under the seat. I used a slip on aftermarket carbon pipe that came with the bike. I basically cut the stock pipe under the bike just after the collector. I cut the aftermarket pipe and used the bends to route it out the side and to the muffler. I tack welded it together and made a bracket off the foot peg mount to secure it. I still have to remove the whole system and finish welding it.