We noticed you are blocking ads. DO THE TON only works with community supporters. Most are active members of the site with small businesses. Please consider disabling your ad blocking tool and checking out the businesses that help keep our site up and free.
You are using an out of date browser. It may not display this or other websites correctly.
You should upgrade or use an alternative browser.
You should upgrade or use an alternative browser.
Project CB690 (KTM 690 engine in a CB550f frame)
- Thread starter goodoltup
- Start date
goodoltup
Been Around the Block
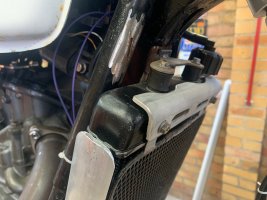
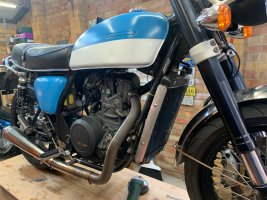
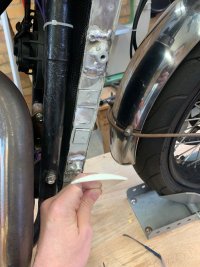
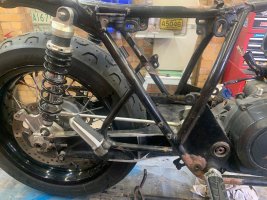
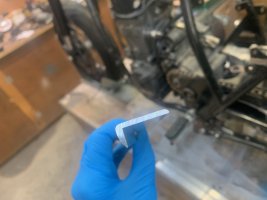
The bike is all back together and ready for a test ride. However the weather is pants so went on to some other projects. The radiator trim needed doing. I got some 38mm wide aluminium that has a curved profile, and just cut and rounded the ends. This will be painted black later. I also got an OEM Suzuki radiator screen and side cover bits in an auction. I had to modify the side cover bits, as they are now top/bottom cover bits. All's good, I'm happy with it. Also need to mount the horn somewhere, and a number of other small tasks. As soon as it stops raining I'll go do a shakedown run and test the shortened swingarm.
Attachments

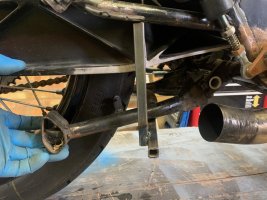
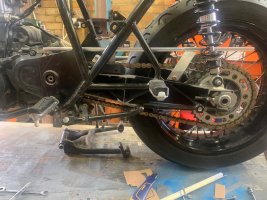
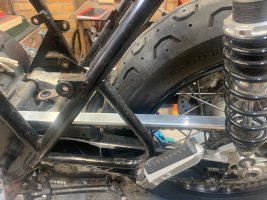
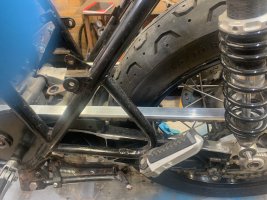
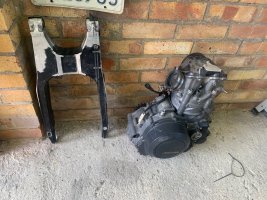
That's a really nice torque arm, but torque arms are best in tension mode. If the load causes it to twist or bend, it can result in a locked up rear brake. The simplest set up is located on a peg in the swingarm, but if it needs a torque arm, it's better to have it in tension.
We had an RS125 racer years ago with a skinny little torque arm (in tension). The early GS 4 cylinder Suzukis used a 3/4" tube in compression, but a large diameter tube can handle more twisting/bending load than a thin rod. The larger the diameter, the greater the load it can carry, so a large diameter tube is stiffer than a small diameter rod.
How as the caliper retained on teh KTM wheel/swingarm combo and can that be replicated.
goodoltup
Been Around the Block
I've decided no more work on this bike over the winter, I need a little break. In the meantime I'm working on my Honda CD175, I've started a new thread over at Honda Twins. Link below.
https://www.hondatwins.net/threads/...ic-start-5-speed-gearbox.138638/#post-1151305
Check it out!
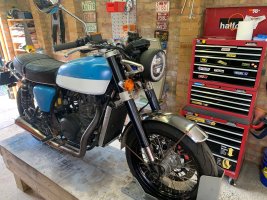
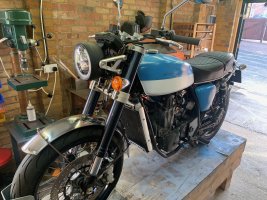
Once the CD175 project is done I'll get back on the CB690 project. For now I will continue to ride it over the summer, and plan a full teardown in the autumn.
https://www.hondatwins.net/threads/...ic-start-5-speed-gearbox.138638/#post-1151305
Check it out!
Once the CD175 project is done I'll get back on the CB690 project. For now I will continue to ride it over the summer, and plan a full teardown in the autumn.
Richard Pitman
New Member
I've been reading your CD175 project with interest, even made a couple of suggestions, under the user name I M Band. This was a dig at Vertical Scope, who banned me for posting links to the new independent Vintage Honda Twins site, where most of us long time Honda Twins members moved to, following disgust at the way VS were / are running the original HT site. It'd be great if you'd look in at us over at VHT, all the old crew are there.
goodoltup
Been Around the Block
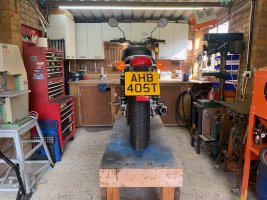
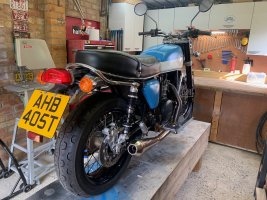
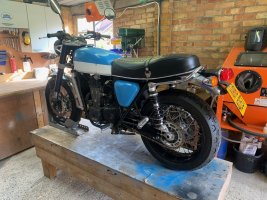
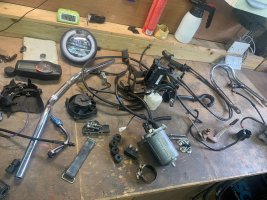
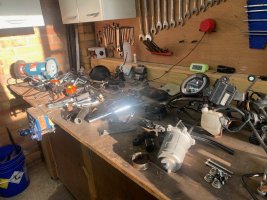
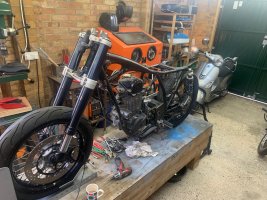
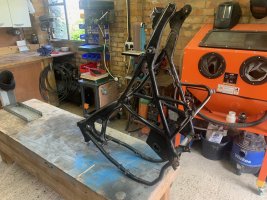
Ok well it's been over a year, it is finally time to do the full teardown. In the past year I've put about 50 miles (at most!) on the machine. I wanted to ride it and get to know it, so when it came time for the teardown I would have a good idea of what needed any fixing/adjusting, but everything has been pretty evident from the beginning.
The plan for the bike is as follows:
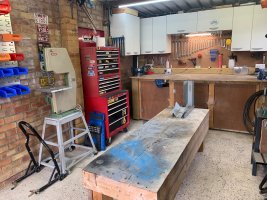
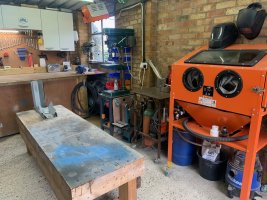
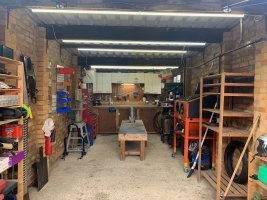
Ok. So here we go. Over the last bank holiday weekend I started. Here is the initial state of the garage and the bike.
The plan for the bike is as follows:
- Address the things that need to be changed while the bike is still assembled.
- Chain guard
- Front computer mount revise
- Horn mount
- Centrestand
- Sidestand switch revise
- Tear the bike down
- Put everything in piles
- Parts to be generally cleaned
- Parts for beadblasting and painting
- Parts to be replaced
- Parts to be modified then cleaned and or painted
- Put everything in piles
- Order all parts needed
- Modify and finish anything else
- Swingarm finish cleanup
- Fully weld the frame. There a lot of m6 nut inserts and mounts and things that need finishing.
- Drop the frame and swingarm off for beadblasting/powdercoat
- Repaint the engine
- Paint the tank/sidecovers/headlight shell
- Finish cleaning, modifying, and painting all parts
- assemble
- Test
- Ride the bike, document with professional pictures, videos, update this blog
- Try and get the bike onto bikeexif or the like
- Sell.
Ok. So here we go. Over the last bank holiday weekend I started. Here is the initial state of the garage and the bike.
Attachments
goodoltup
Been Around the Block
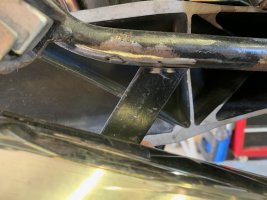
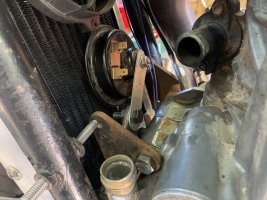
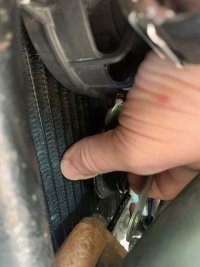
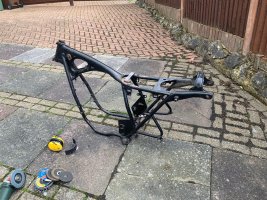
I didn't document all this very well at the time. I mounted the horn by creating a tab off of the front engine mount. Next was the front computer mount. Below is the before picture, the after picture will have to come later! Also I changed the muffler mount. I had only tacked on the mount to the frame, but wanted to change it to a solid mount all the way down to the muffler. Then it will be part of the frame and it will be less visually distracting than a stainless mount.
Attachments
goodoltup
Been Around the Block
Currently the centrestand has no stop, and no spring. They will have to be revised since the new shorter swingarm doesn't allow them to be in their original locations. Below I've just mocked up where the stand will be stowed so when the bike is apart I can make a stop.
I am in the middle of deciding whether I actually want a centrestand at all. It looks a little awkward and it may be a lot of work to go through for something that the future owner may not even want. I will have a think about it.
I am in the middle of deciding whether I actually want a centrestand at all. It looks a little awkward and it may be a lot of work to go through for something that the future owner may not even want. I will have a think about it.
Attachments

goodoltup
Been Around the Block
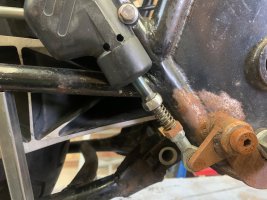
Rear brake return spring. It is a tube that is mounted to the body of the master, and the rod rides inside it. It works really well and is tidy, I'm happy with this. Note how rusty the rear brake got because I neglected to throw a coat of paint on it. I was expecting to do the frame teardown a YEAR ago.
Attachments

goodoltup
Been Around the Block
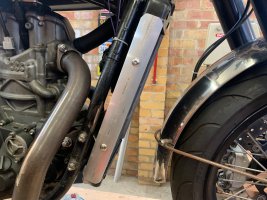
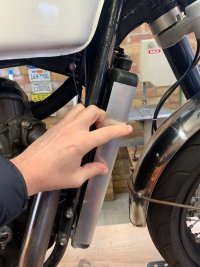
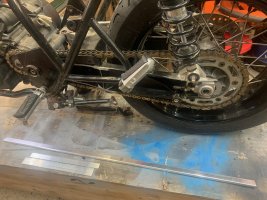
Appreciate your thoughts on this one. I made a chain guard from some aluminium coping. The whole thing will be painted black in the end. I made some brackets but after assembly I could get the chain to touch the guard, so I made some new brackets, and now it seems to sit really high. Does it look weird? Should I make it lower?
Attachments
goodoltup
Been Around the Block

Hard to say about the chain guard until it's in paint, I think.
goodoltup
Been Around the Block
Cheers, I'll go with as it is for now, when the bike is together and painted we'll have another look, can always make shorter brackets later without much trouble.Hard to say about the chain guard until it's in paint, I think.
goodoltup
Been Around the Block
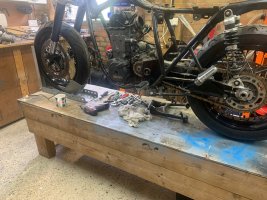
Almost a year between posts!
Where did I leave off? I had just totally disassembled the motorcycle in preparation for frame powdercoating and essentially a total rebuild and refurbish, then I had to go to America for 3 months for work, then a bunch of other stuff happened, then it was winter, and here we are. I completely forgot everything and now I have to remember what it was that I was doing a year ago.
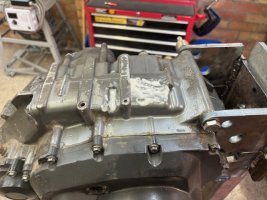
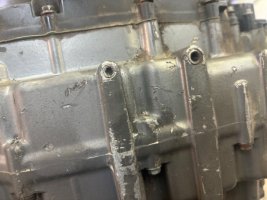
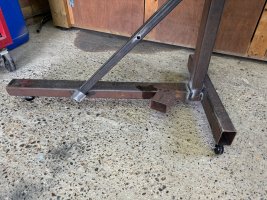
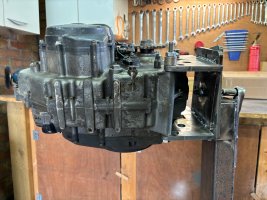
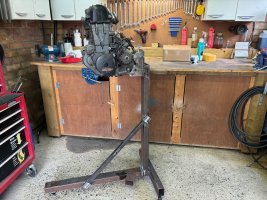
I am considering painting the engine. I am also considering NOT painting the engine. I am considering vapour blasting the covers only, giving them a scotch-bright finish, and leaving the paint on the engine. Either way, the engine will need to be cleaned up, so I made an engine stand out of scrap parts. The rectangular tube was actually previously used on the the frame jig, in the last picture you can see the headstock support. DO NOT look at the welds! I tig tacked everything together, and then MMA welded all the joints for a little practice and to save my argon. It did not go well. But, it works, and is good enough. While I was at it I made the engine rototable.
So next I will clean up the engine, decide on the paint, and execute. Meanwhile, the frame has some last final bits to weld up, then it is off to the powder coater. He will also get a box of parts for bead blasting/vapour blasting. Then the wheels will get new tyres. Then, it should all come together at the same time, and will get built up into a rolling chassis. Then all the other parts get cleaned, refurbished or replaced, and installed on the roller. AND THEN,, the tank paint. Then I will be done.
Where did I leave off? I had just totally disassembled the motorcycle in preparation for frame powdercoating and essentially a total rebuild and refurbish, then I had to go to America for 3 months for work, then a bunch of other stuff happened, then it was winter, and here we are. I completely forgot everything and now I have to remember what it was that I was doing a year ago.
I am considering painting the engine. I am also considering NOT painting the engine. I am considering vapour blasting the covers only, giving them a scotch-bright finish, and leaving the paint on the engine. Either way, the engine will need to be cleaned up, so I made an engine stand out of scrap parts. The rectangular tube was actually previously used on the the frame jig, in the last picture you can see the headstock support. DO NOT look at the welds! I tig tacked everything together, and then MMA welded all the joints for a little practice and to save my argon. It did not go well. But, it works, and is good enough. While I was at it I made the engine rototable.
So next I will clean up the engine, decide on the paint, and execute. Meanwhile, the frame has some last final bits to weld up, then it is off to the powder coater. He will also get a box of parts for bead blasting/vapour blasting. Then the wheels will get new tyres. Then, it should all come together at the same time, and will get built up into a rolling chassis. Then all the other parts get cleaned, refurbished or replaced, and installed on the roller. AND THEN,, the tank paint. Then I will be done.
Attachments
goodoltup
Been Around the Block
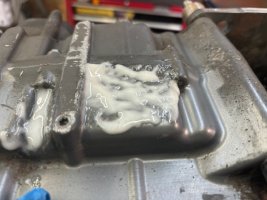
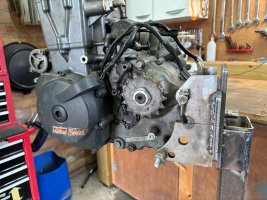
I did some testing with paint stripper just to see if the paint magically came off, it did not. I think it is powder coated because the stripper didn't even touch it. No matter, the determination has been made. I will just clean up the engine the best I can, and vapour blast the covers. I'll probably give them a scotchbrite finish and clear coat them for protection.