Step aside Moto Guzzi...........Yamaha SR250 coming through :-)

Just a quick update. The panels needed a bit of tidying around the edges and fettling to fit in nicely with the modified subframe.

Also got the rear end tail piece cut out and tacked in.
 

Attachments

  • 20210131_162025.jpg
    20210131_162025.jpg
    1,004.7 KB · Views: 182
  • 20210129181338.jpg
    20210129181338.jpg
    362.3 KB · Views: 181
  • 20210129181344.jpg
    20210129181344.jpg
    472.1 KB · Views: 167
  • 20210130154030.jpg
    20210130154030.jpg
    367.6 KB · Views: 168
  • 20210130154043.jpg
    20210130154043.jpg
    273.1 KB · Views: 177
  • 20210130154930.jpg
    20210130154930.jpg
    331.4 KB · Views: 189
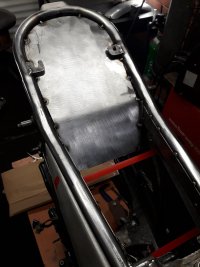
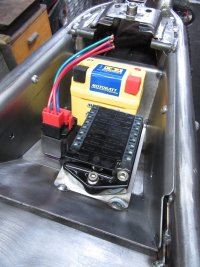
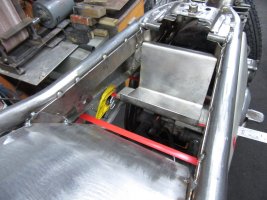
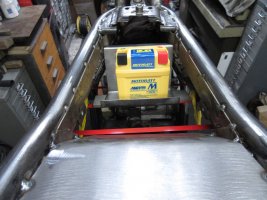
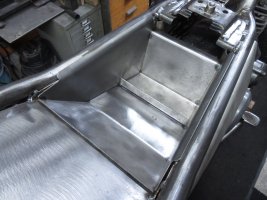
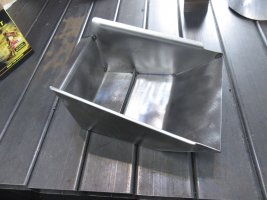
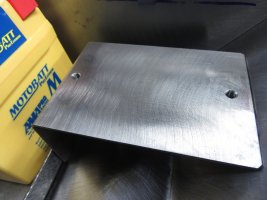
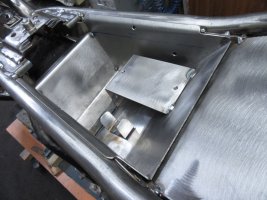
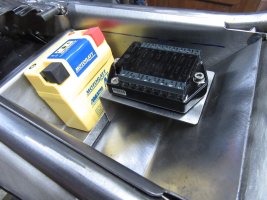
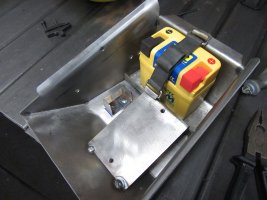
got the battery box designed and tacked together. Going to be using the M-unit I was saving for the Guzzi, but might look at a NUUT unit for that build. Seems a shame not to use it on the little 250. A bit overkill for a basic layout, but they make everything so easy to to install as Ive used them before and makes life so simple
 

Attachments

  • 20210202174839.jpg
    20210202174839.jpg
    512.2 KB · Views: 181
  • 20210201152041.jpg
    20210201152041.jpg
    340.3 KB · Views: 170
  • 20210201152116.jpg
    20210201152116.jpg
    347.7 KB · Views: 176
  • 20210201164305.jpg
    20210201164305.jpg
    476.6 KB · Views: 171
  • 20210201180013.jpg
    20210201180013.jpg
    409.6 KB · Views: 171
  • 20210202141736.jpg
    20210202141736.jpg
    483.3 KB · Views: 173
  • 20210202141840.jpg
    20210202141840.jpg
    429.5 KB · Views: 166
  • 20210202154733.jpg
    20210202154733.jpg
    399.4 KB · Views: 171
  • 20210202174634.jpg
    20210202174634.jpg
    439.3 KB · Views: 172
  • 20210202154901.jpg
    20210202154901.jpg
    403.6 KB · Views: 182
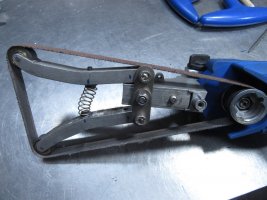
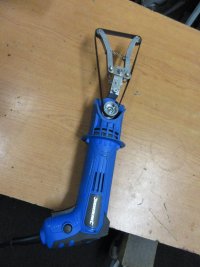
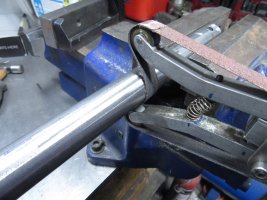
Ive been using my B&D belt file for a few years and its great but is limited when it comes to radius or round objects. So I spotted a job lot of dynabrade fingers on the bay for 99p :D

Set about modifying a cheapo belt file tool to tackle the de-tabbing jobs and exhaust seam welds when the time comes...works a treat !
 

Attachments

  • 20210205153725.jpg
    20210205153725.jpg
    401 KB · Views: 185
  • 20210205124504.jpg
    20210205124504.jpg
    238 KB · Views: 174
  • 20210205152052.jpg
    20210205152052.jpg
    463.2 KB · Views: 185
  • 20210205152056.jpg
    20210205152056.jpg
    460.9 KB · Views: 185
  • 20210205153028.jpg
    20210205153028.jpg
    356.3 KB · Views: 178
  • 20210205153638.jpg
    20210205153638.jpg
    251.4 KB · Views: 181
Back to the battery box.................had to dig out my teeny weeny Eclipse toolmakers clamp for the tabs on the battery strap and weld those in place.

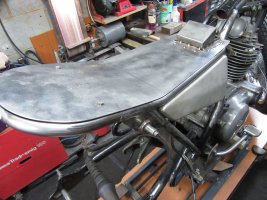
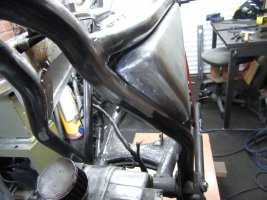
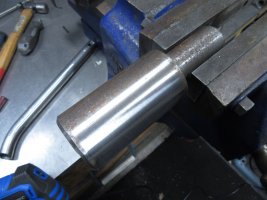
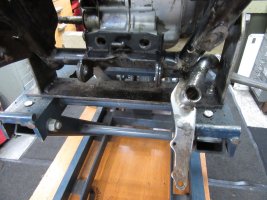
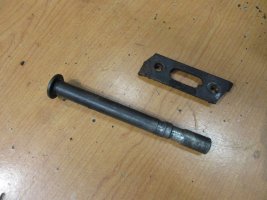
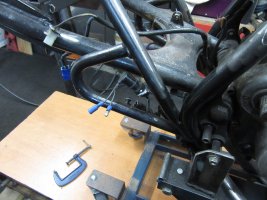
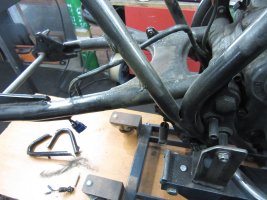
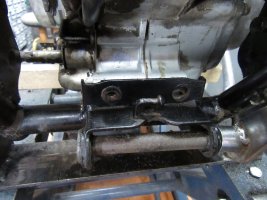
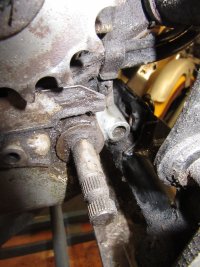
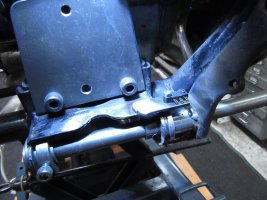
Currently working on the rear brake pedal. it was looking a little tired, so after I clean out all the crud and got to the bottom of it, along with the worn out pivot shaft, I also discovered the bottom engine mount had taken early retirement many years ago :whistle: ................some reverse engineering required!

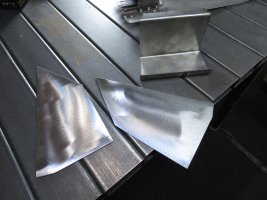
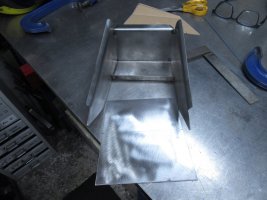
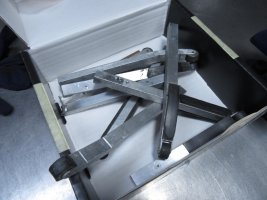
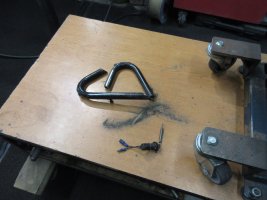
Few extra bits of frame for the scrap bin as well.....
 

Attachments

  • 20210206163835.jpg
    20210206163835.jpg
    353.4 KB · Views: 204
  • 20210206164049.jpg
    20210206164049.jpg
    490.5 KB · Views: 196
  • 20210206160114.jpg
    20210206160114.jpg
    267 KB · Views: 195
  • 20210206160418.jpg
    20210206160418.jpg
    271 KB · Views: 196
  • 20210206160528.jpg
    20210206160528.jpg
    343 KB · Views: 202
  • 20210206161331.jpg
    20210206161331.jpg
    262.5 KB · Views: 195
  • 20210206161334_1.jpg
    20210206161334_1.jpg
    269.2 KB · Views: 190
  • 20210206163133.jpg
    20210206163133.jpg
    264.6 KB · Views: 191
  • 20210206163205.jpg
    20210206163205.jpg
    545.2 KB · Views: 186
Hey man, i definitely drew some inspiration from this build for my own SR, been following for a few months. Can't wait to see it finished.
 
Hey man, i definitely drew some inspiration from this build for my own SR, been following for a few months. Can't wait to see it finished.
No worries, glad its provided some ideas! Thats what custom bike building is all about eh? Should be back on with some progress over the coming autumn winter. Watch this space
 
Righto...............last day of the year. No updates since February .....Ive been busy, honest..................life work etc. just gets in the way as we all know. I'll try and get up to date before February 2022................but Ive got 100's of pics to get through!

I did some work on the bike up until March/April................pics to follow, then recommenced full on build action a bit later this year back in October. Anyway where was I...................working on the brake pedal If I recall?

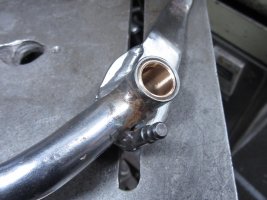
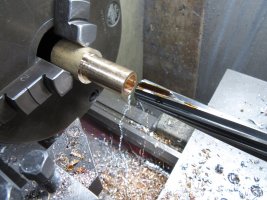
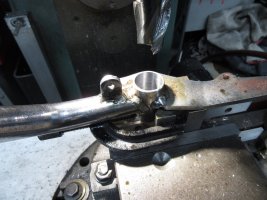
So I made a new spindle/bushes etc.

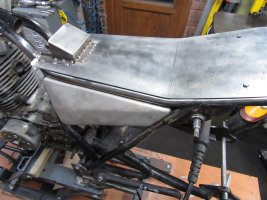
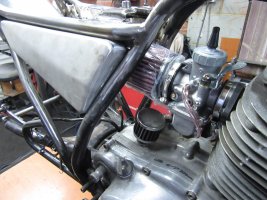
Mounted the rectifier under the motor.

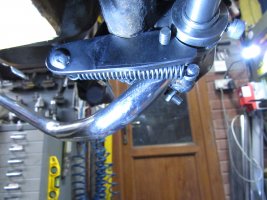
Mounted a micro switch for the rear brake light in place of the OEM switch

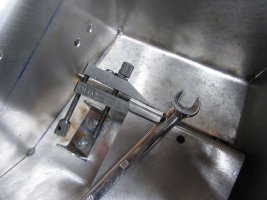
Made some linkage plates and rebushed the pedal pivot.


20210213170203.JPG20210207153120.JPG20210210174203.JPG20210211130542.JPG20210211145701.JPG
 

Attachments

  • 20210213161336.JPG
    20210213161336.JPG
    185.5 KB · Views: 112
  • 20210213145306.JPG
    20210213145306.JPG
    427.4 KB · Views: 117
  • 20210213142003.JPG
    20210213142003.JPG
    429.2 KB · Views: 121
  • 20210212174946.JPG
    20210212174946.JPG
    272.6 KB · Views: 121
  • 20210211175738.JPG
    20210211175738.JPG
    321.6 KB · Views: 118
decided to mount the speedo pickup in the rear drum, to save having extra cables running down the front wheel.

Had to machine the hub to take some neodymium magnets, bush welded onto the brake plate and some machining and measuring.

Bought some YSS alloy shocks for the old girl just to get the back end raised up a tad for the larger rear wheel.

20210219181403.JPG20201212_180845.jpg20201212_180925.jpg20210217161945.JPG20210217164511.JPG20210217165544.JPG20210217165841.JPG20210219181348.JPG
 
Onto the exhaust...........first up, cut off the mounting bracket off the silencer, and polish it back.

Then make a new bracket, and weld that on with my best instagram weld LOL.

Made a new mounting bracket and welded some lugs onto the frame to hold it in place.

20210221180223.JPG20210220143935.JPG20210220150819.JPG20210220160154.JPG20210220171159.JPG20210220172405.JPG20210220172508.JPG20210221161837.JPG20210221171319.JPG20210221175408.JPG
 
jumping around a bit here.....................back to the battery box whilst I waited for the exhaust plumbing to arrive. Got that welded up..

While there I took care of some of the "low spots" in the frame tubes. Welded up and ground back so they wont be too obvious when painted.
20210301152141.JPG20210224170012.JPG20210301145725.JPG20210301145736.JPG20210301145746.JPG20210301150900.JPG20210301150909.JPG
 
Still waiting on the plumbing for the exhaust, I made myself busy repairing the damaged threads in the head and made a new flange.

The plumbing turned up mid machining.

Finished it off with some go faster holes.

20210307150559.JPG20210301153053.JPG20210301153437.JPG20210301153646.JPG20210301171848.JPG20210301174350.JPG20210301180917.JPG20210303_073646.jpg20210306165944.JPG20210306174244.JPG
 
Just a "simple" task of joining one end to the other........which was harder then it looks. For a simple single cylinder system, trying to get it under the pedal was a headache!. Ive done simpler 4 into 1 systems !


20210307150820.JPG20210307160036.JPG20210307160842.JPG20210307161418.JPG20210307170441.JPG20210307175241.JPG20210308142145.JPG20210313170851.JPG20210314144937.JPG20210314144947.JPG
 
much welding, grinding and polishing.............hey presto. One custom exhaust...

20210327181433.JPG20210314155830.JPG20210314170845.JPG20210314174458.JPG20210321162222.JPG20210321173700.JPG20210327175913.JPG20210327175934.JPG20210327181140.JPG20210327181421.JPG
 
Hello
Upper bend 90 degrees.
Lower bend 68 degrees.
At least that's what I am planning to cut ;)
How about your header? :)
 
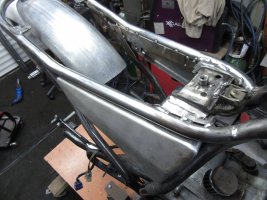
Again, jumping around a bit. The rear mudguard arrived in sorry state having been crushed by the courier, anyway I set about cutting and straightening it, and fitting it, the refitting it, then refitting it again !!........... and made up a number plate holder.
The mudguard turned into another epic job of fettling, fiddling and caressing
!20210321_151600.jpg20210404153043.JPG20210404153239.JPG20210404153300.JPG
 
Onto that random twin leading shoe brake drum hub I got. I needed to make a torque arm for it and attach it to the fork. I started out making one from stainless, but that went south as I forgot to tighten the vice up on the mill, so ended up making an alloy one instead. After the sweat of cutting the 10mm stainless by hand too!!
I had to make up a way of securing it to the hub, so machined a boss which I'll weld in when the time comes.

20210412165450.JPG20210405161955.JPG20210405162752.JPG20210411135159.JPG20210411135223.JPG20210411151524.JPG20210411151607.JPG20210411165314.JPG20210412161129.JPG20210412164306.JPG
 
Back
Top Bottom