Road Rash's Maxim Cafe Build

RoadRash

Coast to Coast
Well, I figured it was about time I put something up here of my build, so here goes:

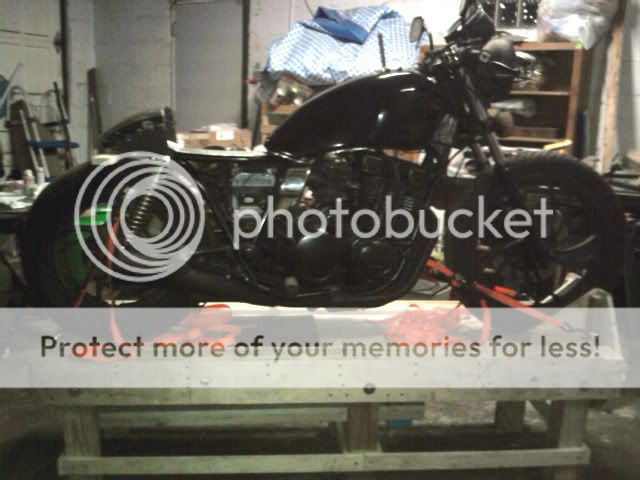
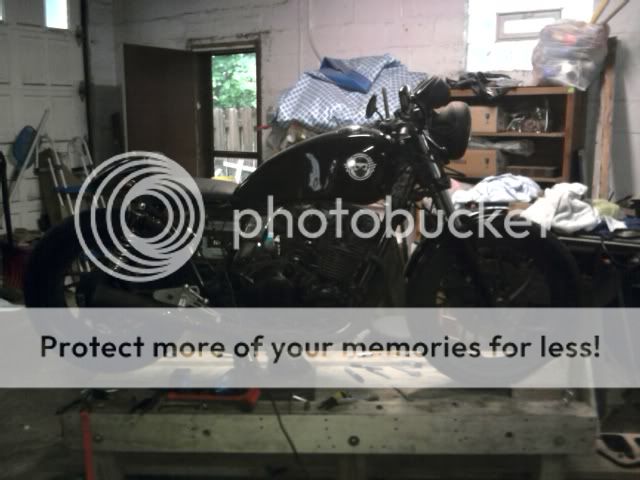
She's a 1982 Yamaha 650 Maxim. The previous owner had begun transforming her into a camouflaged bobber, lowered with rear solid struts. Luckily, she also came with about 2 boxes full of spare parts, as well. Here's a quick video to take you from how I originally acquired her, to where she is, now:


MAXIM CAFE RACER BUILD
 
Thanks. I've been trying to get as much done as possible, without throwing much cash at it. doing alot of reconditioning of parts and whatnot. Waiting on my income tax check, now, to get some new parts like rear sets, new front fork springs and rear shocks, maybe a set of clip-ons, and still trying to decide if I should continue the home-grown route with the seat, or drop some bucks on a nice fiberglass one.
 
One of my rear-to-front wheel conversion kits would fit this build - either a similar vintage XV rear wheel (8" drum OD) or a XJ rear wheel (8.75" drum OD). Look up my cafe XV750 thread for details and let me know if you're interested.
 
I think I already have my wheel situation planned out. Got a rear SECA rim sitting there, that I'll be adding to the back once I get a new tire for her.
 
Wow Jim, it looks great, you would have never known the tank was damaged by the looks of it now. That tank and seat combo is looking really good on your bike man. I can't wait to see more. Great video too. I'm so glad you were able to save the tank. I guess i better get to work on mine soon and post updates as well. :D
 
hehe! Glad you saw it and dug it. I wasn't gonna give up so easily on her, and figured I could bring her back.

Only thing I have to do now, after finishing her, is figure out how to address the liner. You used Kreem on her, right? At least that's what it appears to me. I have to imagine that the liner is mangled on the inside of the dent area, seeing as I was running a push bar through the filler hole. I'm forming an attack plan in my head of masking off the entire outside of her with plastic, to protect the finish, sealing off the holes and sloshing MEK around for a bit to disolve the liner, then flush her out. The masking seems crucial, since I've heard of some guys screwing up their finish, merely from the FUMES of that stuff! In hindsight, I shoulda cleaned her first, before I started refinishing, but I didn't want to leave any of the outside area down to bare metal for too long.

Can't wait to see more pics of your bike!
 
I did not use kreem, but the previous owner of my bike did. There's gotta be some product out there that helps remove that stuff. As long as you tape and use a bag to cover the outside of the tank to avoid damage when using the solvant to remove the kreem, you should be fine. I've been too busy to work on my bike. But the first thing I am doing is relocating the mounting bracket on the tank. Mine too was a bit too far back. lol
 
Oh no, your tank, too? Yikes. Yeah, I intend to cover it much like you said, and use MEK to break it down and remove it. MEK is some nasty shit, so I'm gonna try to do it, outside, once things warm back up a bit.
 
Re: Road Rash's Maxim Cafe Build - Quick Update

Been trying to both build my table top AND work on the bike. Got the table top done and got some updates on the bike:

Swapped out the black clubmans for a set of chrome clip-ons, which allowed me to lower the trees over the forks further. Parts company screwed up on my shock order and sent me the wrong length, so I'm still waiting on those so I can raise the ass a bit. Got the tank mounted and am working on some custom side emblems for it in Photoshop, plus I'm in process of fabbing the rear cowl.

Here she is, as she sits, now, on the table:

0312112023.jpg
 
Re: Road Rash's Maxim Cafe Build Update - Rear Sets

Got around to installing my rear sets from Durgam_K. Quality stuff. Took a lot of trial and error to get them in the ideal spot, and ultimately had to ditch my idea of using a factory frame hole and go with the custom mounting plates I made:

195994_1624888071065_1502409307_31242796_1250014_n.jpg

190404_1624887951062_1502409307_31242795_5882824_n.jpg

If you look at the pics, you'll see I modded the factory shift and brake levers, and made them part of the new linkage set up. This still allowed me to use the factory rear linkage and brake switch. Right now, I also have the factory return spring in the mix, which makes the new lever set up a bit stiff. If it proves to be TOO stiff, I'll come up with an alternative spring return idea, but, so far, it feels like it'll work fine, and the shorter throw makes fora faster-reacting rear brake.
 
Figured I'd post some pic updates. Not big on frequent updates. Much rather spend that time, getting the bike on the road! ;)


Side Shot on my bike table:

0517111821.jpg


Rear lights:

0517111805.jpg


Tank emblem I designed in Photoshop and sent off to an online decal printhouse. side note: This was the side of the tank that was bashed in by some neanderthal luggage handler during it's trip from Raleigh NC to here in Pittsburgh:

0517111807b.jpg


Not too ,long now, and I should have her on the road, provided this damn weather ever behaves!!
 
It's looking really good Jim. Just amazing, that rear seat looks da bomb. I also like what you did witht the front fender. It came out just right. How did you get your rear brake issue solved, did you weld a stopper for the pedal not to go back up too much?
 
Thanks! Appreciate the kind words. I'm about to work on the rear brake issue. Seems I hacked the stock lever too short, so that the geometry is off a bit and the shortness is taking away some much needed leverage. Just got my replacement stock lever in the mail, today, so hopefully, I can jump on it, this weekend, and get it fixed.

How's your bike coming along? I want pics! hehe!
 
Jim,
I've been so busy with work that I have not had a chance to even look at my Seca in a while. When i get to it, you'll be the first to know. LOL

One suggestion if you don't mind. Lower that headlight 2 or 3 inches and the bike will look mean as ever.
 
Back
Top Bottom