Little Italian Goose - Moto Guzzi V50 Cafe Racer

remfanuk

New Member
Hi guys from the UK!

After lurking about on the forum as a guest I have finally registered and thought I would share the trials and tribulations of the build that me and my dad are undertaking. Neither of us have ever done anything like this before even though we had discussed it in the past...it took the passing of my mum last year for us to do the father/son bonding thing.

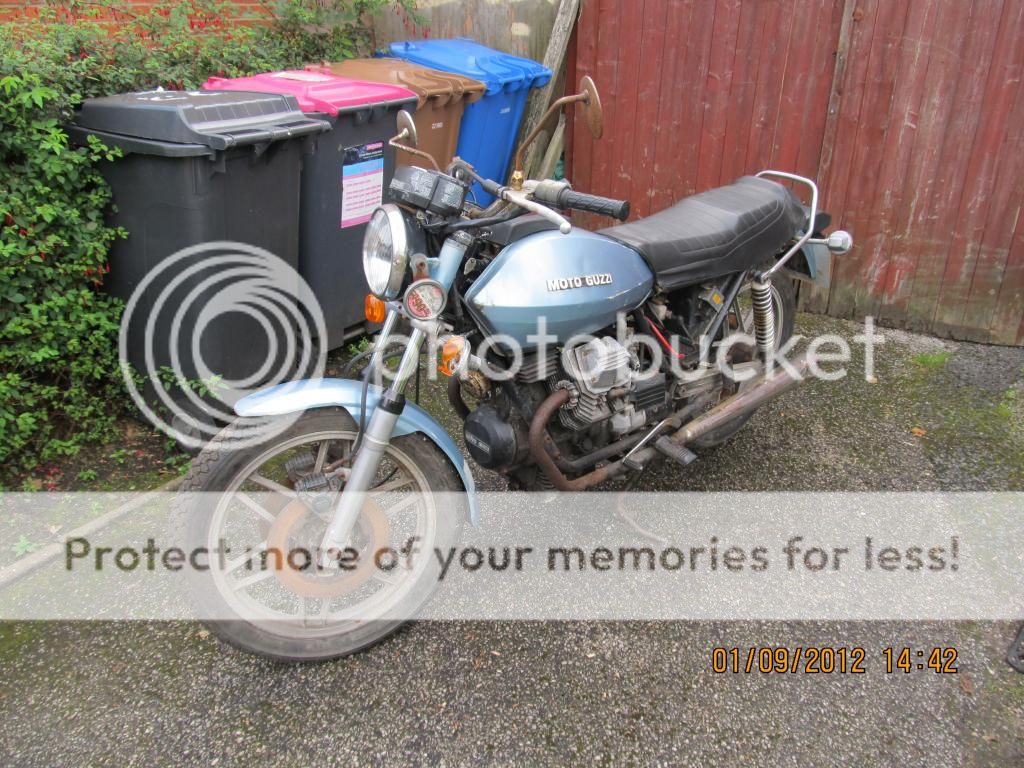
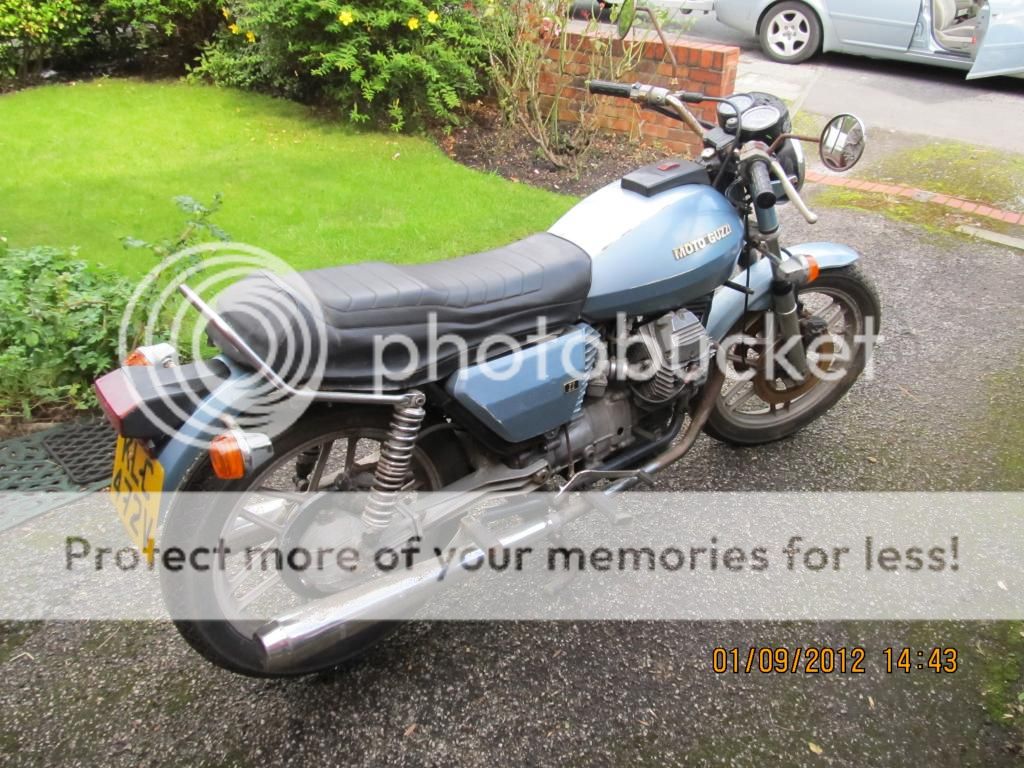
I have had a number of bikes in the past...FireBlade, Kawasaki Z250, Ducati 900SS and Ducati 748...the Italian exotica is where it's at for me so after a very short ebay search a 1979 Moto Guzzi was located a couple of hundred miles from me. It had been standing for at least 7 years, was a non-runner but was a good base on which to learn and cobble together something that resembled the image in my mind.


I bought this in September 2012 and within a few weeks it was dismantled, everything labelled and put in boxes and tins ready for the re-assemble.


The frame was straight and had no rust which was all good. The engine, although not able to be started, moved freely enough. I turned the engine by hand with a wrench on the crank...the pistons moved up and down and there was no scoring on the bores. The plan at this time was to renew the top end and replace gaskets and bearings throughout the engine.


Due to work sending me back to University from October 2012 to June 2013 not much was accomplished on the bike other than some lovely powdercoating.


Following me ruining the petrol tank by taking off too much metal than was really needed, I looked around for another tank and found one attached to a really nice V50 that had lots...and i mean LOTS of new parts on it. This one was a runner and had the best part of £2000 ($3150) worth of new parts on it which i paid £650 ($1022) for! Things that were new or recently replaced in the last year or so...stainless steel exhaust system; all brake calipers fitted with new seals, pistons, pad; digital electronic ignition system; new tyres; new carbs; brake master cylinder x 2; reground and rechromed forks and lots of original parts that were in great condition that I could sell to make some money back. We would have been daft not to have bought it. However, that did mean that the total budget of £2000 ($3150) was almost gone.


Now I was well on my way to having 2 Moto Guzzi V50's in lots more tins and boxes!

One or two photos are a little shaky...sorry.


Here is the digital electronic ignition system by Sachse Elektronik...


...and the other end that attachs to the alternator...


...back to the original bike. Breaking the bike down was straight forward even for someone with very little experience like me. However, we did hit a snag when taking the timing chest off one of the columns snapped which we had to get drilled out and a Helicoil fitted...


But of course, I had another bike sat there with lots of useable parts so the partly disassembled engine was put back together in favour of using the 'donor' bike's engine that I knew worked. Obviously this would mean that engine and frame numbers would not match but seeing as this was not a faithful restoration job I thought this didn't matter.

So various parts have been cleaned up and sprayed, such as the rear drive...


...swingarm was attacked with Nitromors and then sprayed Satin Black to match the frame powdercoat...


The engine, which I knew to be working as I had ridden the bike around briefly, was cleaned and had already been painted to a reasonable standard by the previous owner. It was mainly just surface muck and grime and came off easily with carb cleaner.


as you can see, the stock airbox has been removed for cone filters which saved me a job. The previous owner put brand new carbs on it but could only get two right hand ones so they are slightly more tilted towards each other than they otherwise would be. To be honest if he hadn't of told me I would have been none the wiser!


New bolts for the timing chest and alternator cover were put on and the whole thing looks much smarter...


The Brembo calipers had been given new pistons and pads by the previous owner but looked scabby. So I dismantled them and gave them a new lease of life with new banjos, pins and pad retainers...


I also sprayed the disc rotor centres with VHT primer and then Satin Black. As these need to be cured and the bike was not in a running state, they went in the oven for an hour at 200F...this was not as anxiety inducing as I imagined.


I am really pleased with how they have come out.
 
While you have it in bits I would recommend that you check the bolts holding the ring gear to the hub in the final drive. I had one of these and one of the bolts came out at 85mph - that was no fun at all. It destroyed the casing and dumped oil on the tyre after briefly locking up the rear drive. I have heard of this on at least two other V50's.
Justin
 

Attachments

  • Sting!nTheTailAvatar.jpg
    Sting!nTheTailAvatar.jpg
    2.9 KB · Views: 1,645
My dad managed to get the bottom yoke polished up nicely and the original head bearing cups were very useable and looked fine. I did consider the conversion to a taper roller head bearing but couldn't justify the outlay (£140; $220) considering how I felt the simple ball bearing type was going to last just fine.


I did however order some nice parts...

a set of lovely clipons that would mount on the fork stanchion rather than the clamp above the top yoke...


and some equally nice shortened headlight brackets that would allow the clipons to be mounted under the top yoke...


StingInTheTail said:
While you have it in bits I would recommend that you check the bolts holding the ring gear to the hub in the final drive. I had one of these and one of the bolts came out at 85mph - that was no fun at all. It destroyed the casing and dumped oil on the tyre after briefly locking up the rear drive. I have heard of this on at least two other V50's.
Justin

Thanks for the heads up Justin! I imagine that to be no fun at any time let alone at 85mph :eek: 
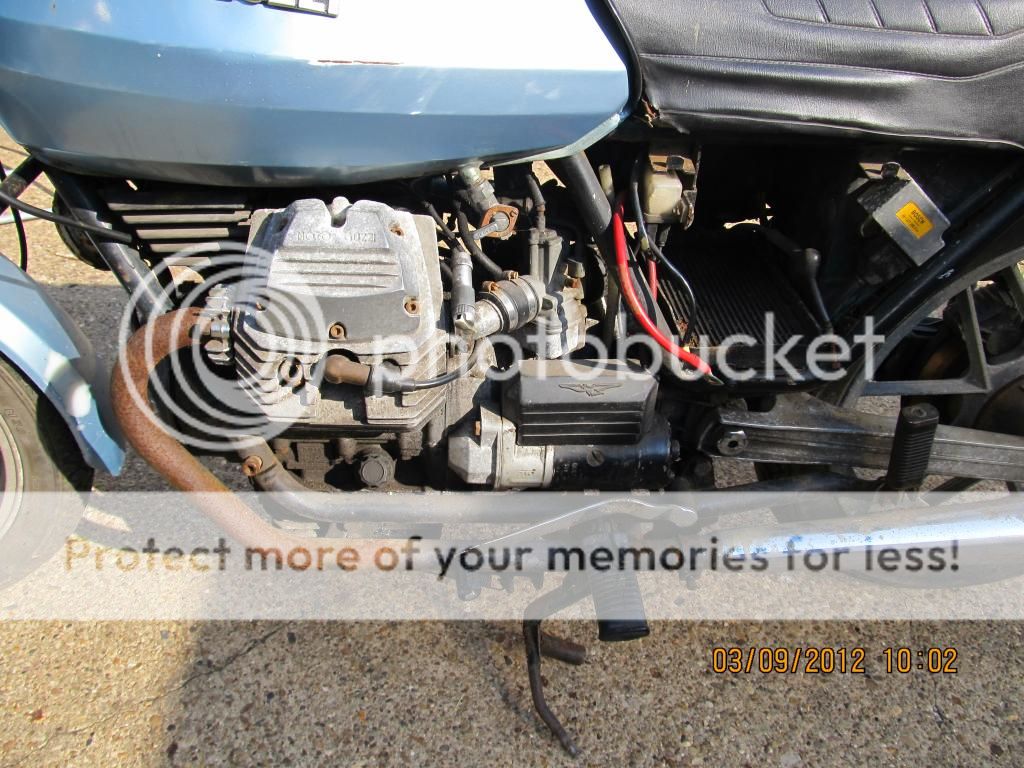
I shall take an extra special close look at that before reassembly.
 
I noticed that whilst the engine that is going into the powdercoated frame was sat on its little stand that there was a small puddle of oil under it but there was no oil coming from the sump or any rotten gasket. So when I cleaned the engine up I had noticed that there seemed to be some oil around the crankcase breather pipe which was a little loose...so I undid it and thats when the bolt sheared!


leaving much of it in the sump! Fearing that this was going to require it to be drilled out by a pillar drill and the engine completely dismantled my heart sank. I did however have a stud extractor kit that I had used on a snapped Brembo bleed nipple on the rear brake caliper...apparently the 6mm ones snap regularly and are re-drilled to accept an 8mm nipple....without success. Thankfully because the bolt was hollow we were able to get a 6mm stud extractor in there and it came out without much problem...


a new breather is on order!
 
The starter motor and rear brake master cylinder were next for some brightening up. I am not sure what colour the bike is going to ultimately be...possibly black but also I have considered a shade similar to the green of the racing Otto (Google it!)...


...Metallic Burnt Copper! 8)


I imagine they won't be to everyone's taste, but will lift what might be a bike that is mainly black, stainless, chrome....so just wanted a couple of bits to stand out.
 
So...that's now all up to date. The next job is to put the nicely cleaned engine into my powdercoated lower frame rails which I am going to attempt this weekend...hopefully. I also hope to mount the lower yoke, stem, bearings and top yoke in the powdercoated frame this weekend too.

Then it will be a case of transferring the wiring to the frame that I am using before assembling the front and rear ends and mounting them. The big question will then be about what seat unit I shall be using; how to put a Monza petrol cap on the tank (there is a hinge mount so hoping to use that); and how to hide the wiring. any ideas/tips/hints appreciated.

Also, I should like to not have side panels but not sure how to hide the battery. It has a good quality gel type battery that I want to keep and don't want to go down the route of using Li-on batteries...it's too big to be hidden in a seat unit or Manx hump for instance. I have seen some other types of Guzzi's where the battery is mounted in the same area but much lower so that it hangs down almost as low as the sump, but cannot see how that has been achieved with the swingarm there. Any help or advice on this conundrum would be appreciated. thanks. ;)
 
Moved on a little since my last post...the engine is in the frame, the headbearings have been swapped and the forks placed in the yokes for alignment purposes for now. However, I couldn't help but mount the clipons and headlight brackets, with the headlight and now it is looking like a motorbike again.


All this went well, with a little bit of filing and sanding required where there was overspray of powdercoat.

Next on was the swingarm, again without much difficulty. Putting the bevel box on I forgot to put the brake disc on, so off it all came again and the disc was mounted.


Getting the bevel box mounted onto the wheel was ok when the wheel was on the floor, but mounting the wheel with the bevel box mounted to it onto the swingarm and lining up the driveshaft splines proved extremely difficult. So the the bevel box was mounted and the wheel offered up to it. At this it was noted that we (my dad and I) had not put the spacer inbetween the wheel bearings, so had to punch one out with minimal damage and put the spacer in.

It was difficult to keep all the cush drive rubbers in place whilst lining the wheel up, but after a bit of a struggle the wheel was manhandled and attached to the bevel box and the wheel spindle inserted.


Brake discs have also been mounted on the front wheel...and yet again I will need to pull a bearing out and put the spacer back in :mad:

The next big job will be to get the bike to a lower level before adding more weight and the put the forks back together with oil in them, before putting the wheel and shortened mudguard on. Then it will be the likely nightmare that is the wiring.
 

Not a Guzzi expert but most starters are grounded through the mount to the engine case. Painting the nose and mounting ears insulated that. Make sure you have good, solid, clean, metal to metal, (no paint) mounting surface and it will save you electrical headaches in the future.
 
Hi Steve

The brake system will be put back on soon and I have decided to keep the linked brakes. I did think about de-linking them as it's not a system I am used to, but I have heard such good things about it that I am at least going to give it a try.
 
Back
Top Bottom