peteGSX
Zuk's Rock!
Re: 1949? Ducati Cucciolo T2 - The clean up and dismantling continues
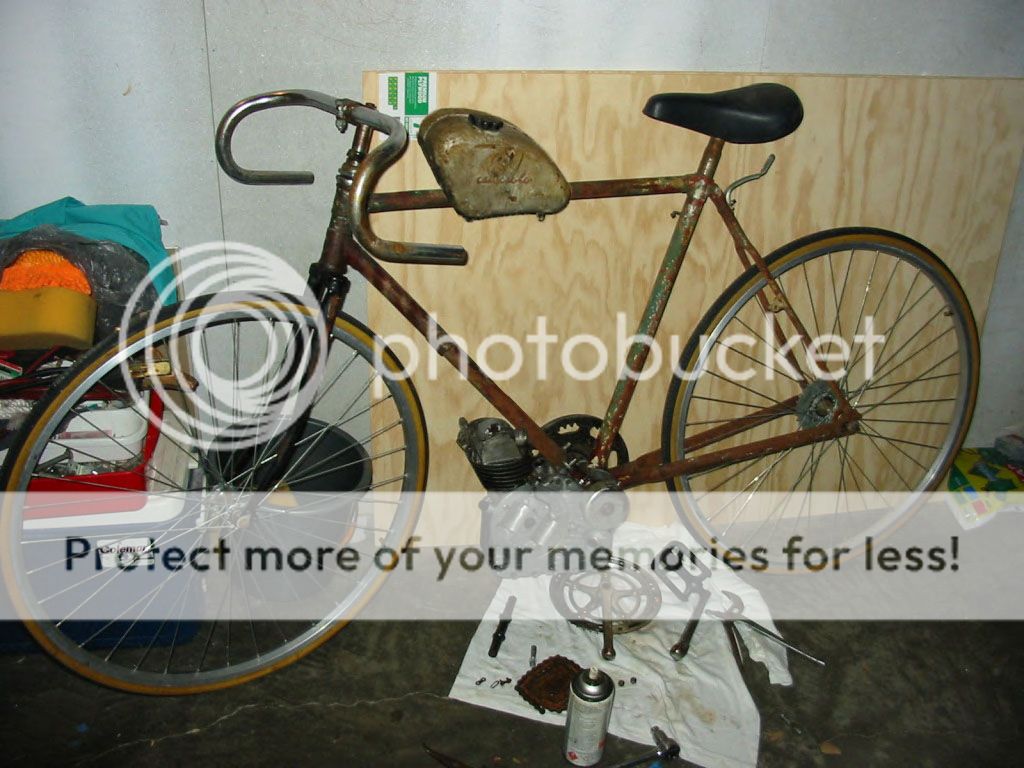
Ok, pic's have uploaded... anyway first up I called the guy about the Malvern Star today and I have Wednesday off and I should be able to pick it up then. Can't wait to get it in the garage...
I'm giving the crankshaft to my house mate to take to the mechanic next to his work to see if he has any bright ideas on removing the sprocket and bearings as I can't see any way I'd be able to do it with the lack of tools I have.
And tonight I started on the last remaining bit to disassemble; the carb.


There's grit in everything as expected and the butterfly didn't really want to move at all, so it needs a huge clean and will definitely need the Yamalube carb cleaner treatment later on before it goes back together.
No rubber intake boots here, it's attached via a metal pipe:

And that's what passes for an intake filter... no foam or anything, just a perforated metal plate:

Bit grungy under there:

There's a good diagram for reference in the workshop manual which helps:

The float looks in good shape:

The screen on the float valve is clogged with crud and I haven't been able to get it off yet:

Here's the state of the mixture screw, and all the jets were in about the same condition:

Definitely need to get some more Yamalube carb cleaner!
Sat everything in container for the moment after a good go over with the kero, they can stay in there until it's time for the carb cleaner:

The kero clean and shooting some DWF down the butterfly shaft freed it up and it now opens and springs closed quite nicely which is a relief.
I'm getting really excited now... time to start properly cleaning up the cases and so forth and sourcing the few spare parts I need ready for reassembly.
As per my comments with Joeyputt over in his Bridgestone restoration thread I'll be having a go with walnut shell blasting on the cases and other external stuff.
I figure I should be able to make myself a little blasting cabinet with a blasting kit from Supercheap for around the $50 mark.
Ok, pic's have uploaded... anyway first up I called the guy about the Malvern Star today and I have Wednesday off and I should be able to pick it up then. Can't wait to get it in the garage...
I'm giving the crankshaft to my house mate to take to the mechanic next to his work to see if he has any bright ideas on removing the sprocket and bearings as I can't see any way I'd be able to do it with the lack of tools I have.
And tonight I started on the last remaining bit to disassemble; the carb.
There's grit in everything as expected and the butterfly didn't really want to move at all, so it needs a huge clean and will definitely need the Yamalube carb cleaner treatment later on before it goes back together.
No rubber intake boots here, it's attached via a metal pipe:
And that's what passes for an intake filter... no foam or anything, just a perforated metal plate:
Bit grungy under there:
There's a good diagram for reference in the workshop manual which helps:
The float looks in good shape:
The screen on the float valve is clogged with crud and I haven't been able to get it off yet:
Here's the state of the mixture screw, and all the jets were in about the same condition:
Definitely need to get some more Yamalube carb cleaner!
Sat everything in container for the moment after a good go over with the kero, they can stay in there until it's time for the carb cleaner:
The kero clean and shooting some DWF down the butterfly shaft freed it up and it now opens and springs closed quite nicely which is a relief.
I'm getting really excited now... time to start properly cleaning up the cases and so forth and sourcing the few spare parts I need ready for reassembly.
As per my comments with Joeyputt over in his Bridgestone restoration thread I'll be having a go with walnut shell blasting on the cases and other external stuff.
I figure I should be able to make myself a little blasting cabinet with a blasting kit from Supercheap for around the $50 mark.