Here's a little project log (so far)...
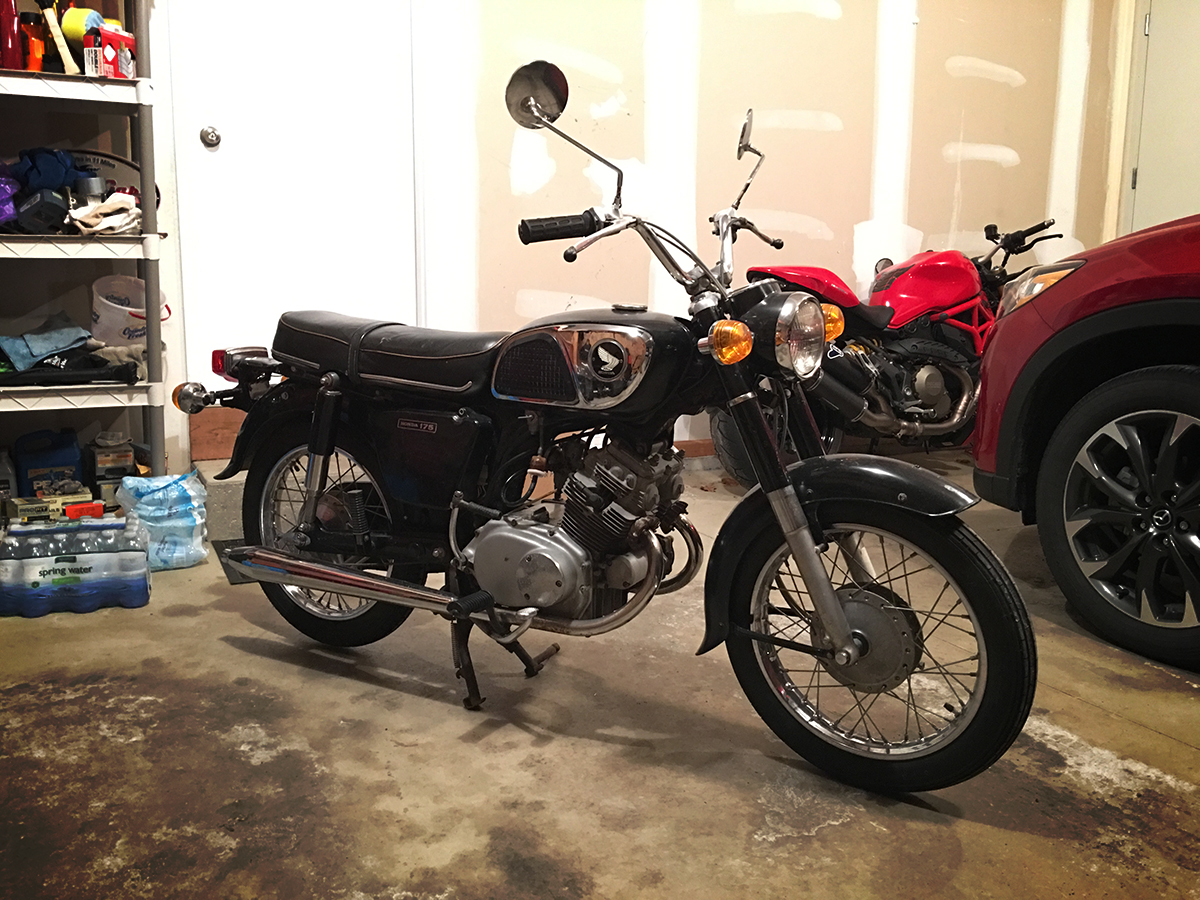
Alright, so I've been taking a lot of pictures. It's easier to take pictures sometimes than it is to prop up a camera and take video (and then edit video), so this is going to be a split forum thread + YouTube video series in regards to the restoration / customization of my 1969 Honda CD175.
If you want to see the first filmed video in the series, and an intro to the bike, it's here:
https://www.youtube.com/watch?v=Dm3XaddxXpY
-----------
This is the bike when I got it home. This is basically where the video starts...
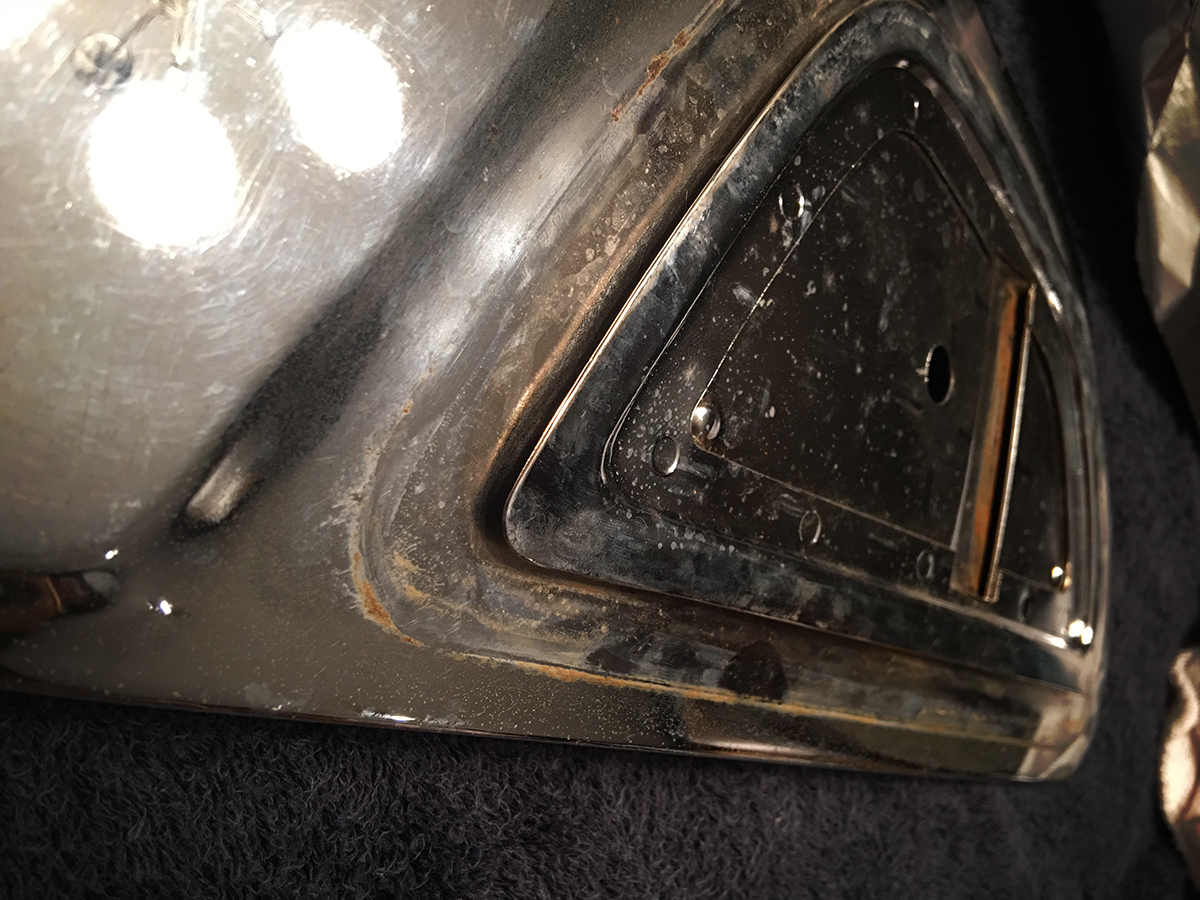
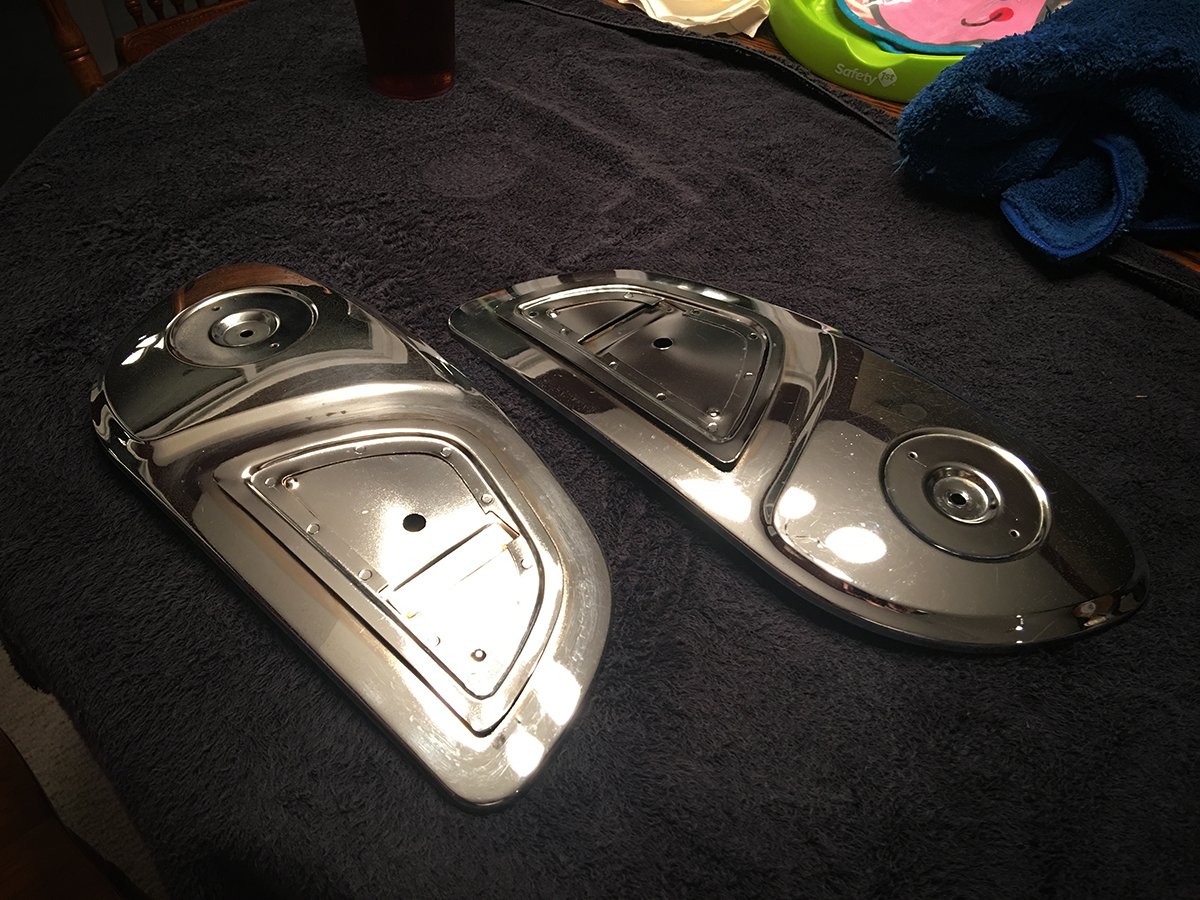
First thing I brought inside after the disassemble in the video were the sides of the tank. These are obviously very prominent and I wanted to make sure I could clean them up well.
I tried the "aluminum foil and water" trick, and that got almost everything off. I then hit them up with some chrome polish and they look pretty good now.
I"m not sure if I'm going to get them re-chromed or not, since they do have some pitting and some scratches that I wasn't able to get rid of.
Before:
After:
That was night 1. Night 2 I removed the front wheel and brought that in.
I bought one of those Powerball Minis and some Mothers aluminum polish, and decided to go to town with that. It did a really good job.
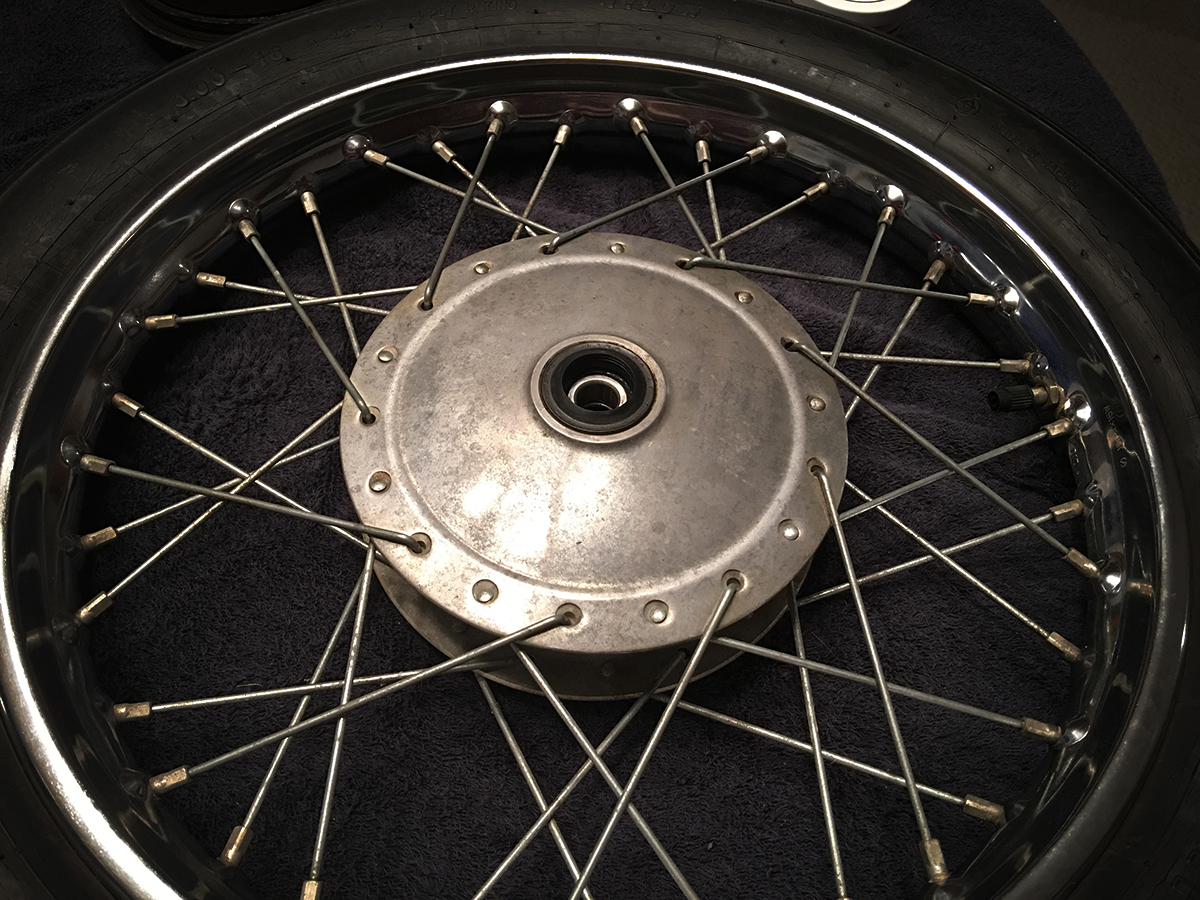
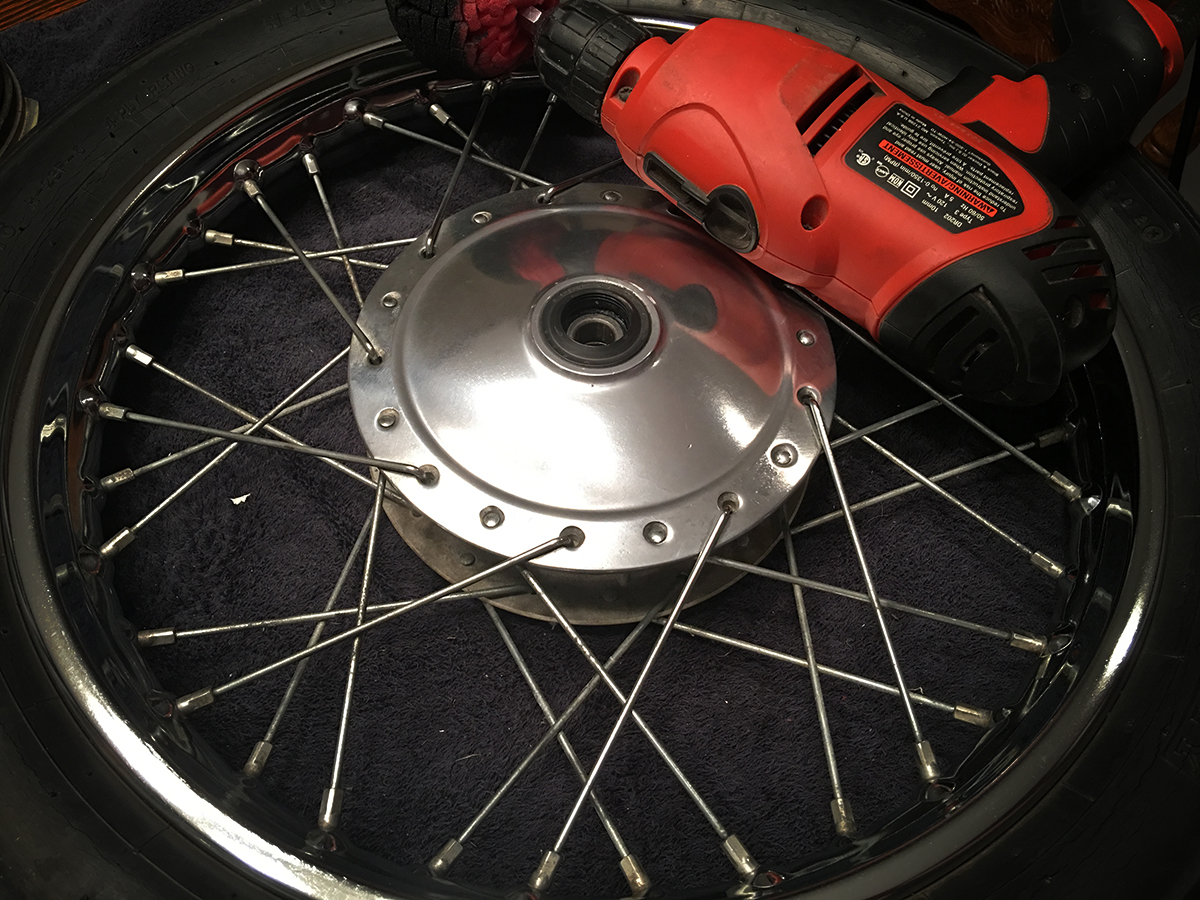
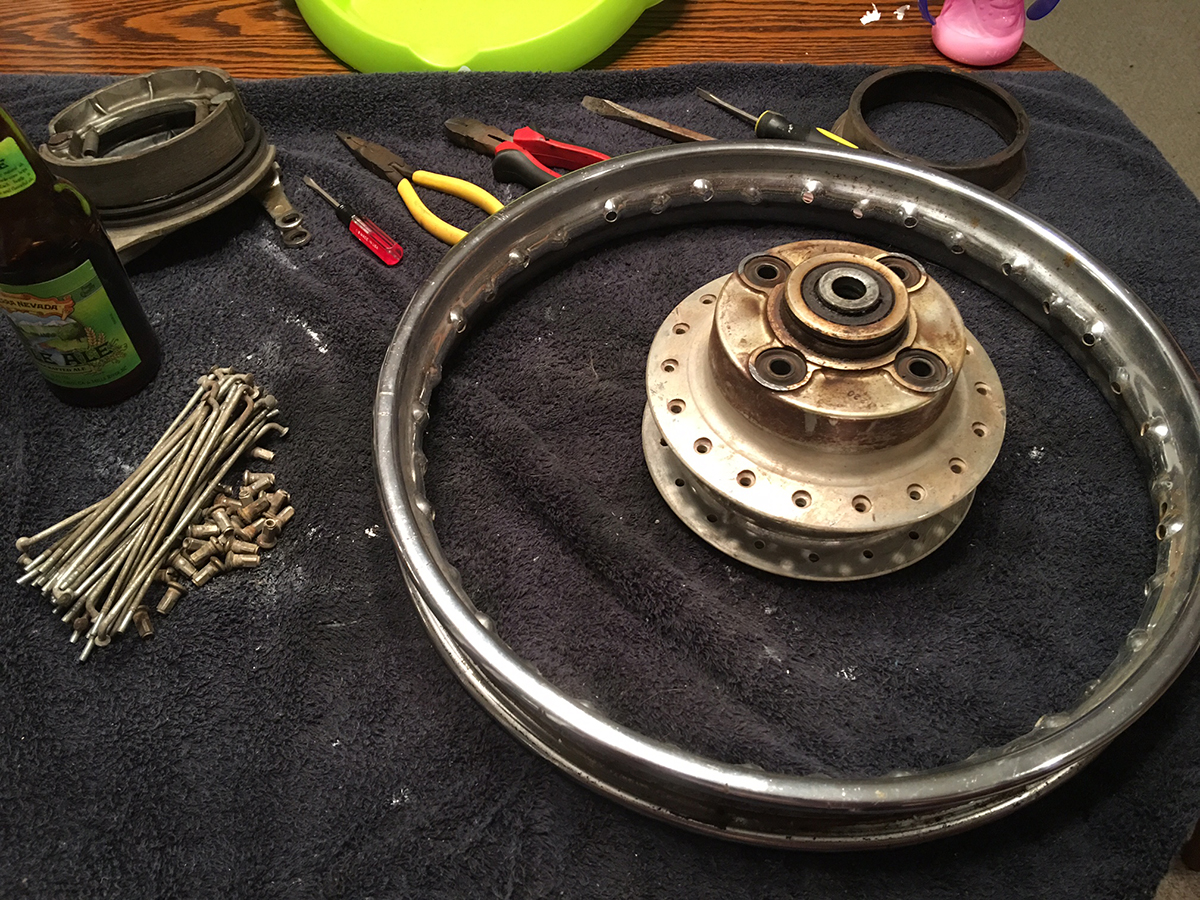
I didn't like all of the areas of the hub that I couldn't reach with the spokes on, and my front tire needed to be replaced anyway (it was the original and was cracking all over), so I just decided to disassemble the whole wheel so I could clean everything properly. Wasn't too bad of a job.
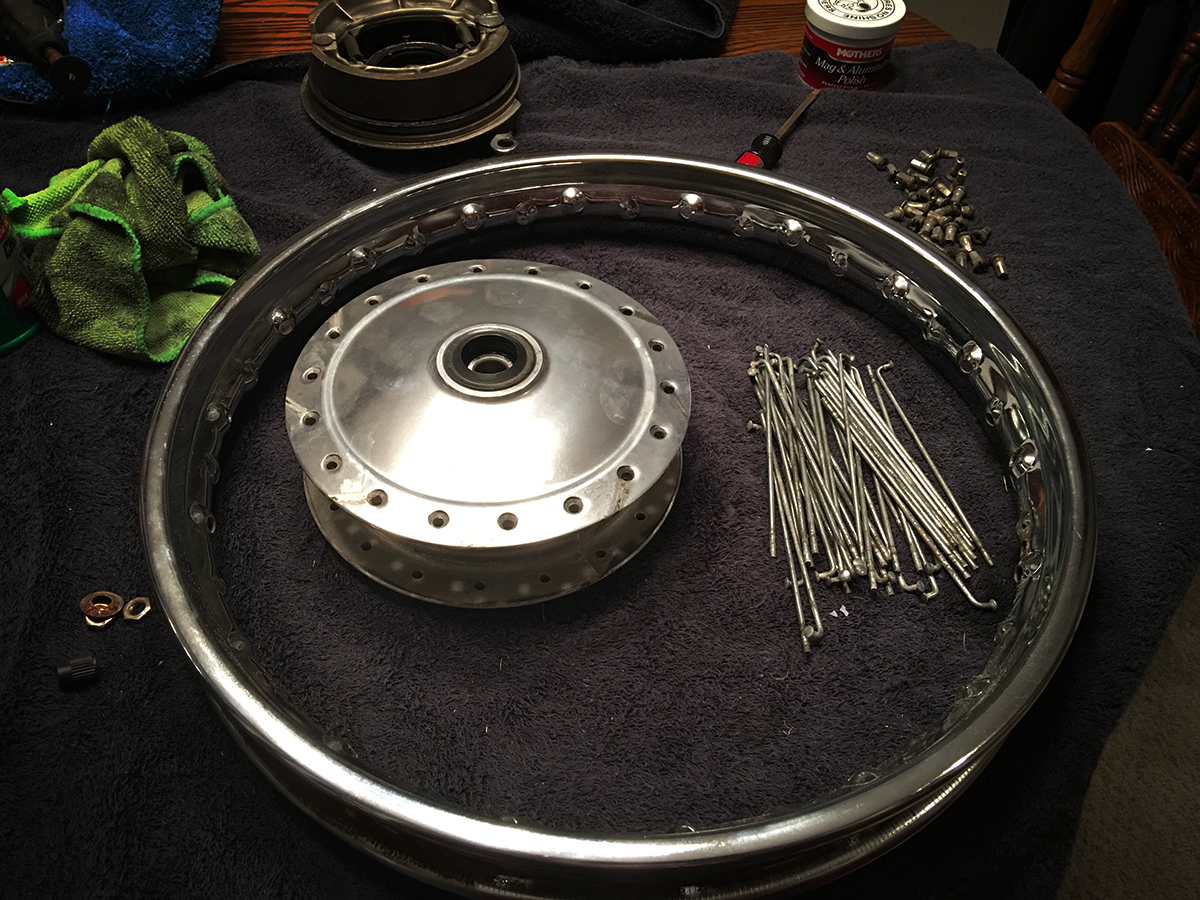
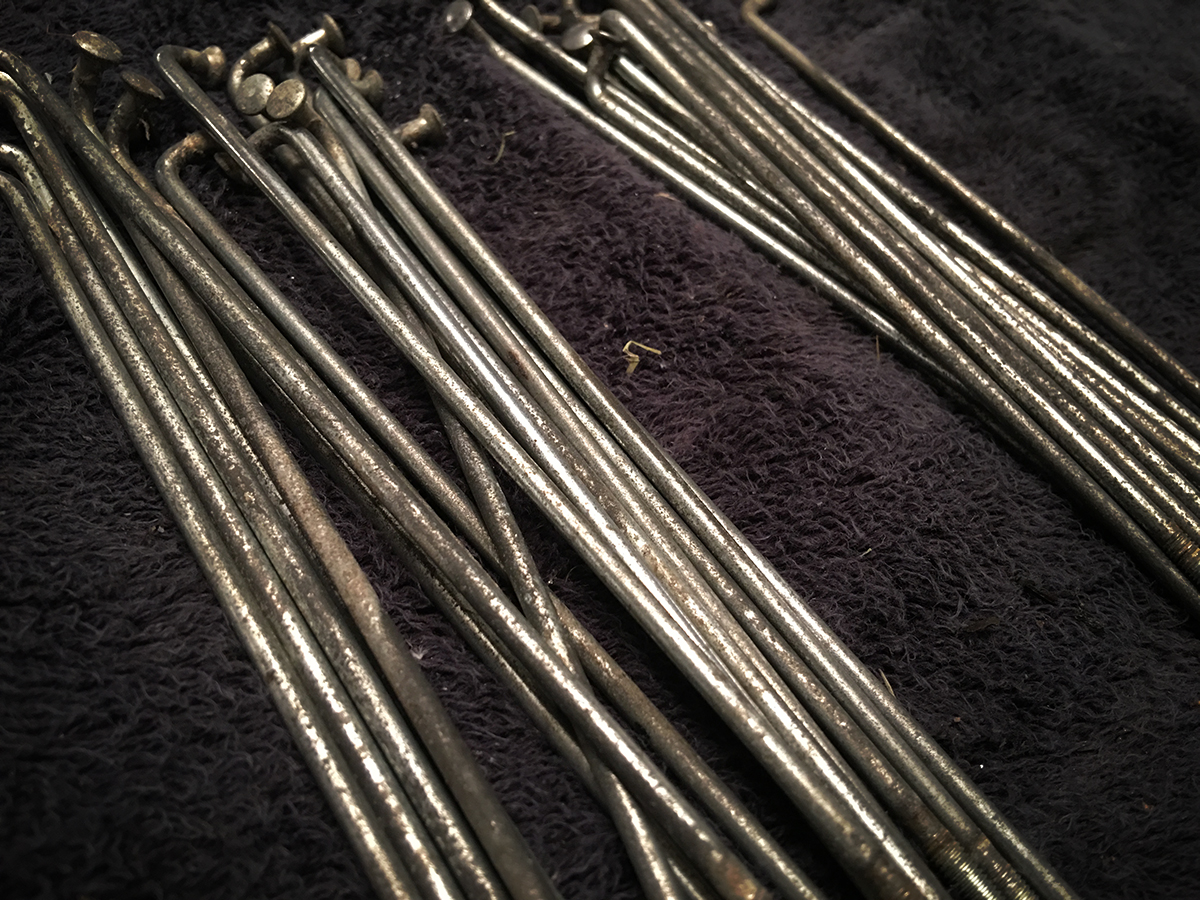
All of the spokes came off easily and aren't rusted or anything, so I'm going to re-use them. As you can see they're kinda dingy though.
So I have them sitting in a little carb cleaner bath and that seems to be working really well. If I can't get them to 100% of their former glory, I'm going to paint them black.

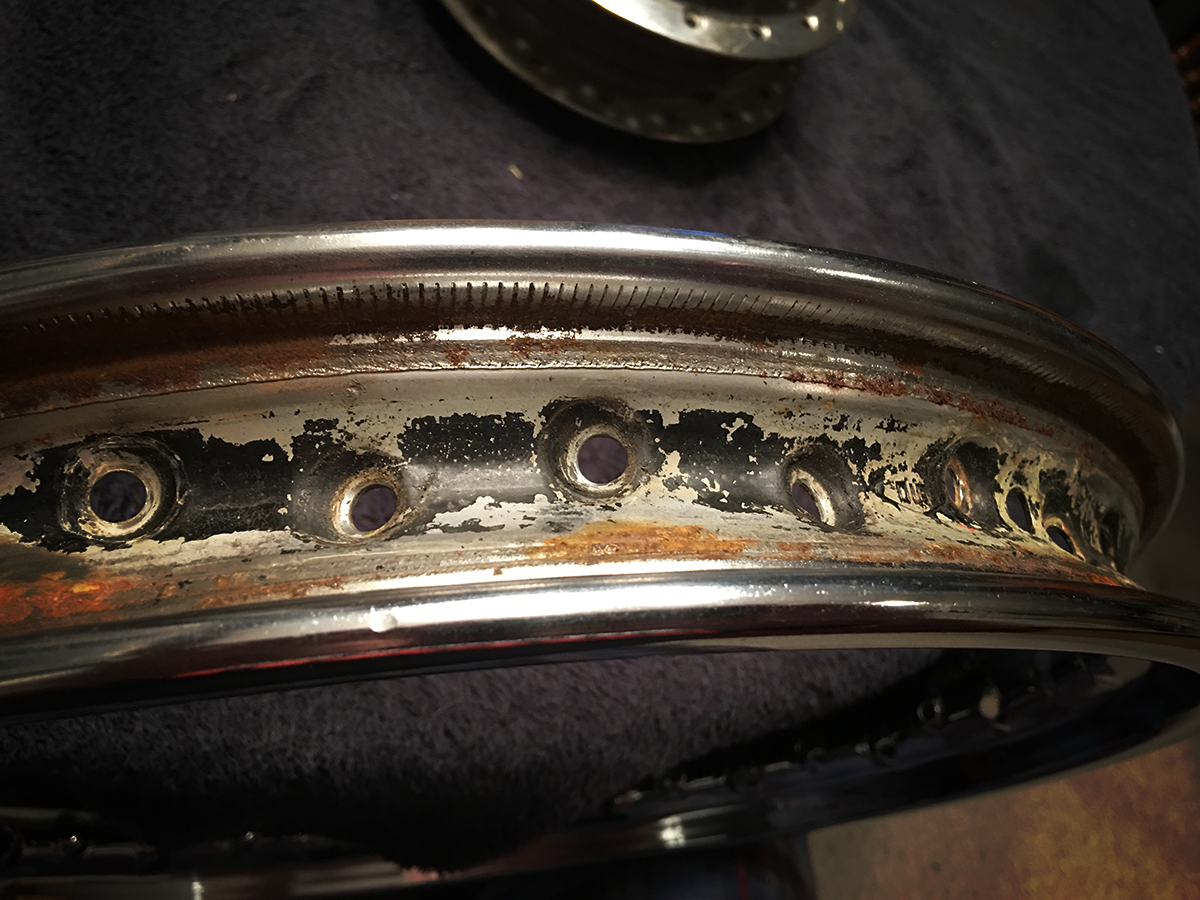
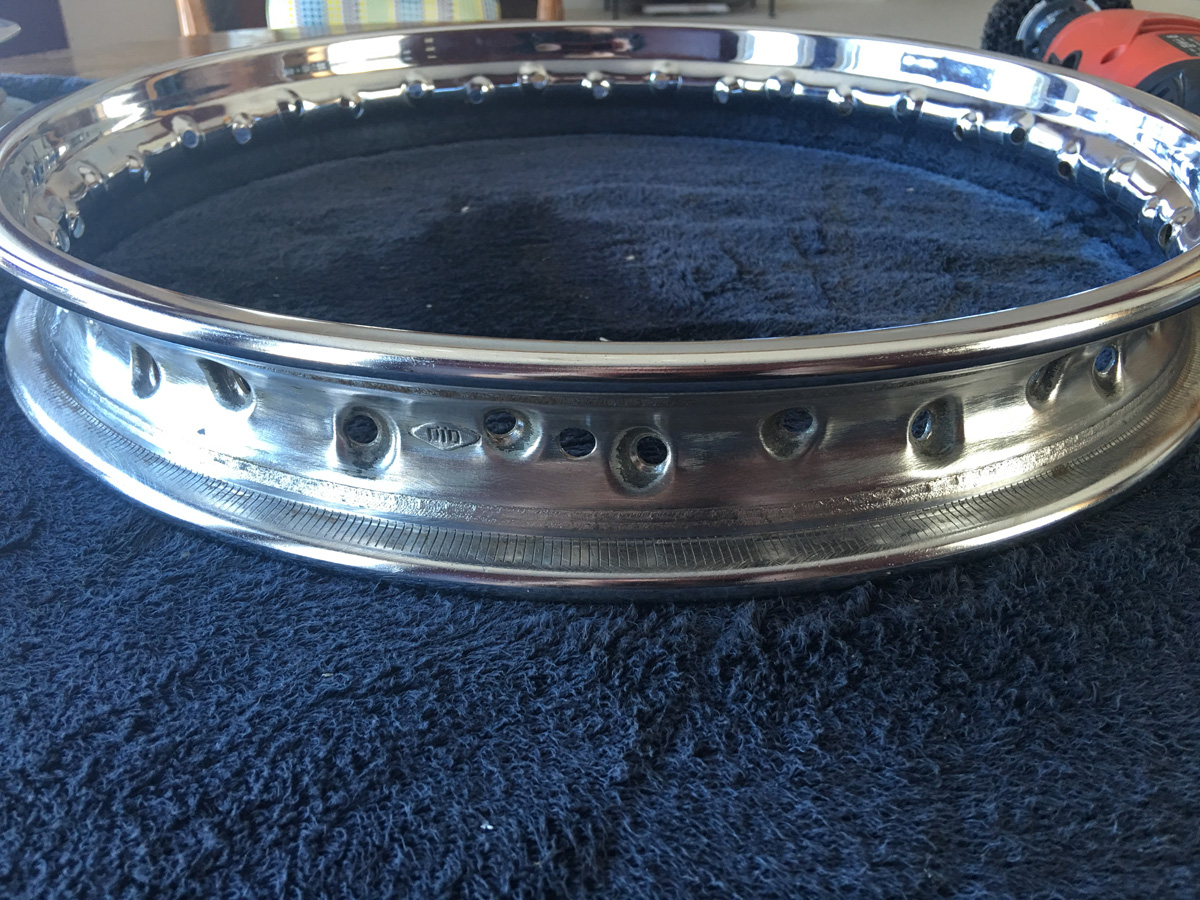
The visible part of the rim is in extremely excellent shape. No pitting, rust, or flaking of the chrome. As you can imagine the inside of the rim was a little bit worse just because of what gets trapped in there under the tube and what not.
Spokes come out of the carb cleaner bath...
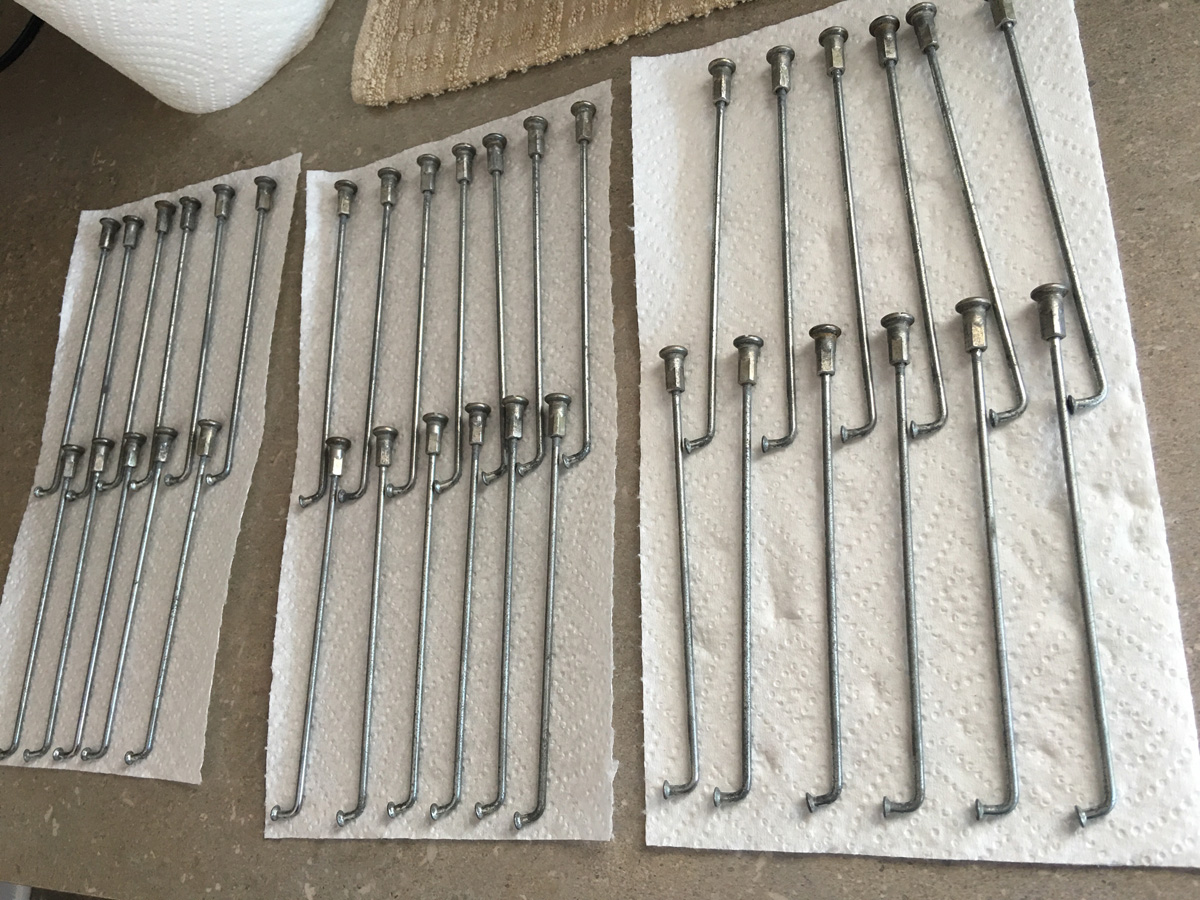
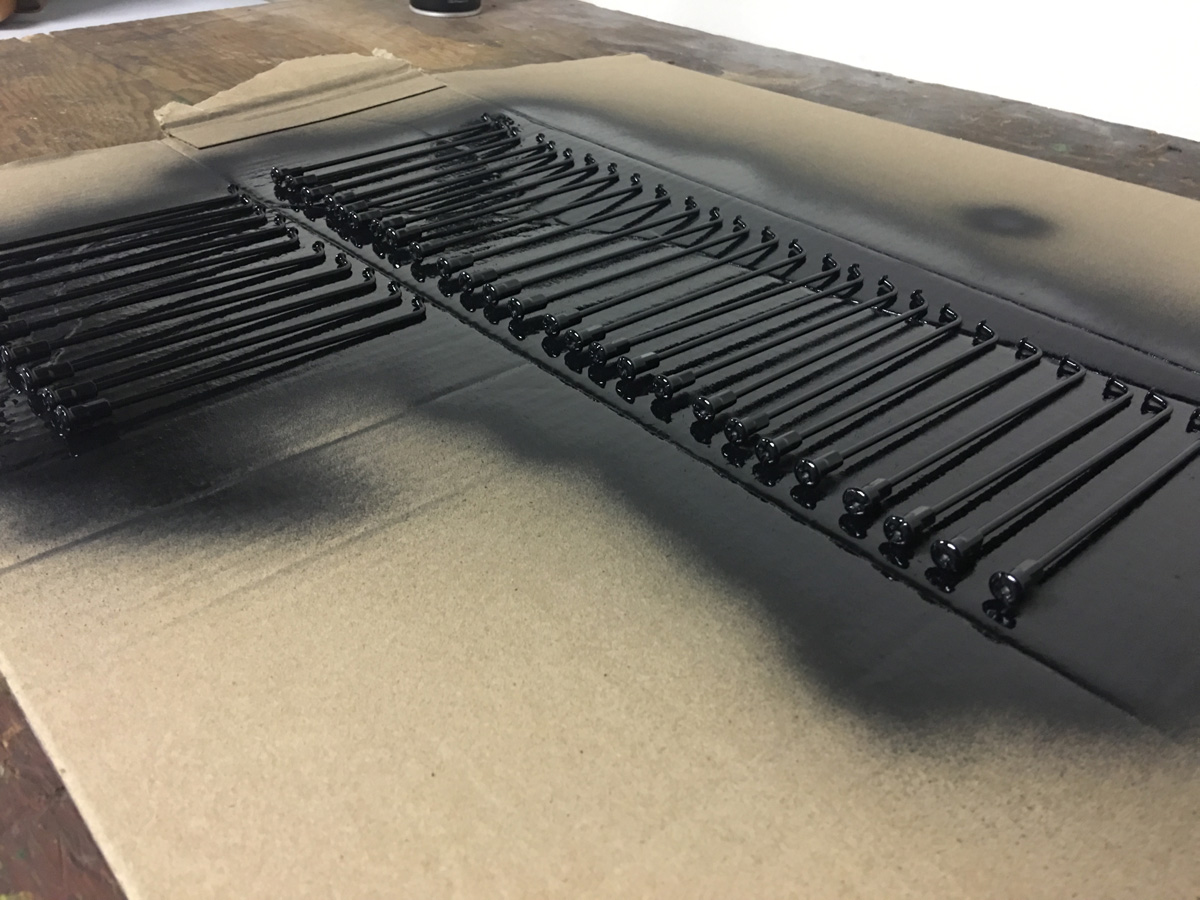
They are super clean and smooth now, but they are stainless and not chrome, so they aren't super shiny. They are the original ones as far as I can tell, and rather than spend over $100 shipped for some aftermarket ones from Taiwan I decided to paint these. I covered the threads with the nuts, painted them, waited a couple hours, flipped them, and then coated them again. I'll wait a day or so for them to dry completely and hit them with a coat of clear to protect them.
In other news, I was able to get that rim cleaned up really well.")
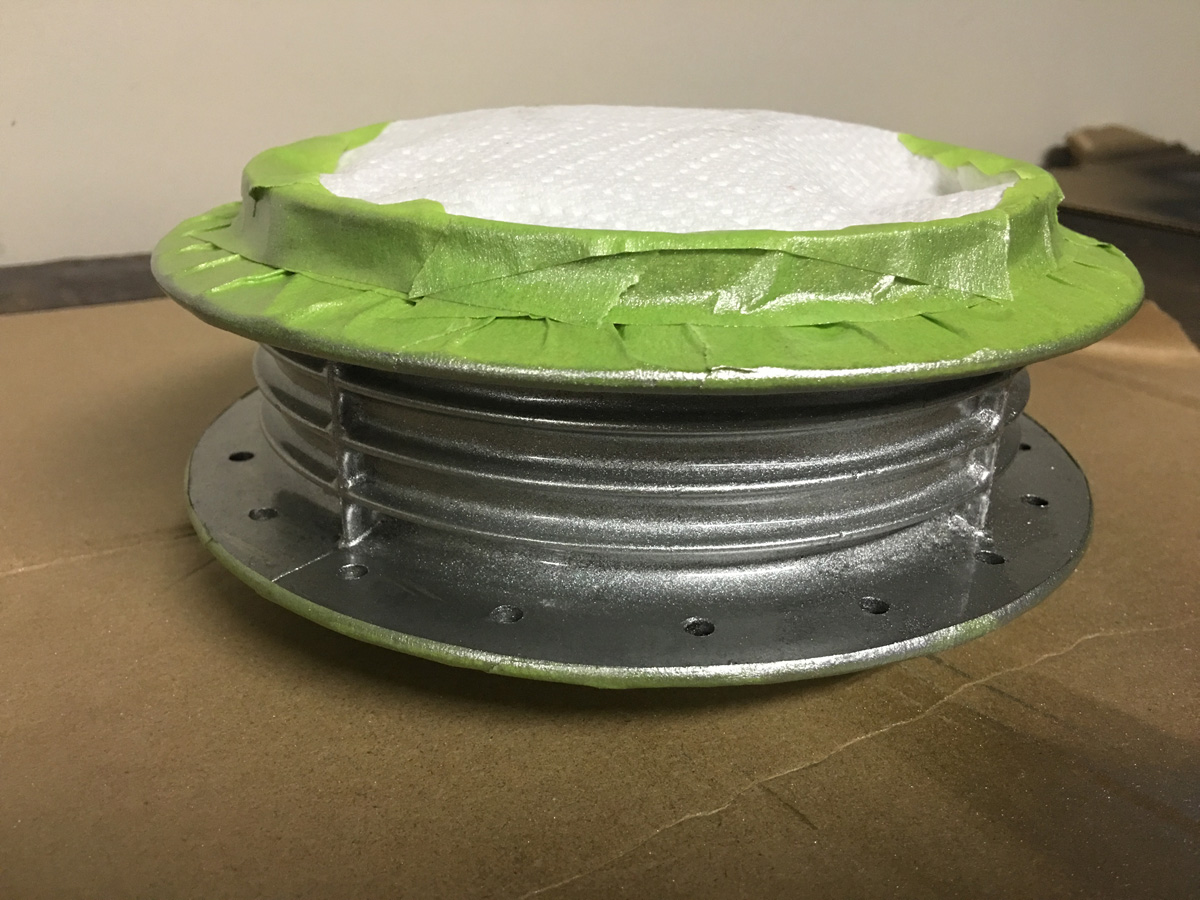
I'm going to polish the aluminum on the outside of the hub as best I can, but inside the hub is a different story. I scrubbed on it for a while, and though it came clean, it's nearly impossible to get any tool that I can use to buff with in there to clean it up. Even if I was able to it'd be impossible to clean with the spokes on later. Result? masked the parts I was able to polish on both sides of the hub and hit the middle with some wheel paint. When it dries, I'll hit it with some clear.
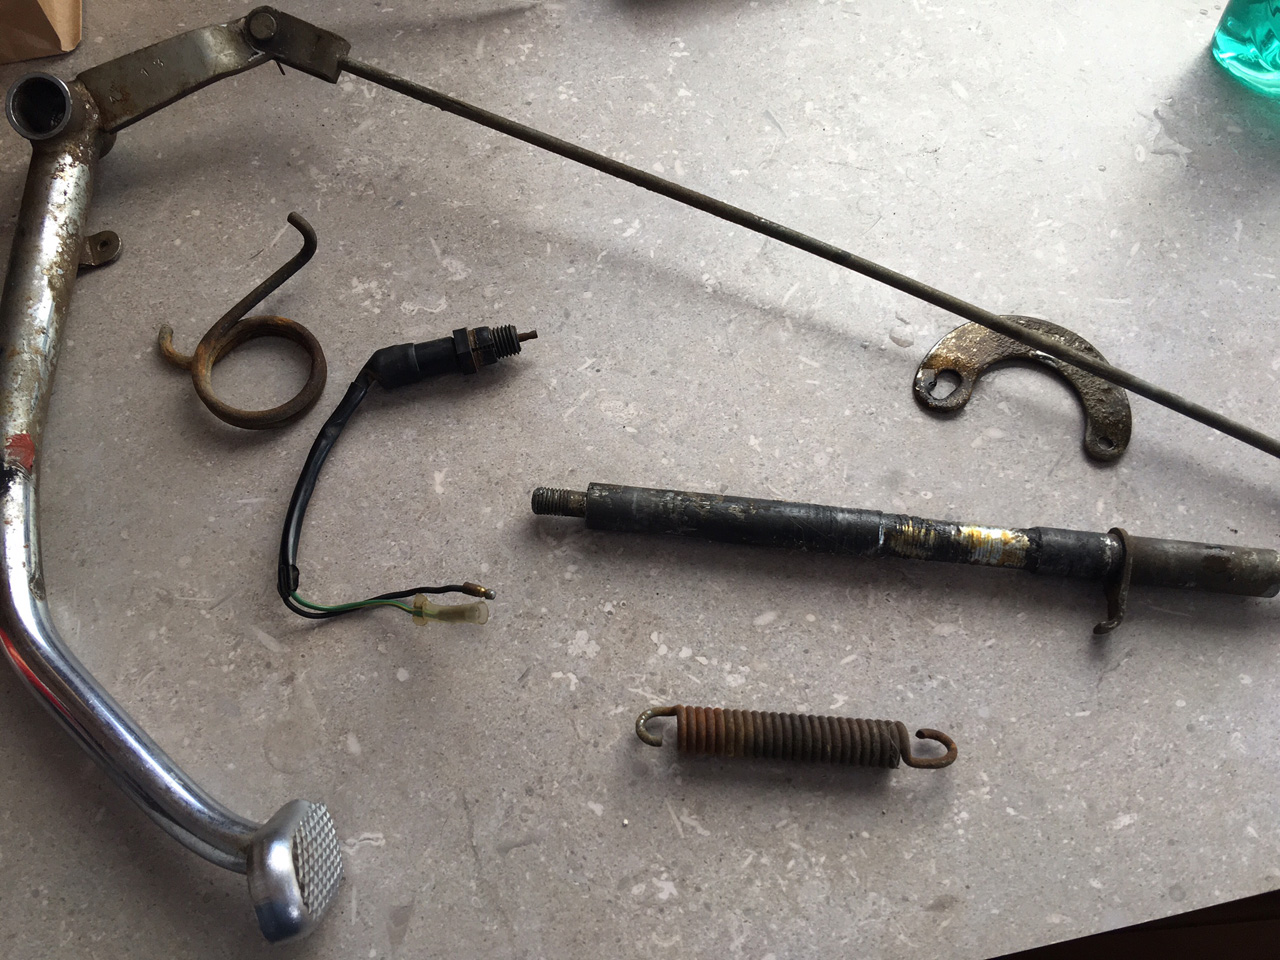
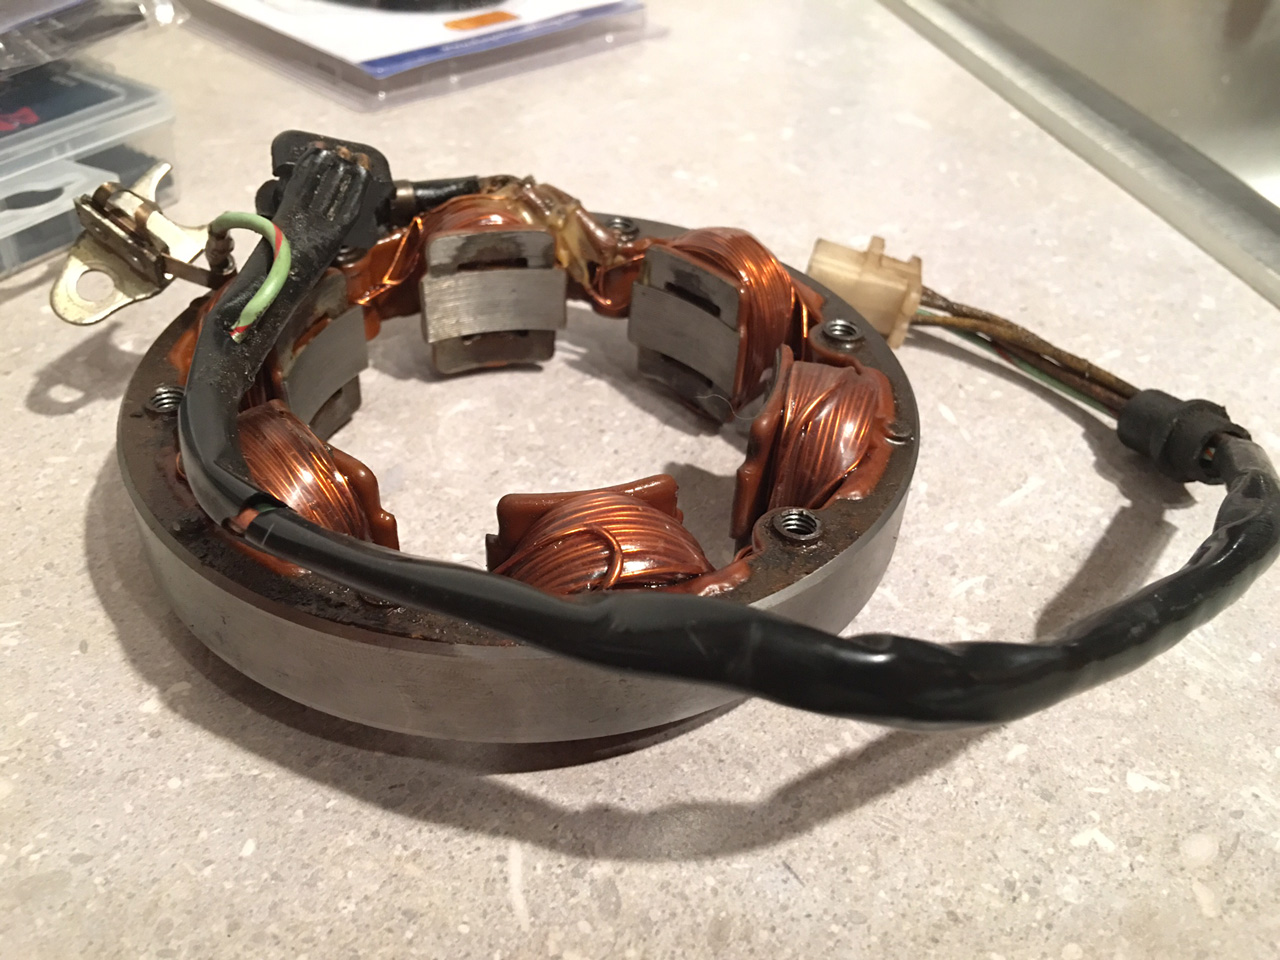
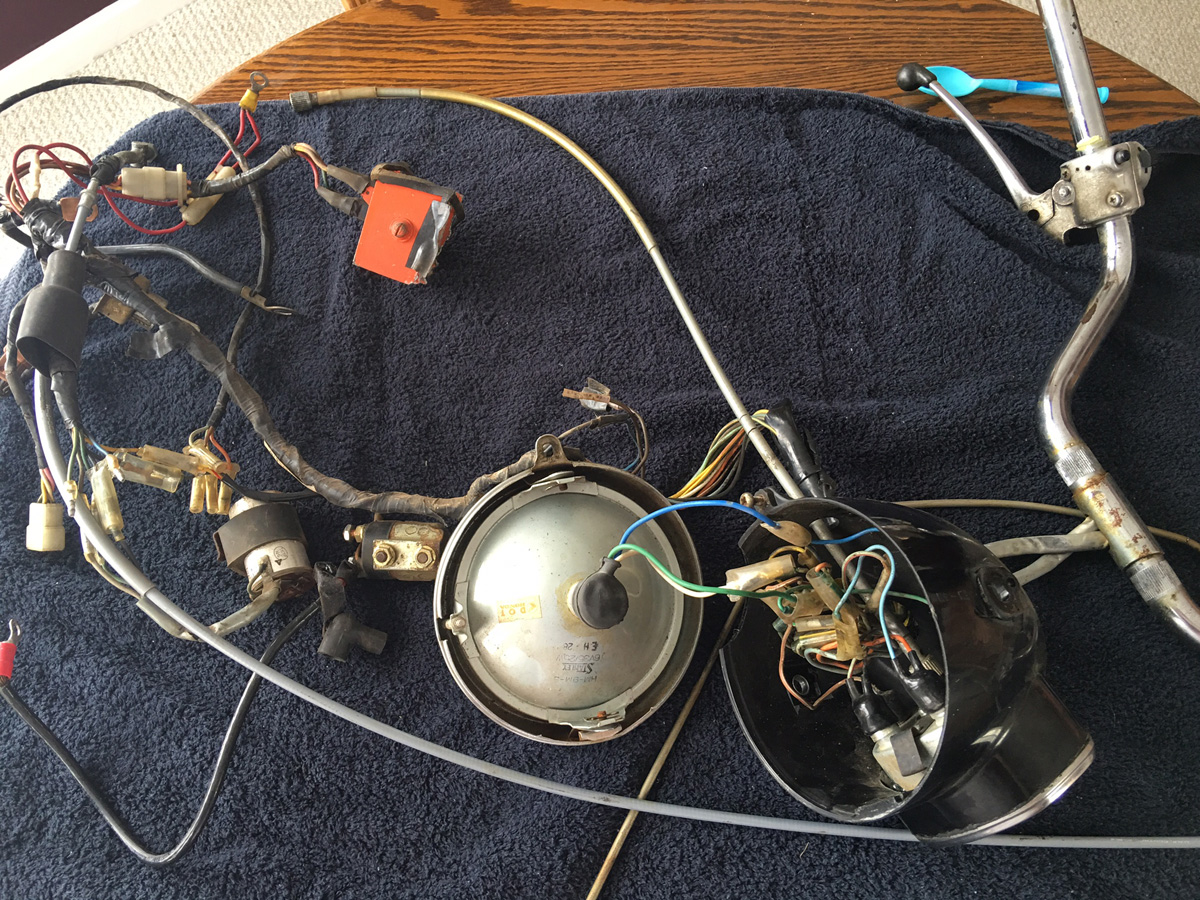
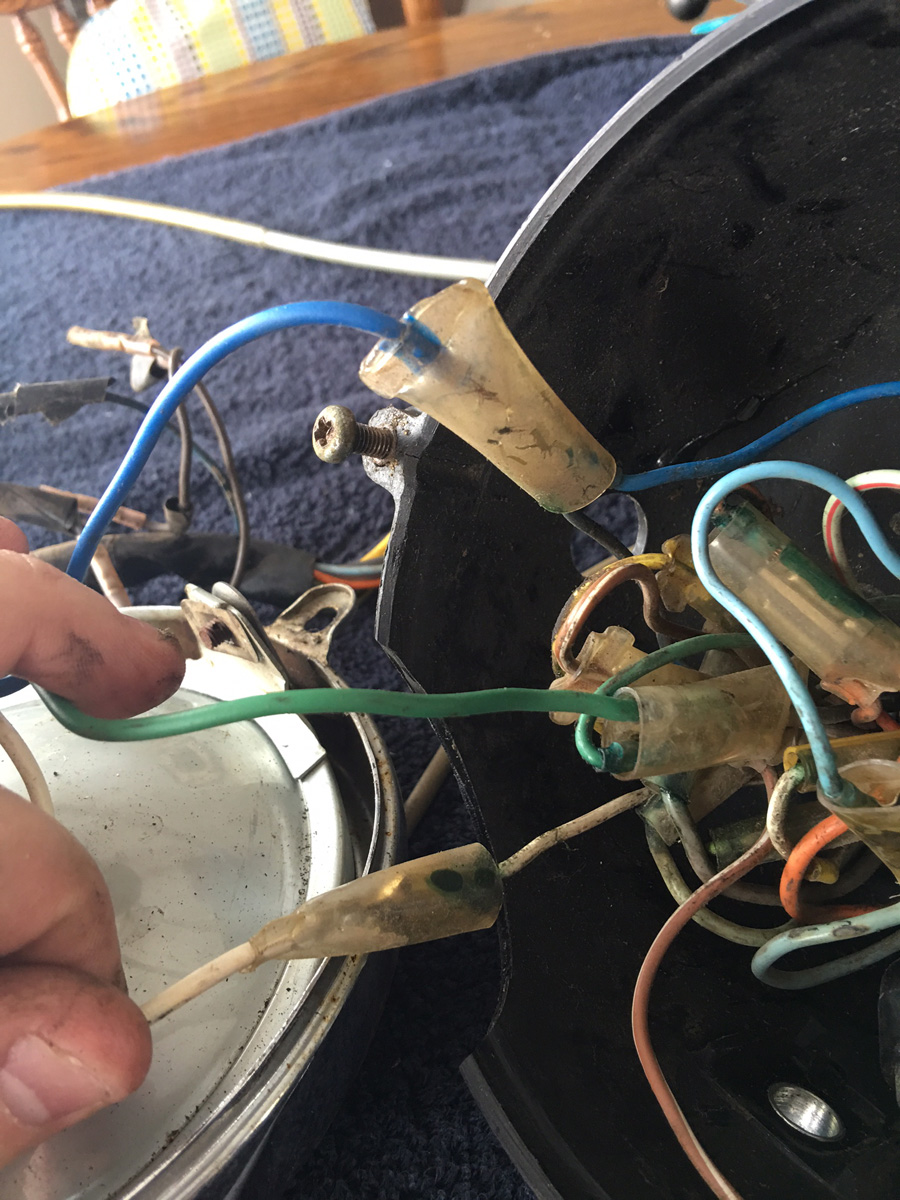
I worked on getting all of the electrical pulled out of the bike... which revealed some less than awesome things. I'll get to that later...
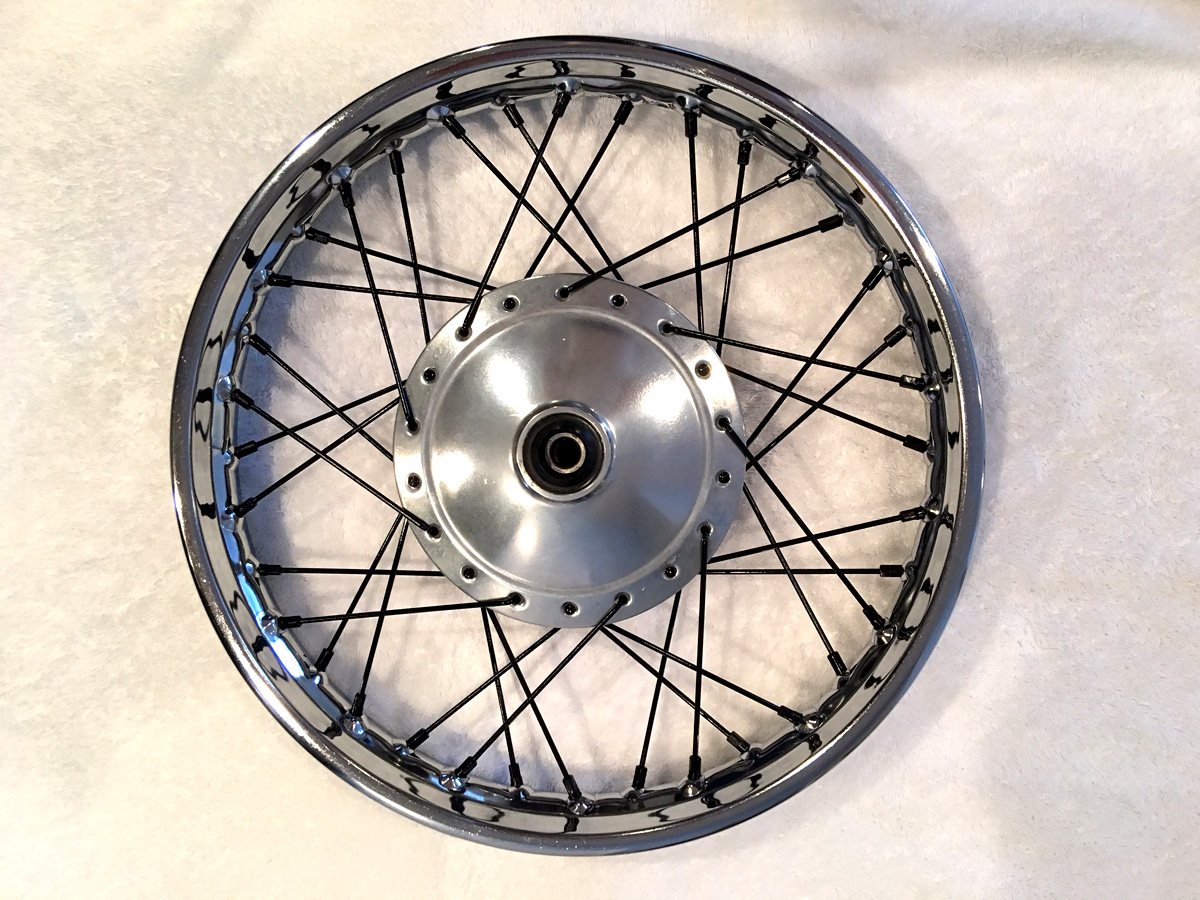
I also worked on re-lacing my wheel, which turned out pretty great. I need to build a rig to true the rim still, and pick up a spoke wrench, so for now it's just laced and waiting. I was referred to a local place that works on mopeds, stocks a lot of equipment. They have Shinko SR714's in stock, along with tubes and tire strips, so when I get the rear wheel looking like this front wheel I'll probably just take them both to them, have them true the wheels for me, and install the strips/tubes/tires.
Removing the electrical involved removing the handlebars and handlebar controls. Getting the electrical components out of the handlebars was a pain in the arse. The wires are all so stiff, and the at one time plastic sheathing that goes around them is rock hard. Some of it I was able to just grab with my hand and squeeze and it broke apart. Ugh.
I was able to get the whole harness off/out without cutting anything.
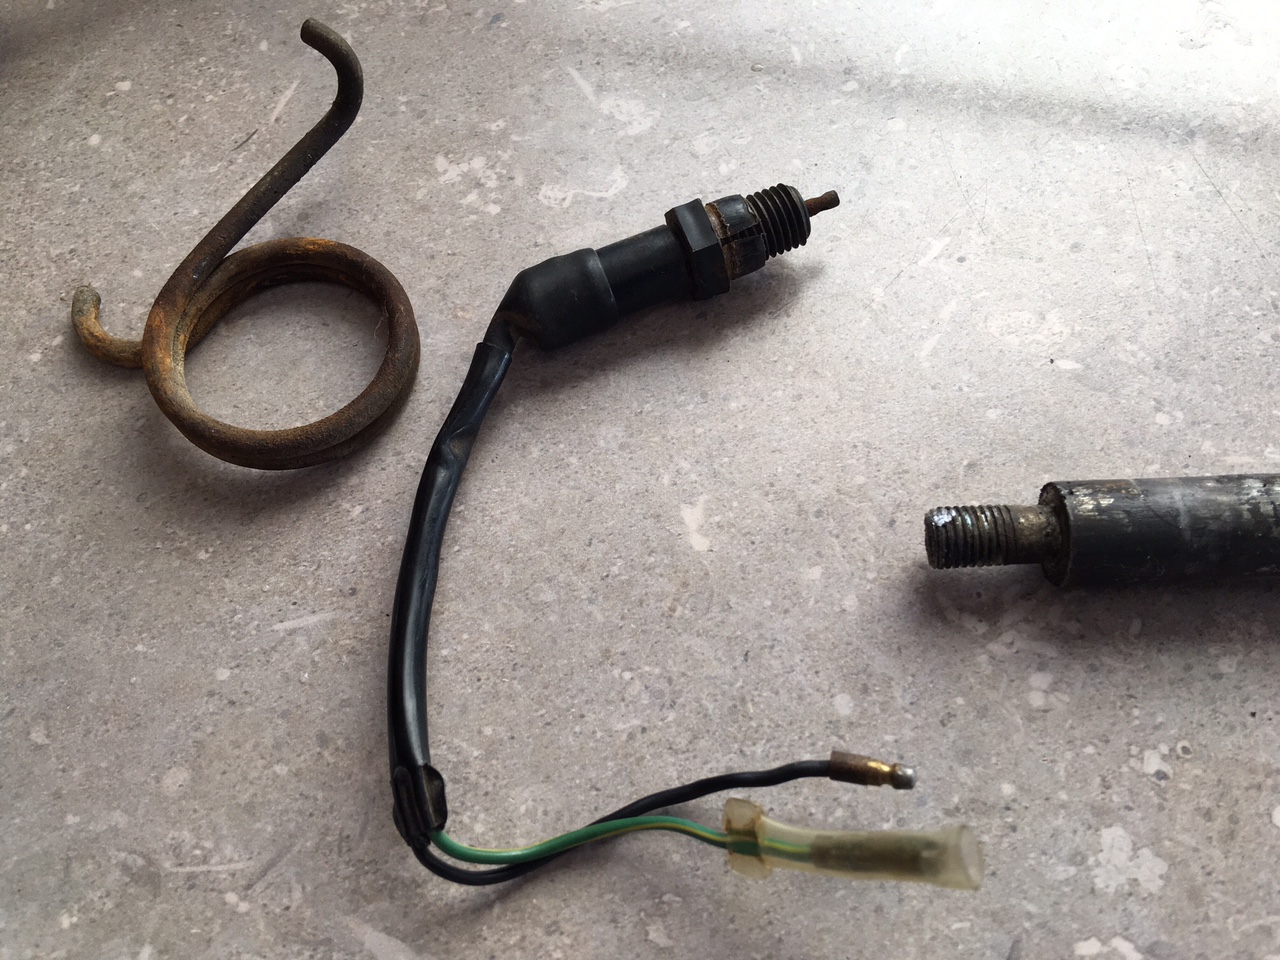
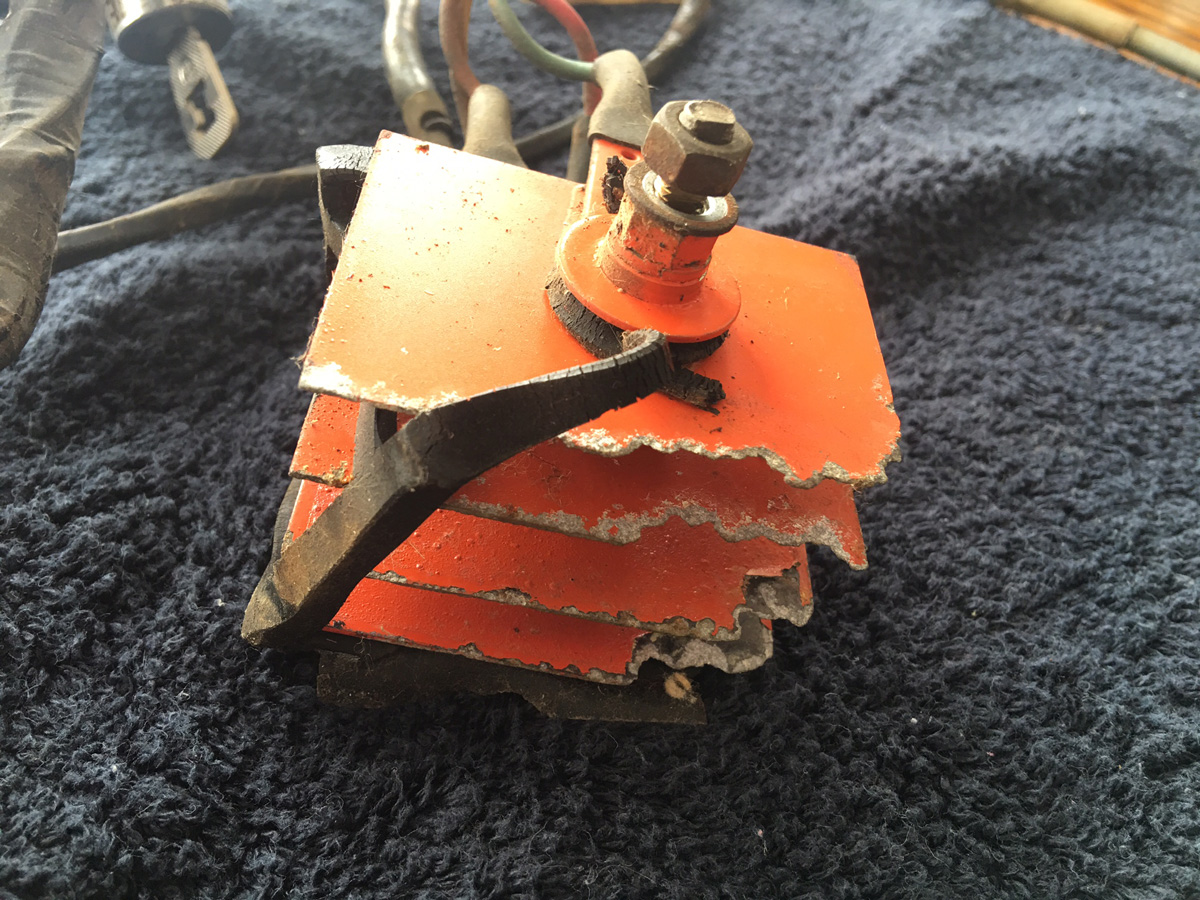
A majority of the harness, including the entire coil and the voltage regulator are inside the frame under where the tank goes. Also in there at one point lived a mouse, because I found remnants of his home... and his poop. He also at one point thought it'd be fun to snack on this..
Just some thoughts on the harness... I'm not going to be re-using it. Wiring in this bike is simple enough to the point that I'm just going to make my own harness when the time comes to put the bike back together. A lot of these components will be replaced anyway, since I will be converting the bike to 12V. The handlebar controls are also pretty rough. One of them is missing the little black square of plastic for the selector switch, and both are pretty dingy inside. I'm thinking that the items that I remove from this bike and don't re-use, since these bikes are hard to find in the US, I'll put on this forum for sale or on eBay to help someone else out who is restoring one to 100% factory condition.
That being said, I don't think I'm going to go that route. Originally that's what I wanted to do, but I'm not doing all of this to make a profit on the bike or to make it some sort of historic time piece. I want to build it to enjoy and ride, so reliability is of the utmost importance to me. Likely what I'll do is find some modern controls for the headlights, blinkers, etc.with a retro LOOK but are modern inside. I'd prefer to get them off of a name brand bike vs some random OTS China controls on eBay or something. I'm thinking maybe Triumph would be ideal, or maybe look at the controls from a Yamaha SR400 or some other modern retro-throwback bike, but I haven't looked yet.
I'm also not going to use the original handlebars, so I won't be using the original throttle tube due to the fact that the throttle mechanism is inside the bars, which I didn't know until I pulled that off.
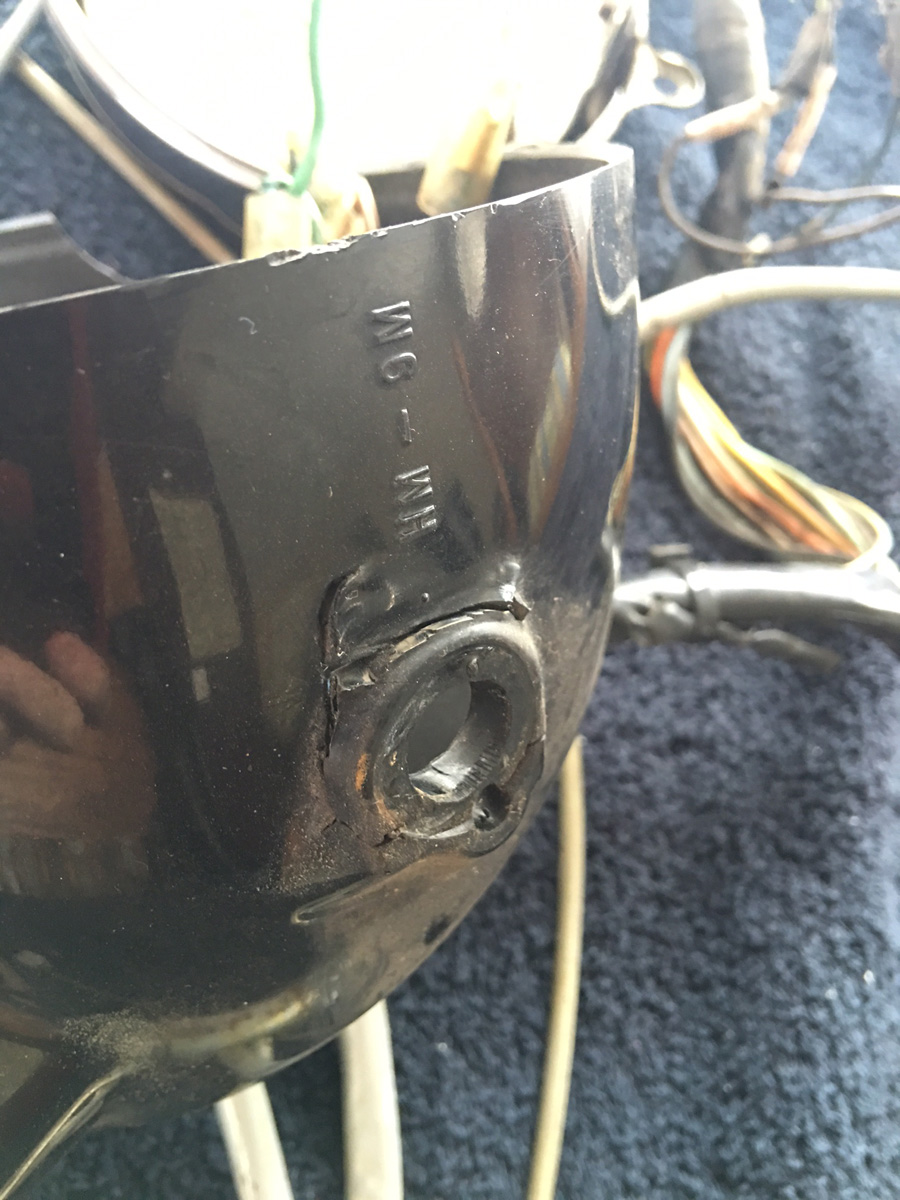
I would like to use the original speedo though, which looks like it might be a problem. The unit itself will be fine after I clean it up, but at some point in time some genius decided it'd be a good idea to use caulk to affix it to the headlight bucket. :-/
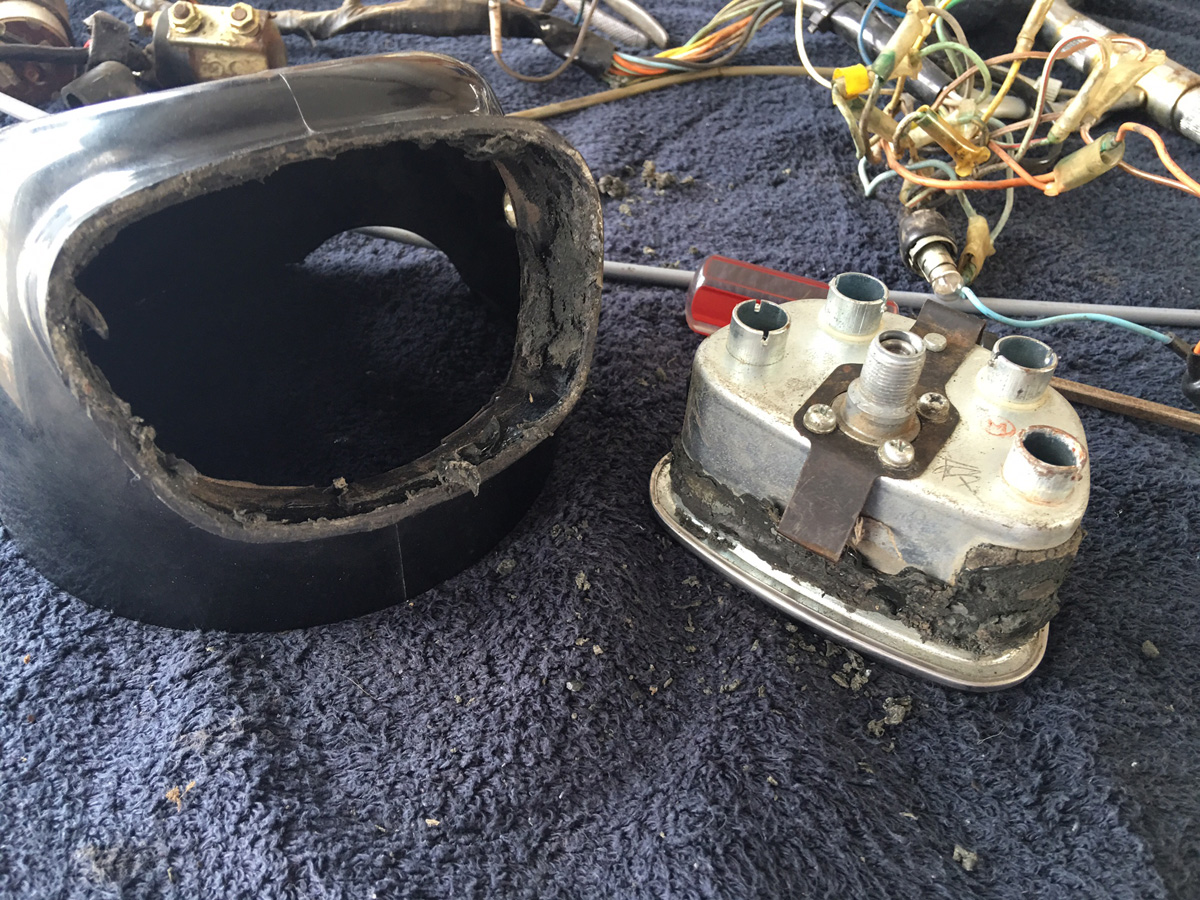
The headlight bucket is also cracked next to the mount (which I knew and mentioned before), but upon removing it I also found a large chunk missing that must have broken off at some point. :-/
Decided to focus on getting the rear end apart. First thing to come off was the giant rear fender, which I found out is actually plastic on this model. Mine is in really good shape, with no cracks or anything. Here's the bike with it on...
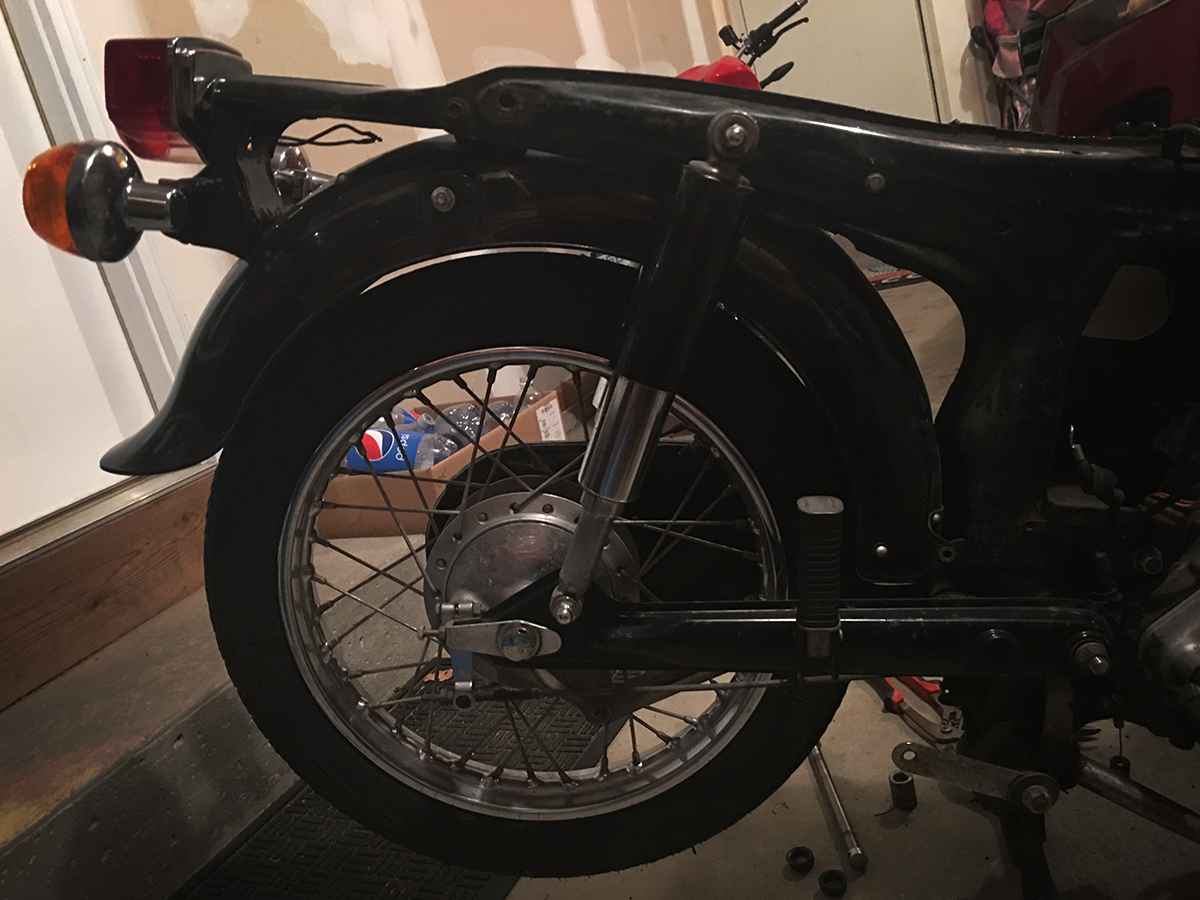
And here it is with the fender off...
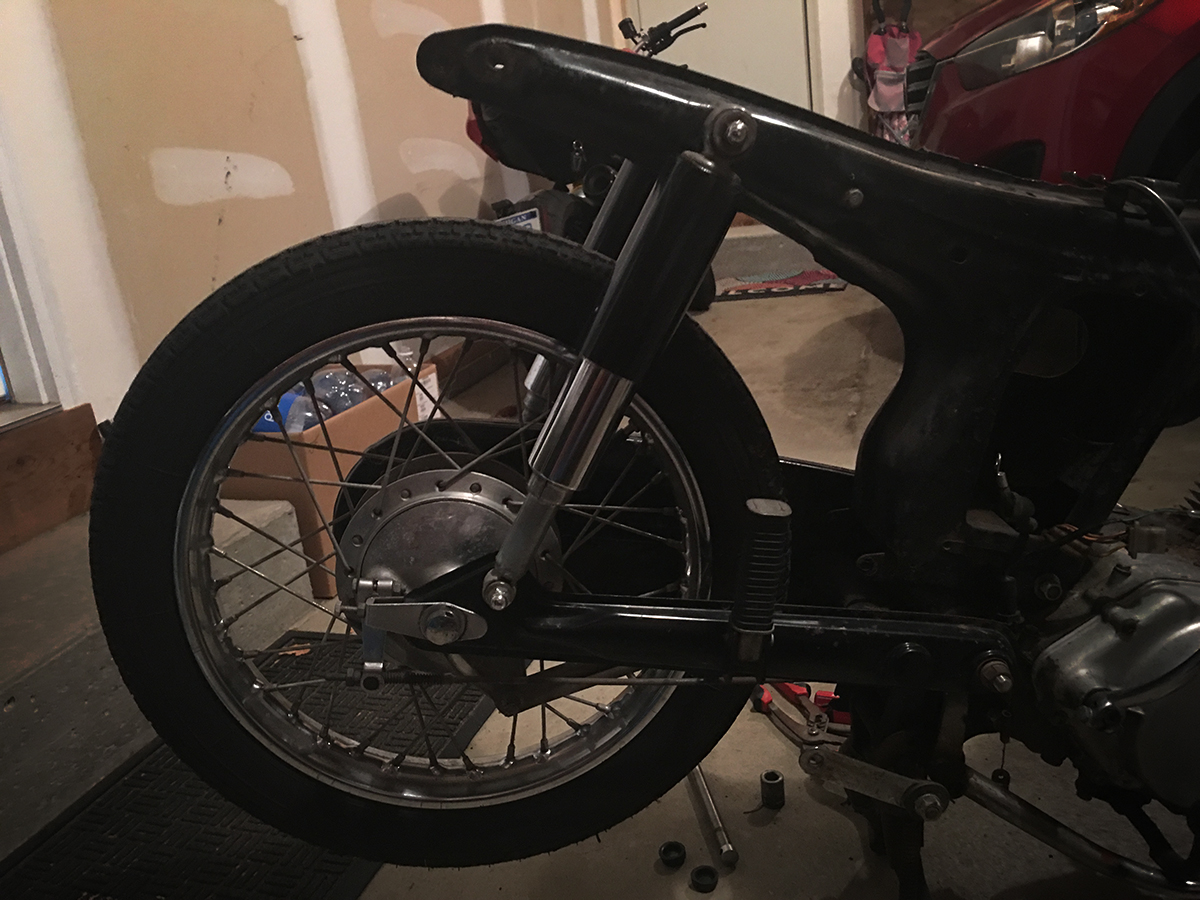
I have to say, it's a lot cleaner looking without that huge rear fender.
The rest of the rear end came off pretty easy as well. Everything is a lot simpler than I thought it would be. Equally as simple as a Honda CRF50 dirtbike that I classed up a few years ago. Aside from the way the suspension and swing arm attaches, it was almost 100% like the CRF50.

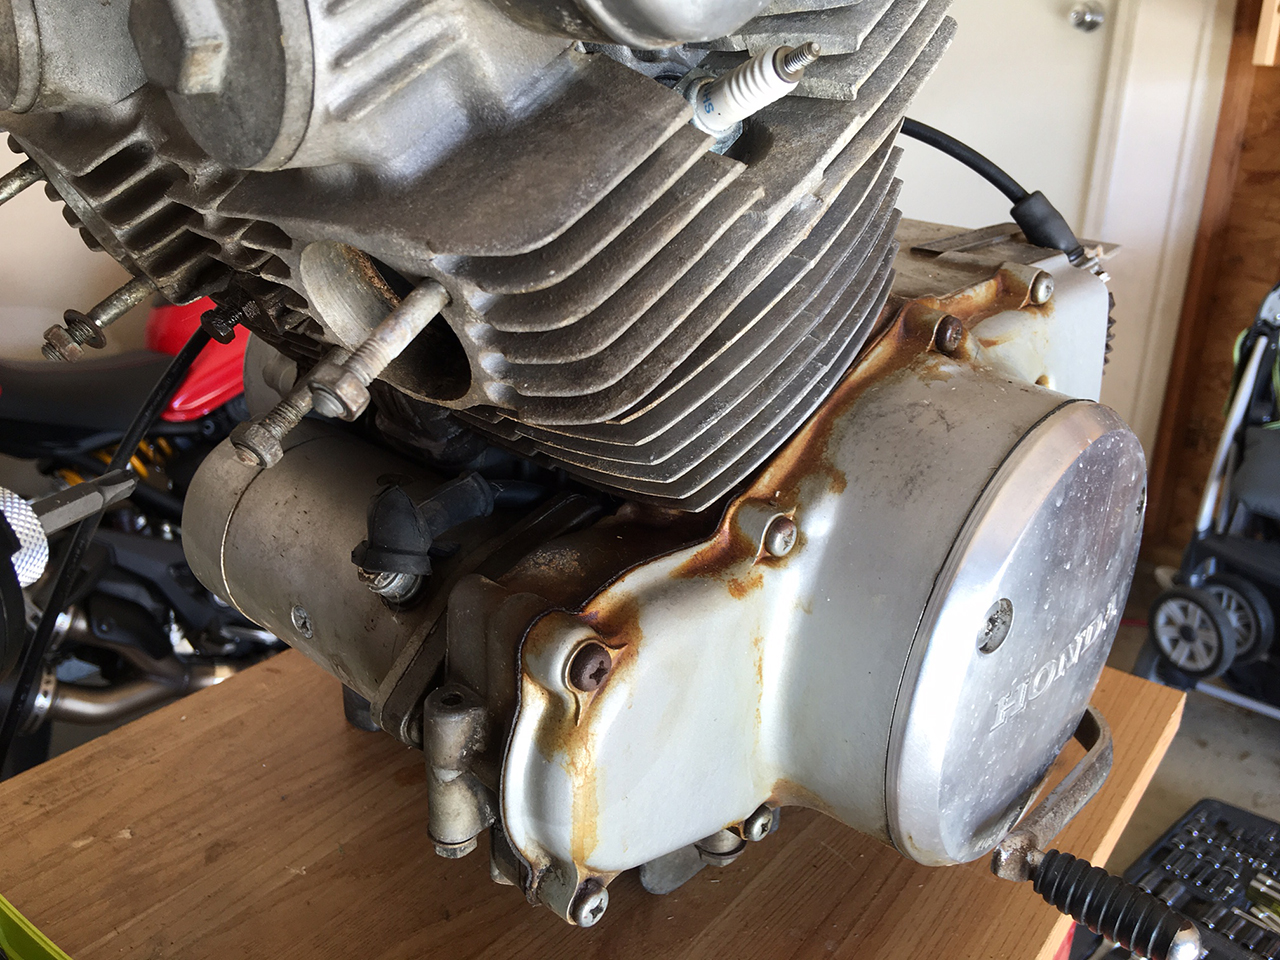
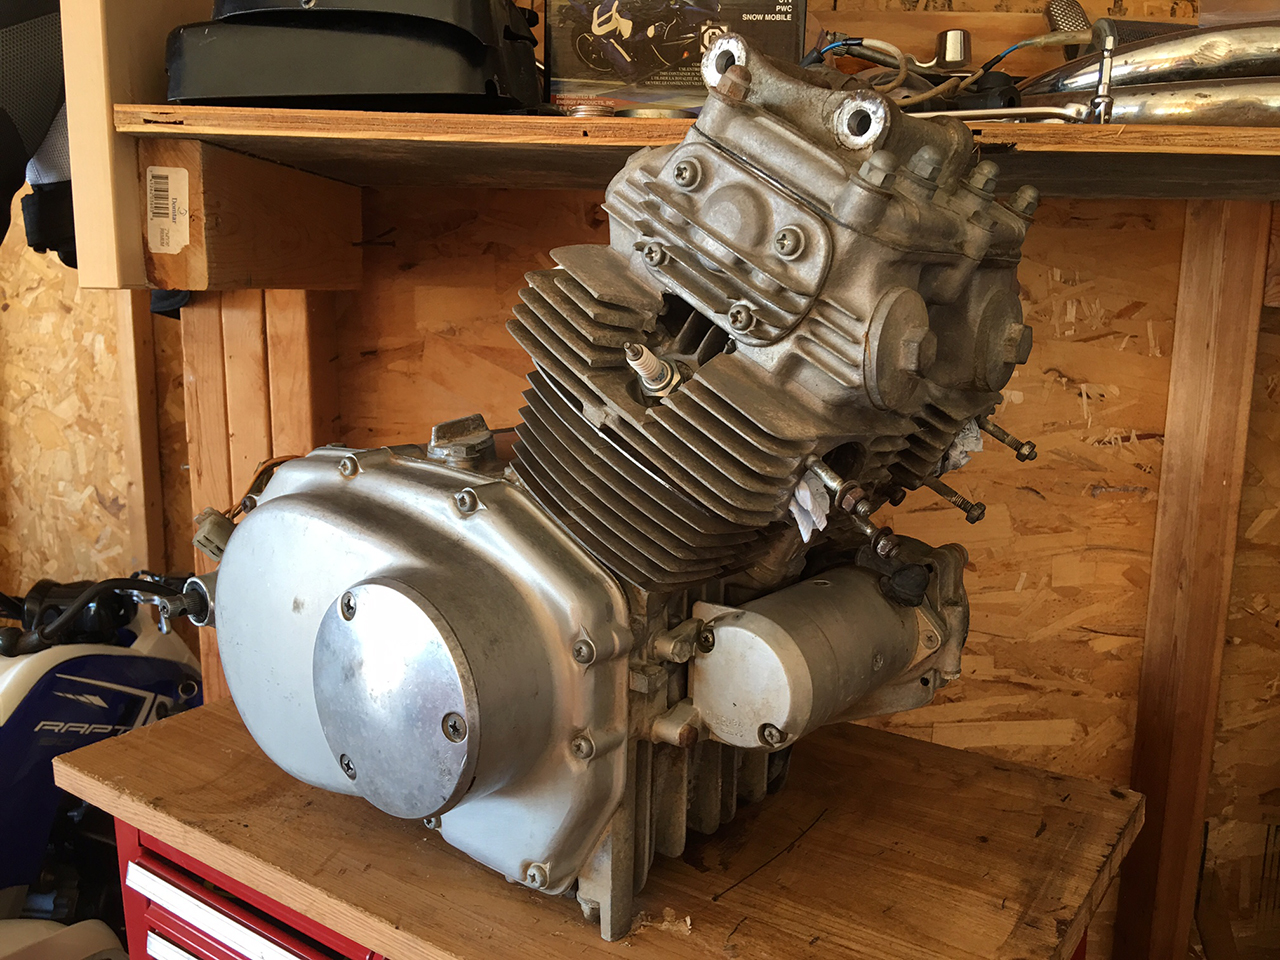
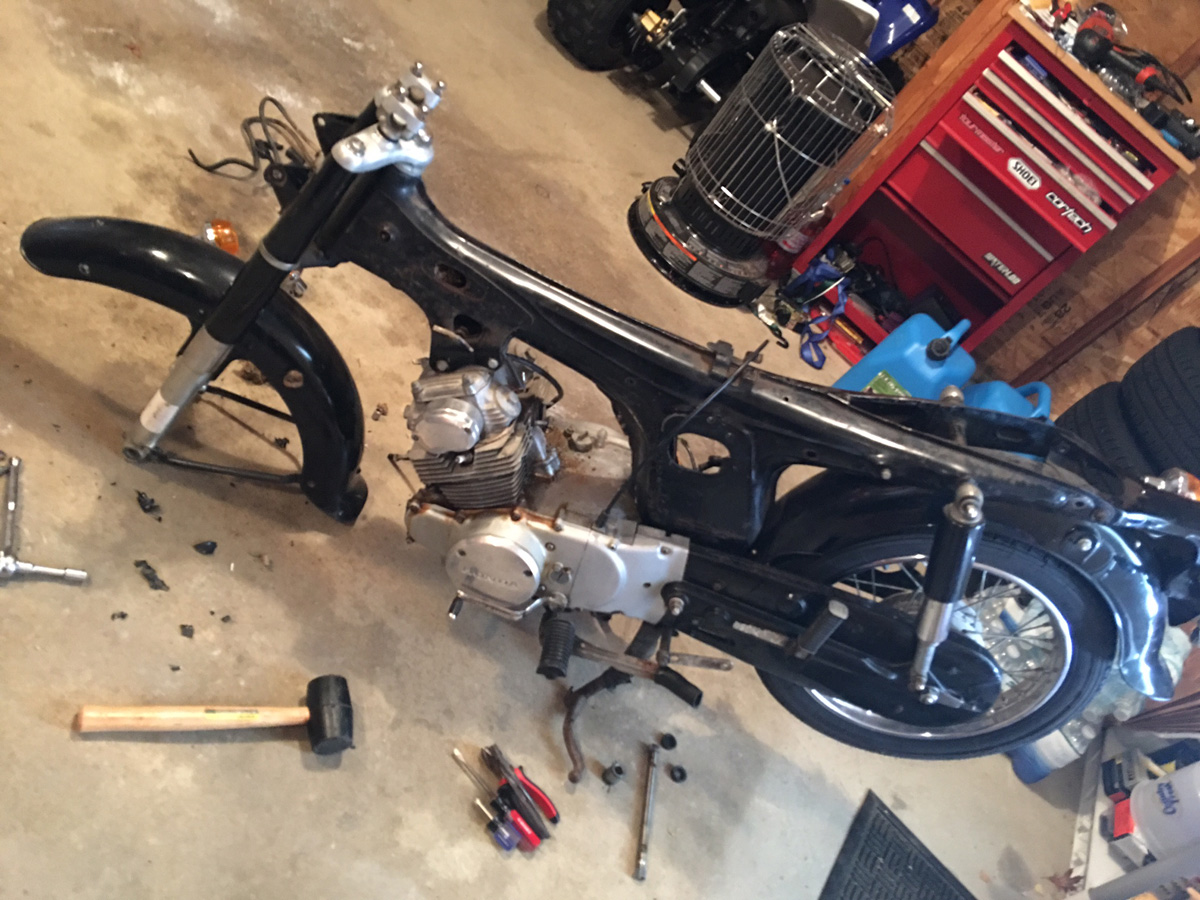
Once the rear end was off, I could finally divorce the engine from the frame. 4 bolts and that was out... pretty simple.
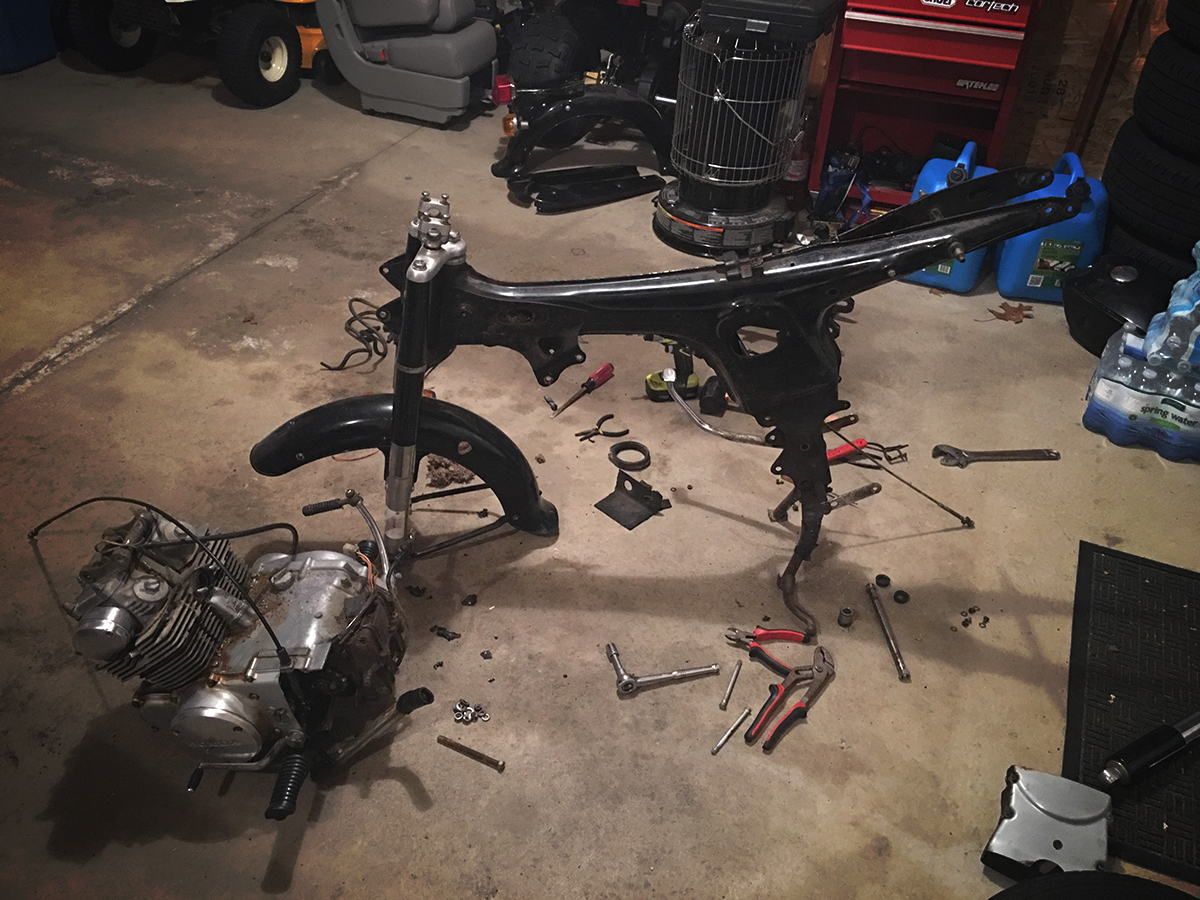
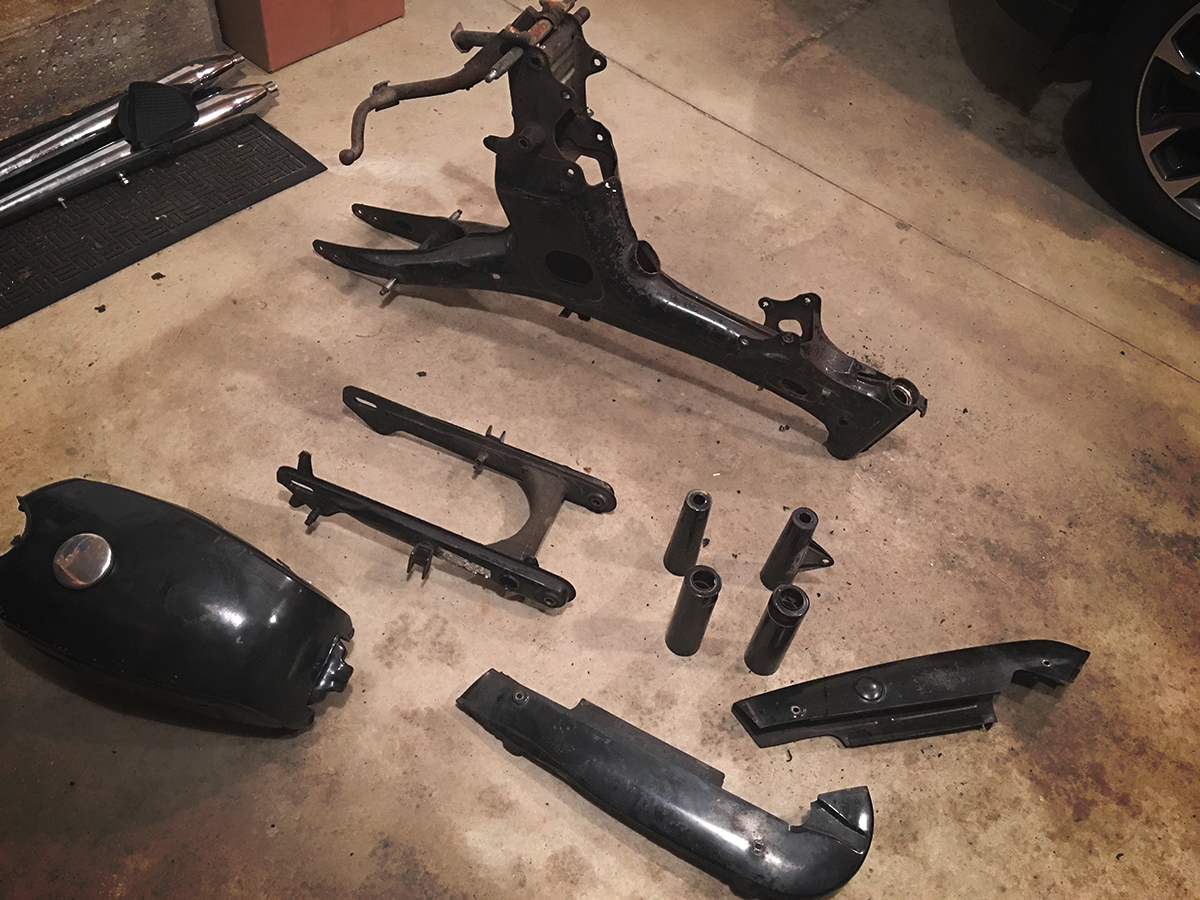
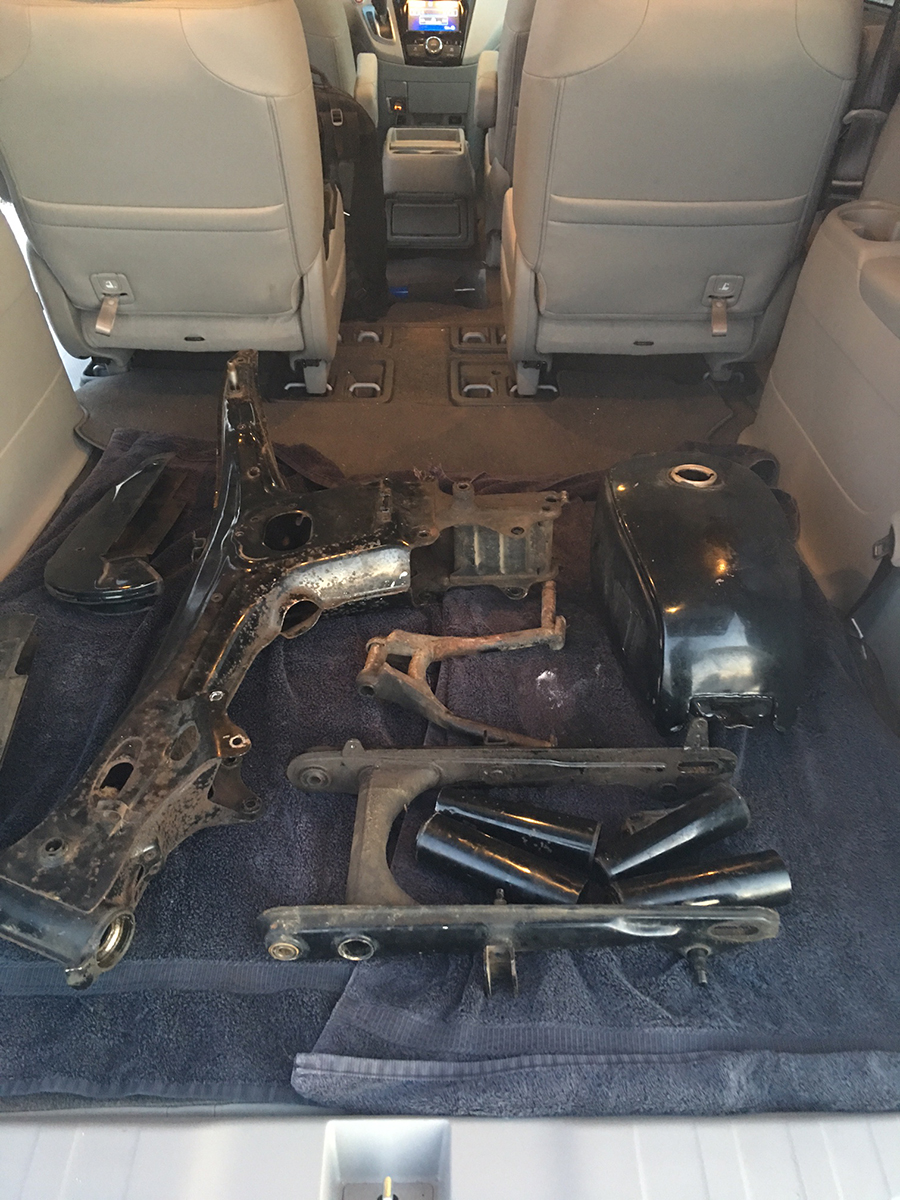
I disassembled the triple tree and pulled the front forks out, and then separated all of the parts that I'm going to need to have media blasted and powder coated.
I got a quote from a local guy for $350 to do all of this stuff. I'm not sure if that's a good price or not. I have a quote request out to another guy but I haven't heard back yet.
Here's all of the stuff that will need to be done:
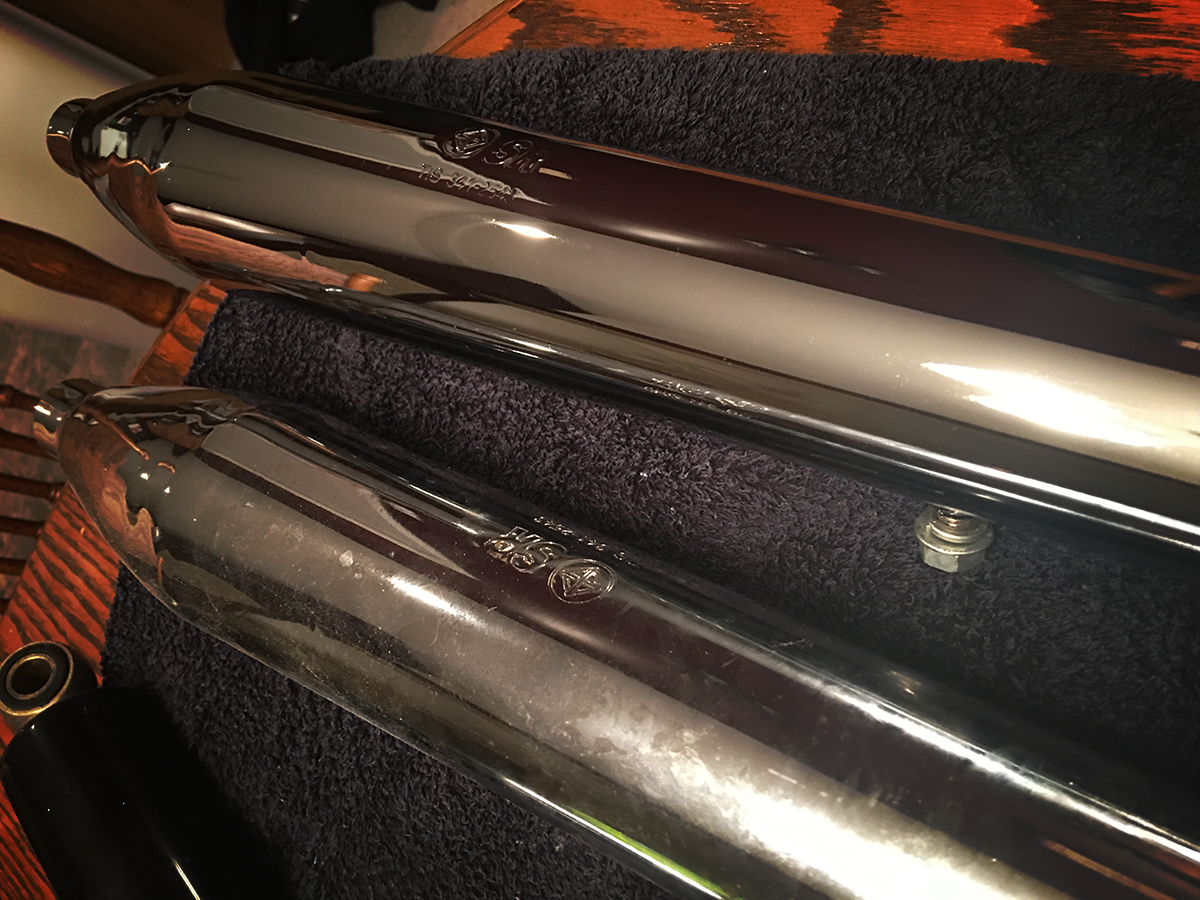
In the mean time, I started cleaning my pipes up.
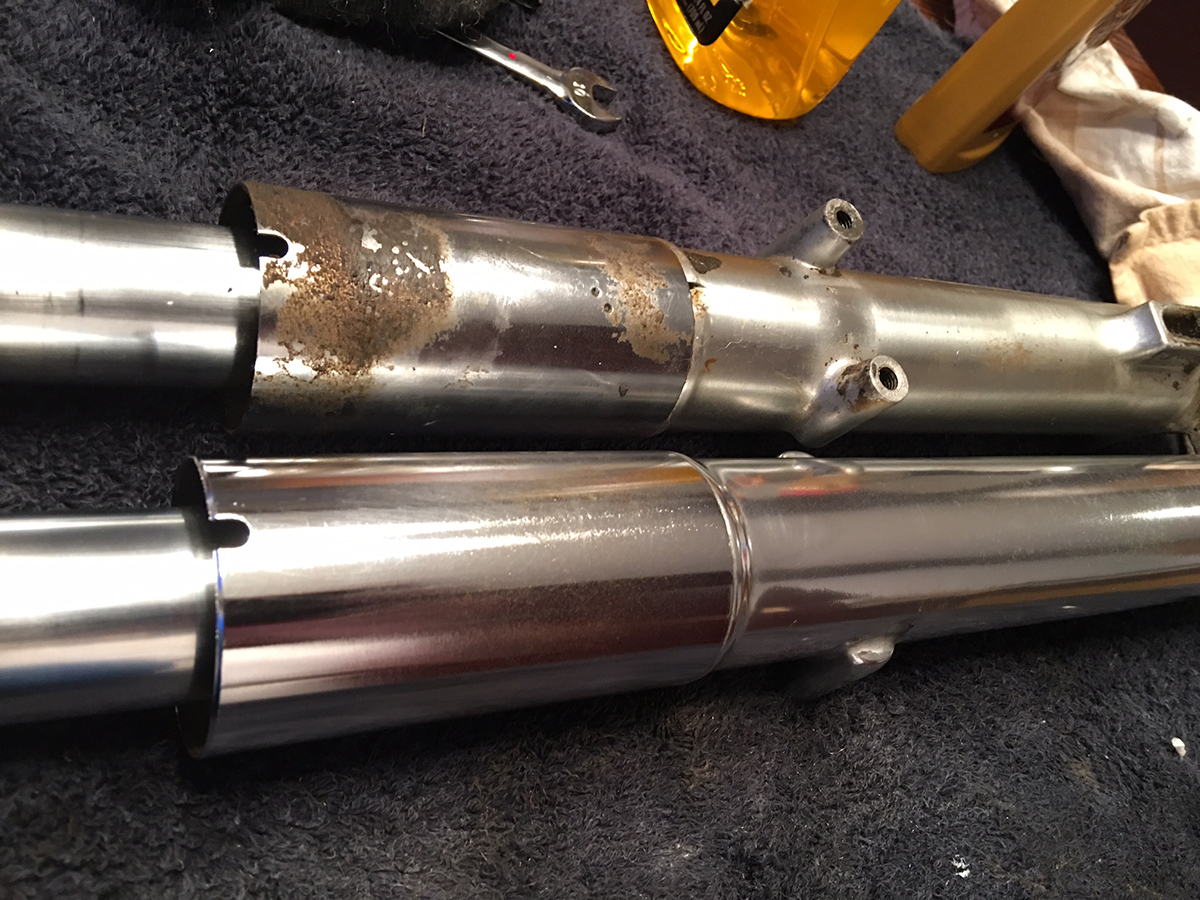
I started cleaning up the front forks. Luckily the seals look good and they aren't leaking or anything, so that's great. Here's a little before and after on one of those after I got it finished.
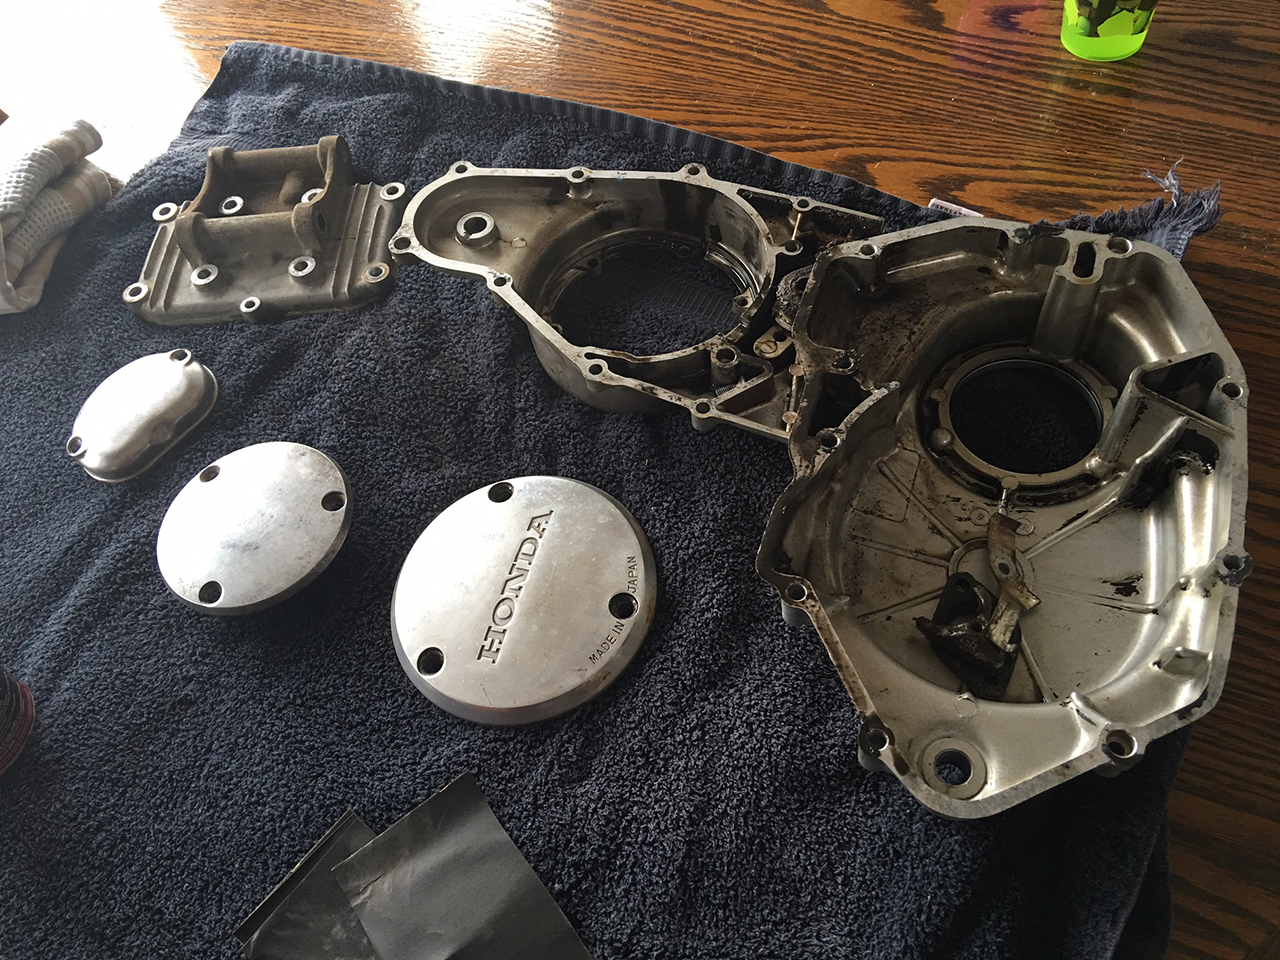
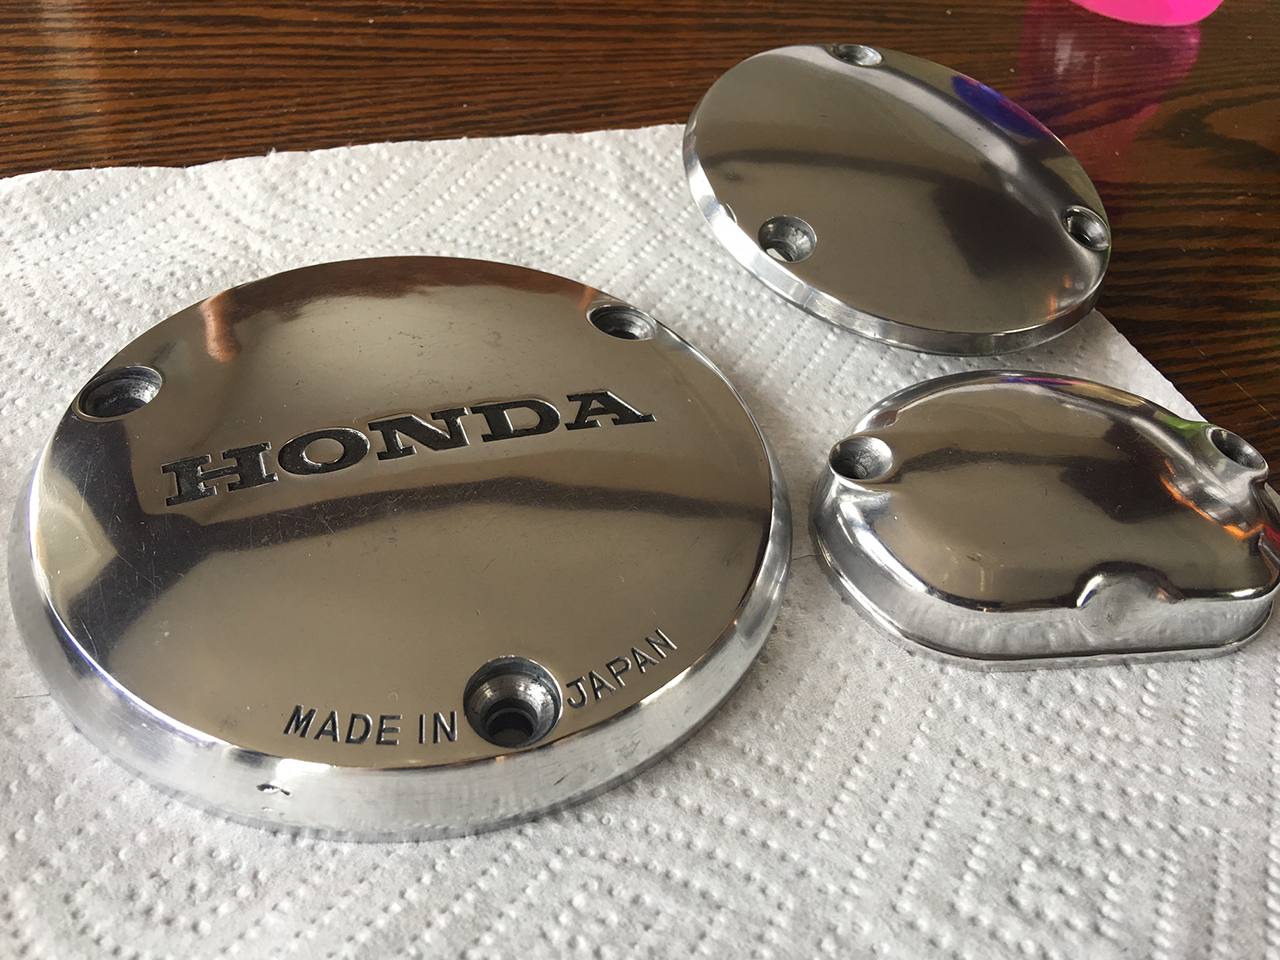
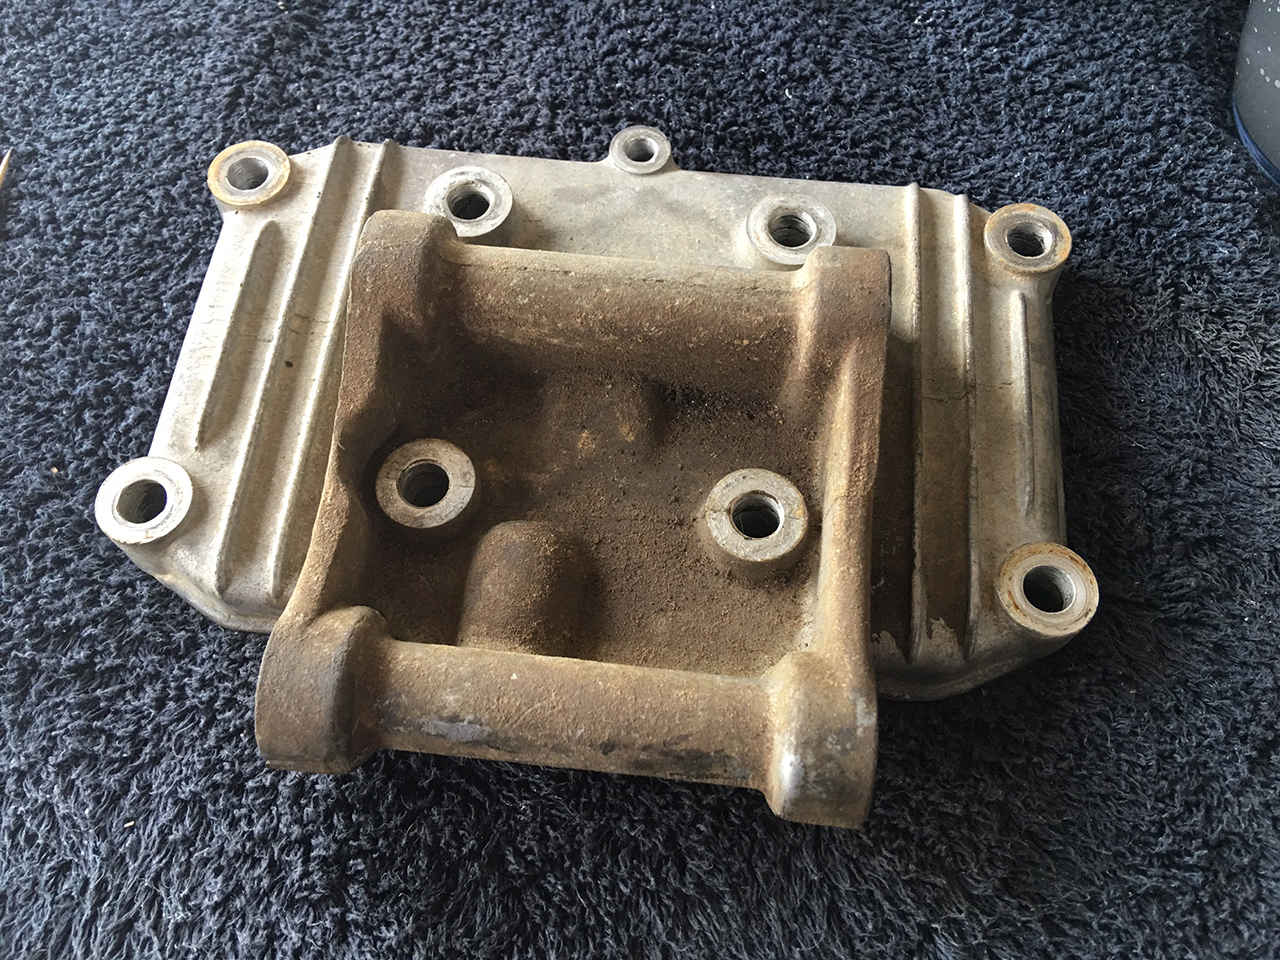
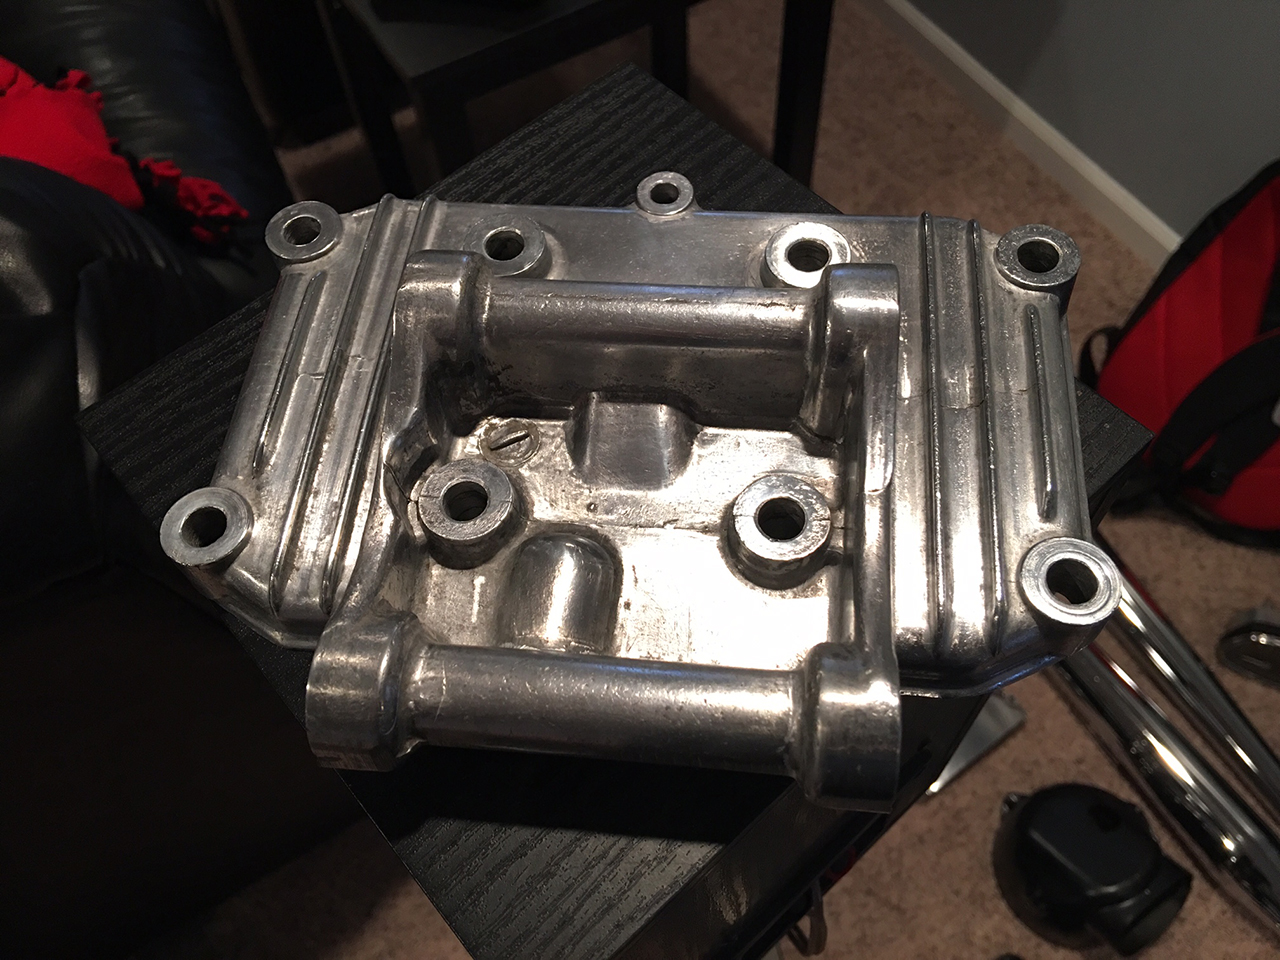
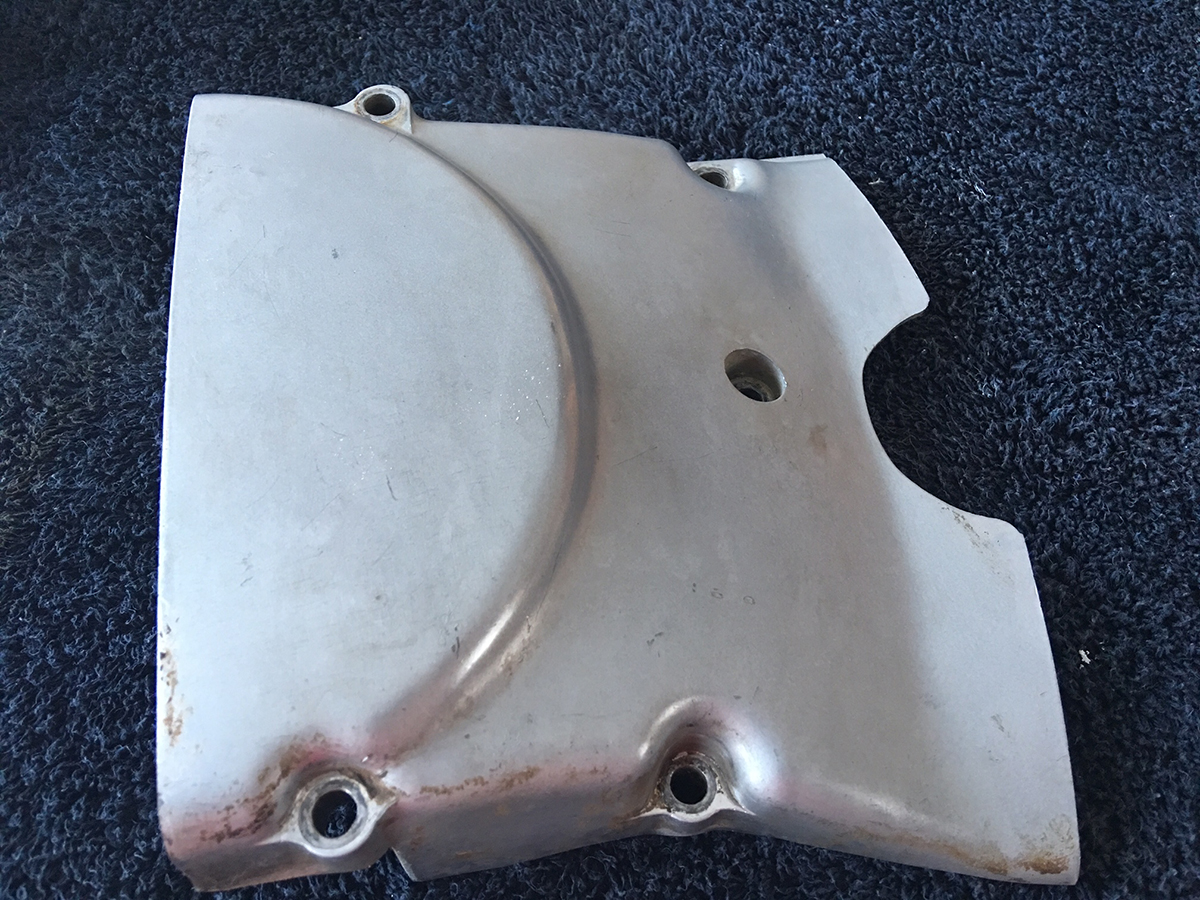
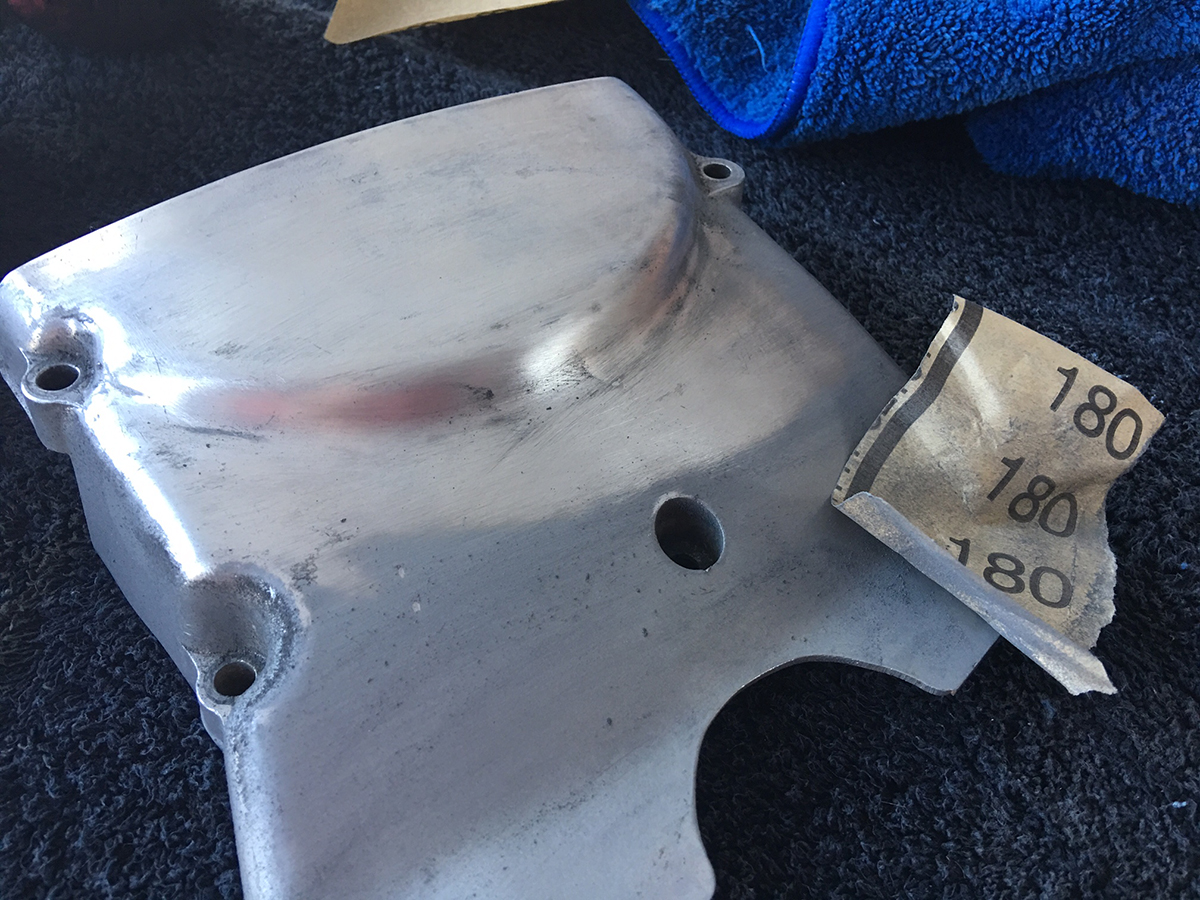
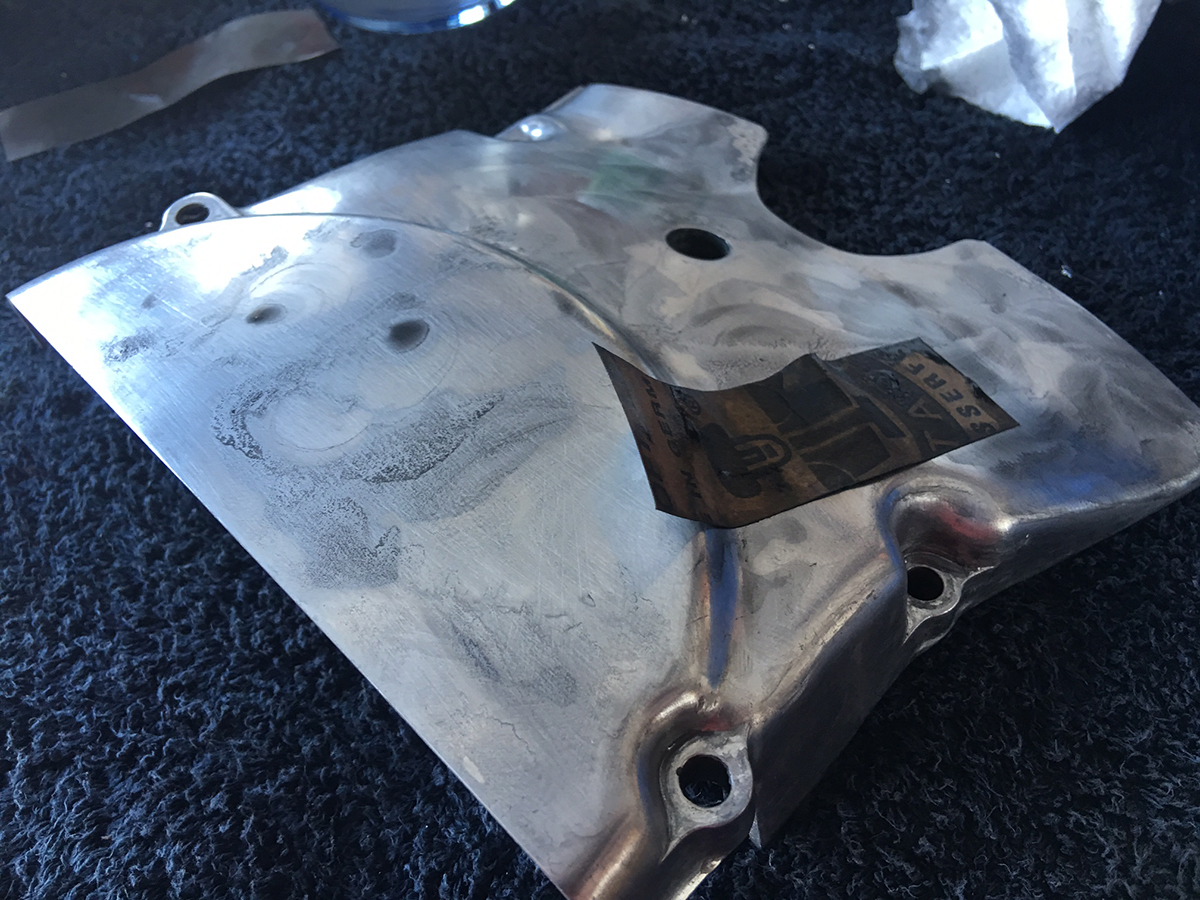
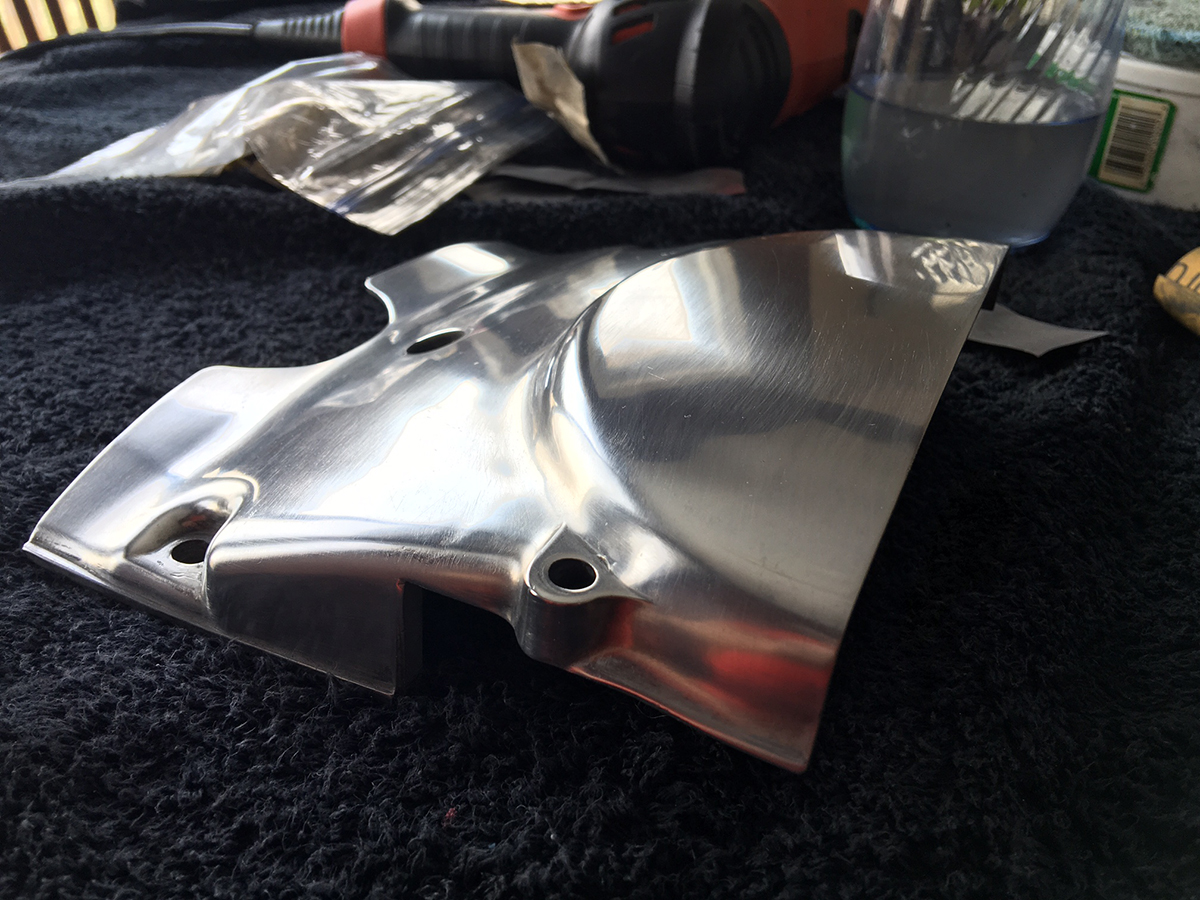
I started pulling random aluminum covers and getting them all polished up. I learned that some of them had been painted at one point, so that required a lot of extra labor...
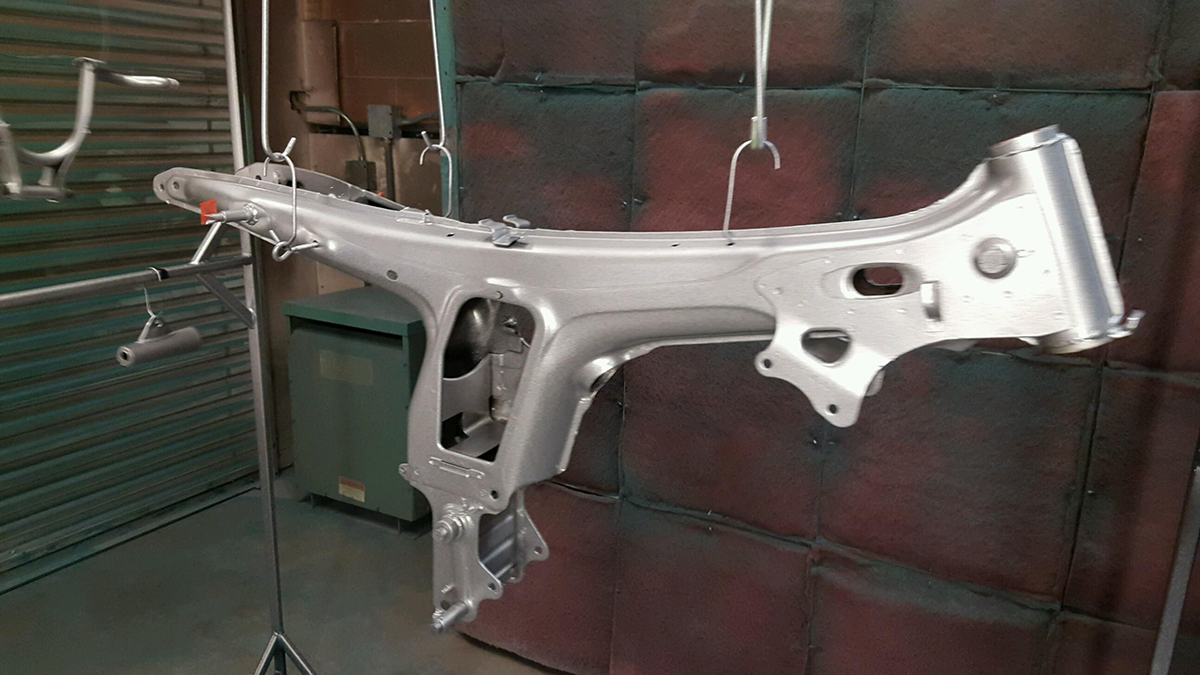
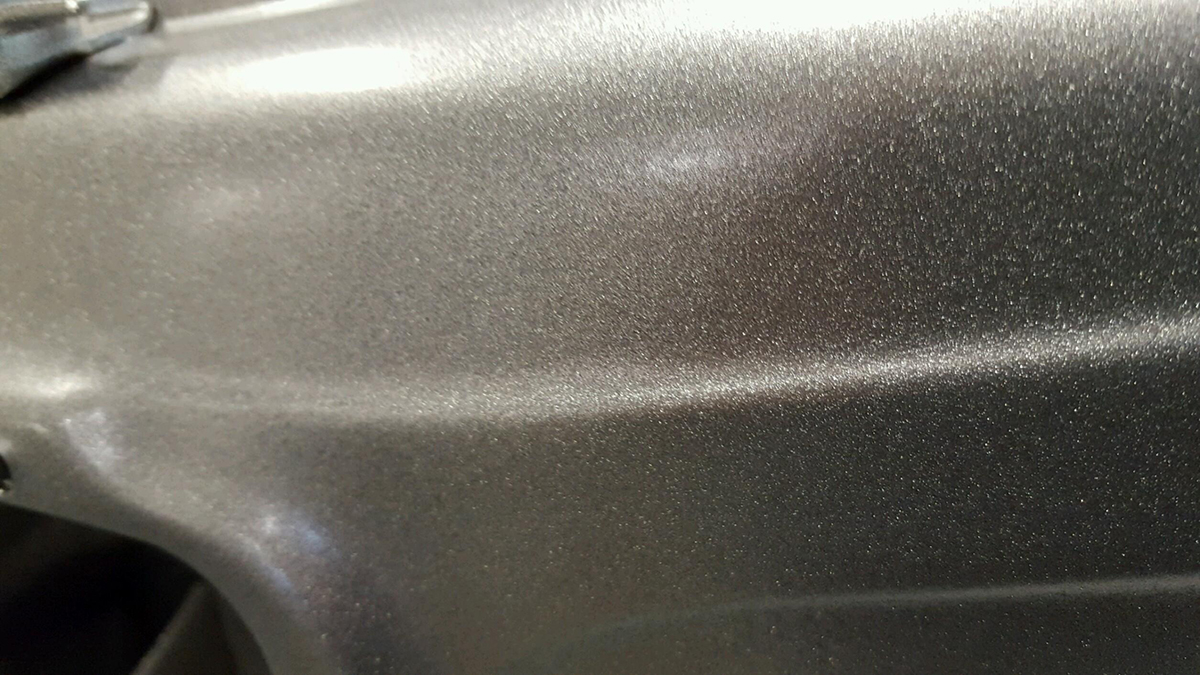
I was finally able to make an appointment with my powder coater. He's going to media blast and coat everything in the pic below.
I ended up changing my mind on color when I went there, after seeing some of his samples. I was just going to go with a gloss black like the bike came with stock, but instead of that decided on a SWEET looking shall-remain-secret (for now) color that will use a silver metallic with a flake as a base coat and then a candy coat over that. It cost a little more since each of the parts has to be sprayed and baked twice, but it'll be so worth it.
Away these go. Hopefully I'll get them back inside a couple of weeks...
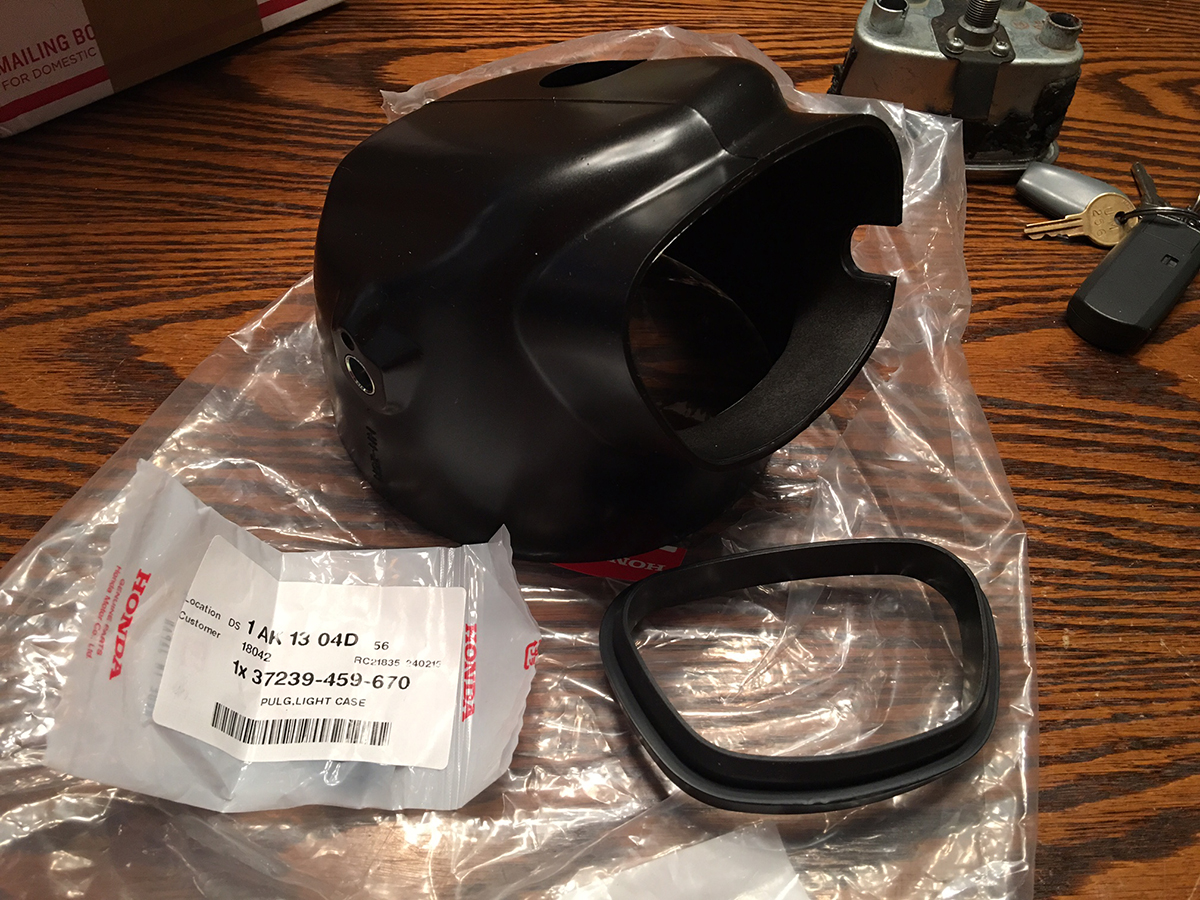
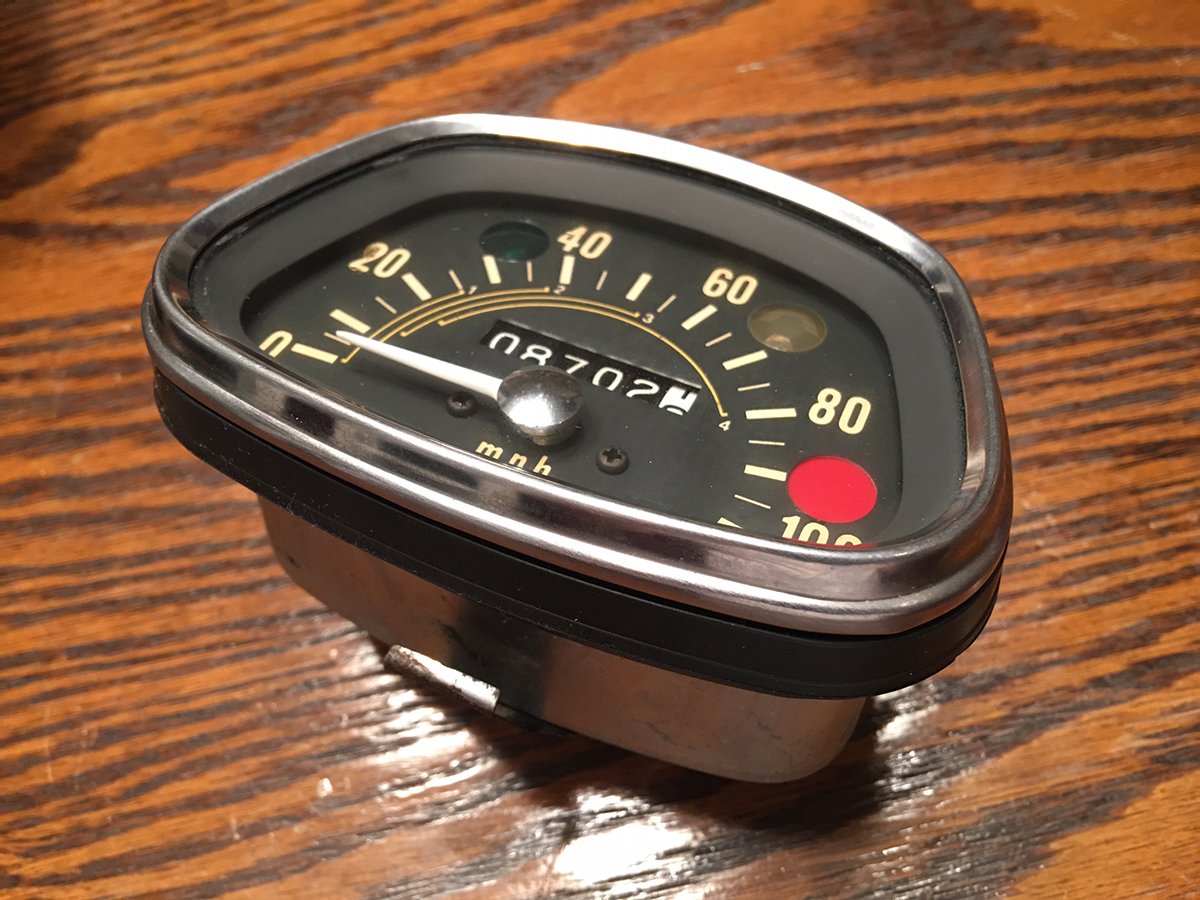
My new headlight bucket came in, along with the rubber ring for my stock gauge. I was able to get all of that black gunk off the gauge with a combination of a razor blade and some "Goo Gone." It worked out well. I'm excited that I can use the stock gauge, since it has the original odometer and everything in it.
I found a NOS pair of the smaller side engine covers vs my huge ones. Price was good enough to where I didn't want to lose them, so I'm hoping they fit and I don't have to modify them to make them fit. Fingers crossed.
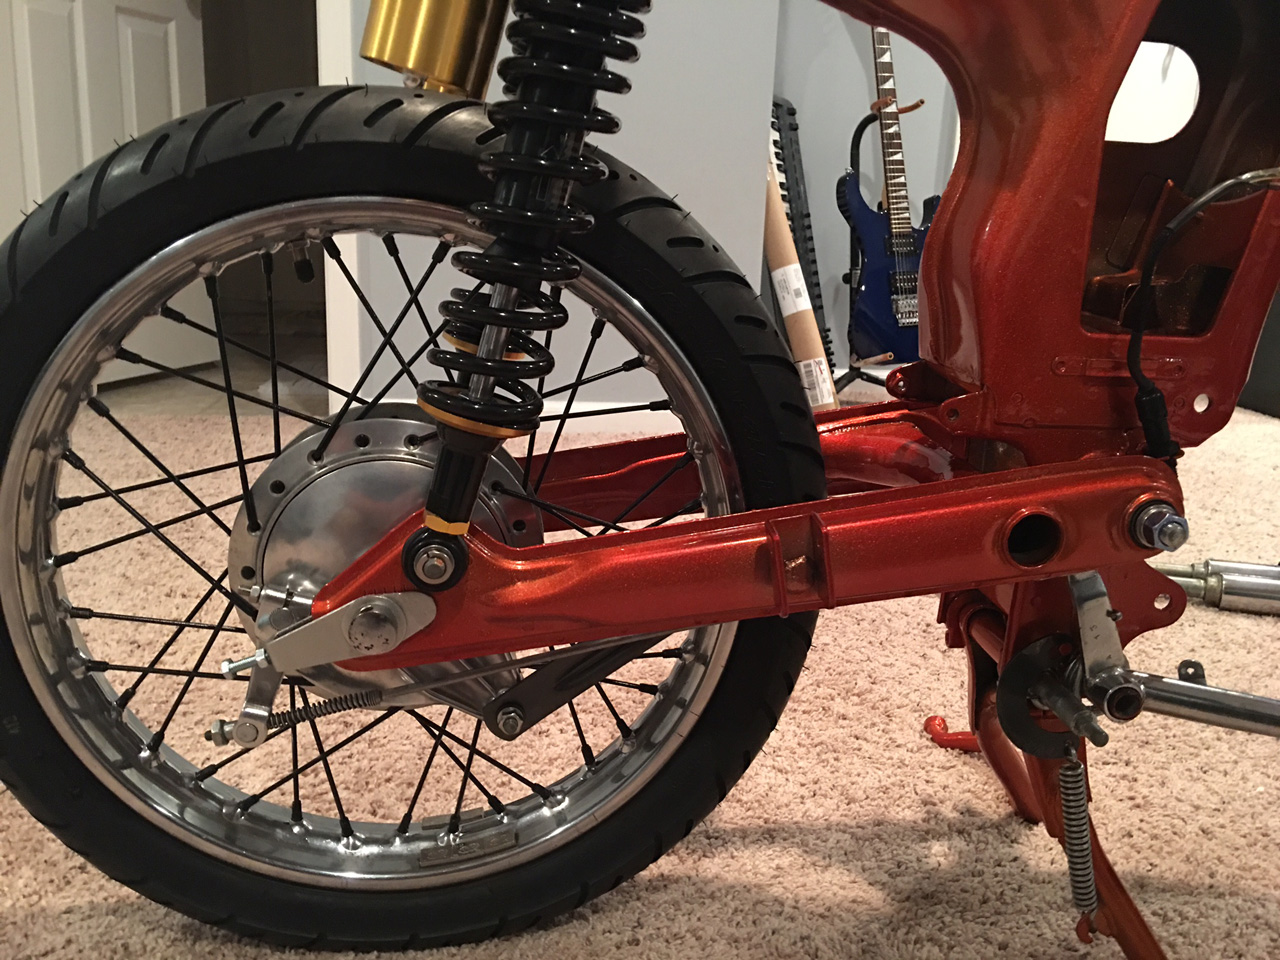
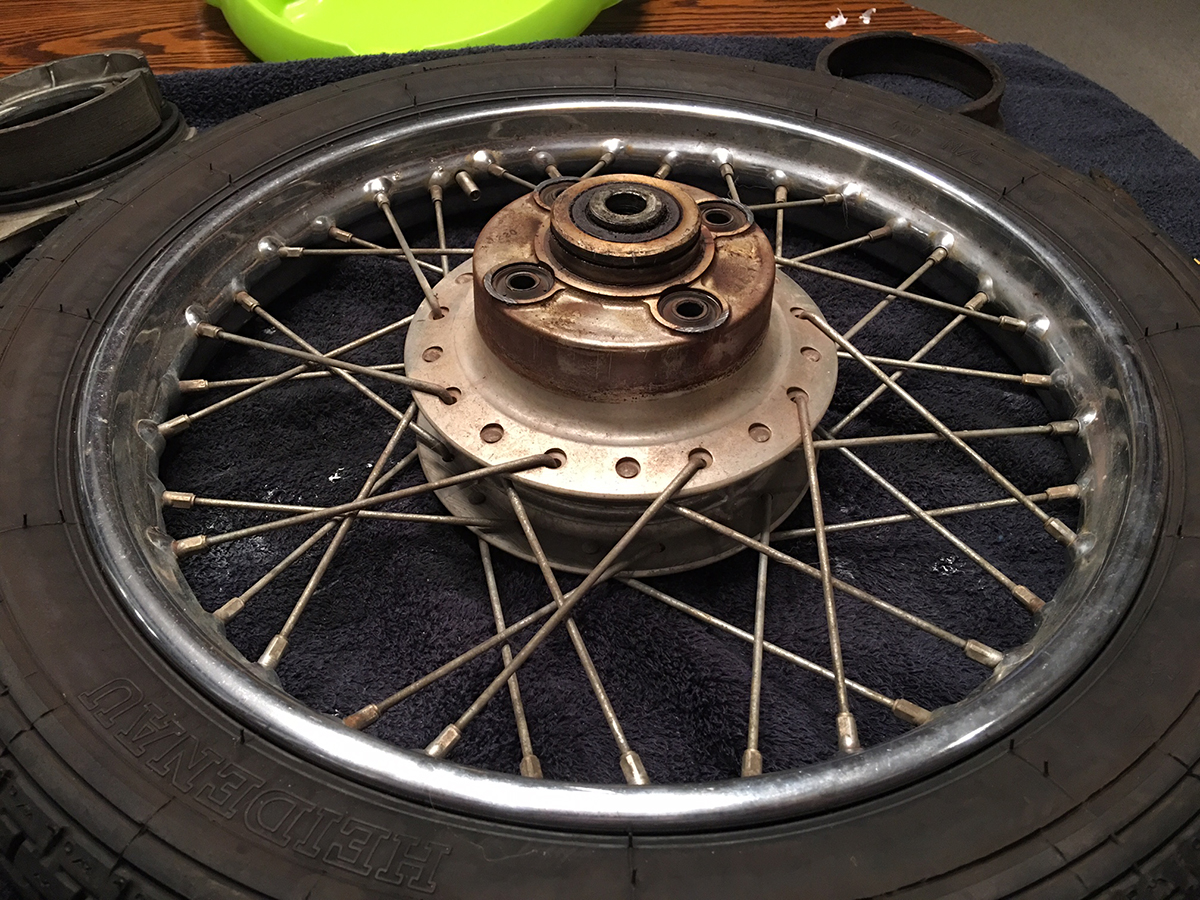
I got the back wheel all apart - spokes all came off without any problems, which was one thing I was worried about. The chrome hoop on the back wheel isn't as nice as the front wheel, but it's not horrible. I need to get some brake parts cleaner today so I can clean up the rear hub and front and rear drum assemblies and get all of those things polished up. Rear spokes and spoke nuts are sitting in a parts cleaner bath right now and I plan on getting those painted tonight.
My rim strips and tires are in, so I'm just waiting on my tubes so I can take everything in and have the wheels trued and have tires mounted. I'm excited that all of that will be done before I get my powder coated pieces back. I might have a rolling chassis here within the next couple of weeks!
The pile of shiny parts is getting bigger.
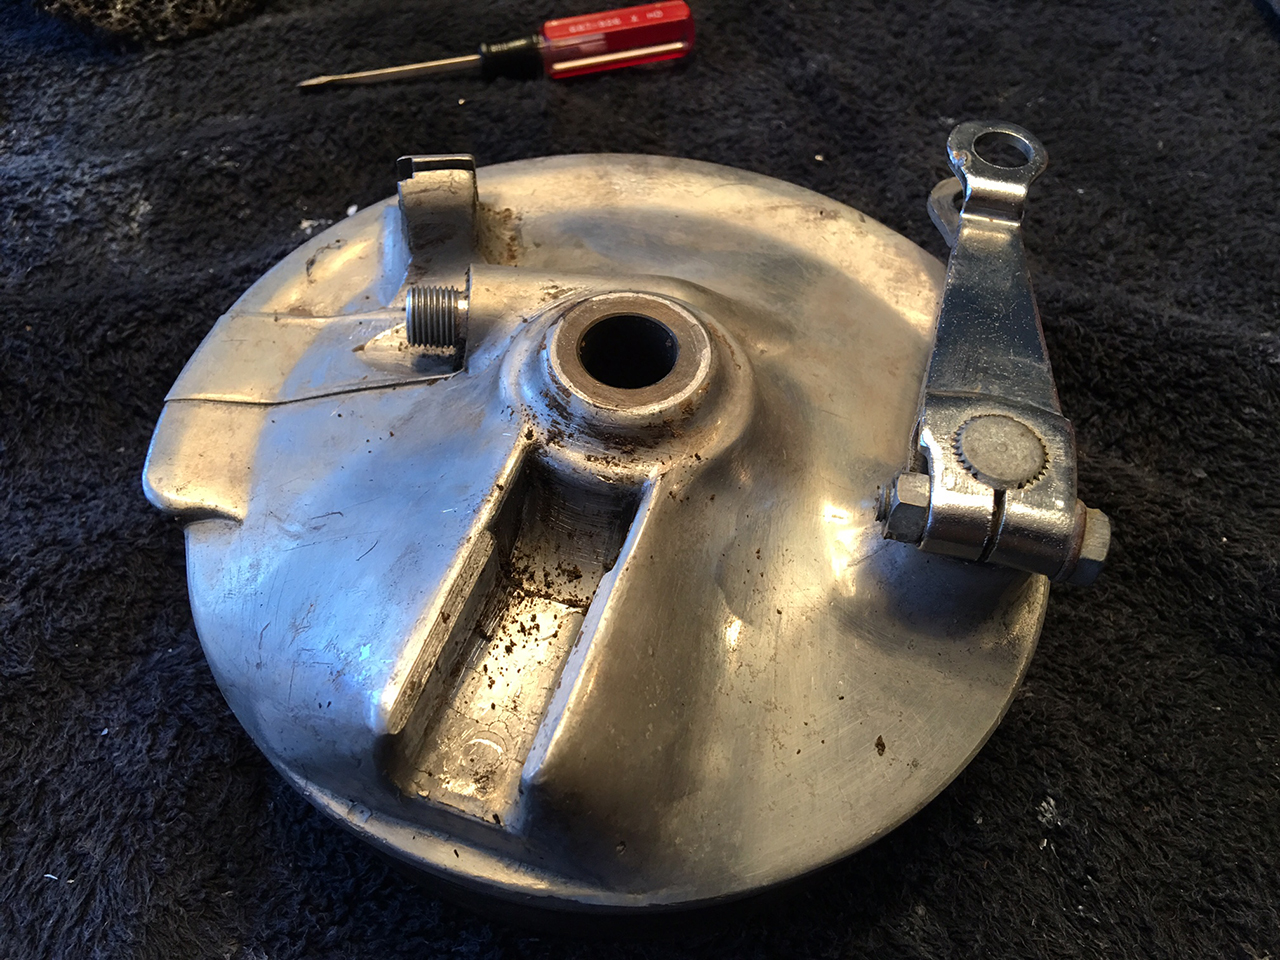
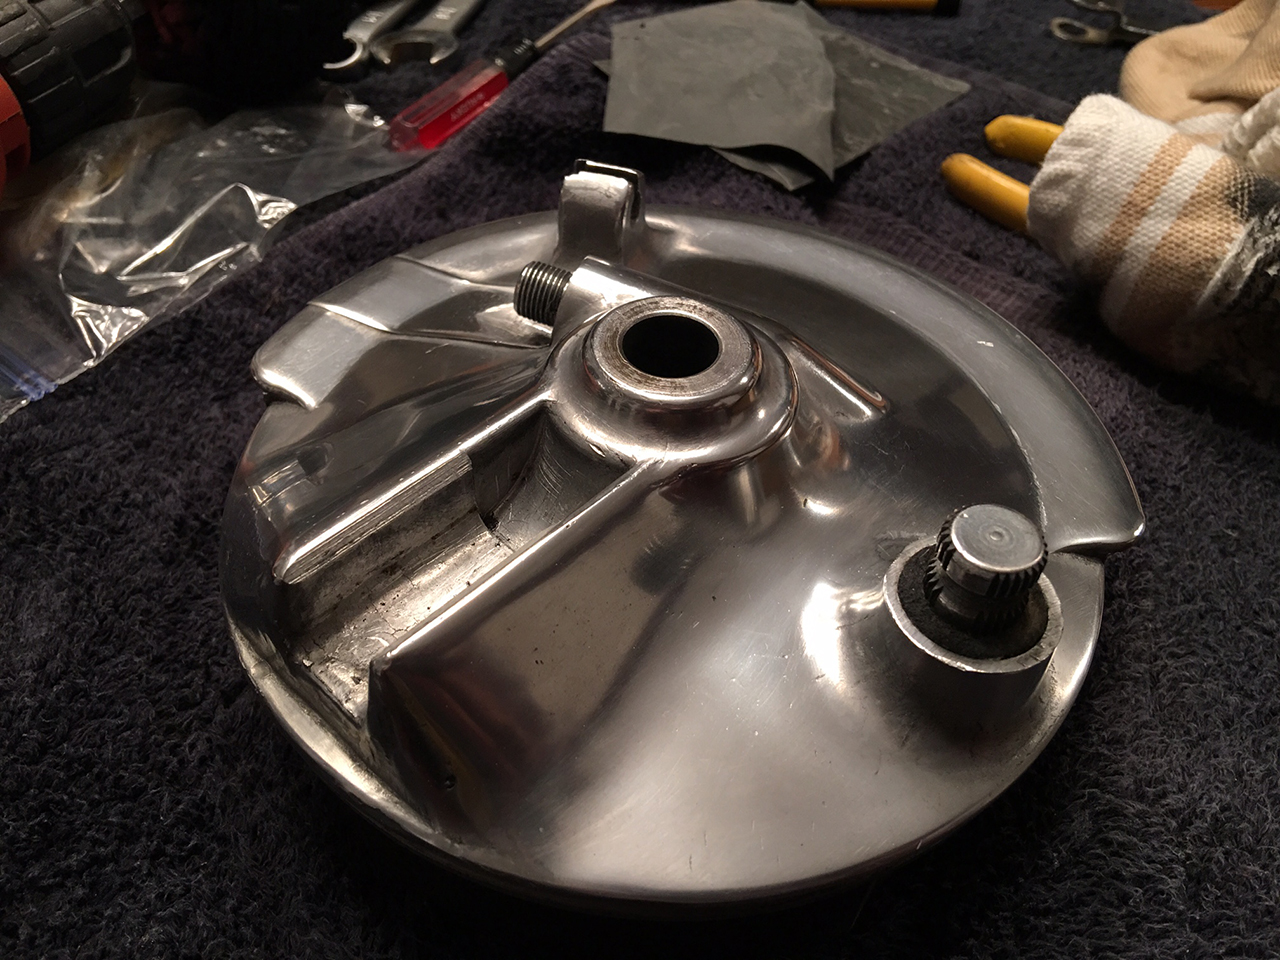
Still working on getting the rear wheel cleaned up so I can get those assembled. I got the front brake all cleaned up.
Front drum before and after...
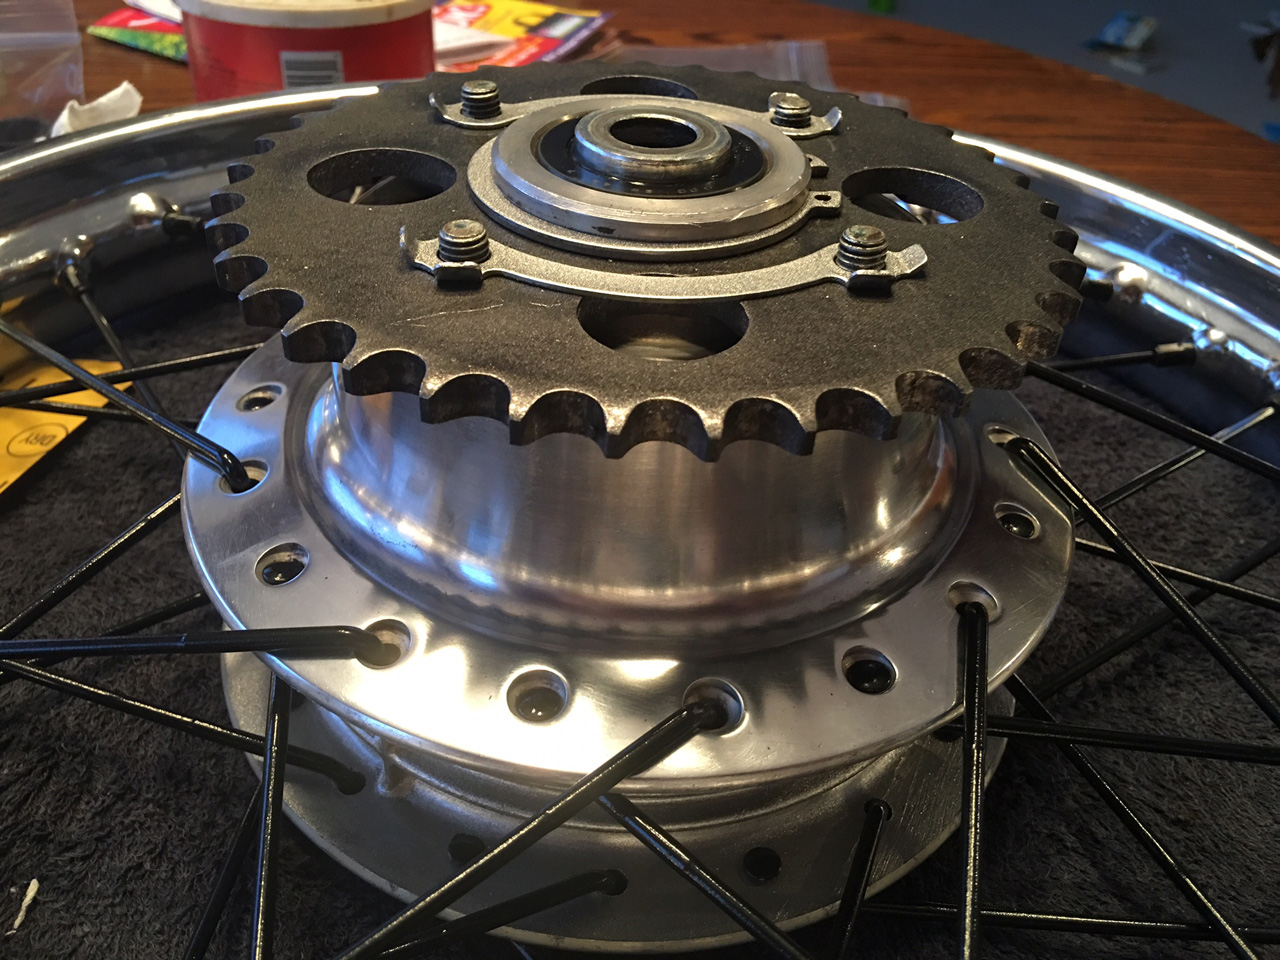
Here are before and afters of the rear wheel...
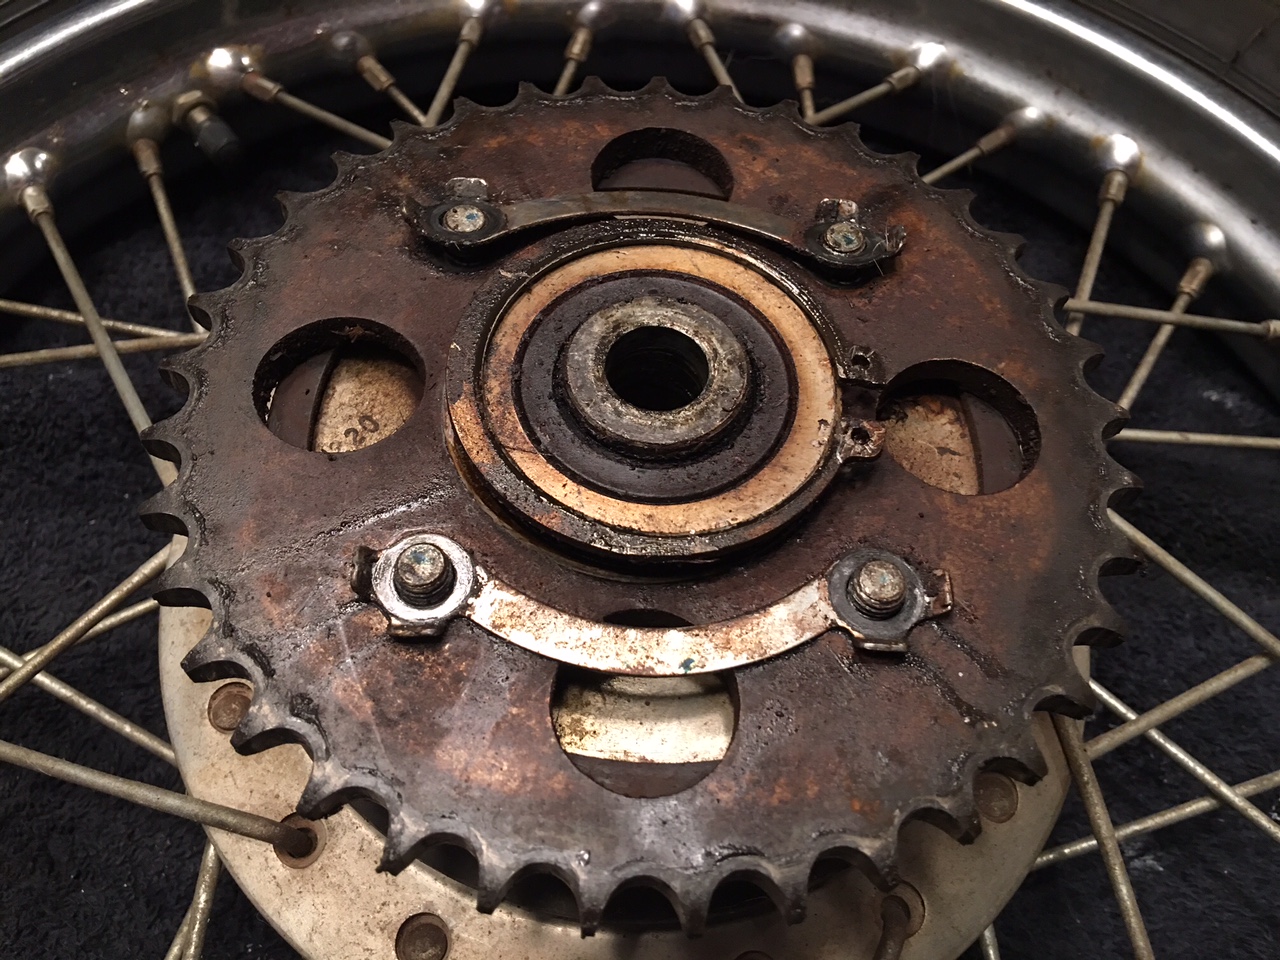
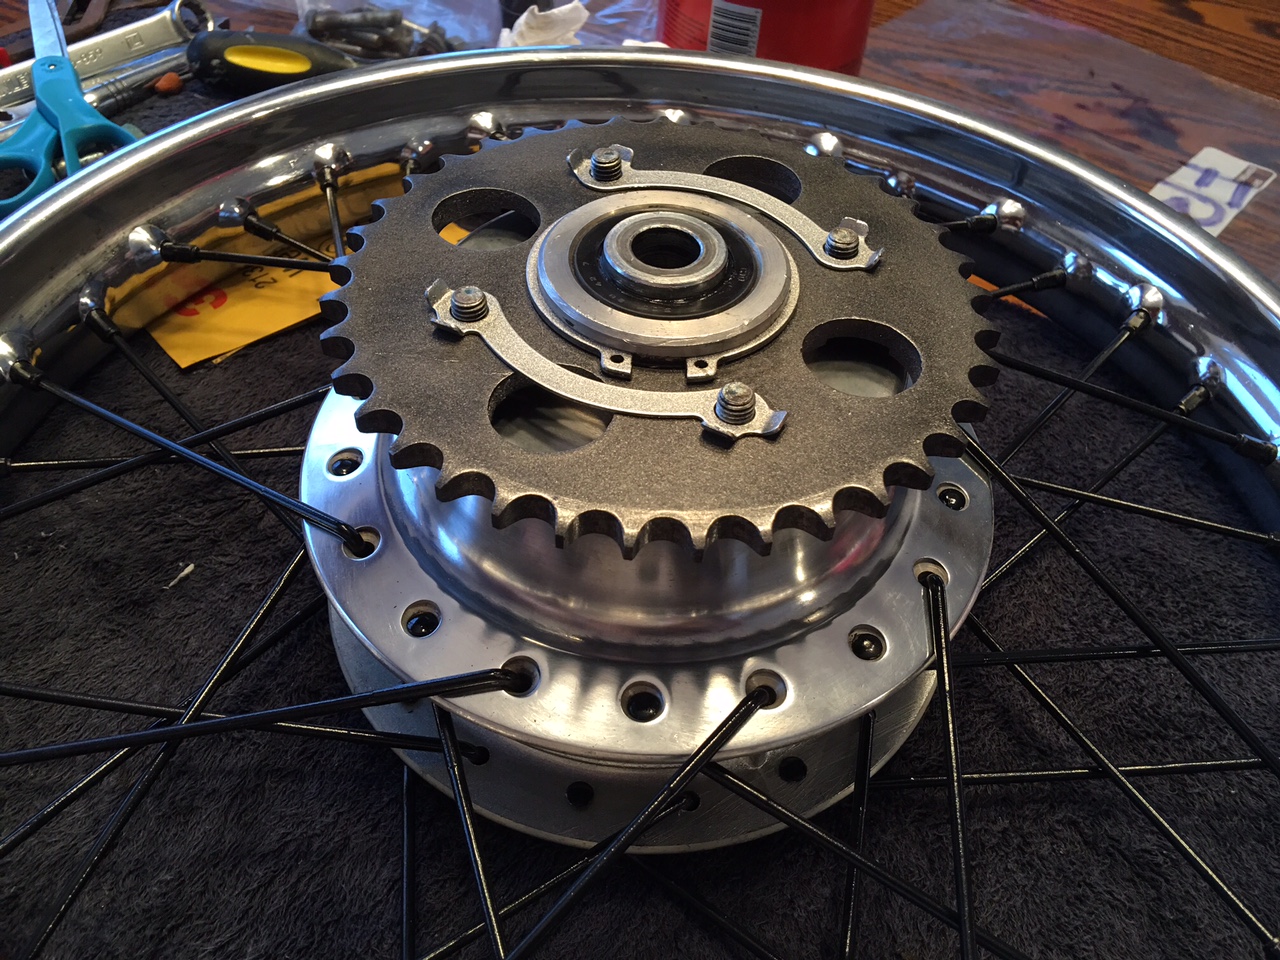
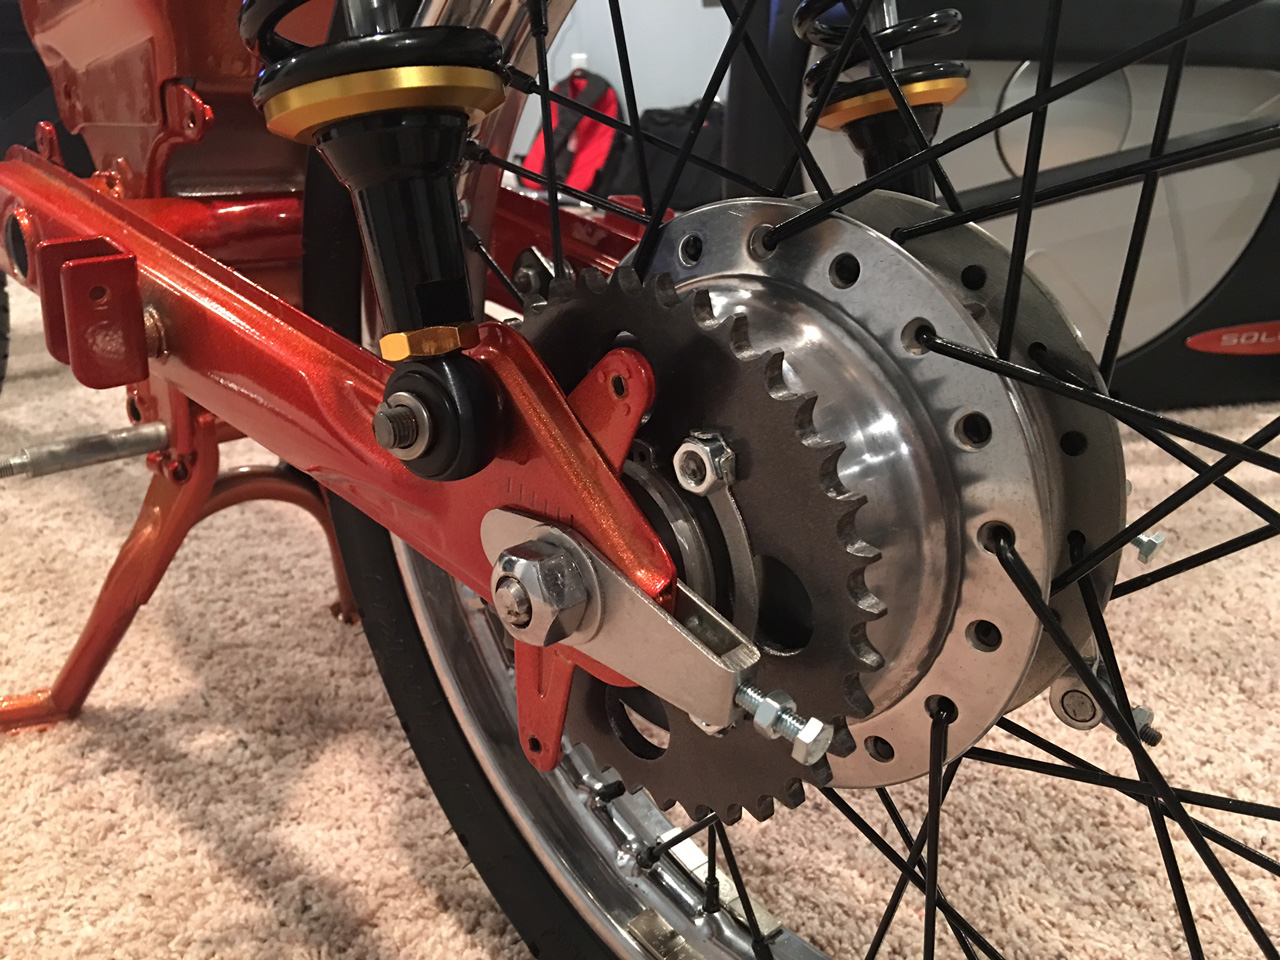
This one was taken after I clocked the snap ring correctly. Stock, the rear wheel came with a large plastic cap over this hub. I polished mine though and it's looking awesome, so I think I'm going to leave the giant plastic thing off. It didn't serve any obvious purpose other than just looks, so I don't think the bike will miss it.
There are also no nuts yet... that's because I somehow missed these when I went to the store today (grr), and I didn't want to put the stockers back on. I'll pick up some stainless or (preferably) chrome ones tomorrow when I'm out and about to throw on.
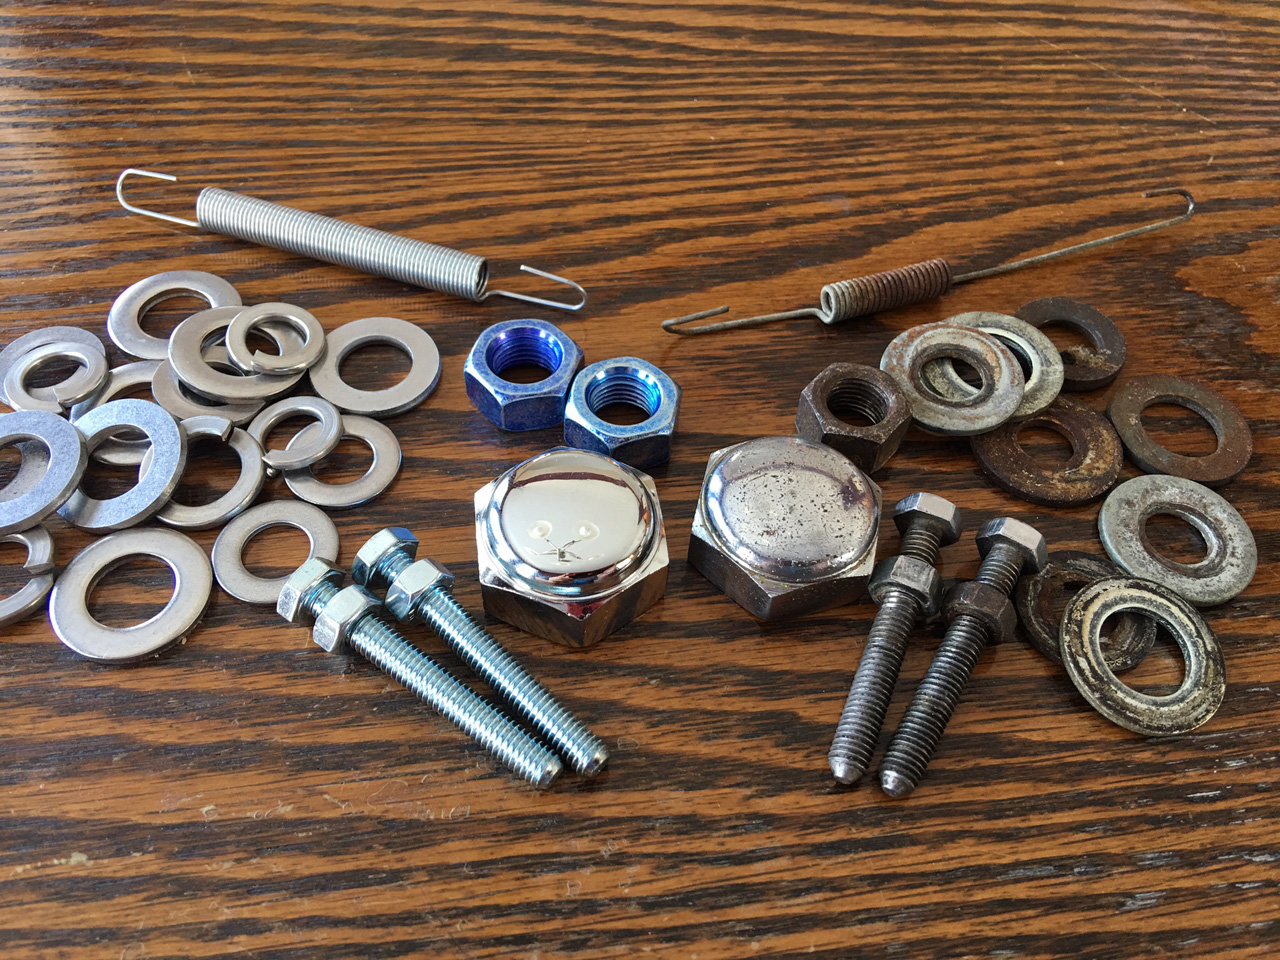
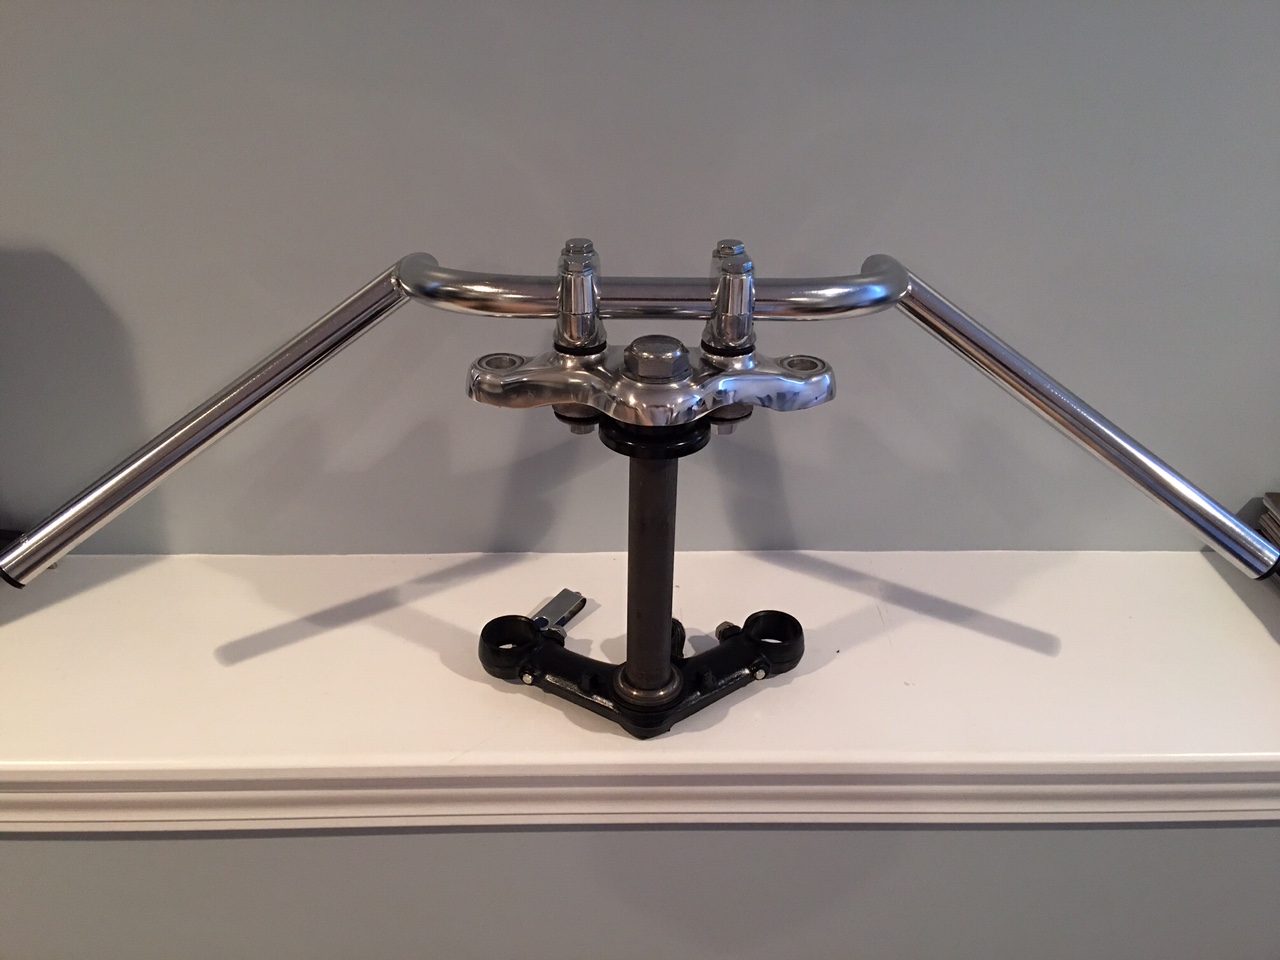
A lot of this will be hidden under the rear chain guard, but I don't care. I don't want to put a single nut, bolt, or bracket back on this bike that isn't clean. Also, as a result, I went to the hardware store today and found either stainless or chrome (chrome was preferable) nuts/bolts to replace all of the dingy stock stuff. This is really prevalent when it comes to things like the triple tree, which are in view first and foremost when the bike is assembled.
Here are before/after shots of that...
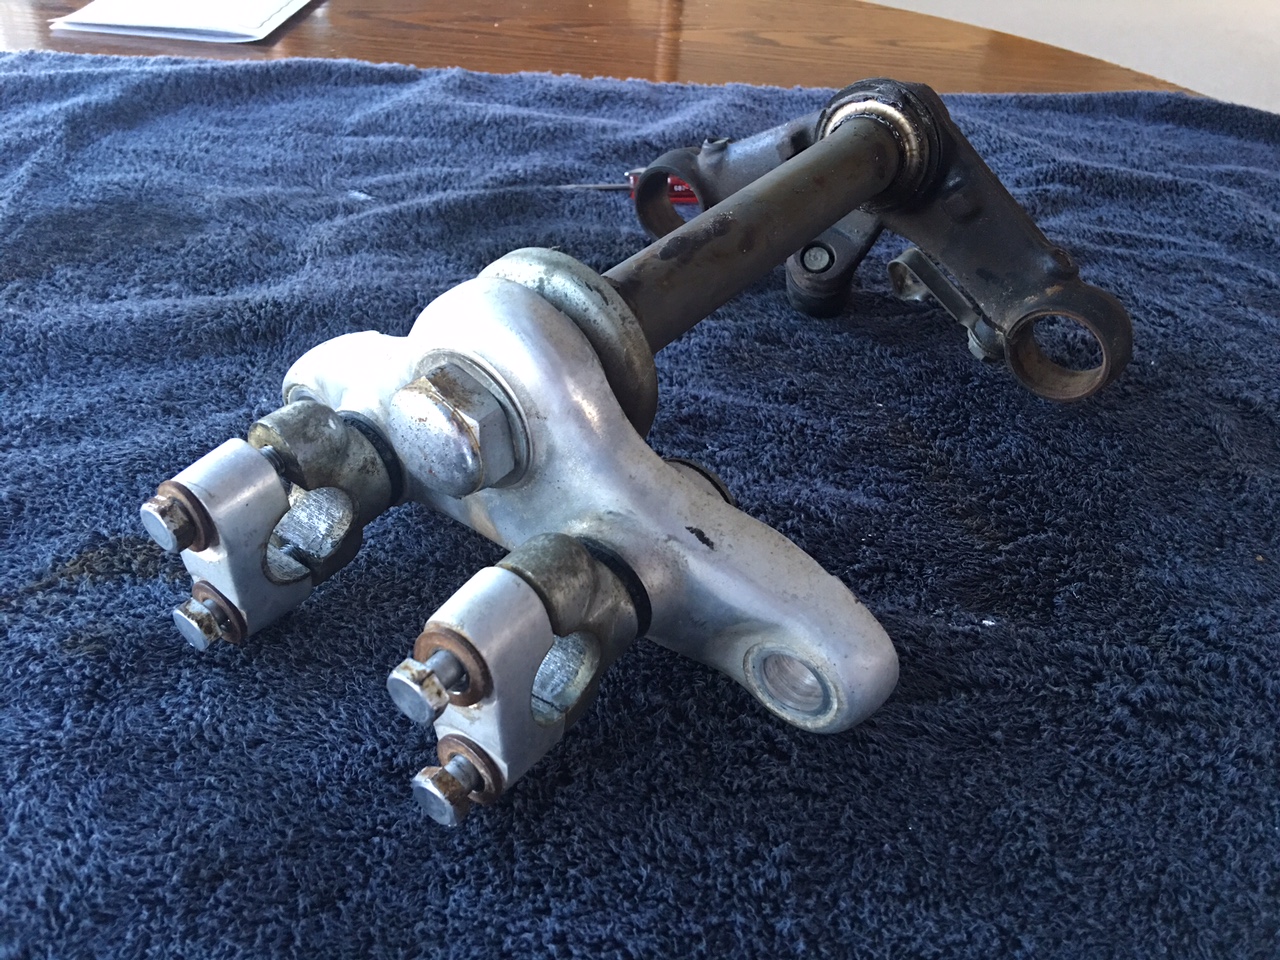
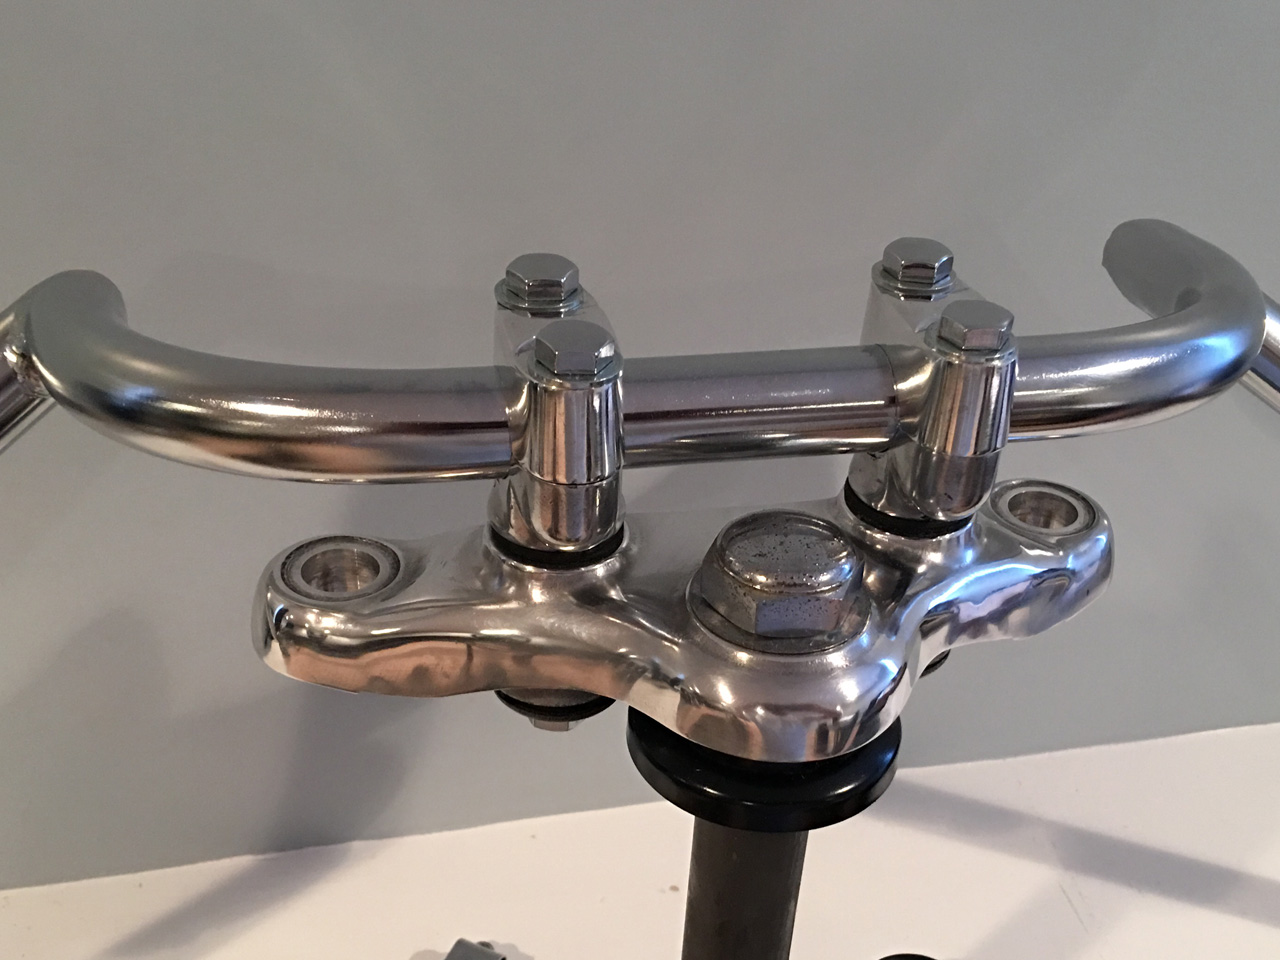
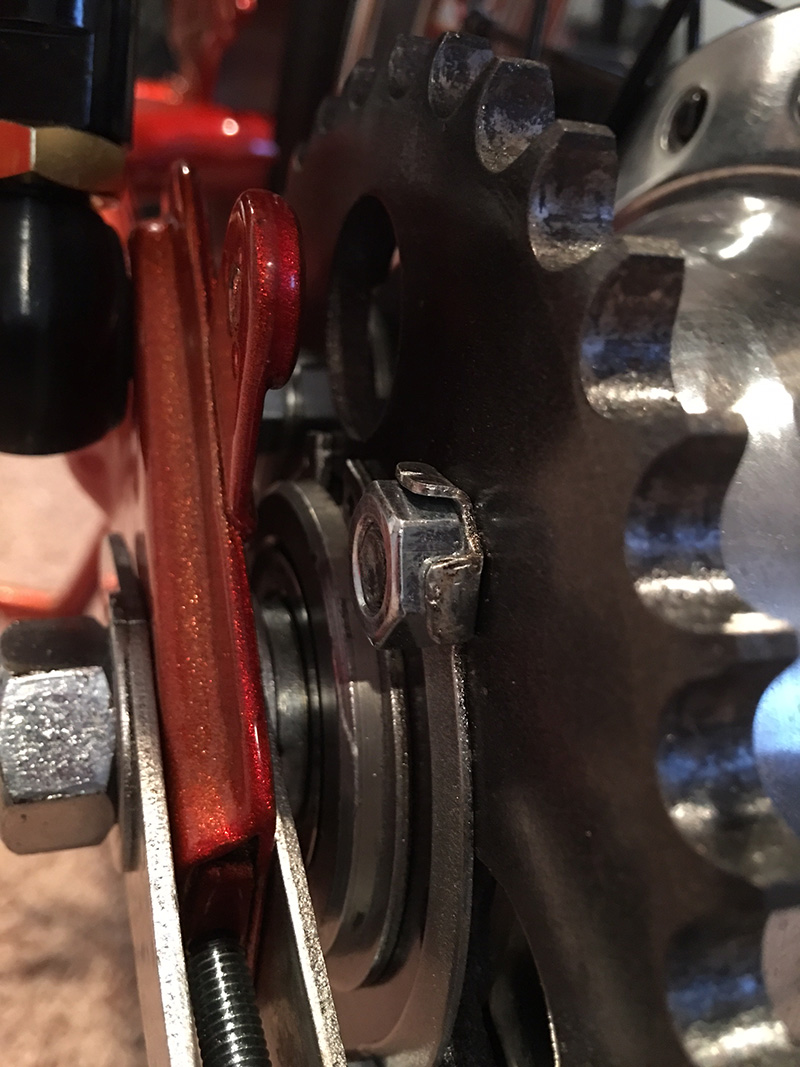
If you look close you'll see that the large nut in the middle is not in the best condition. It was heavily pitted and scratched. I cleaned it up as best I could, but it's not good enough. This is right in front of your face when you sit on the bike, so I want it to be perfect. I'll be replacing it before I call the bike "done."
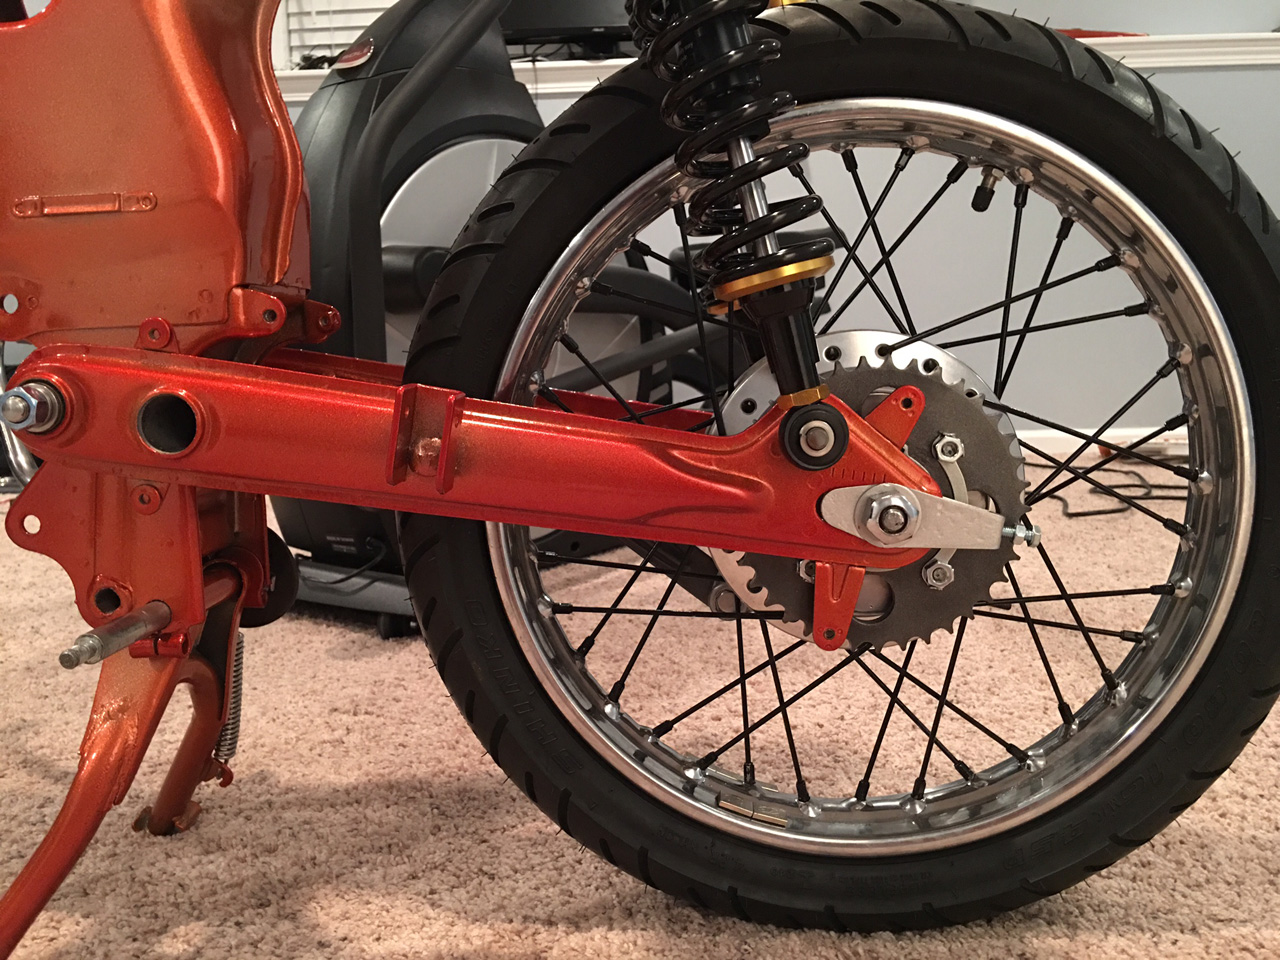
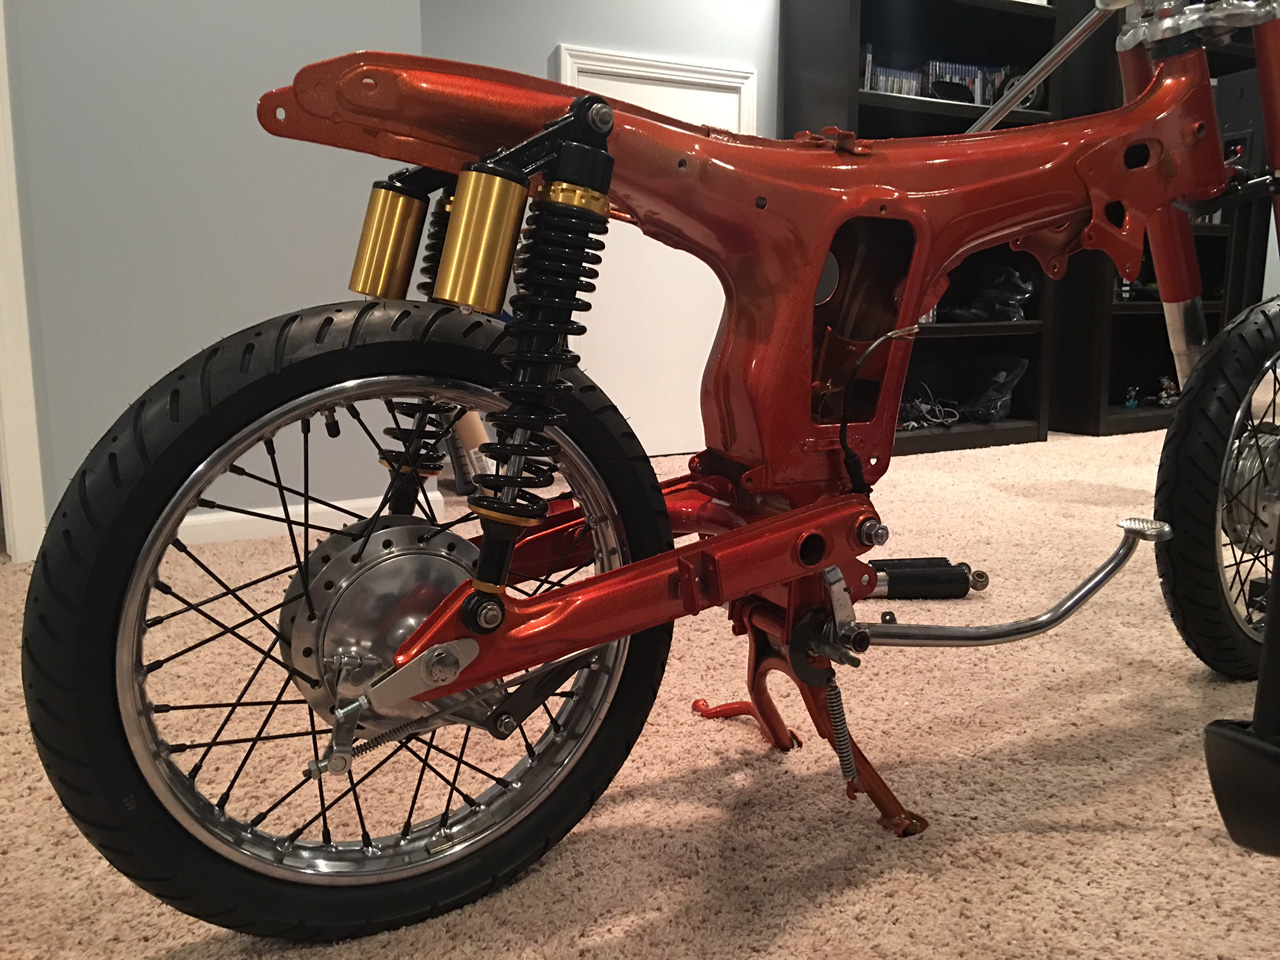
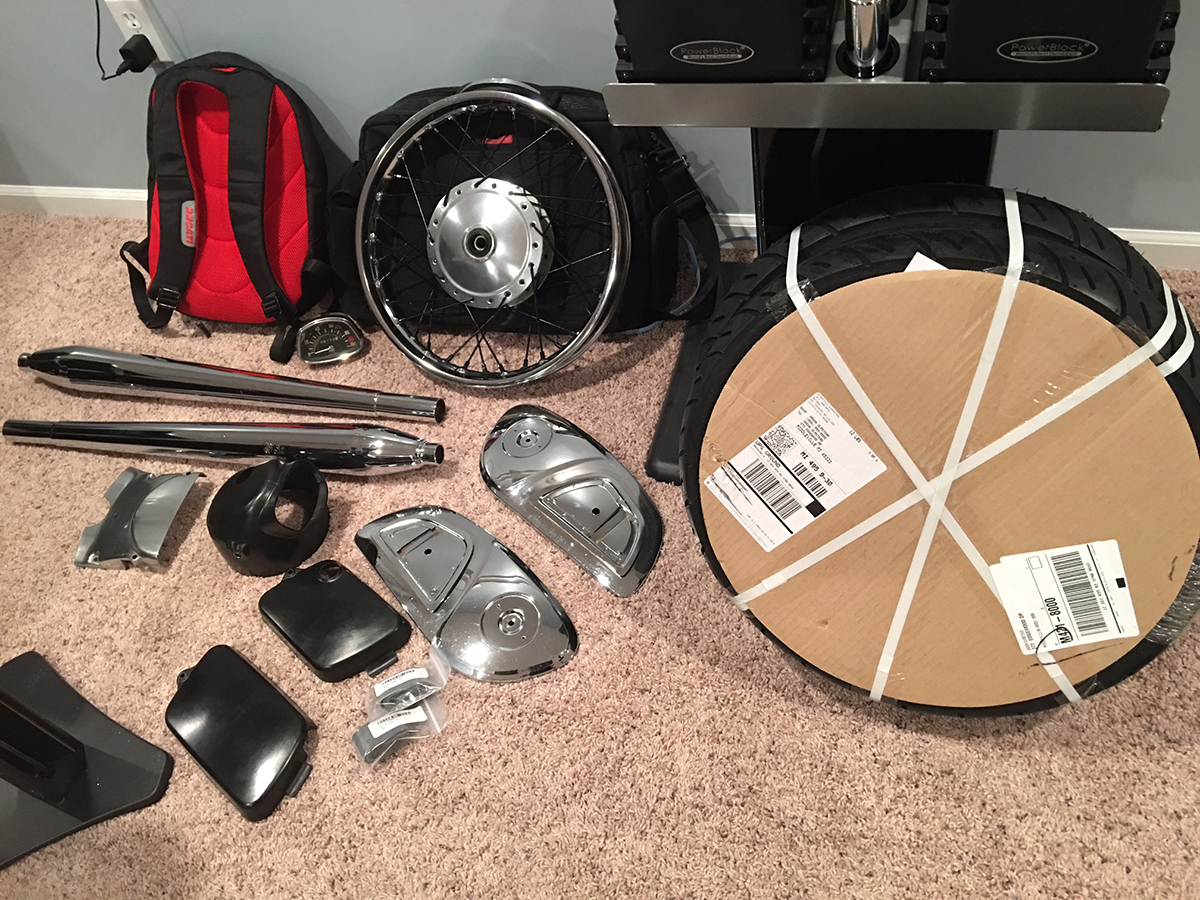
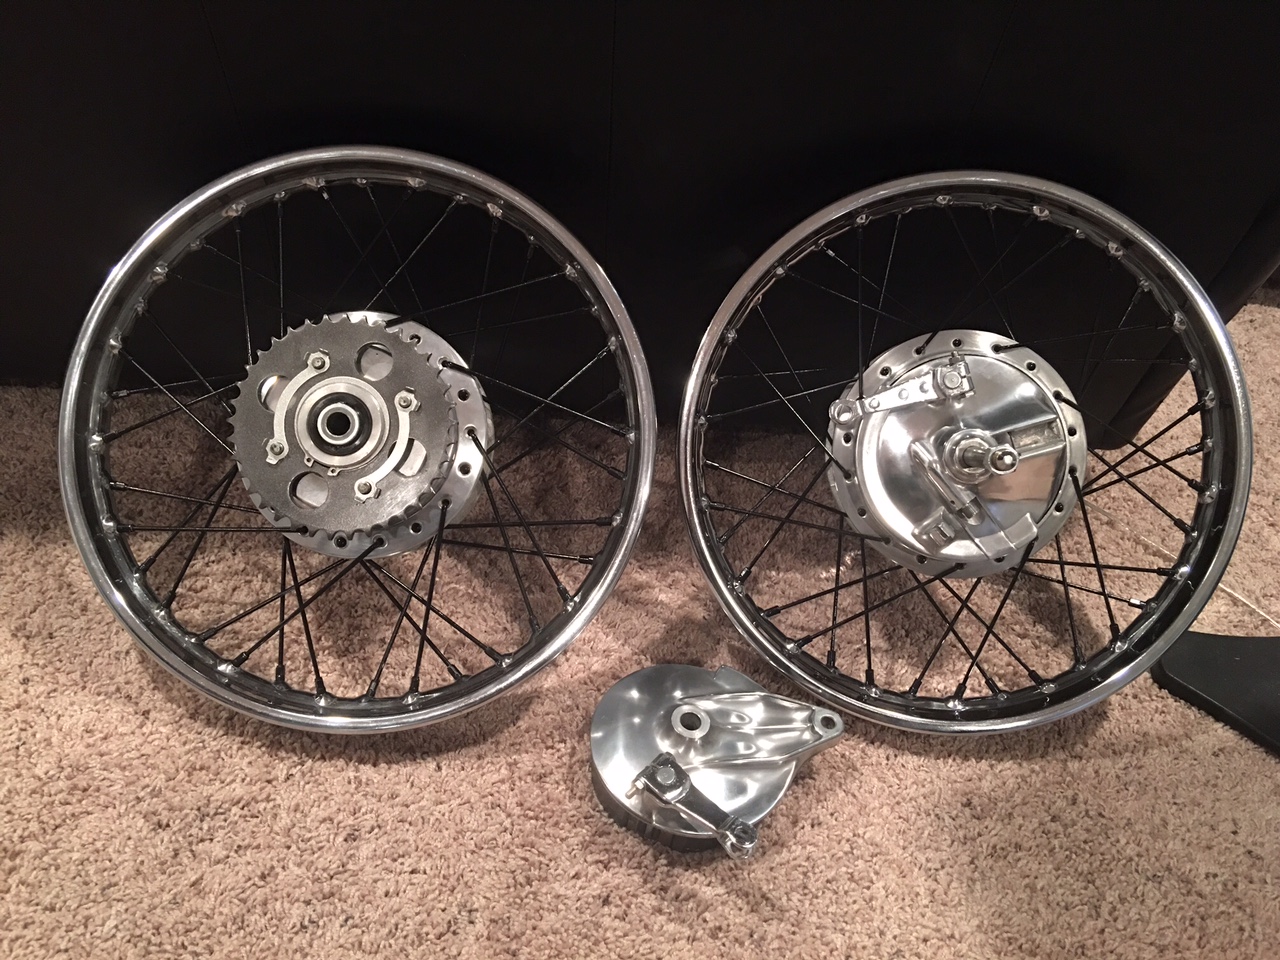
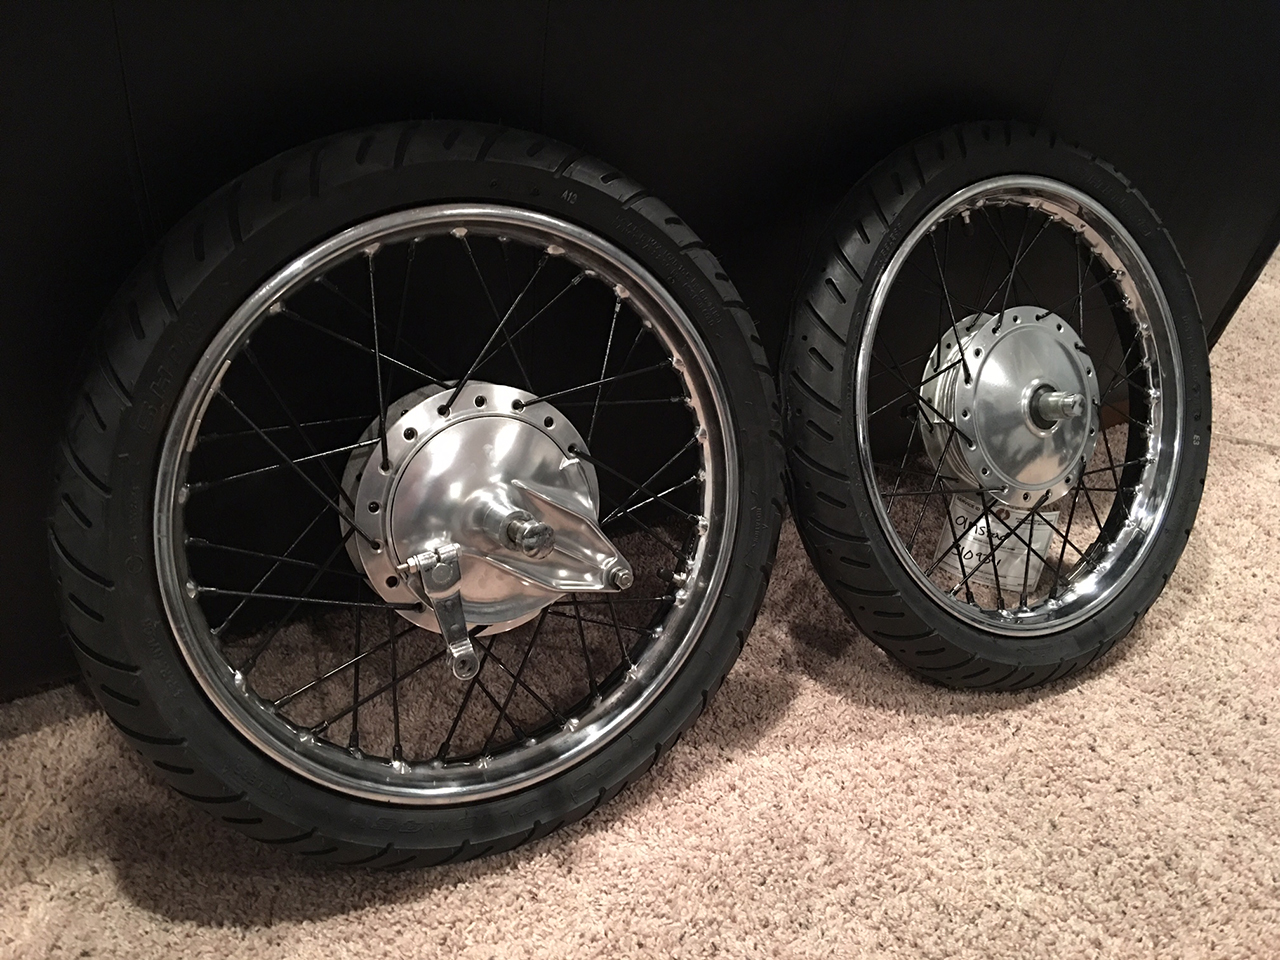
Here's a shot of my front and rear wheels finished. These will be going in to get trued and get the tubes/tires mounted.
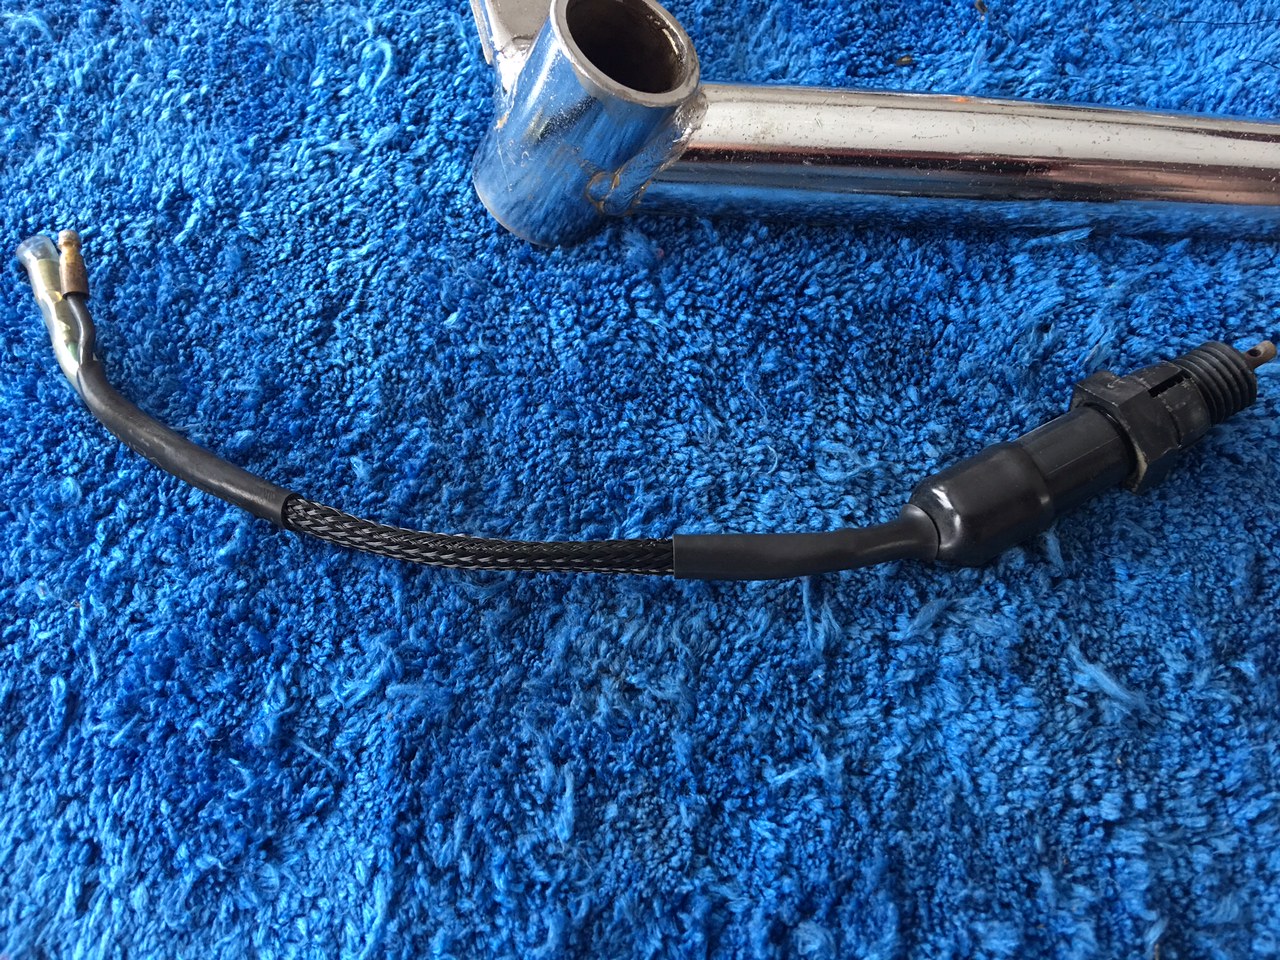
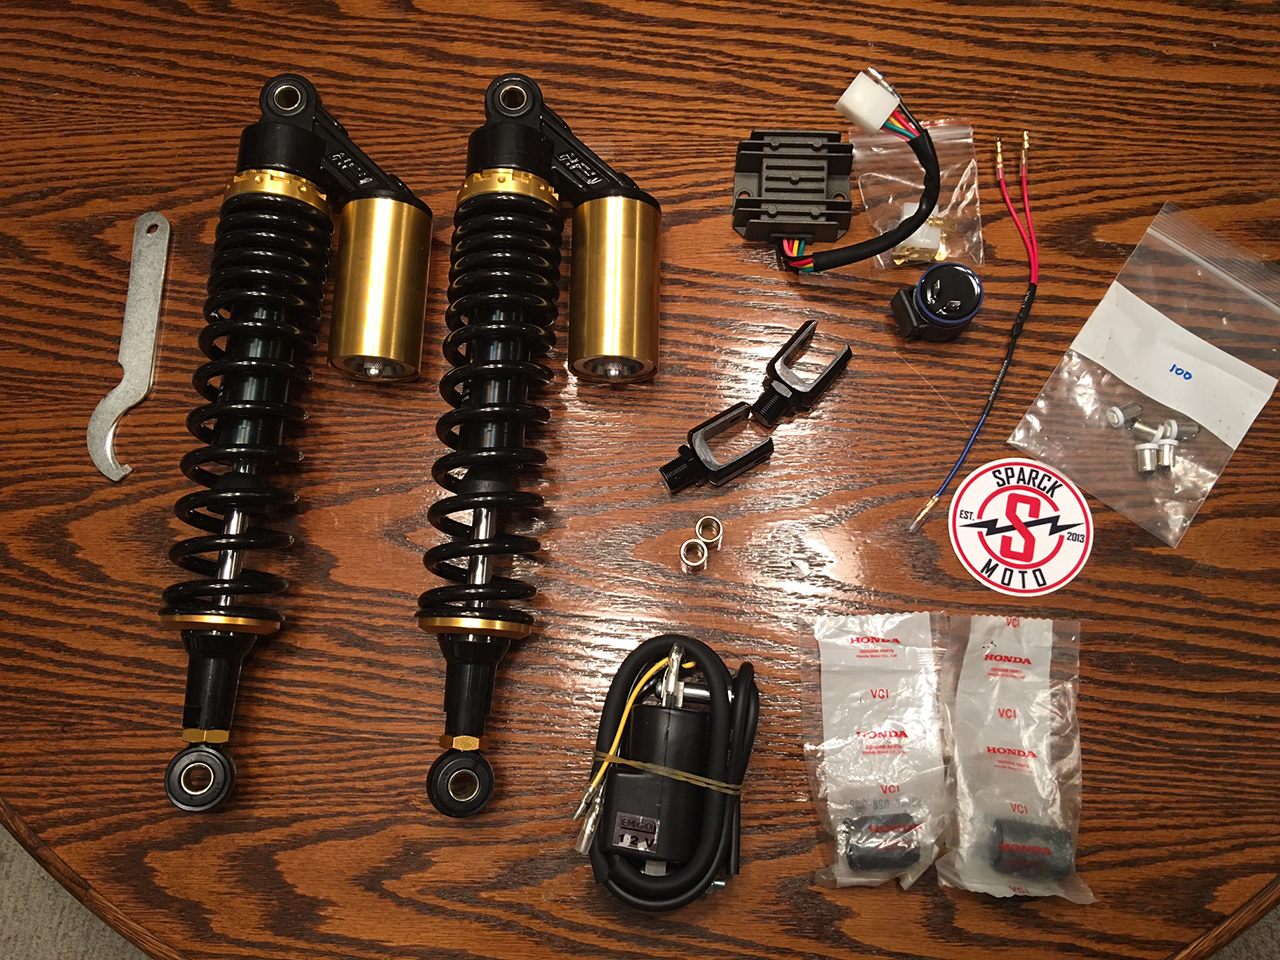
More stuff arrived. The remaining components of the 12V conversion from Sparck Moto, my coil, 12V LEDs for the cluster, LED flasher kit, rear swing arm bushings, and the rear suspension.
Wheels and tires ready to go!
Just waiting on powder coat dude...
To be continued!
Alright, so I've been taking a lot of pictures. It's easier to take pictures sometimes than it is to prop up a camera and take video (and then edit video), so this is going to be a split forum thread + YouTube video series in regards to the restoration / customization of my 1969 Honda CD175.
If you want to see the first filmed video in the series, and an intro to the bike, it's here:
https://www.youtube.com/watch?v=Dm3XaddxXpY
-----------
This is the bike when I got it home. This is basically where the video starts...
First thing I brought inside after the disassemble in the video were the sides of the tank. These are obviously very prominent and I wanted to make sure I could clean them up well.
I tried the "aluminum foil and water" trick, and that got almost everything off. I then hit them up with some chrome polish and they look pretty good now.
I"m not sure if I'm going to get them re-chromed or not, since they do have some pitting and some scratches that I wasn't able to get rid of.
Before:
After:
That was night 1. Night 2 I removed the front wheel and brought that in.
I bought one of those Powerball Minis and some Mothers aluminum polish, and decided to go to town with that. It did a really good job.
I didn't like all of the areas of the hub that I couldn't reach with the spokes on, and my front tire needed to be replaced anyway (it was the original and was cracking all over), so I just decided to disassemble the whole wheel so I could clean everything properly. Wasn't too bad of a job.
All of the spokes came off easily and aren't rusted or anything, so I'm going to re-use them. As you can see they're kinda dingy though.
So I have them sitting in a little carb cleaner bath and that seems to be working really well. If I can't get them to 100% of their former glory, I'm going to paint them black.
The visible part of the rim is in extremely excellent shape. No pitting, rust, or flaking of the chrome. As you can imagine the inside of the rim was a little bit worse just because of what gets trapped in there under the tube and what not.
Spokes come out of the carb cleaner bath...
They are super clean and smooth now, but they are stainless and not chrome, so they aren't super shiny. They are the original ones as far as I can tell, and rather than spend over $100 shipped for some aftermarket ones from Taiwan I decided to paint these. I covered the threads with the nuts, painted them, waited a couple hours, flipped them, and then coated them again. I'll wait a day or so for them to dry completely and hit them with a coat of clear to protect them.
In other news, I was able to get that rim cleaned up really well.
I'm going to polish the aluminum on the outside of the hub as best I can, but inside the hub is a different story. I scrubbed on it for a while, and though it came clean, it's nearly impossible to get any tool that I can use to buff with in there to clean it up. Even if I was able to it'd be impossible to clean with the spokes on later. Result? masked the parts I was able to polish on both sides of the hub and hit the middle with some wheel paint. When it dries, I'll hit it with some clear.
I worked on getting all of the electrical pulled out of the bike... which revealed some less than awesome things. I'll get to that later...
I also worked on re-lacing my wheel, which turned out pretty great. I need to build a rig to true the rim still, and pick up a spoke wrench, so for now it's just laced and waiting. I was referred to a local place that works on mopeds, stocks a lot of equipment. They have Shinko SR714's in stock, along with tubes and tire strips, so when I get the rear wheel looking like this front wheel I'll probably just take them both to them, have them true the wheels for me, and install the strips/tubes/tires.
Removing the electrical involved removing the handlebars and handlebar controls. Getting the electrical components out of the handlebars was a pain in the arse. The wires are all so stiff, and the at one time plastic sheathing that goes around them is rock hard. Some of it I was able to just grab with my hand and squeeze and it broke apart. Ugh.
I was able to get the whole harness off/out without cutting anything.
A majority of the harness, including the entire coil and the voltage regulator are inside the frame under where the tank goes. Also in there at one point lived a mouse, because I found remnants of his home... and his poop.
He also at one point thought it'd be fun to snack on this..
Just some thoughts on the harness... I'm not going to be re-using it. Wiring in this bike is simple enough to the point that I'm just going to make my own harness when the time comes to put the bike back together. A lot of these components will be replaced anyway, since I will be converting the bike to 12V. The handlebar controls are also pretty rough. One of them is missing the little black square of plastic for the selector switch, and both are pretty dingy inside. I'm thinking that the items that I remove from this bike and don't re-use, since these bikes are hard to find in the US, I'll put on this forum for sale or on eBay to help someone else out who is restoring one to 100% factory condition.
That being said, I don't think I'm going to go that route. Originally that's what I wanted to do, but I'm not doing all of this to make a profit on the bike or to make it some sort of historic time piece. I want to build it to enjoy and ride, so reliability is of the utmost importance to me. Likely what I'll do is find some modern controls for the headlights, blinkers, etc.with a retro LOOK but are modern inside. I'd prefer to get them off of a name brand bike vs some random OTS China controls on eBay or something. I'm thinking maybe Triumph would be ideal, or maybe look at the controls from a Yamaha SR400 or some other modern retro-throwback bike, but I haven't looked yet.
I'm also not going to use the original handlebars, so I won't be using the original throttle tube due to the fact that the throttle mechanism is inside the bars, which I didn't know until I pulled that off.
I would like to use the original speedo though, which looks like it might be a problem. The unit itself will be fine after I clean it up, but at some point in time some genius decided it'd be a good idea to use caulk to affix it to the headlight bucket. :-/
The headlight bucket is also cracked next to the mount (which I knew and mentioned before), but upon removing it I also found a large chunk missing that must have broken off at some point. :-/
Decided to focus on getting the rear end apart. First thing to come off was the giant rear fender, which I found out is actually plastic on this model. Mine is in really good shape, with no cracks or anything. Here's the bike with it on...
And here it is with the fender off...
I have to say, it's a lot cleaner looking without that huge rear fender.
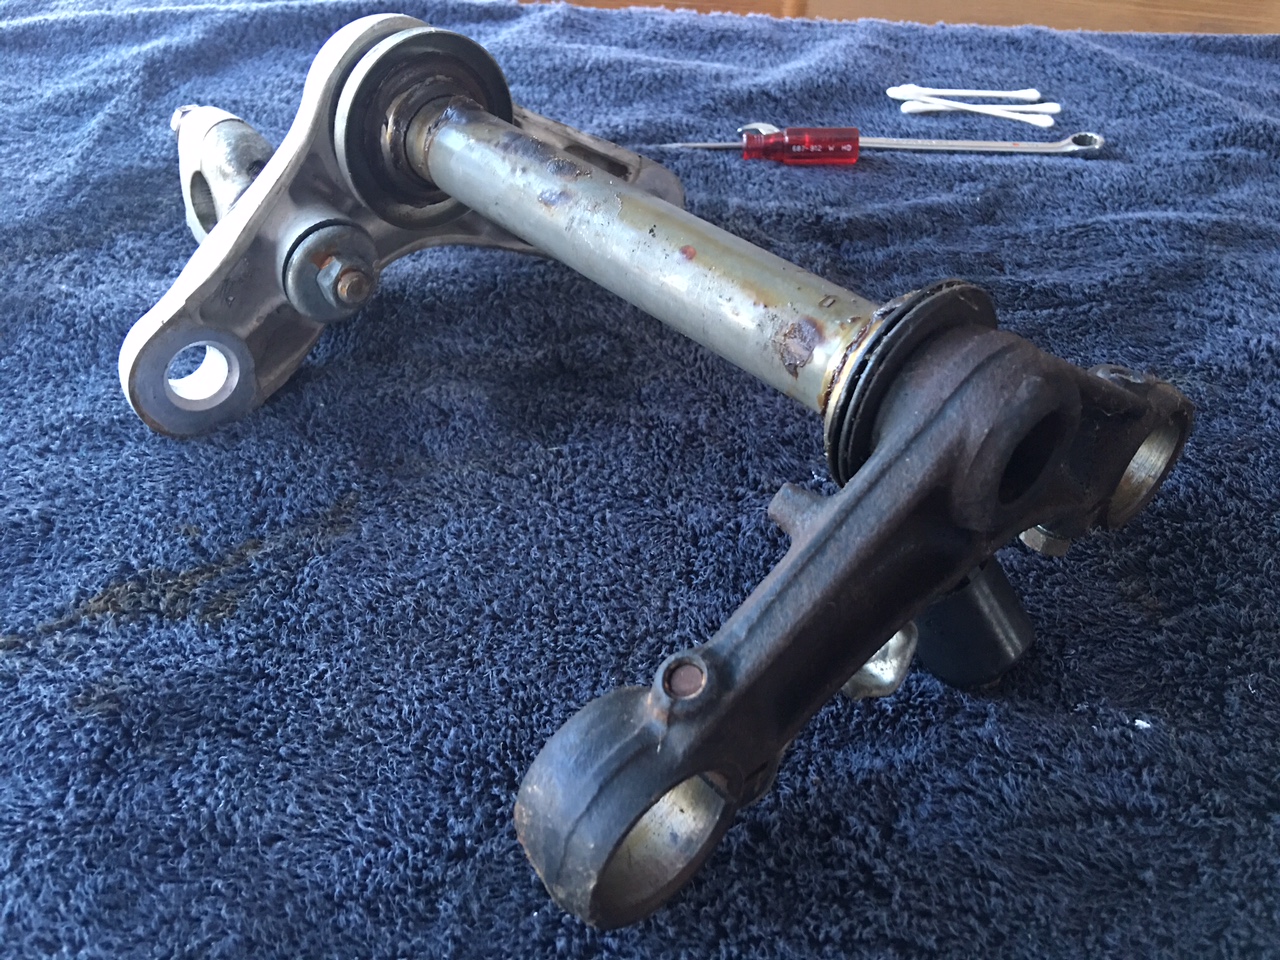
The rest of the rear end came off pretty easy as well. Everything is a lot simpler than I thought it would be. Equally as simple as a Honda CRF50 dirtbike that I classed up a few years ago. Aside from the way the suspension and swing arm attaches, it was almost 100% like the CRF50.
Once the rear end was off, I could finally divorce the engine from the frame. 4 bolts and that was out... pretty simple.
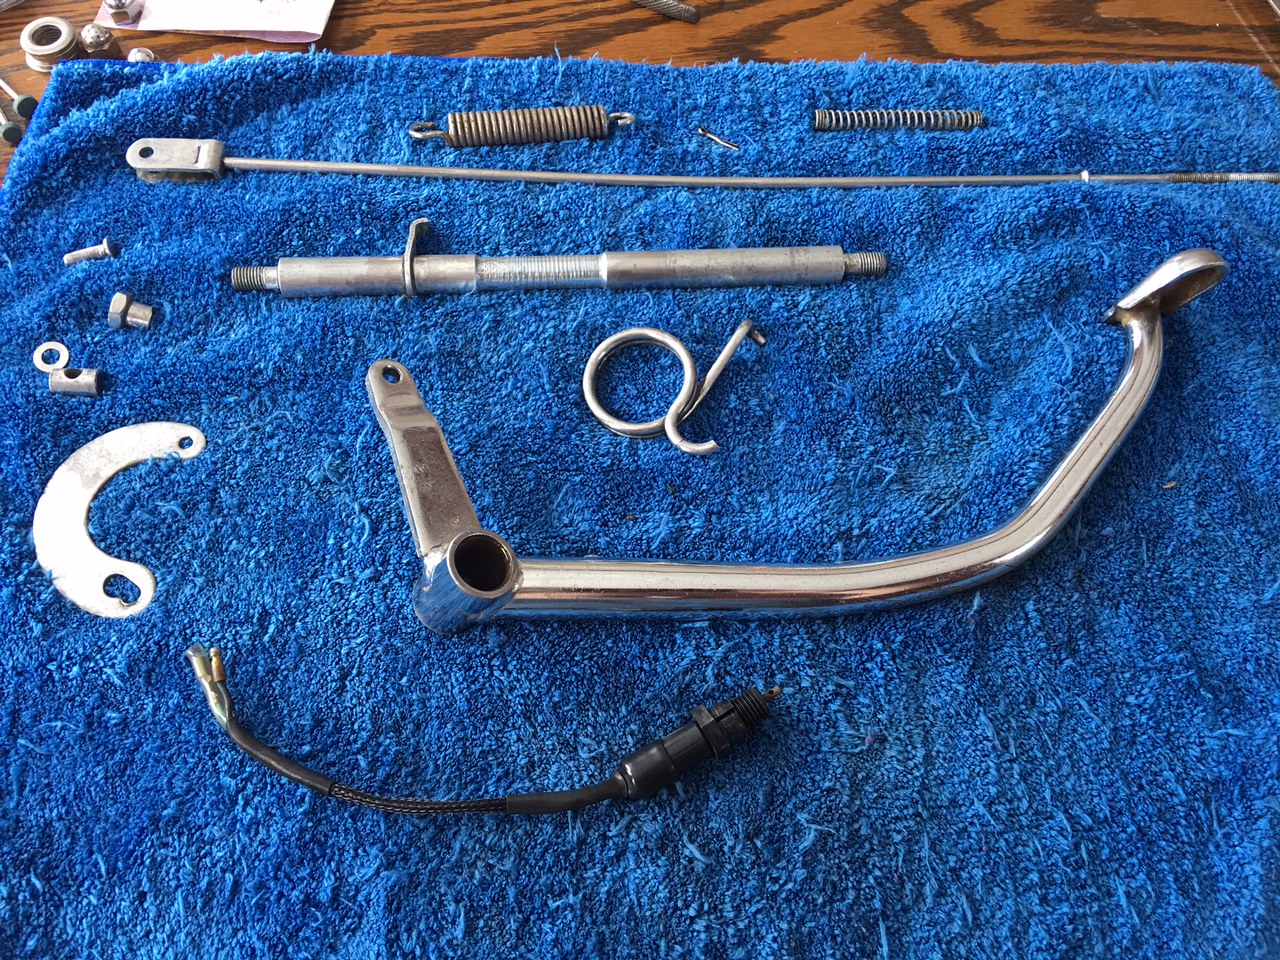
I disassembled the triple tree and pulled the front forks out, and then separated all of the parts that I'm going to need to have media blasted and powder coated.
I got a quote from a local guy for $350 to do all of this stuff. I'm not sure if that's a good price or not. I have a quote request out to another guy but I haven't heard back yet.
Here's all of the stuff that will need to be done:
In the mean time, I started cleaning my pipes up.
I started cleaning up the front forks. Luckily the seals look good and they aren't leaking or anything, so that's great. Here's a little before and after on one of those after I got it finished.
I started pulling random aluminum covers and getting them all polished up. I learned that some of them had been painted at one point, so that required a lot of extra labor...
I was finally able to make an appointment with my powder coater. He's going to media blast and coat everything in the pic below.
I ended up changing my mind on color when I went there, after seeing some of his samples. I was just going to go with a gloss black like the bike came with stock, but instead of that decided on a SWEET looking shall-remain-secret (for now) color that will use a silver metallic with a flake as a base coat and then a candy coat over that. It cost a little more since each of the parts has to be sprayed and baked twice, but it'll be so worth it.
Away these go. Hopefully I'll get them back inside a couple of weeks...
My new headlight bucket came in, along with the rubber ring for my stock gauge. I was able to get all of that black gunk off the gauge with a combination of a razor blade and some "Goo Gone." It worked out well. I'm excited that I can use the stock gauge, since it has the original odometer and everything in it.
I found a NOS pair of the smaller side engine covers vs my huge ones. Price was good enough to where I didn't want to lose them, so I'm hoping they fit and I don't have to modify them to make them fit. Fingers crossed.
I got the back wheel all apart - spokes all came off without any problems, which was one thing I was worried about. The chrome hoop on the back wheel isn't as nice as the front wheel, but it's not horrible. I need to get some brake parts cleaner today so I can clean up the rear hub and front and rear drum assemblies and get all of those things polished up. Rear spokes and spoke nuts are sitting in a parts cleaner bath right now and I plan on getting those painted tonight.
My rim strips and tires are in, so I'm just waiting on my tubes so I can take everything in and have the wheels trued and have tires mounted. I'm excited that all of that will be done before I get my powder coated pieces back. I might have a rolling chassis here within the next couple of weeks!
The pile of shiny parts is getting bigger.
Still working on getting the rear wheel cleaned up so I can get those assembled. I got the front brake all cleaned up.
Front drum before and after...
Here are before and afters of the rear wheel...
This one was taken after I clocked the snap ring correctly. Stock, the rear wheel came with a large plastic cap over this hub. I polished mine though and it's looking awesome, so I think I'm going to leave the giant plastic thing off. It didn't serve any obvious purpose other than just looks, so I don't think the bike will miss it.
There are also no nuts yet... that's because I somehow missed these when I went to the store today (grr), and I didn't want to put the stockers back on. I'll pick up some stainless or (preferably) chrome ones tomorrow when I'm out and about to throw on.
A lot of this will be hidden under the rear chain guard, but I don't care. I don't want to put a single nut, bolt, or bracket back on this bike that isn't clean. Also, as a result, I went to the hardware store today and found either stainless or chrome (chrome was preferable) nuts/bolts to replace all of the dingy stock stuff. This is really prevalent when it comes to things like the triple tree, which are in view first and foremost when the bike is assembled.
Here are before/after shots of that...
If you look close you'll see that the large nut in the middle is not in the best condition. It was heavily pitted and scratched. I cleaned it up as best I could, but it's not good enough. This is right in front of your face when you sit on the bike, so I want it to be perfect. I'll be replacing it before I call the bike "done."
Here's a shot of my front and rear wheels finished. These will be going in to get trued and get the tubes/tires mounted.
More stuff arrived. The remaining components of the 12V conversion from Sparck Moto, my coil, 12V LEDs for the cluster, LED flasher kit, rear swing arm bushings, and the rear suspension.
Wheels and tires ready to go!
Just waiting on powder coat dude...
To be continued!