1970 CL350 Restoration

King Browne

New Member
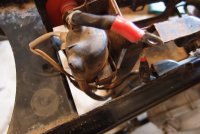
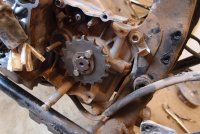
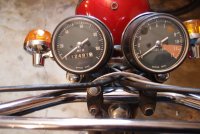
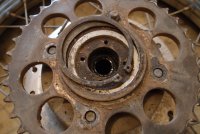
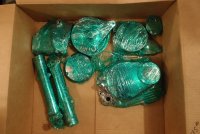
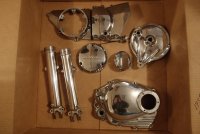
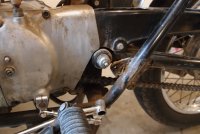
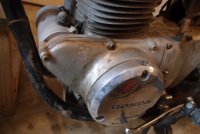
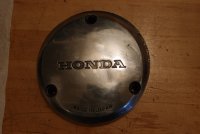
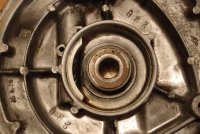
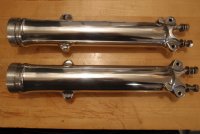
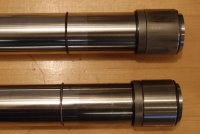
Do we really need another thread on CL350's ? Probably not, but since I like reading other posts, I'll share what I'm doing here.

First of all, I recently finished a six year 1975 CB400F restoration. Took a long time, but in the meantime I was restoring a 1971 Commando 750 and a Ducati 750GT. I'll post pictures if anyone's interested.

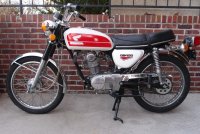
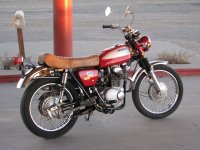
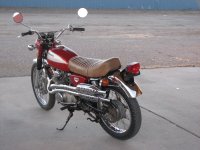
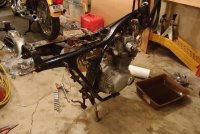
The 400 was my first frame up no expenses spared, restoration and is (in my opinion) better than new. So much fun I decided to jump into another one. This time I have a more limited budget and am trying to build a daily rider for my daughter who is graduating from a CB100 (that goes 45 MPH max with a tail wind).
 

Attachments

  • P1110237 compressed.jpg
    P1110237 compressed.jpg
    246.6 KB · Views: 303
  • P1220325 compressed.jpg
    P1220325 compressed.jpg
    241.1 KB · Views: 301
So about two months ago I sold the CB100 and bought a nice looking CL350 on Ebay, in Albuquerque, a days drive from Golden, Colorado.

Bike was a mixed bag. The dry weather had prevented some things from rusting, like the exhaust, but dry rotted a lot of others. The tires had giant cracks in them, and the wiring harness ending up being so stiff it would barely come off the bike. I was hoping for a driver that didn't need much attention but as I looked closer, I decided to strip everything to the frame and work my way back out.

I am in the middle of the restoration now so will reconstruct what I've done so far and take more pictures as I go.
 

Attachments

  • $_57 (2).JPG
    $_57 (2).JPG
    444.3 KB · Views: 336
  • $_57.JPG
    $_57.JPG
    443.9 KB · Views: 312
Lots of boring tear down pictures, mostly showing 40 years of dirt. Here's the bike in its naked glory. To remove the engine, I have some lifting eyebolts lagged into the ceiling rafters of my garage; I strapped the engine to a come-along and lifted the bike by the engine. That allowed me to unbolt the frame and rotate the frame out and away from the engine (I figured it's easier to remove something light from something heavy than the other way around). With that I lowered the engine into a bin and carted it off to a local bike shop that works on vintage bikes and builds cafe racers. The owner is a flat track racer known for winning one of the Pike's Peak hill climb classes in 2012. There I had him tear the motor down and check the overall condition and specs.

All looked good, so a hone and ring replacement is probably all I'll need for freshening although I'll probably replace the cam chain and tensioner as well. The owner also decided to regrind the intake valve seats.
 

Attachments

  • Frame and motor with parts and 750GT in the background.jpg
    Frame and motor with parts and 750GT in the background.jpg
    201.4 KB · Views: 306
OK, here are some before pictures from the teardown.
 

Attachments

  • Solenoid cover crumbled to dust in my hands upon removal.jpg
    Solenoid cover crumbled to dust in my hands upon removal.jpg
    164.3 KB · Views: 294
  • Previous owner actually rode in the dirt.jpg
    Previous owner actually rode in the dirt.jpg
    212.2 KB · Views: 302
  • Not bad for a 44 year old bike.jpg
    Not bad for a 44 year old bike.jpg
    181.1 KB · Views: 295
  • A little grime in places.jpg
    A little grime in places.jpg
    188.8 KB · Views: 282
And some more pictures.

Every bike tells a story when you take it apart. First is the fork tube piston shown here; this needs to slide freely to expose the holes in the fork tube and allow oil to move from the inner tube to the outer fork. It was jammed tight. Upon measuring the tube it was definitely too large. They had to have pounded the piston into place at the factory.
 

Attachments

  • P2110398.JPG
    P2110398.JPG
    1.5 MB · Views: 297
  • Wiring harness a little stiff.jpg
    Wiring harness a little stiff.jpg
    166.6 KB · Views: 296
  • This is why they have those felt dust seals.jpg
    This is why they have those felt dust seals.jpg
    185.7 KB · Views: 289
  • Wheels were OK compared to some I've seen but showing their age.jpg
    Wheels were OK compared to some I've seen but showing their age.jpg
    166.8 KB · Views: 286
So I like to do wheels first. Stock wheels are 3.50-18 rear and 3.00-19 front. Equivalent to 1.65x19 in the front and 1.85x18 in the rear (both 36 spoke). I decided to bump the width up a size to 1.85 in the front and 2.15 in the rear. Mikesxs.net had very nice, and reasonable priced, shouldered aluminum rims in these sizes so I went with these.

For tires I decided on the Bridgestone Trail Wing dual sport tires, a 120/90-18 for the rear (TW42) and a 90/100-19 (TW39) from Motorcycle Superstore. Stainless steel spokes were ordered from DimeCity Cycles.

Woody's Wheel Works in Denver polished the stock hubs, installed new sealed wheel bearings, laced and trued the wheels, and mounted and balance the tires.

I thought I would lose weight by going with aluminum vs steel rims, but instead the finished weight went from 43 lbs (the pair) to 49 lbs! I attribute this mostly to the extra rubber in the tires.
 

Attachments

  • 0000-bridgestone-tw39-trail-wing-dual-sport-front-tire----mcss.jpg
    0000-bridgestone-tw39-trail-wing-dual-sport-front-tire----mcss.jpg
    94 KB · Views: 338
  • 0000-bridgestone-tw42-trail-wing-dual-sport-rear-tire----mcss.jpg
    0000-bridgestone-tw42-trail-wing-dual-sport-rear-tire----mcss.jpg
    78.4 KB · Views: 344
  • Front 1.85 x 19.jpg
    Front 1.85 x 19.jpg
    240 KB · Views: 467
More views of the finished wheels
 

Attachments

  • Front brake side.jpg
    Front brake side.jpg
    220.3 KB · Views: 306
  • Rear 2.15 x 18.jpg
    Rear 2.15 x 18.jpg
    250 KB · Views: 352
  • Rear brake side.jpg
    Rear brake side.jpg
    245.3 KB · Views: 300
Hello KB3,
The bike looks like it going together quick. The wheels look great.
Will you get time to ride this when it's finished? Or is it going to be a shed ornament?
Cheers
brt651
 
A shed ornament ?!? A garage queen? No this is definitely a rider for my daughter, but its also going to look good.
 
Had the engine torn down to the cases. From my experience its the best way to get a look at all the internals and also to clean up 40 yrs of internal sludge and external grime. Once I had the cases in hand I did a simple wash and degrease and then had them soda blasted. Soda blasting is amazing, it takes everything down to the bare aluminum but doesn't harm bearing journals, valve seats, gasket faces and so on. The best part is that any soda remnants dissolve with a soak in soapy water, and there is no possibility of blasting media remaining in the engine. Here are pictures of before and after blasting.
 

Attachments

  • After soda blasting.jpg
    After soda blasting.jpg
    226.1 KB · Views: 326
  • All carbon gone.jpg
    All carbon gone.jpg
    196.5 KB · Views: 282
  • Cases before.jpg
    Cases before.jpg
    212.2 KB · Views: 296
Here are pictures after rattle can painting with high temp engine paint. The finned cylinder and head are taped up for powder coating.
 

Attachments

  • Ready for painting.jpg
    Ready for painting.jpg
    196.7 KB · Views: 287
  • Painting the lower crankcase.jpg
    Painting the lower crankcase.jpg
    209.1 KB · Views: 289
  • Ready for powder coating.jpg
    Ready for powder coating.jpg
    175.8 KB · Views: 279
  • Ready for powder coating 2.jpg
    Ready for powder coating 2.jpg
    150.5 KB · Views: 279
Final painted parts ready for reassembly. Powder coated parts not done yet. Second interesting thing encountered in the rebuild was finding a Heli-coil on one of the spark plug holes.
 

Attachments

  • Heli-coil on right.jpg
    Heli-coil on right.jpg
    72.1 KB · Views: 272
  • Finished painted parts.jpg
    Finished painted parts.jpg
    157.2 KB · Views: 628
Cases and other parts back from the polisher. $175 for the lot.
 

Attachments

  • Like opening Christmas presents.jpg
    Like opening Christmas presents.jpg
    205.6 KB · Views: 256
  • Gorgeous.jpg
    Gorgeous.jpg
    166.2 KB · Views: 282
Posting before pictures out of sequence :p
 

Attachments

  • Side covers before 2.jpg
    Side covers before 2.jpg
    176.5 KB · Views: 272
  • Side covers before.jpg
    Side covers before.jpg
    164.1 KB · Views: 276
Third interesting find is a cracked alternator cover. Bought another one on Ebay.
 

Attachments

  • Crack in alternator case.jpg
    Crack in alternator case.jpg
    164.3 KB · Views: 269
Starting in on the front brake rebuild, I removed everything and then tried to remove the worm gear. Bad idea. I got the roll pin out but then busted off the spline trying to pull out the gear. Doh :(

So I bought another used brake case on Ebay which is why it wasn't in the previous polished parts picture.
 

Attachments

  • Attempted removal of speedo worm gear.jpg
    Attempted removal of speedo worm gear.jpg
    232.5 KB · Views: 287
  • Busted spline.jpg
    Busted spline.jpg
    104.1 KB · Views: 269
Fork rebuild was fairly easy. Use an impact wrench to loosen the bold on the bottom of the fork slider. All other parts come out with the help of a snap ring pliers. I had a lot of corrosion on the tubes so I found a NOS pair in France (they're getting scarce) and replaced the springs and oil seals from David Silver Spares. New boots were sourced on Ebay along with some misc parts.
 

Attachments

  • Lowers ready to go.jpg
    Lowers ready to go.jpg
    160.4 KB · Views: 270
  • Lower forks reassembled.jpg
    Lower forks reassembled.jpg
    151 KB · Views: 258
  • Old forks next to new.jpg
    Old forks next to new.jpg
    121 KB · Views: 264
  • Corroded spring, circlip and washer.jpg
    Corroded spring, circlip and washer.jpg
    181.8 KB · Views: 268
More fork pictures
 

Attachments

  • New seals, one new guide and washer.jpg
    New seals, one new guide and washer.jpg
    174.9 KB · Views: 273
  • New springs, boots, and misc seats.jpg
    New springs, boots, and misc seats.jpg
    184.4 KB · Views: 260
  • My method for driving the seal into place.jpg
    My method for driving the seal into place.jpg
    65.5 KB · Views: 627
Back
Top Bottom